climbingxj
New member
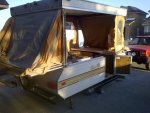
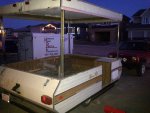
I said I'd never do it, but somehow I took a tent trailer home on Monday. It's a 1978 Lionell, it's a pile of crap, and my wife has named it the turd. How in the world did I end up in this situation? Here's a little background.
The wife and I will be spending about four weeks this summer travelling throughout Alberta and BC climbing and hiking. Originally I planned on doing what I've always done, packing things into the jeep, sleeping in a tent, and having fun. The more I thought about it though the more I realized I was growing sick of two main aspects of camping. The first is organization. I like to keep all my climbing and camping gear organized, and whenever I'm on the road for a couple of weeks things seep to slowly get less organized, I needed to come up with a system to change that. The second thing I'm sick of is the hassle of cooking while camping. Coolers aren't ideal for keeping things cold, dealing with leftovers is a pain, food prep on a picnic table can be annoying, you get the idea. So I had two requirements: a cooking space and an organizational system.
So I started out wanting a small expedition trailer, then the more I thought about it I wanted to keep the gear in the jeep for convenience, and cook in the trailer, why not a teardrop trailer? Then I could sleep in the thing and save the hassle of setting up a tent. Then I could set up a base camp at a campgroud, and head out for daily trips. If we wanted to head to the back county we'd leave the trailer behind and take off in the jeep. I thought some more, and figured I'd rather a small trailer with a bed and kitchen, but more room than a teardrop. So I decided I wanted a trailer that's about 10' long. Buying a new trailer is out of the question, so I decided to build my own. After reading a pile of build threads and doing some research I decided I wanted to begin my build with a pre-built platform. I learned how to weld years ago, but I don't own a welder right now, and by the time you factor in the cost of steel for the frame, a new axle and suspension components, and registering it with a VIN, I was pretty sure I would be able to find a trailer of some sort for cheaper, and then just build my trailer on that frame.
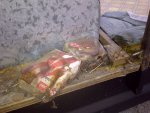
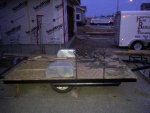
Well on Sunday night I found my potential platform, and by lunch time Monday my wife and I were the proud owner of a 1978 Lionell tent trailer, and $350 poorer.
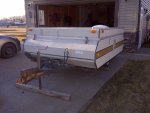
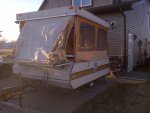
The basic plan for this is to turn it into a 10' hard sided camper that contains a comfy bed, a kitchen with a small fridge, running water, propane stove, and electricity (batteries charged using solar power). It has to be usable by the beginning of June, so I'm planning on having the trailer built and livable by then, but may not have running water, batteries or solar panels in it until July. We'll see how finances and spare time work out.
I thought it would be nice to start a build thread in order to document the experience for both myself and others. I'm going to make a few mistakes, learn a bunch, and have a bunch of fun along the way. I love tinkering and building things, and I thought that others may be able to learn from my experiences and mistakes. It would also be nice to be able to have a place to post any questions I may have along the way and get some help if needed as this is the first time I've built a trailer.
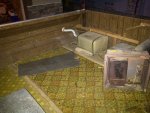
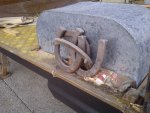
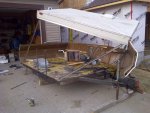
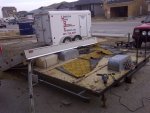
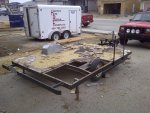
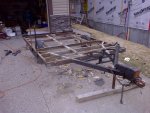
It's time for tear down to begin...
The wife and I will be spending about four weeks this summer travelling throughout Alberta and BC climbing and hiking. Originally I planned on doing what I've always done, packing things into the jeep, sleeping in a tent, and having fun. The more I thought about it though the more I realized I was growing sick of two main aspects of camping. The first is organization. I like to keep all my climbing and camping gear organized, and whenever I'm on the road for a couple of weeks things seep to slowly get less organized, I needed to come up with a system to change that. The second thing I'm sick of is the hassle of cooking while camping. Coolers aren't ideal for keeping things cold, dealing with leftovers is a pain, food prep on a picnic table can be annoying, you get the idea. So I had two requirements: a cooking space and an organizational system.
So I started out wanting a small expedition trailer, then the more I thought about it I wanted to keep the gear in the jeep for convenience, and cook in the trailer, why not a teardrop trailer? Then I could sleep in the thing and save the hassle of setting up a tent. Then I could set up a base camp at a campgroud, and head out for daily trips. If we wanted to head to the back county we'd leave the trailer behind and take off in the jeep. I thought some more, and figured I'd rather a small trailer with a bed and kitchen, but more room than a teardrop. So I decided I wanted a trailer that's about 10' long. Buying a new trailer is out of the question, so I decided to build my own. After reading a pile of build threads and doing some research I decided I wanted to begin my build with a pre-built platform. I learned how to weld years ago, but I don't own a welder right now, and by the time you factor in the cost of steel for the frame, a new axle and suspension components, and registering it with a VIN, I was pretty sure I would be able to find a trailer of some sort for cheaper, and then just build my trailer on that frame.
Well on Sunday night I found my potential platform, and by lunch time Monday my wife and I were the proud owner of a 1978 Lionell tent trailer, and $350 poorer.


The basic plan for this is to turn it into a 10' hard sided camper that contains a comfy bed, a kitchen with a small fridge, running water, propane stove, and electricity (batteries charged using solar power). It has to be usable by the beginning of June, so I'm planning on having the trailer built and livable by then, but may not have running water, batteries or solar panels in it until July. We'll see how finances and spare time work out.
I thought it would be nice to start a build thread in order to document the experience for both myself and others. I'm going to make a few mistakes, learn a bunch, and have a bunch of fun along the way. I love tinkering and building things, and I thought that others may be able to learn from my experiences and mistakes. It would also be nice to be able to have a place to post any questions I may have along the way and get some help if needed as this is the first time I've built a trailer.
It's time for tear down to begin...
Last edited:

