Outono
Well-known member
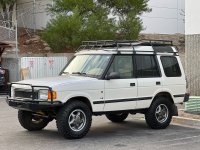
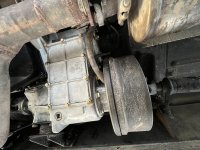
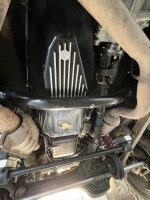
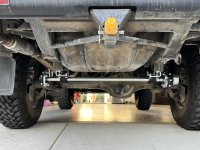
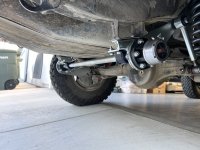
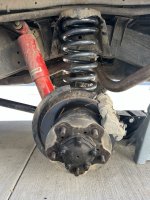
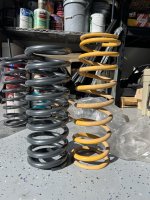
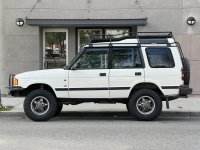
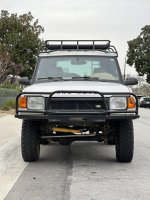
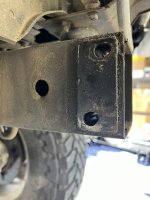
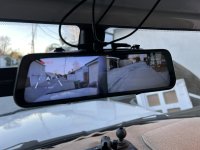
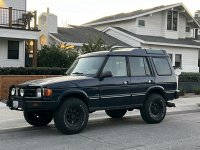
The truck has been at the shop for the better part of 2 weeks now for a whole slew of things:
Anyway, Black Friday has come and gone and this year I had my eye on a compressor. On my last trip, the air down / up process was a real chore. While it's easy, it takes forever and since it's not automated you end up spending a lot of time deflating / inflating, checking PSI, deflating / inflating, checking PSI - and so on. There has to be a better way.
Turns out, there is!
Compressors
There are a ton of compressors out there, most of which can inflate your tires one by one at decent speed. To do 4 tires, you'll probably finish up anywhere from 10 to 20 minutes, depending on your unit. ARB, Viair, and Extreme Outback are popular options, but they all operate roughly the same and push anywhere from 2 CFM to 6 CFM of air (with the latter reserved for the most expensive units).
Here's the thing, who wants to wait that long? All of these systems require you to constantly check the pressure as you air up; if you don't, you'll over or undershoot your target.
Why can't these things go faster? Turns out, the issue is the Schrader Valve on your tires.
As Morrflate puts it:
Regular tire valve stems (and most after market valve stems) use a valve core called a “Schrader Valve”. With the Schrader Valve still inside your tire’s valve stems, that makes an opening of roughly 1/16” (or smaller!). 1/16″ openings are only rated for about 1.8 to 2 CFM (cubic feet per minute) of air flow at 20 psi (now, that CFM rating goes up as you “push” with more pressure, such as a CO2 tank, or a pressurized on board air tank, and it goes down as far as .8 CFM at 0 psi). By running straight off of a compressor with no tank in the mix, your tires can only really accept about 2 CFM of air flow at a time. So, by using other popular compressors on the market that flow 5.65 CFM or 6.2 CFM, and doing 1 tire at a time, you aren’t able to get the full use and output of those compressors due to the bottleneck of air flow at your tire’s valve stem. The “useable CFM” while doing 1 tire at a time is really only 2-3 CFM for the pressures that we run in tires while off roading. That means that not only are you not getting the best efficiency from your compressor, but you are creating a backlog of pressure on your compressor, making it work harder, and possibly fail prematurely.
So I have a couple options here:
After a bit of searching, I came across a 10.6 CFM high output compressor with digital pressure control, which allows you to set and forget your desired PSI. Here is how Morrflate describes the system:
"By combining the air flow from 4 tires at the same time, we can theoretically make use of a full 8-12 CFM of air flow without creating any bottlenecks or back pressures on your compressor. Which is why we have designed and come out with a compressor that pushes a monstrous 10.6 CFM! Thus making use of the “useable” air flow for airing up off road vehicles! Compared to a 6.2 CFM compressor on a single tire, you wont see just a 58% decrease in air up times, you should see a theoretical 300-400% decrease in air up times!"
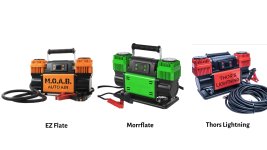
There is a single OEM supplying these units to 3 main brands: EZ Flate (UT), Morrflate (CA), and Thors Lightning (CO). All 3 systems are essentially identical so you're not going to get anything special from either, other than maybe a couple of extra components and better service.
What I love about these systems is that they make airing up an absolute breeze and allow you to wrap everything up in under 5 minutes. Simply connect the tubing to your tires, set the compressor to your desired PSI, and off it goes. You don't need to watch the system or check pressure every minute or so; the compressor will turn itself off once its done. That's the beauty of the digital pressure gauge!
Each brand's kit comes with tubing for 4 tires, as well as a manifold (more on that below). I ended up going with the Thors Lightning simply because it had the cheapest total price this week (sale is still going), but im using Morrflate tubing since I like the way they assembled it.
As for the manifold, well let me tell you about that...
Air Manifold
All 3 of these brands build the exact same manifolds, exactly as you see below:
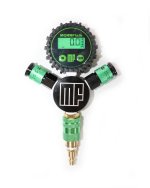
The left and right connectors attach to your left and right tubing, while the bottom connector attaches to the compressor. The green sleeve on the bottom connector slides up and down to allow air to pass in or out of the manifold.
While its a slick little manifold, it's missing something: the ability to accurately and automatically deflate and equalize pressure across all 4 tires simultaneously. I've automated the inflate, now I want to do the same for the deflate.
In my research, I came across a 4th company that competed in this space for a while, but appears to be exiting the market. They're called Desert Armor (AZ) and they sell the previous generation compressors that lack the digital pressure gauge for automatic inflate. What they do have that all the others don't is a novel little manifold with deflate pressure control.
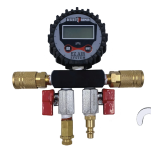
While it's not a looker, it allows you to set an air down PSI using the pressure relief valve on the bottom left of the manifold. That means once its set, you simply turn the red valve and all 4 tires will deflate to the exact PSI you set on the regulator. No more constantly checking your gauge like the old days!
So here's the thing, im a sucker for aesthetics and I also felt like this particular unit could use better parts. For one, I prefer an analog gauge over a digital one. I also don't like the turning valves compared to the valve slides from Morrflate, even if the turning valves give you a bit more control.
So today, I built my own manifold with a few nice upgrades.
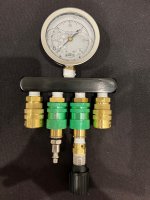
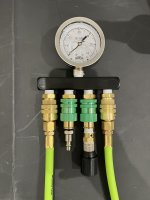
Air hoses come into the side connectors. When deflating, you'd slide the middle right valve up (open), while keeping the middle left valve down (closed).
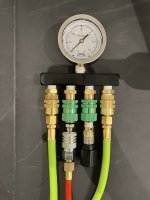
When the air hose is connected (red), you'd slide the middle left valve up (open) and the middle right valve down (closed).
If you're come this far, thanks for reading! I hope this helps some of you with your air up / down needs. To me, this is the best possible solution short of a more complex on-board air solution that probably wouldn't fit easily on a Disco 1. I've still not tested this thing yet so fingers crossed it works...
UPDATE: There is another company now selling these for a crazy low price: $199! If I could do it again, i'd pick up this unit from AllTop.
- Ashcroft 4HP22 transmission w/ Stage 1 upgrade and high capacity sump
- Rear main seal / cross seals
- Gas tank leak
Anyway, Black Friday has come and gone and this year I had my eye on a compressor. On my last trip, the air down / up process was a real chore. While it's easy, it takes forever and since it's not automated you end up spending a lot of time deflating / inflating, checking PSI, deflating / inflating, checking PSI - and so on. There has to be a better way.
Turns out, there is!
Compressors
There are a ton of compressors out there, most of which can inflate your tires one by one at decent speed. To do 4 tires, you'll probably finish up anywhere from 10 to 20 minutes, depending on your unit. ARB, Viair, and Extreme Outback are popular options, but they all operate roughly the same and push anywhere from 2 CFM to 6 CFM of air (with the latter reserved for the most expensive units).
Here's the thing, who wants to wait that long? All of these systems require you to constantly check the pressure as you air up; if you don't, you'll over or undershoot your target.
Why can't these things go faster? Turns out, the issue is the Schrader Valve on your tires.
As Morrflate puts it:
Regular tire valve stems (and most after market valve stems) use a valve core called a “Schrader Valve”. With the Schrader Valve still inside your tire’s valve stems, that makes an opening of roughly 1/16” (or smaller!). 1/16″ openings are only rated for about 1.8 to 2 CFM (cubic feet per minute) of air flow at 20 psi (now, that CFM rating goes up as you “push” with more pressure, such as a CO2 tank, or a pressurized on board air tank, and it goes down as far as .8 CFM at 0 psi). By running straight off of a compressor with no tank in the mix, your tires can only really accept about 2 CFM of air flow at a time. So, by using other popular compressors on the market that flow 5.65 CFM or 6.2 CFM, and doing 1 tire at a time, you aren’t able to get the full use and output of those compressors due to the bottleneck of air flow at your tire’s valve stem. The “useable CFM” while doing 1 tire at a time is really only 2-3 CFM for the pressures that we run in tires while off roading. That means that not only are you not getting the best efficiency from your compressor, but you are creating a backlog of pressure on your compressor, making it work harder, and possibly fail prematurely.
So I have a couple options here:
- Get an onboard tank w/ ARB Dual (not enough space on the Disco)
- Carry a CO2 tank (cool, but I don't want to keep refilling)
After a bit of searching, I came across a 10.6 CFM high output compressor with digital pressure control, which allows you to set and forget your desired PSI. Here is how Morrflate describes the system:
"By combining the air flow from 4 tires at the same time, we can theoretically make use of a full 8-12 CFM of air flow without creating any bottlenecks or back pressures on your compressor. Which is why we have designed and come out with a compressor that pushes a monstrous 10.6 CFM! Thus making use of the “useable” air flow for airing up off road vehicles! Compared to a 6.2 CFM compressor on a single tire, you wont see just a 58% decrease in air up times, you should see a theoretical 300-400% decrease in air up times!"
There is a single OEM supplying these units to 3 main brands: EZ Flate (UT), Morrflate (CA), and Thors Lightning (CO). All 3 systems are essentially identical so you're not going to get anything special from either, other than maybe a couple of extra components and better service.

What I love about these systems is that they make airing up an absolute breeze and allow you to wrap everything up in under 5 minutes. Simply connect the tubing to your tires, set the compressor to your desired PSI, and off it goes. You don't need to watch the system or check pressure every minute or so; the compressor will turn itself off once its done. That's the beauty of the digital pressure gauge!
Each brand's kit comes with tubing for 4 tires, as well as a manifold (more on that below). I ended up going with the Thors Lightning simply because it had the cheapest total price this week (sale is still going), but im using Morrflate tubing since I like the way they assembled it.
As for the manifold, well let me tell you about that...
Air Manifold
All 3 of these brands build the exact same manifolds, exactly as you see below:

The left and right connectors attach to your left and right tubing, while the bottom connector attaches to the compressor. The green sleeve on the bottom connector slides up and down to allow air to pass in or out of the manifold.
While its a slick little manifold, it's missing something: the ability to accurately and automatically deflate and equalize pressure across all 4 tires simultaneously. I've automated the inflate, now I want to do the same for the deflate.
In my research, I came across a 4th company that competed in this space for a while, but appears to be exiting the market. They're called Desert Armor (AZ) and they sell the previous generation compressors that lack the digital pressure gauge for automatic inflate. What they do have that all the others don't is a novel little manifold with deflate pressure control.

While it's not a looker, it allows you to set an air down PSI using the pressure relief valve on the bottom left of the manifold. That means once its set, you simply turn the red valve and all 4 tires will deflate to the exact PSI you set on the regulator. No more constantly checking your gauge like the old days!
So here's the thing, im a sucker for aesthetics and I also felt like this particular unit could use better parts. For one, I prefer an analog gauge over a digital one. I also don't like the turning valves compared to the valve slides from Morrflate, even if the turning valves give you a bit more control.
So today, I built my own manifold with a few nice upgrades.

- Almost every piece is made in the USA
- The valve slides are supplied by Morrflate
- Pressure relief valve (middle right) is quickly adjustable and accurate
- Gauge is high accuracy (the bubbles are from the glycerin inside)

Air hoses come into the side connectors. When deflating, you'd slide the middle right valve up (open), while keeping the middle left valve down (closed).

When the air hose is connected (red), you'd slide the middle left valve up (open) and the middle right valve down (closed).
If you're come this far, thanks for reading! I hope this helps some of you with your air up / down needs. To me, this is the best possible solution short of a more complex on-board air solution that probably wouldn't fit easily on a Disco 1. I've still not tested this thing yet so fingers crossed it works...
UPDATE: There is another company now selling these for a crazy low price: $199! If I could do it again, i'd pick up this unit from AllTop.
Last edited:

