You are using an out of date browser. It may not display this or other websites correctly.
You should upgrade or use an alternative browser.
You should upgrade or use an alternative browser.
Casper's Xterra Build
- Thread starter Casper
- Start date
The BN Guy
Expedition Leader
Very nice looking. Tire carrier has me thinking again... What is the setup for the hinge? Parts from...? That's been my biggest hangup was the hinge setup.
Casper
Adventurer
Thanks BN Guy. The hinge is actually very easy this way.Very nice looking. Tire carrier has me thinking again... What is the setup for the hinge? Parts from...? That's been my biggest hangup was the hinge setup.
These are two hiem joints. Tapped into the swing arm and a simple bolt running through. It works great, is not that expensive and easy to do. I think they are 3/4 inch hiems, but am not sure. I will go measure them and let you know.
Thanks for the compliments guys. As you can see I have gotten some ideas from this site and you guys.
Ok, time to go out and take somemore photos. There is a bunch more stuff to tell.
Casper
:smiley_drive:
rroadkilll
Needs a LIFE!
Nice x!!!
Casper
Adventurer
Thanks again guys.
Now for another update.
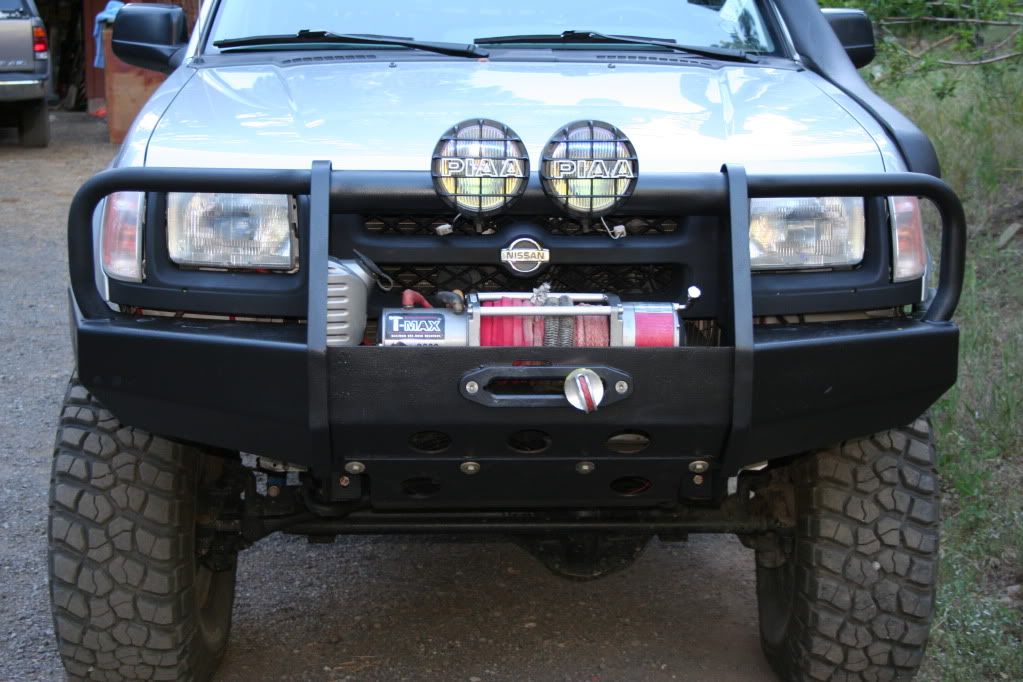
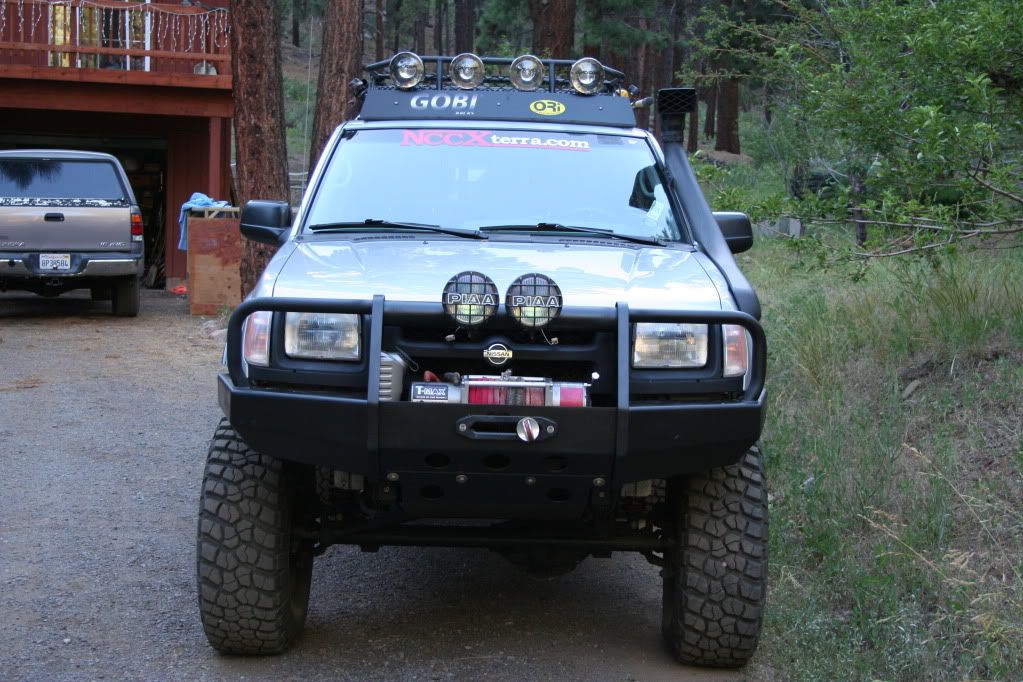
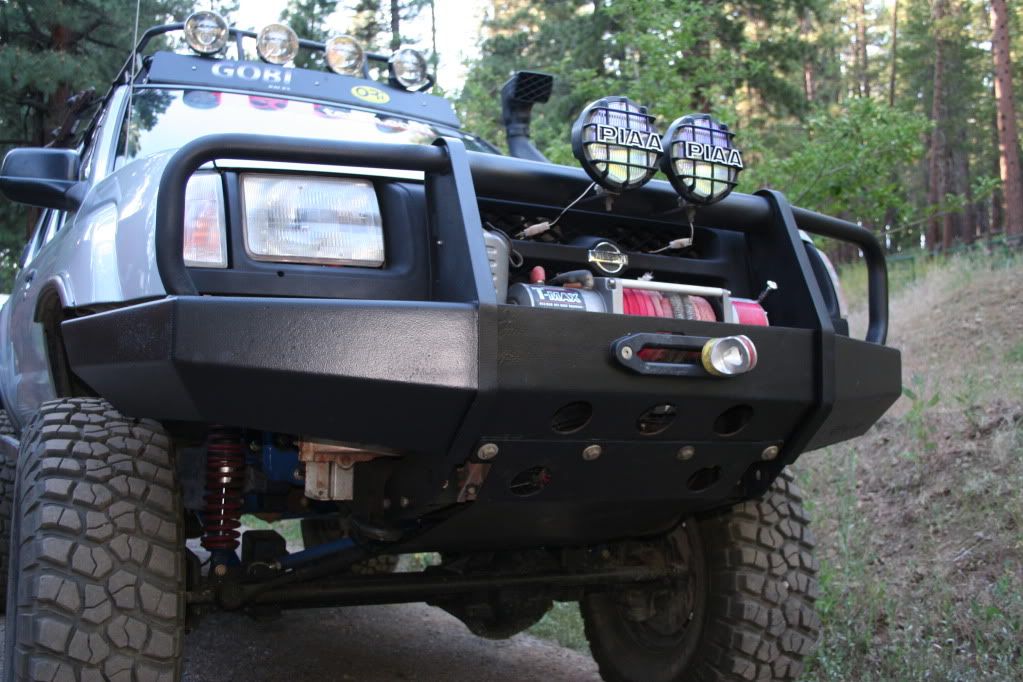
Here is the Calmini front bumper in it’s first faze.
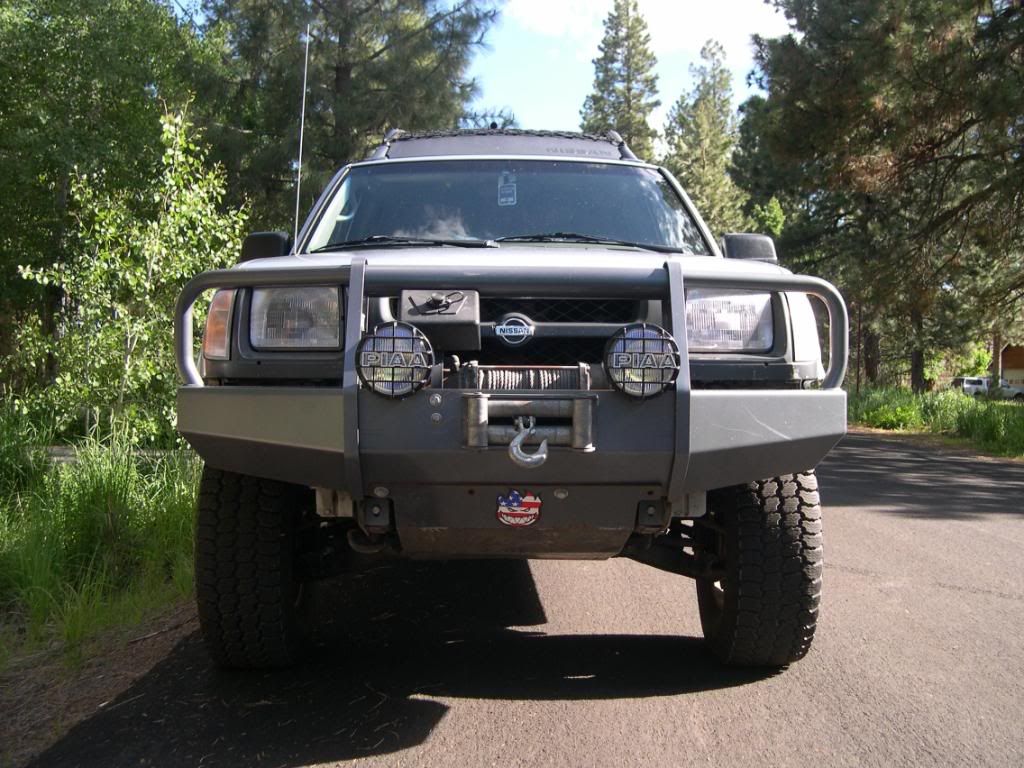
I mounted a set of PIAA Ion Crystal fog lights and an old Warn winch I had from a previous truck. This setup worked well for a few years. I then upgraded the winch to a T-MAX 9000lbs with synthetic line.
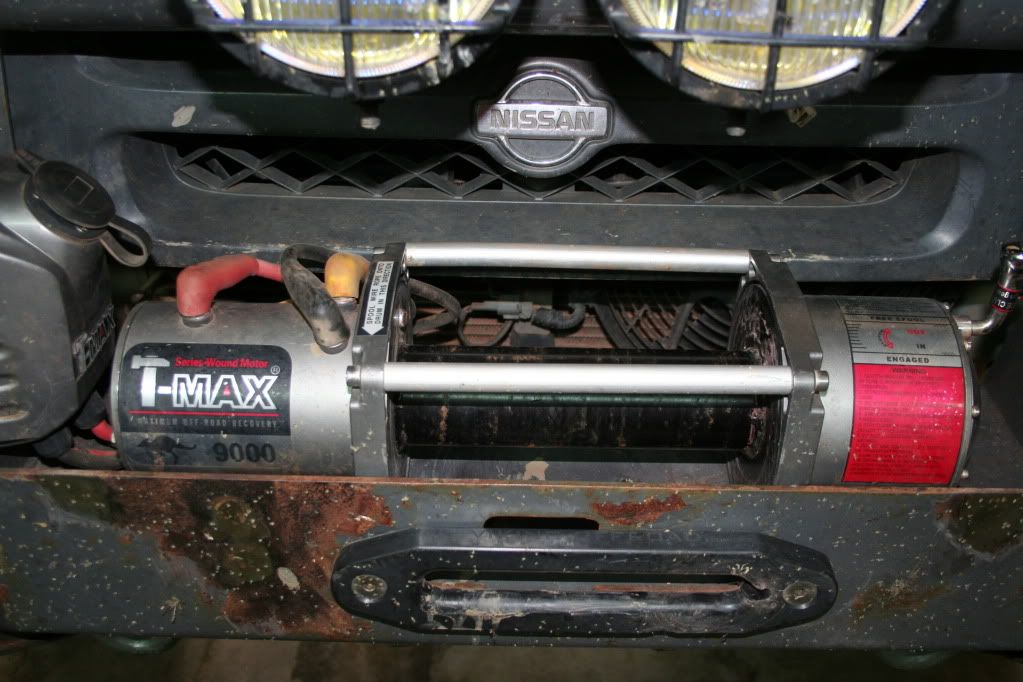
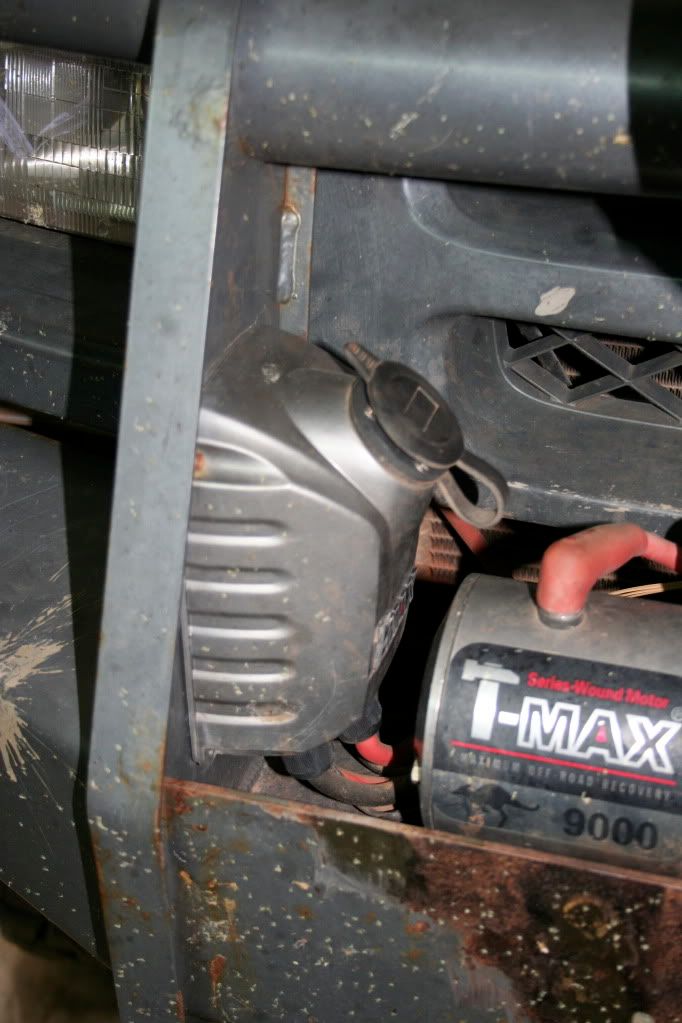
The line is off in this photo because I am in the process of removing the bumper to paint it, too much rust. I will be painting it with Duplicolor Spray on Bedliner. Once it’s done I will post more photos. I also decided to move the lights as they were in the way if I came up to push something.
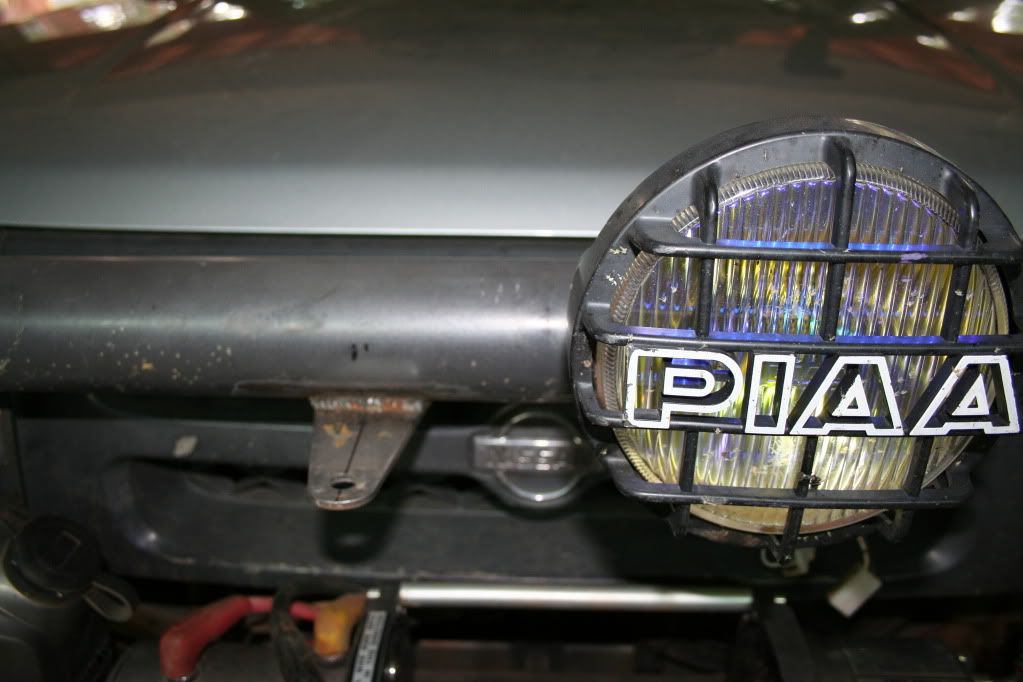
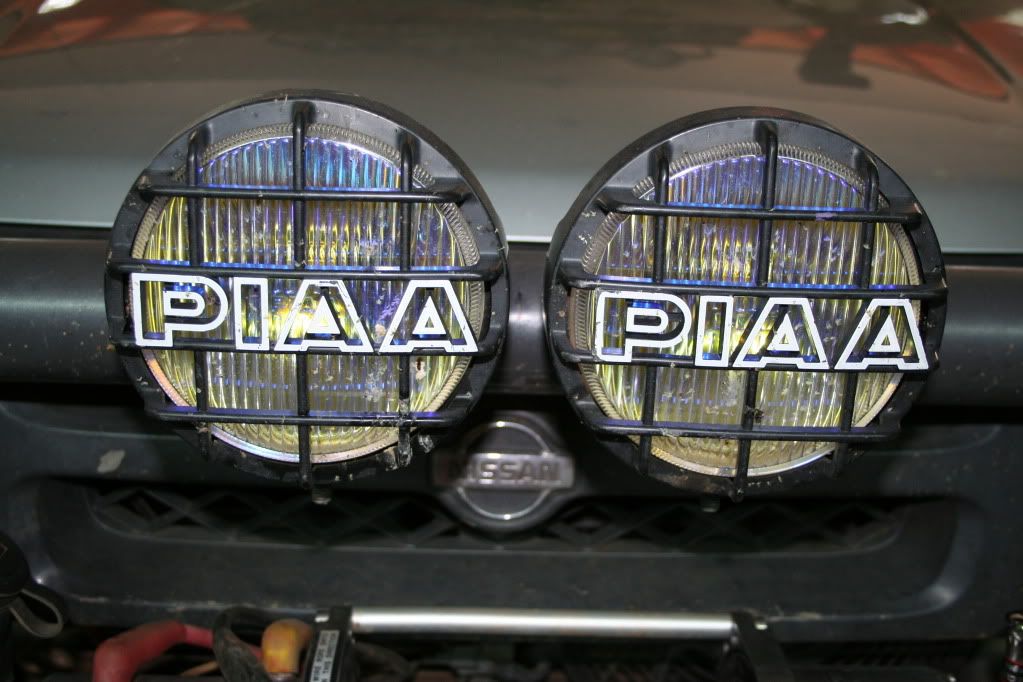
I had some tabs welded on to the top tube to get them out of the way. Lastly I am sure someone noticed the big holes in the bumper and skid.
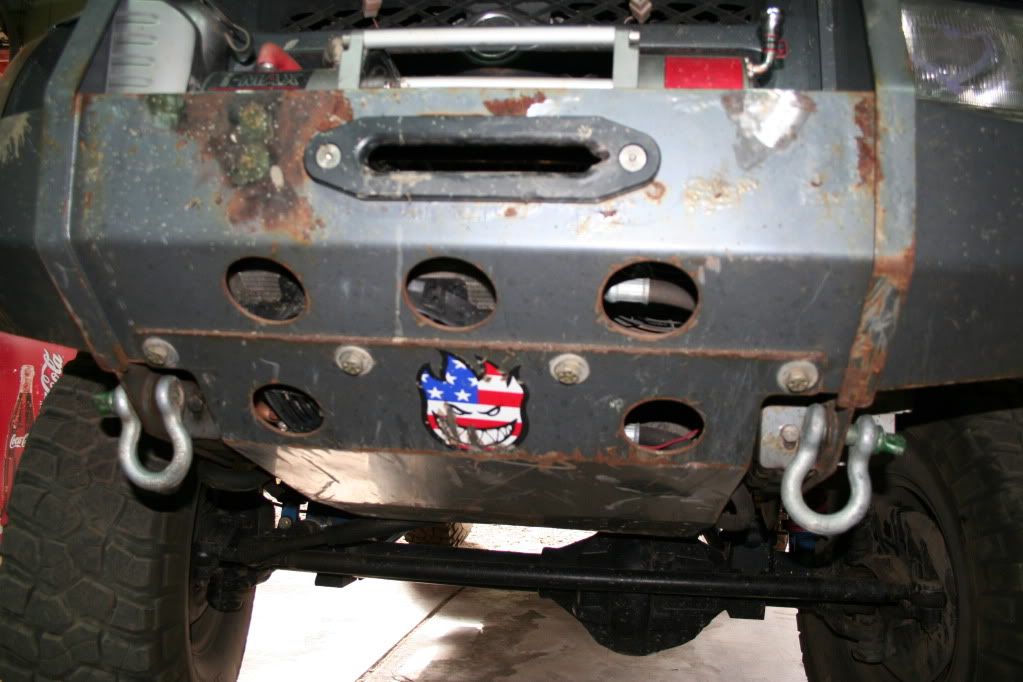
I did this to increase airflow to the radiator. Behind some of those holes you might just see my next add on.
Casper
:coffeedrink:
Now for another update.
Here is the Calmini front bumper in it’s first faze.
I mounted a set of PIAA Ion Crystal fog lights and an old Warn winch I had from a previous truck. This setup worked well for a few years. I then upgraded the winch to a T-MAX 9000lbs with synthetic line.
The line is off in this photo because I am in the process of removing the bumper to paint it, too much rust. I will be painting it with Duplicolor Spray on Bedliner. Once it’s done I will post more photos. I also decided to move the lights as they were in the way if I came up to push something.
I had some tabs welded on to the top tube to get them out of the way. Lastly I am sure someone noticed the big holes in the bumper and skid.
I did this to increase airflow to the radiator. Behind some of those holes you might just see my next add on.
Casper
:coffeedrink:
Casper
Adventurer
I have been chasing a running hot problem for the last few years. Pulling hills under load tends to heat the engine up above normal. I did all the normal stuff (t-stat, water pump, temp sending unit etc.) I then added an engine oil cooler with fan from flex-a-light.
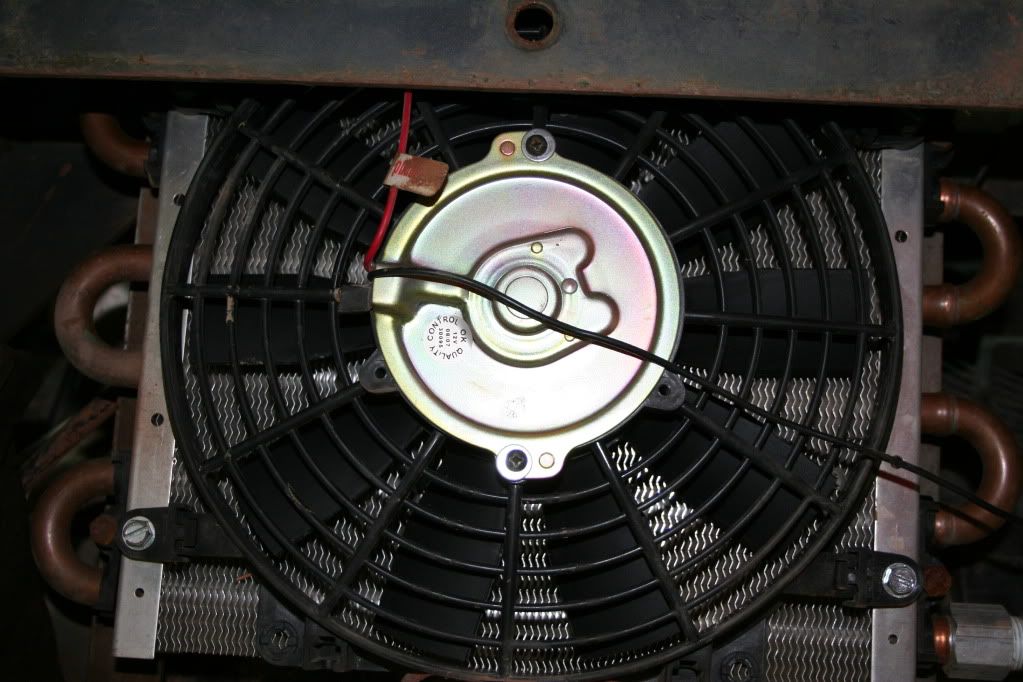

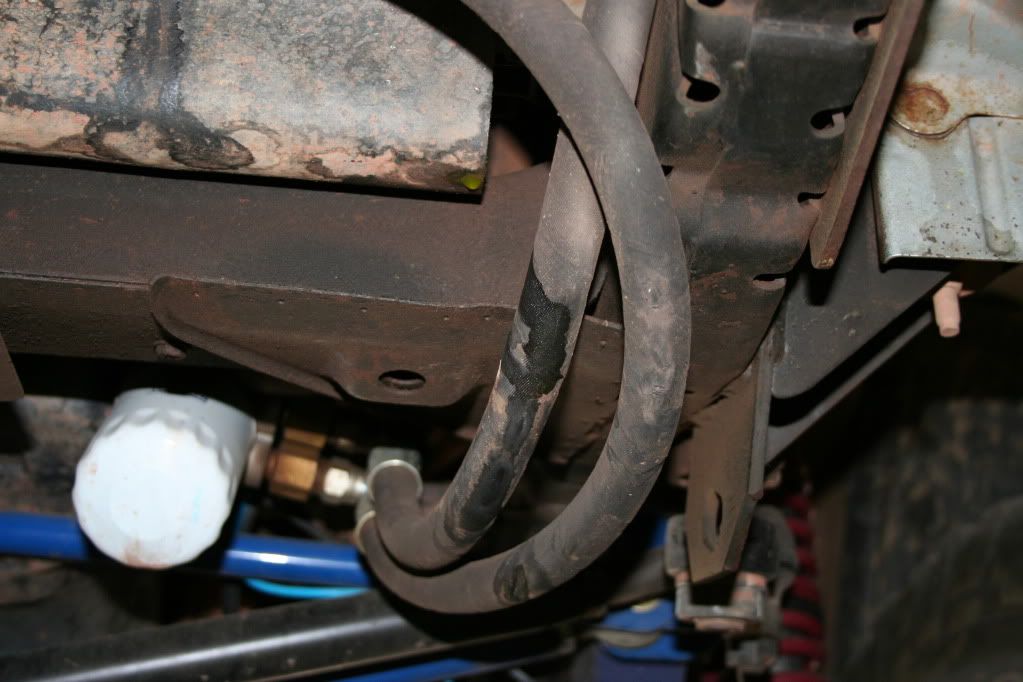
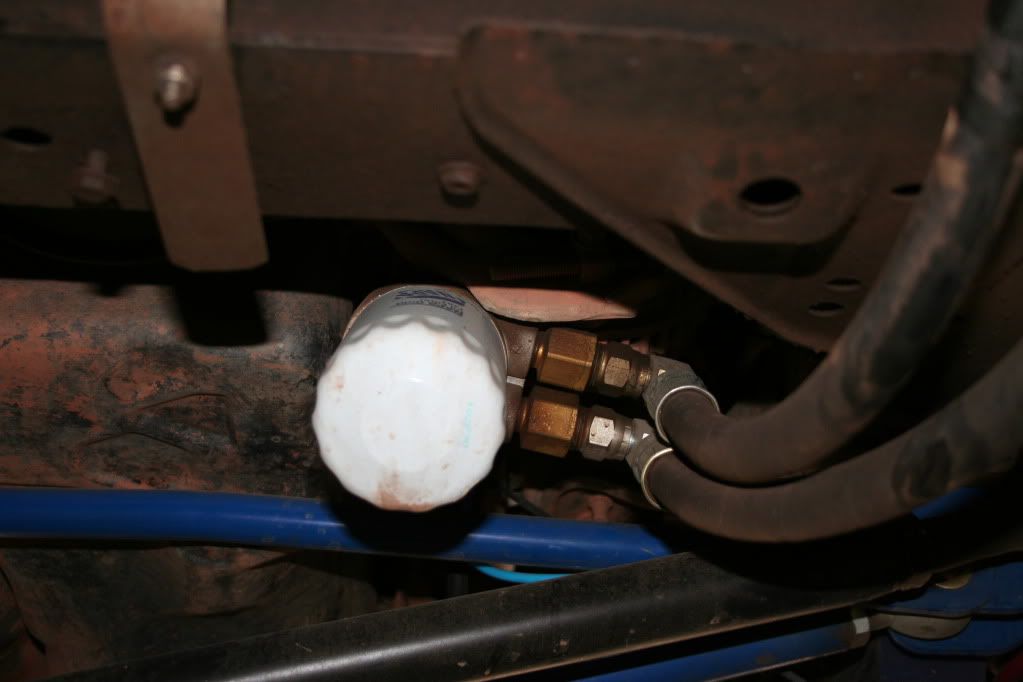
I mounted this just behind the front skid plate. The fan is wired to a switch in the dash. The lines run from an adapter that bolts to where the filter goes.
This has defiantly helped keep the engine 15 to 20 degrees cooler. Next on the list is a tranny cooler. I will post up photos and stats of that once I do it.
Next post, suspension...
Casper
:coffeedrink:
Casper
Adventurer
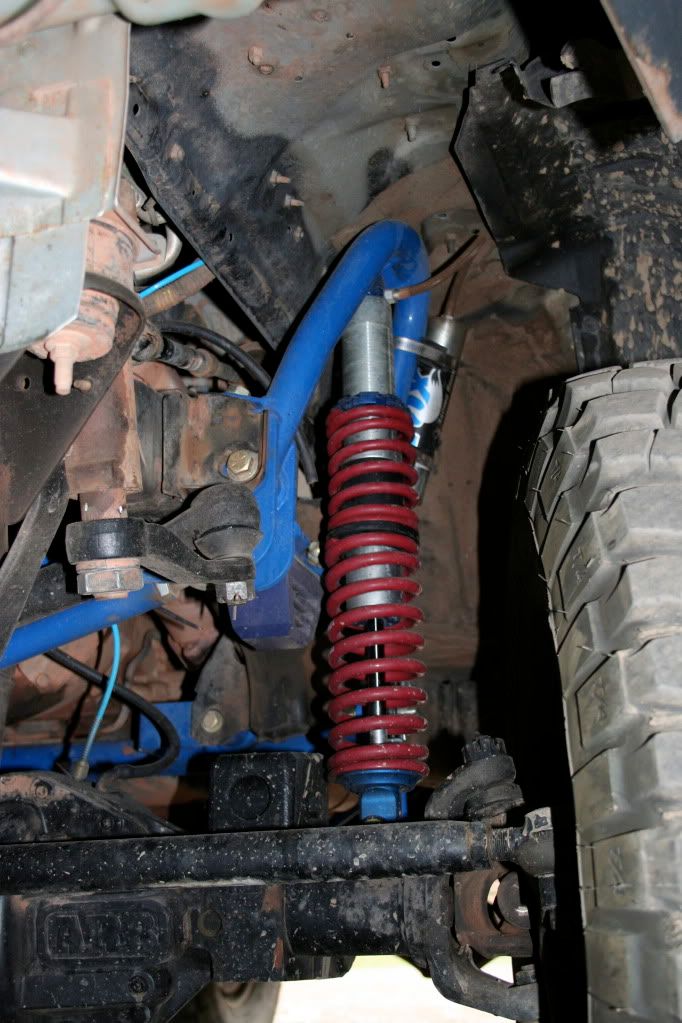
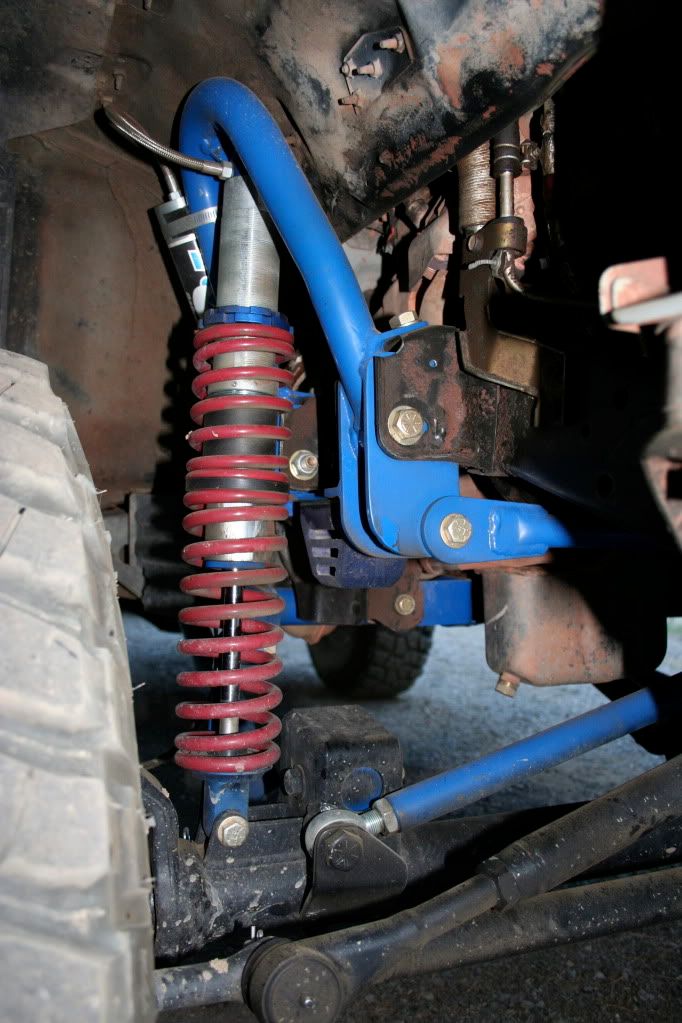
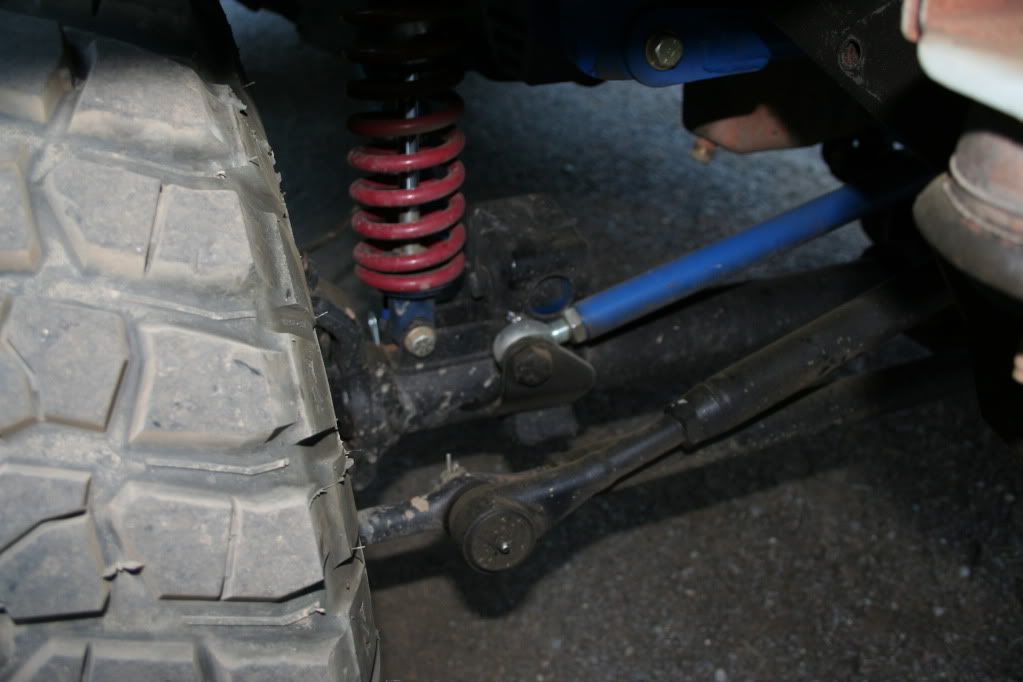
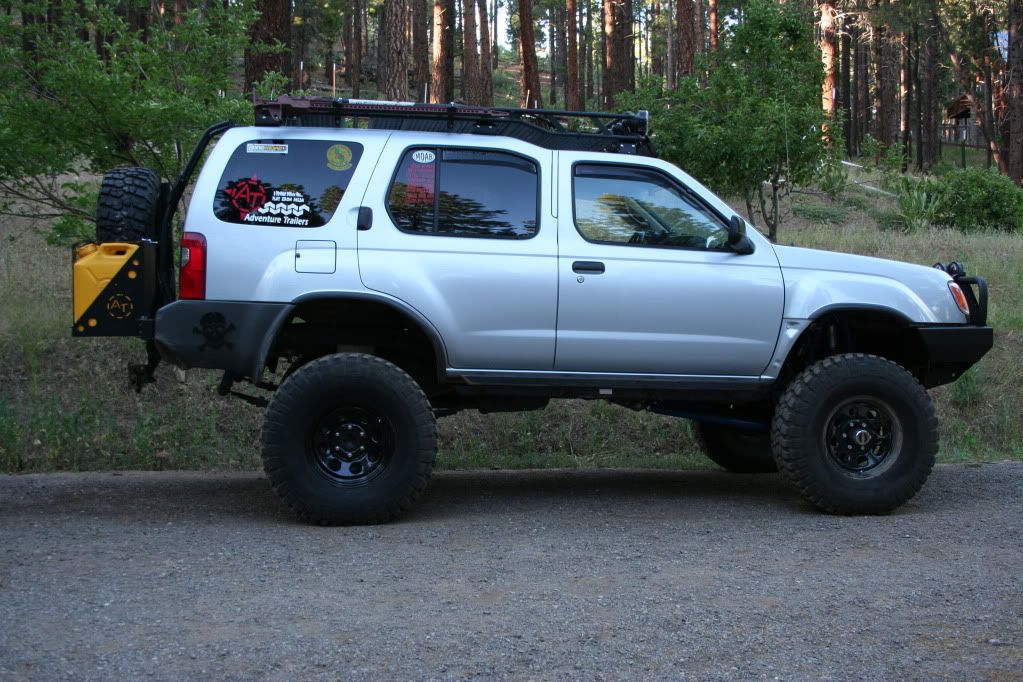
On to the suspension:
I have been running the Calmini 3 inch kit for quite a few years. I have been happy with it, for an IFS setup, but it was time to step it up a notch. This winter I bit the bullet and installed the Calmini SAS kit.
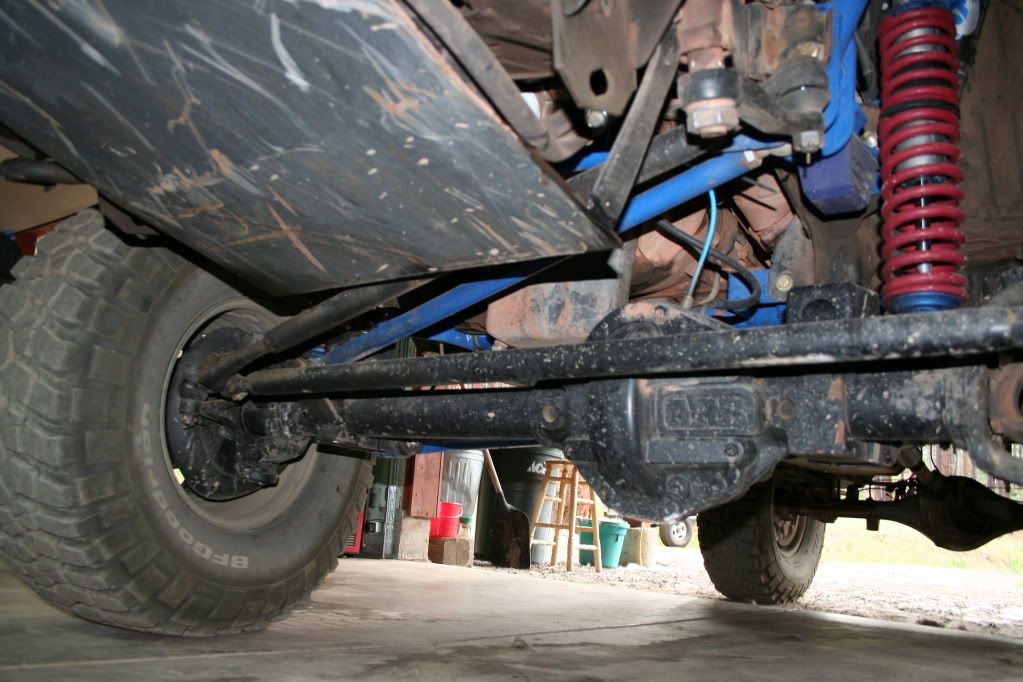
I have to say this is one heck of a kit. Very well thought out and designed. Easy to install. It uses a D44 out of an 80 to 85 Jeep Wagoneer. I started the build with the goal of running a 35-inch tire without a body lift. With that in mind I had to beef up a few things. Steering was the first. The kit is designed to use the stock Waggy steering.
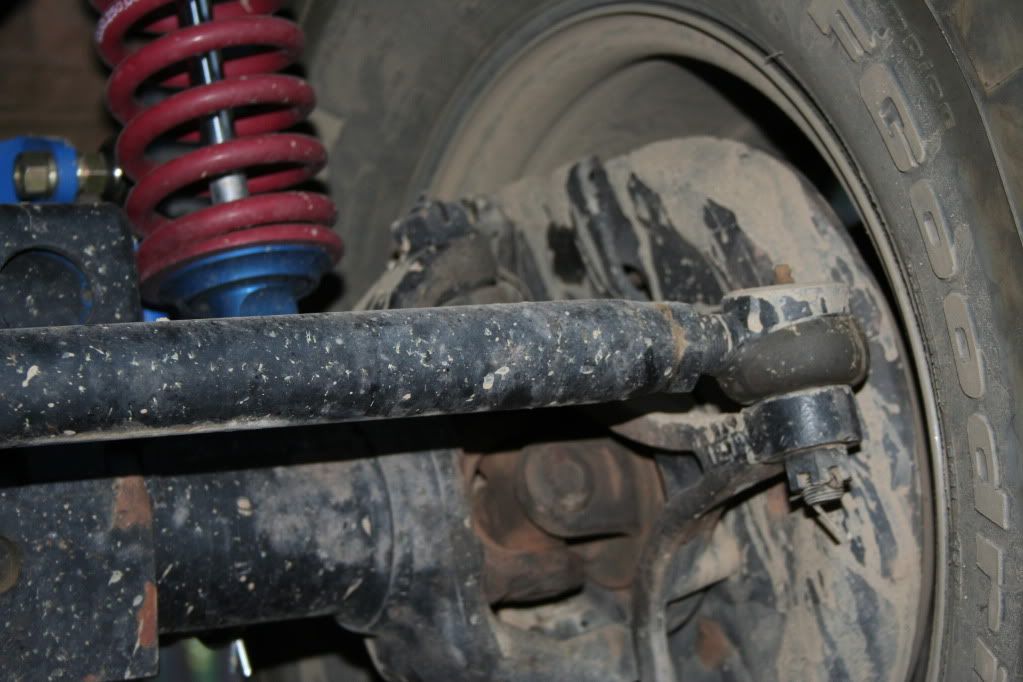
I tossed that and got some 1-ton Chevy tierod ends. This is coupled with 1 ½ DOM tubing with weld in bungs.

Next upgrade was the track bar mount on the axle. It was single sheer. A small gusset fixed that.
(Bugger, I am missing that photo, I will take another and add it later)
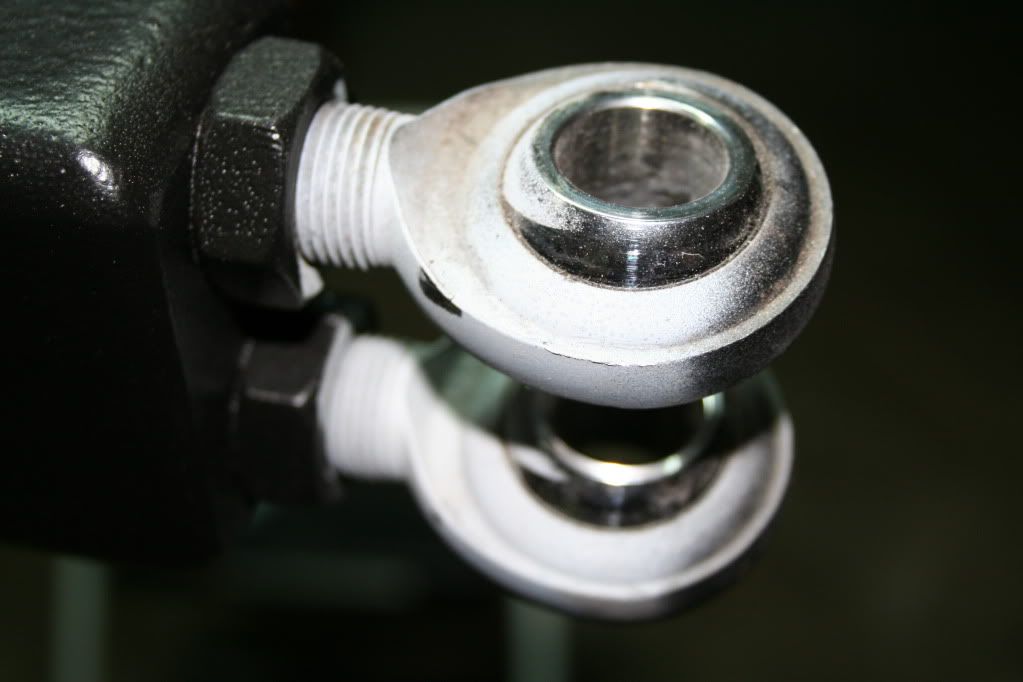
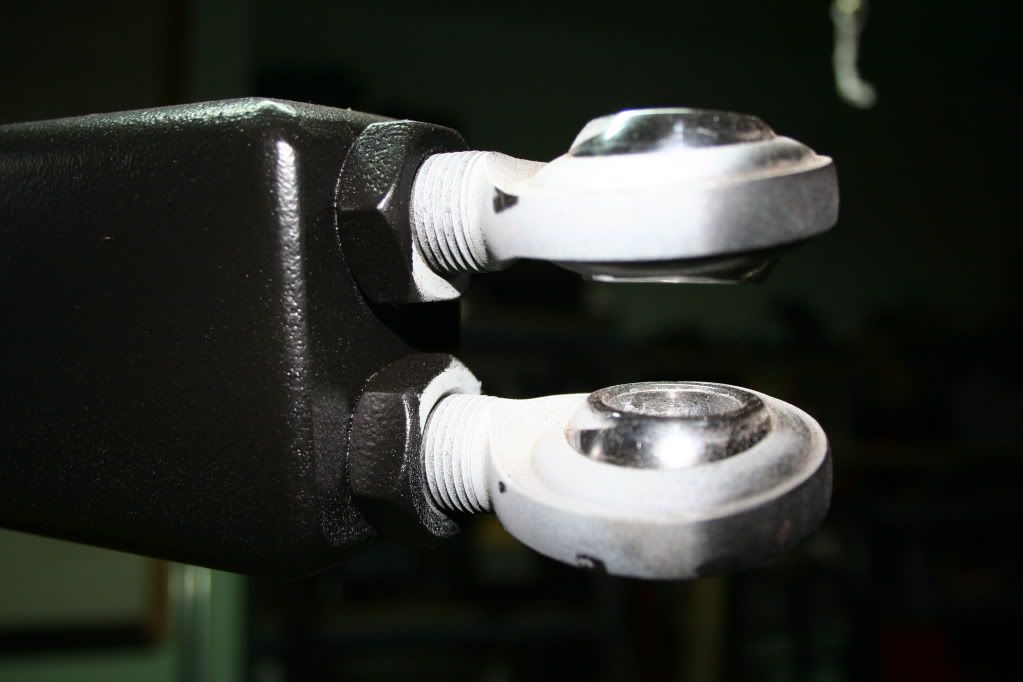
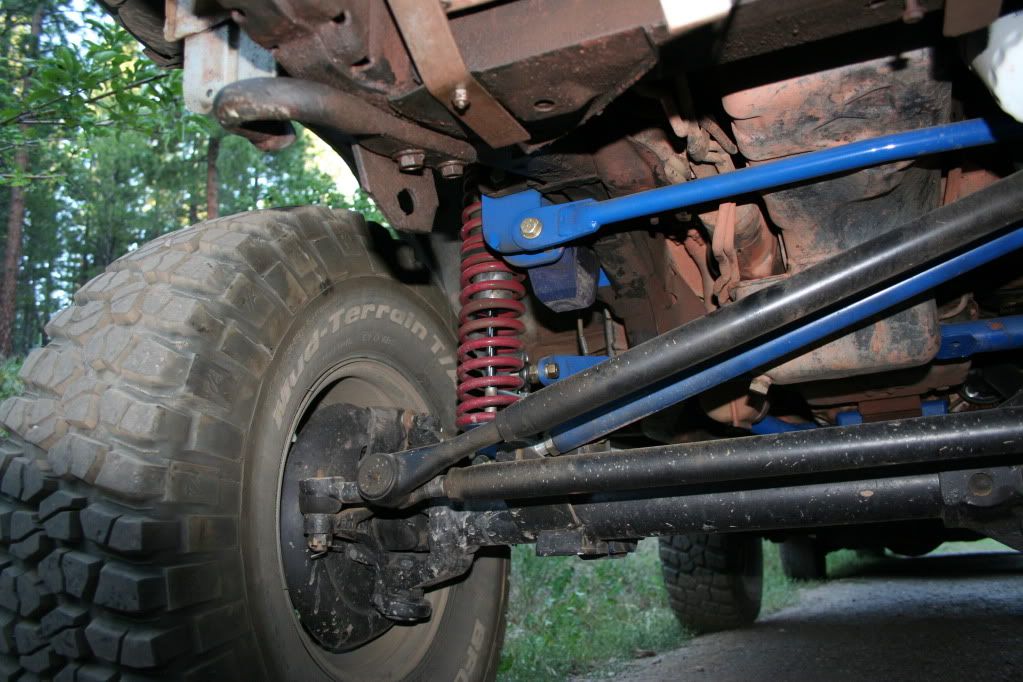
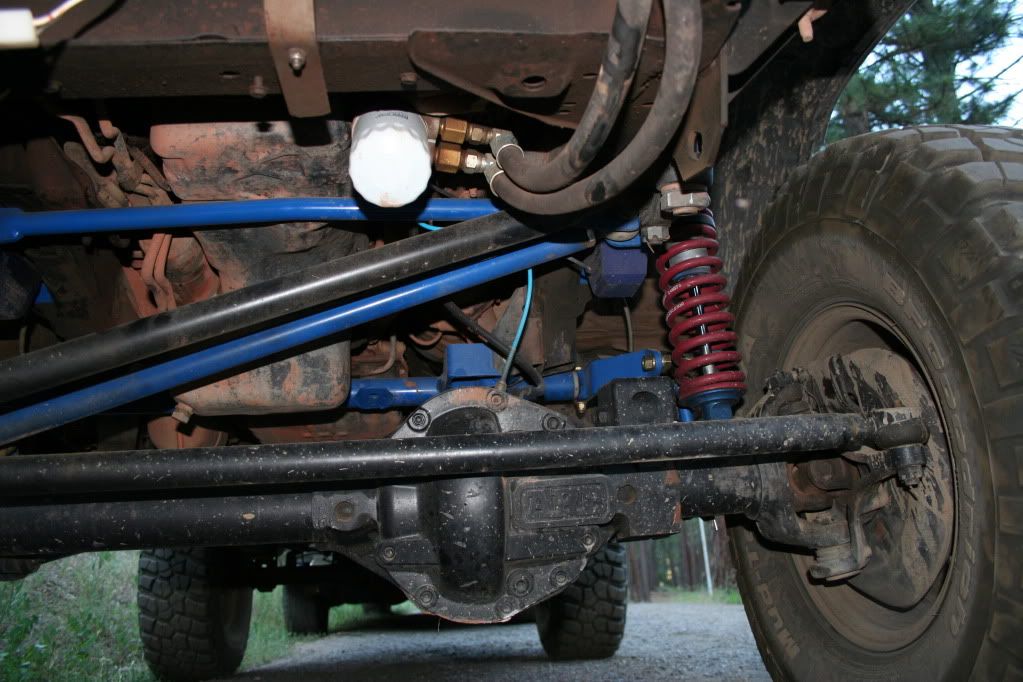
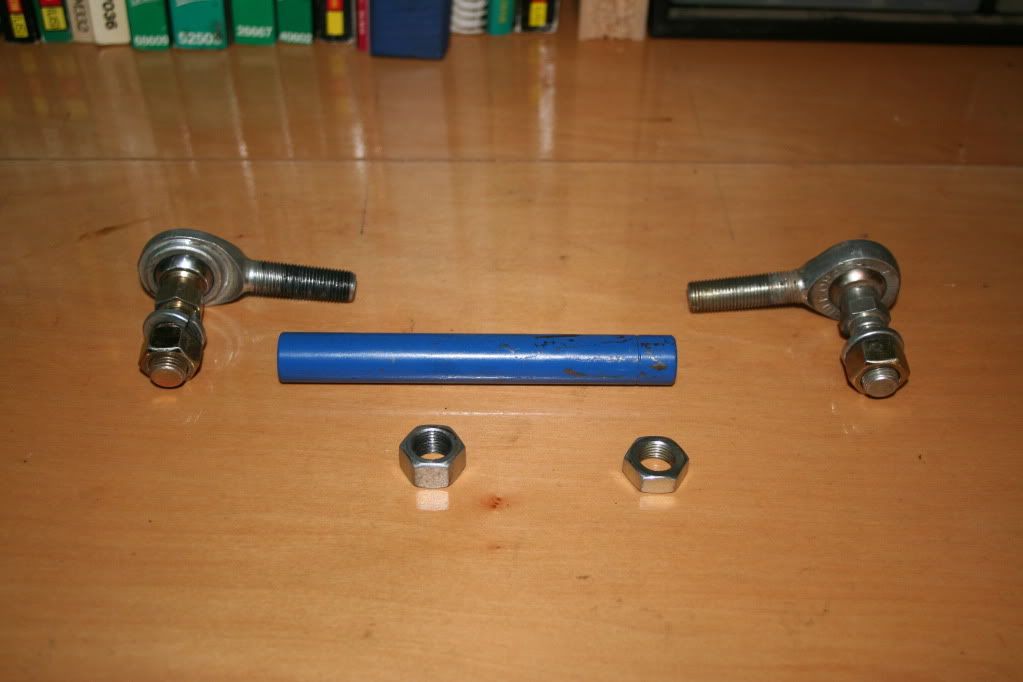
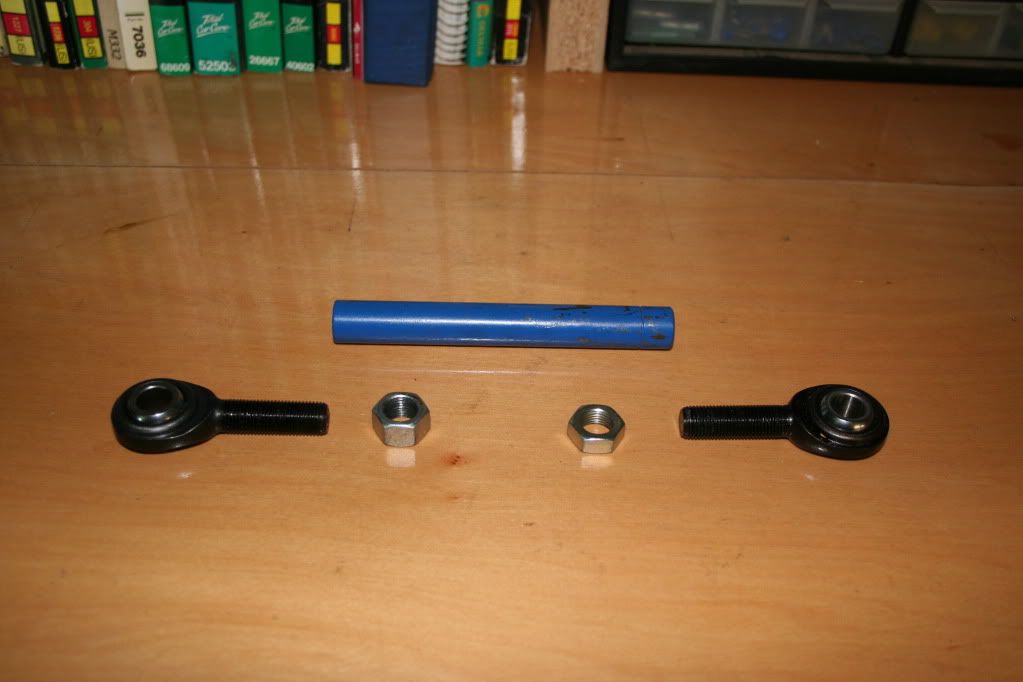
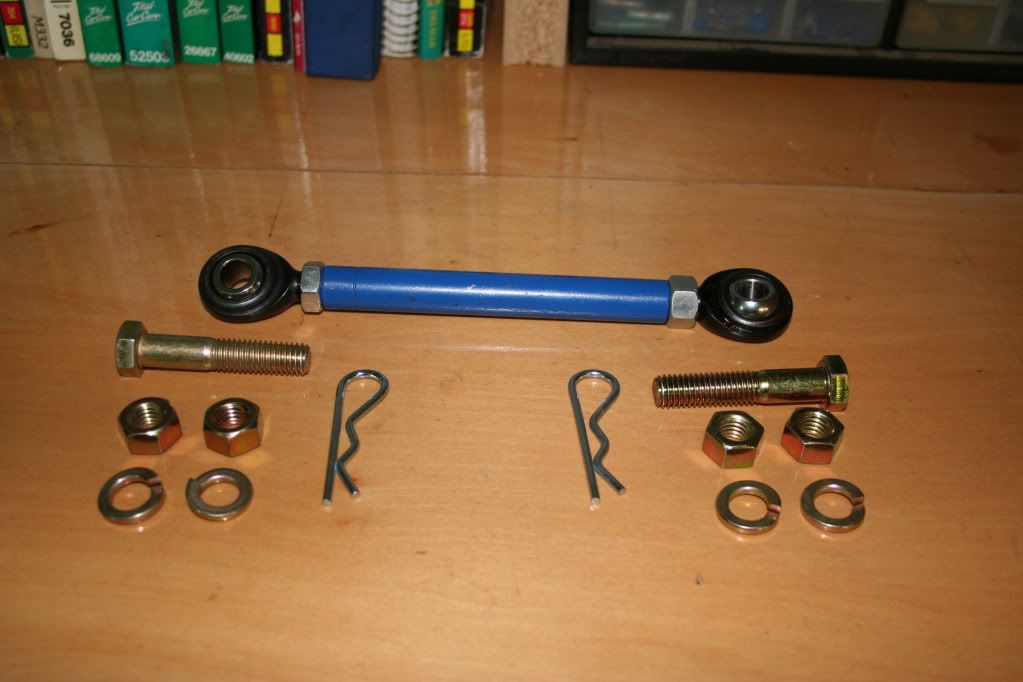
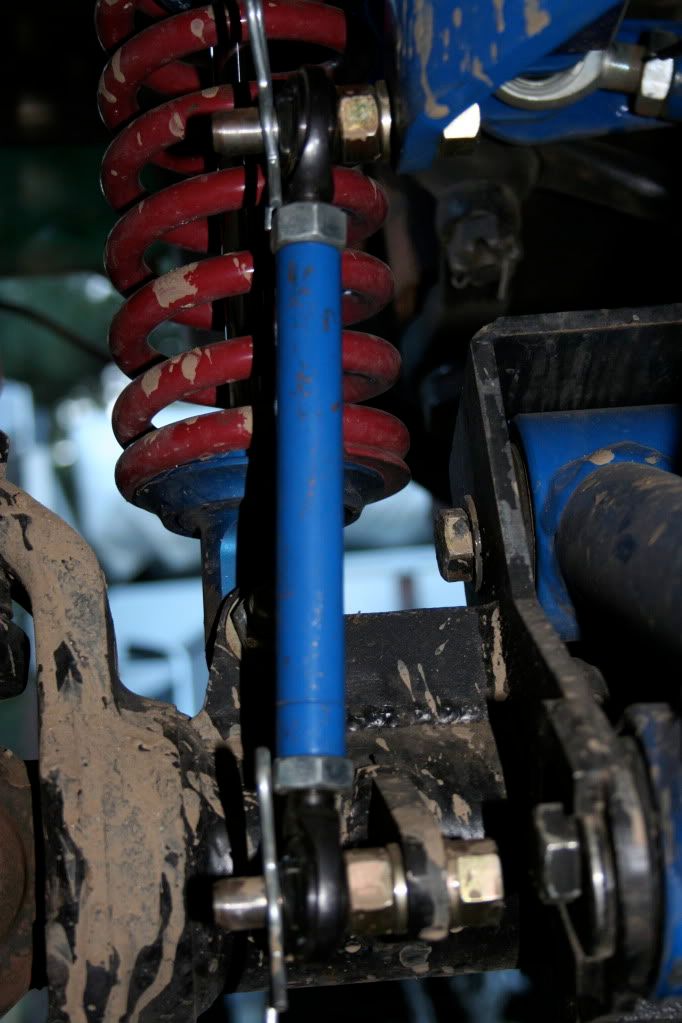
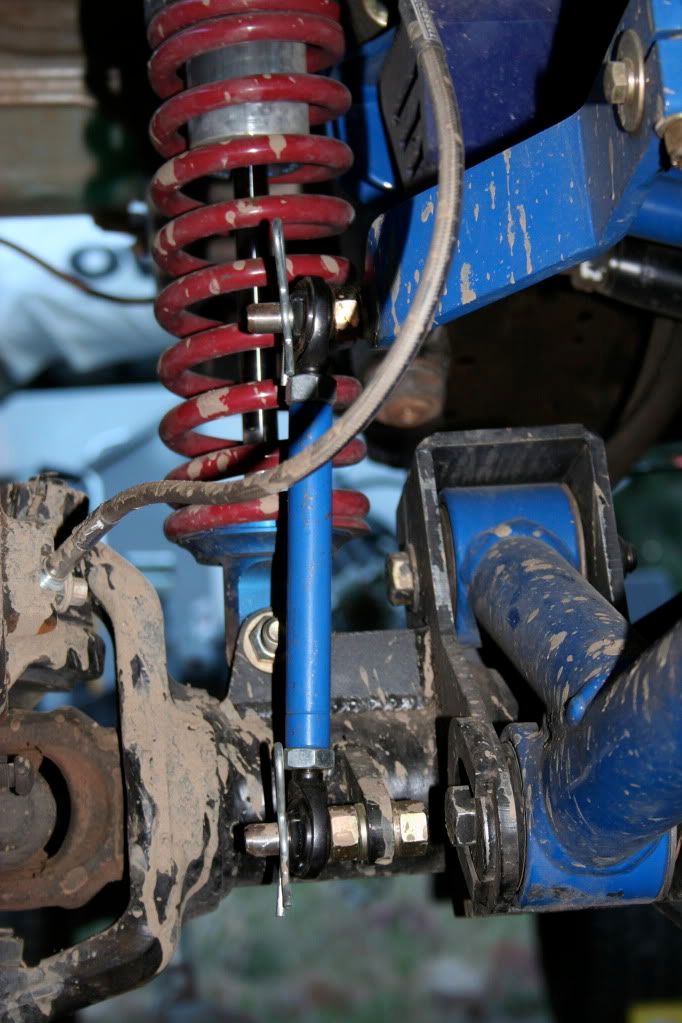
That’s about it. The last upgrade I did because I thought it needed it. The swaybar that comes with the kit bolts on.
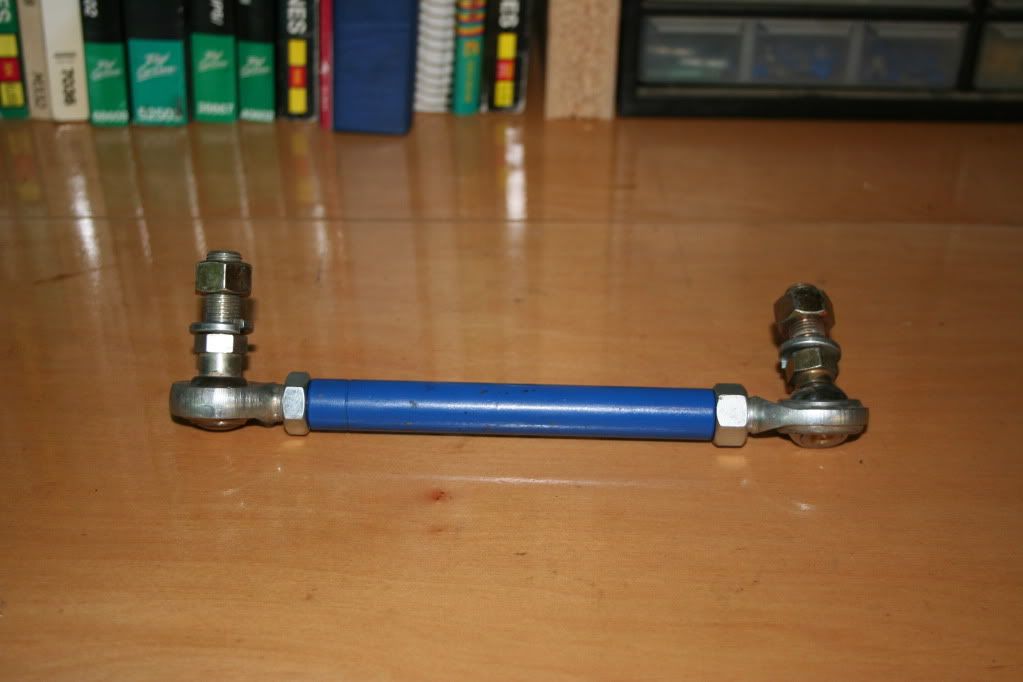
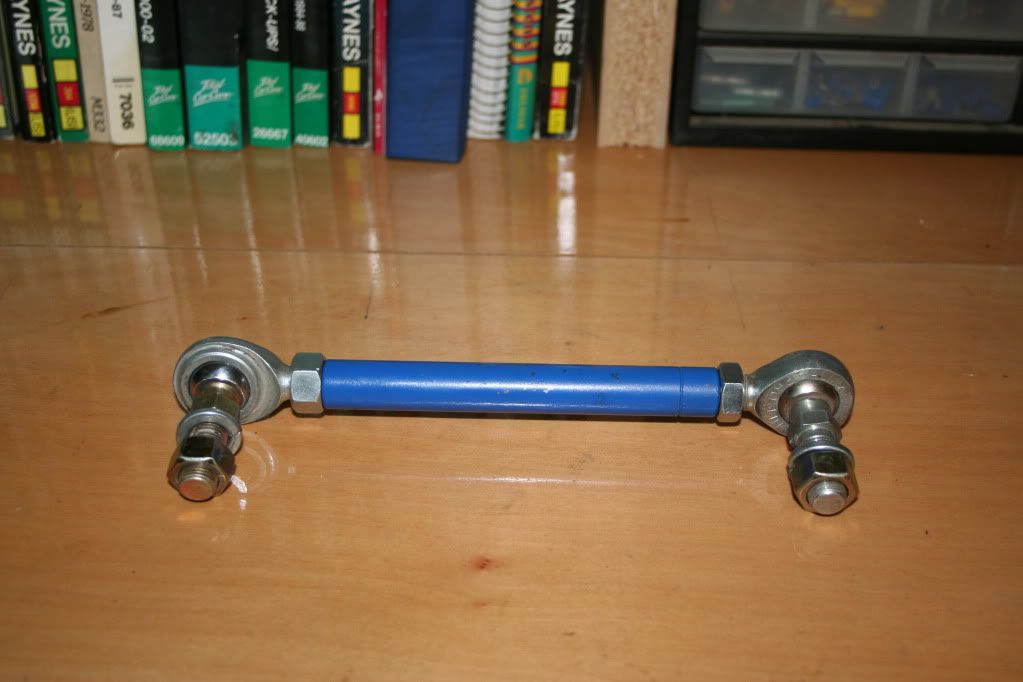
This is fine if you don’t want to be able to remove them for better articulation, I wanted to do just that. So I purchase a few Hiem joints, some 1/2 inch bolts nuts and some 1/8 inch quick pins.
Casper
I have been running the Calmini 3 inch kit for quite a few years. I have been happy with it, for an IFS setup, but it was time to step it up a notch. This winter I bit the bullet and installed the Calmini SAS kit.
I have to say this is one heck of a kit. Very well thought out and designed. Easy to install. It uses a D44 out of an 80 to 85 Jeep Wagoneer. I started the build with the goal of running a 35-inch tire without a body lift. With that in mind I had to beef up a few things. Steering was the first. The kit is designed to use the stock Waggy steering.
I tossed that and got some 1-ton Chevy tierod ends. This is coupled with 1 ½ DOM tubing with weld in bungs.
Next upgrade was the track bar mount on the axle. It was single sheer. A small gusset fixed that.
(Bugger, I am missing that photo, I will take another and add it later)
That’s about it. The last upgrade I did because I thought it needed it. The swaybar that comes with the kit bolts on.
This is fine if you don’t want to be able to remove them for better articulation, I wanted to do just that. So I purchase a few Hiem joints, some 1/2 inch bolts nuts and some 1/8 inch quick pins.
Casper
Last edited:

Casper
Adventurer
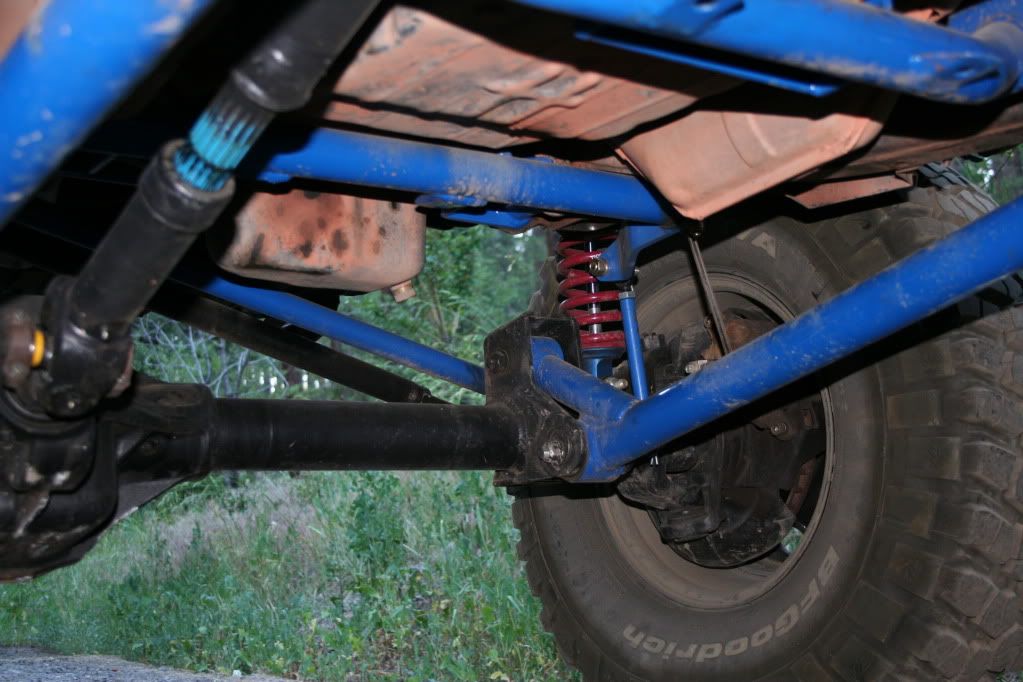
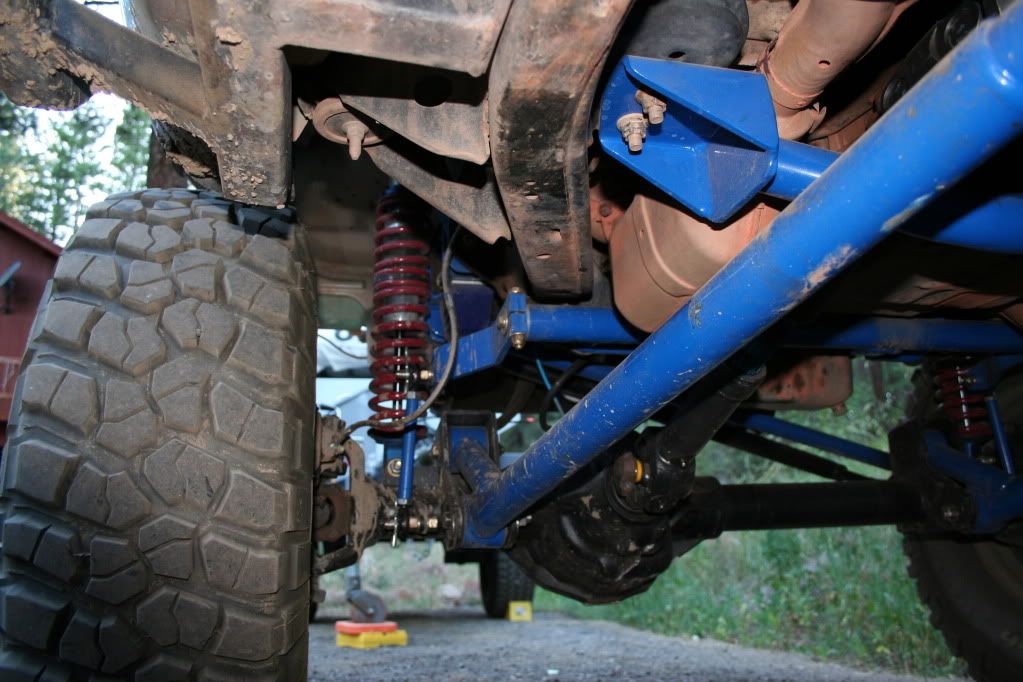
The rear was next. For this I just did a simple SOA.

I still have the Calmini 3 inch lift setup with this. Eventually I will be getting a set of Alcan springs. I also moved my rear shock mounts last year. The stock ones got ripped off one to many times. The tops of the shocks are mounted in the center of the vehicle to a custom made tubular cross member.
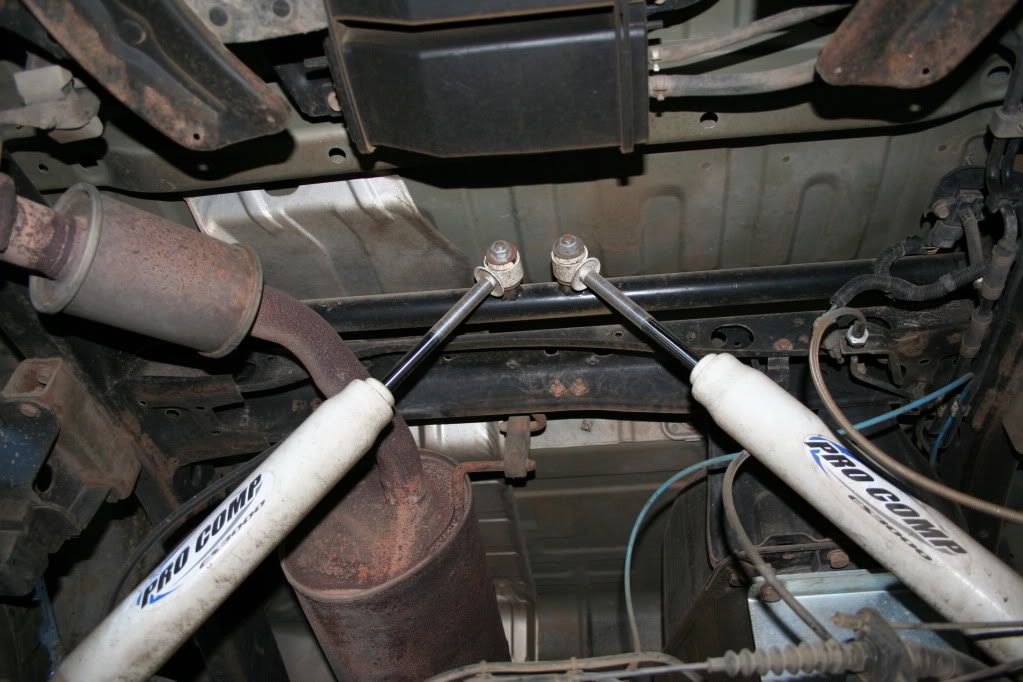
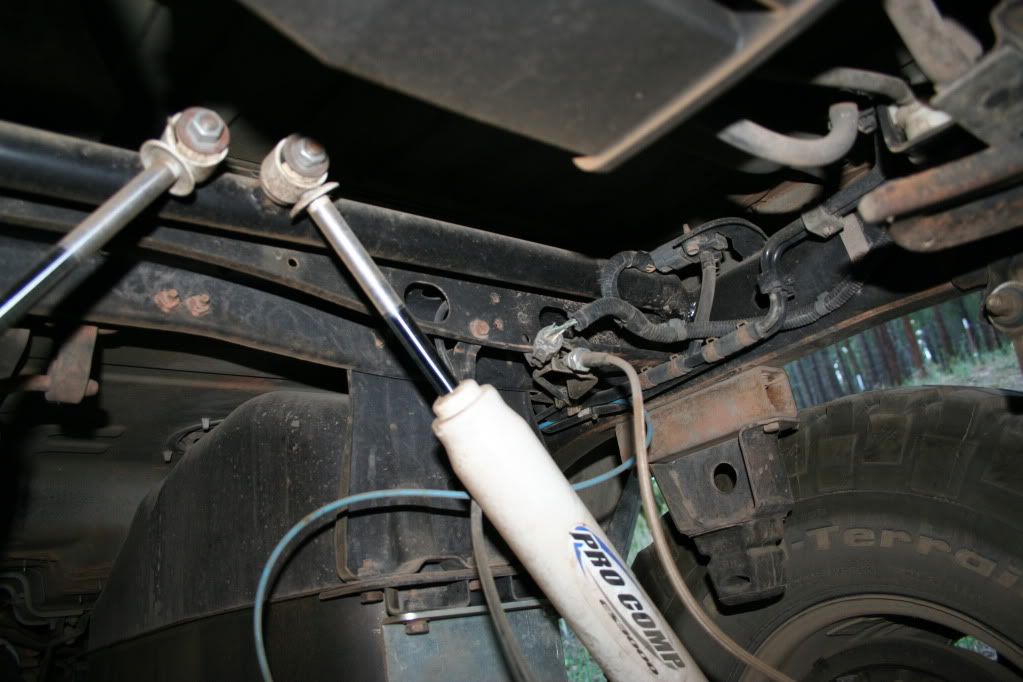
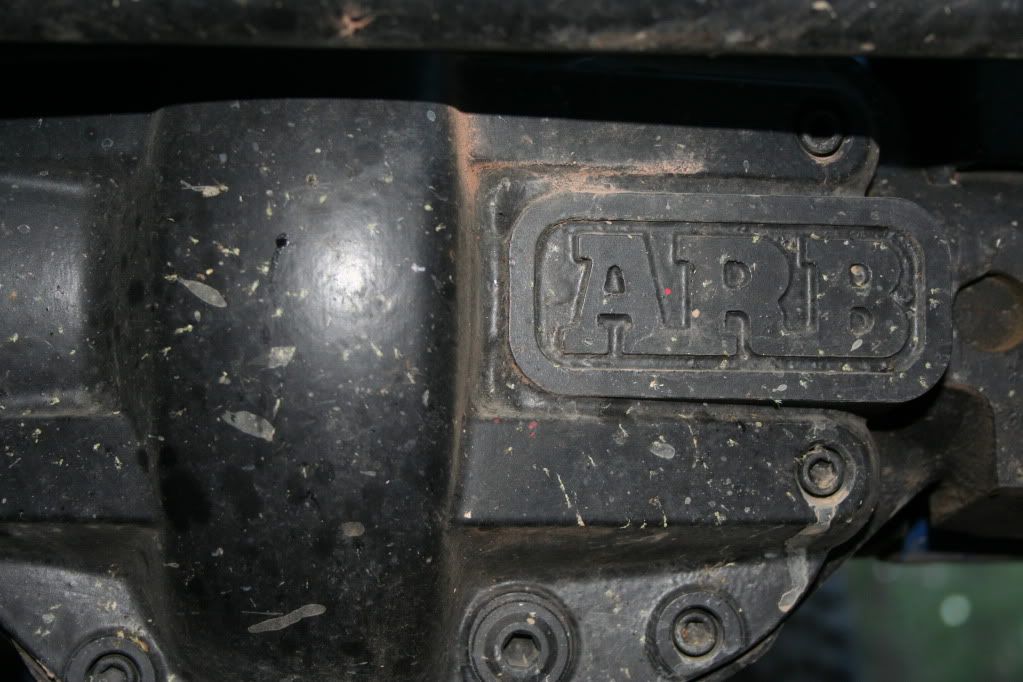
The bottoms of the shocks are mounted to the top of the axle tube. This setup makes for great articulation, but you give up a little rear stability. Not much, but you do notice it. The rear also has an ARB and 5.13 gears.
This setup works great. I have some very minor trimming to do at the back of the front wheel, but that's it.
Well, thats it for now. I have to get some photos of the dual battery setup/move and the compressor install, but that may take me a week or so. I will also post up photos of the newly painted bumper when it's done.
I hope you all injoyed the updates so far.
Casper
:coffeedrink:
I still have the Calmini 3 inch lift setup with this. Eventually I will be getting a set of Alcan springs. I also moved my rear shock mounts last year. The stock ones got ripped off one to many times. The tops of the shocks are mounted in the center of the vehicle to a custom made tubular cross member.
The bottoms of the shocks are mounted to the top of the axle tube. This setup makes for great articulation, but you give up a little rear stability. Not much, but you do notice it. The rear also has an ARB and 5.13 gears.
This setup works great. I have some very minor trimming to do at the back of the front wheel, but that's it.
Well, thats it for now. I have to get some photos of the dual battery setup/move and the compressor install, but that may take me a week or so. I will also post up photos of the newly painted bumper when it's done.
I hope you all injoyed the updates so far.
Casper
:coffeedrink:
Last edited:
Casper
Adventurer
The hiems for the sway bar links I got from Moab 4x4 Outpost when I was last in Moab. The hiems for the swing arm on the bumper I got from Off Road Innovations of Reno Nv. ORI does all my welding work (since I can't weld yet), they are the only shop I will let work on my rig, and I have to say their work is top notch. If you are ever in Reno you should stop by.you definitely have an awsome build going on here. i do have a question for you though, where did you get your 3/4" hiem joints from?
Hope that helps.
Casper
:smiley_drive:
The BN Guy
Expedition Leader
Very nice write-up on the SAS kit. Good pix. Cool rig!:ylsmoke:
Casper
Adventurer
Thanks BN Guy.
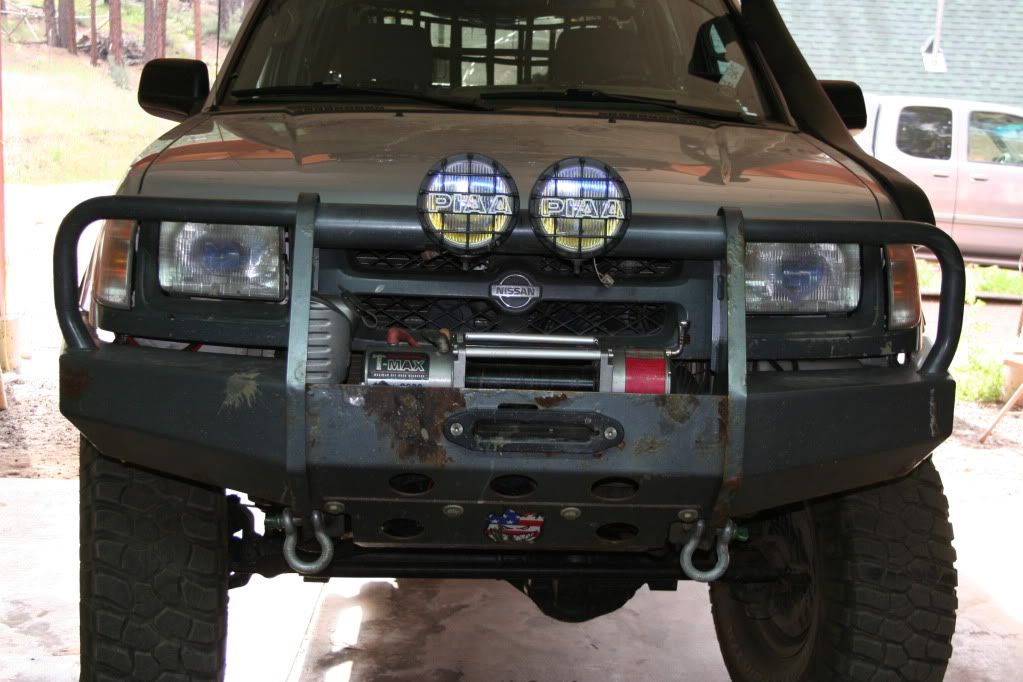
A few more updates from this last weekend. As I am sure some of you noticed, my front bumper looked like c@@@. Very rusty. Well, I spent the weekend fixing that.
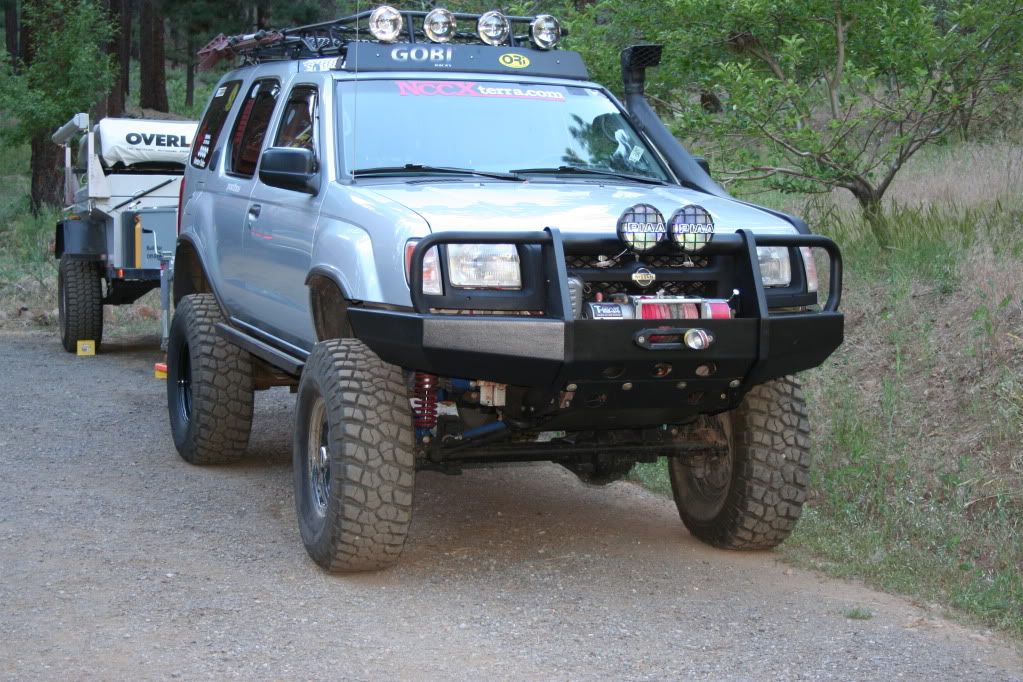
Took it and the grill off, completly sanded them down and sprayed them with Duplicolor spray on bedliner. I think they came out good, but I should have practiced spraying it more, some parts came out smooth and some parts had a ton of textcher to them. Overall I like it.
Now a few photos of a semi clean X.
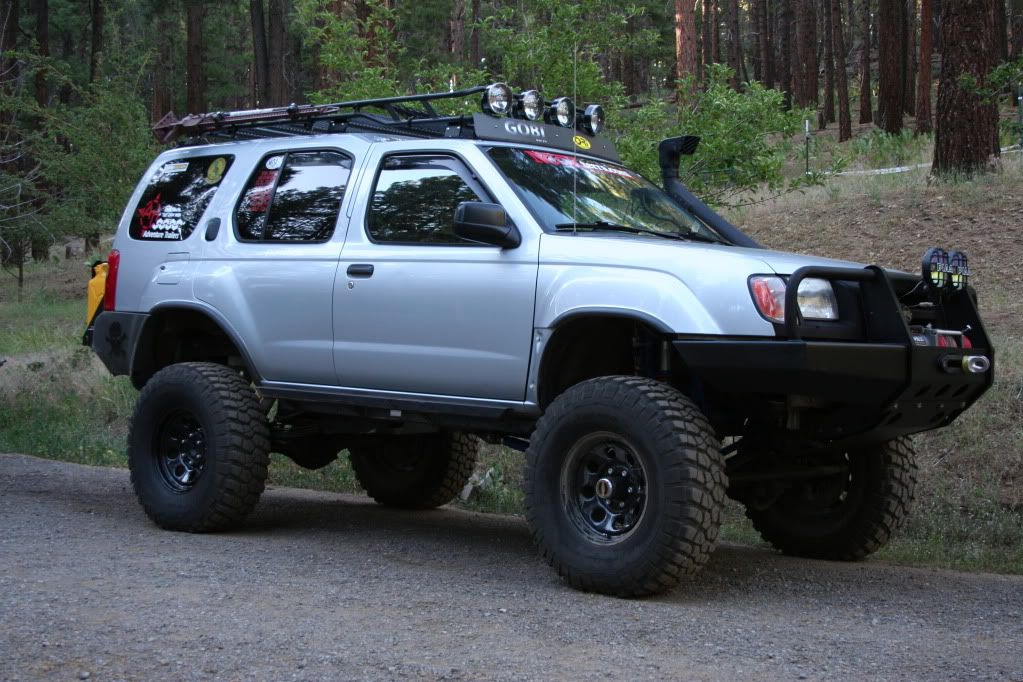
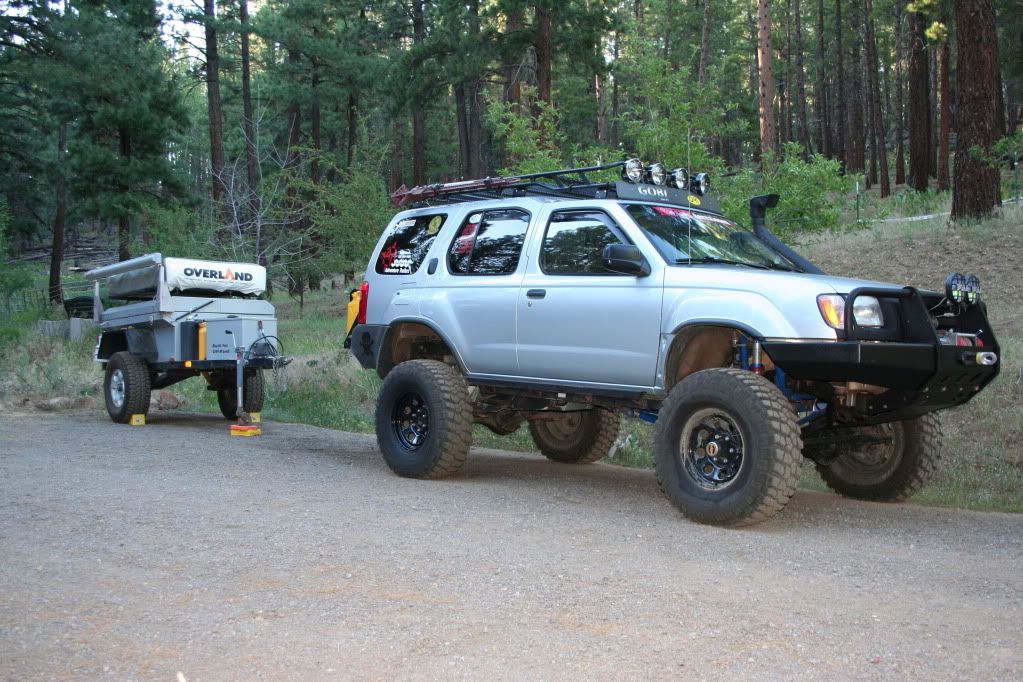
So, thats it until I get some more photos. Hopefully I can get some of the dual battery system and engine bay, but it may be a week or so. Hope you all enjoy.
Casper
:smiley_drive:
A few more updates from this last weekend. As I am sure some of you noticed, my front bumper looked like c@@@. Very rusty. Well, I spent the weekend fixing that.
Took it and the grill off, completly sanded them down and sprayed them with Duplicolor spray on bedliner. I think they came out good, but I should have practiced spraying it more, some parts came out smooth and some parts had a ton of textcher to them. Overall I like it.
Now a few photos of a semi clean X.
So, thats it until I get some more photos. Hopefully I can get some of the dual battery system and engine bay, but it may be a week or so. Hope you all enjoy.
Casper
:smiley_drive:
Last edited: