You are using an out of date browser. It may not display this or other websites correctly.
You should upgrade or use an alternative browser.
You should upgrade or use an alternative browser.
Converting a factory JK/JKU hardtop to modular
- Thread starter jscherb
- Start date
kantidesai
New member
jscherb.
If you see attached image on last image you can see ir-regular black rubber type adhesive dried on factory made corvette.
What is this material is, its a solid like hard material stuck with walls like hard to remove.
also if you see metal extension i attached to the floor with just flat metal angle between gas tank and floor sruface and other end of the angle has hole to clamp bolt of the 2 support plate..
i am expecting that black type of very hard glue can be solid in shape to hold those 2 vertical or i can attach horizontal plate with holes to mount. solid.
please advice me
jscherb
Expedition Leader
jscherb.
If you see attached image on last image you can see ir-regular black rubber type adhesive dried on factory made corvette.
What is this material is, its a solid like hard material stuck with walls like hard to remove.
also if you see metal extension i attached to the floor with just flat metal angle between gas tank and floor sruface and other end of the angle has hole to clamp bolt of the 2 support plate..
i am expecting that black type of very hard glue can be solid in shape to hold those 2 vertical or i can attach horizontal plate with holes to mount. solid.
please advice me
Having never seen inside a Corvette in person I don't know exactly what adhesive the factory uses, but obviously something like the liquid epoxy I suggested in my earlier post isn't appropriate for that application. I'd try something like Norton Speedgrip: https://www.emisupply.com/catalog/n...gclid=CMSNs6nN79ICFchXDQodSxEOqg#.WNVPEme1viw
kantidesai
New member
jscherb.
Thank You very much for this. let me try to place order today and try for how strong it hold.
i hope it works to joint metal with flat surface of fiberglass.
I really appreciate your guidance. is it any way we can communicate directly ? my name is at yahoo if you can
thanks
Thank You very much for this. let me try to place order today and try for how strong it hold.
i hope it works to joint metal with flat surface of fiberglass.
I really appreciate your guidance. is it any way we can communicate directly ? my name is at yahoo if you can
thanks
TrailBadger
Banned
@Jeff I wasn't sure if my question should be posted in the barn door or this thread.
Is there any chance that you'll design the sliding window for the 2 door soft top (left and right side/rear) windows?.
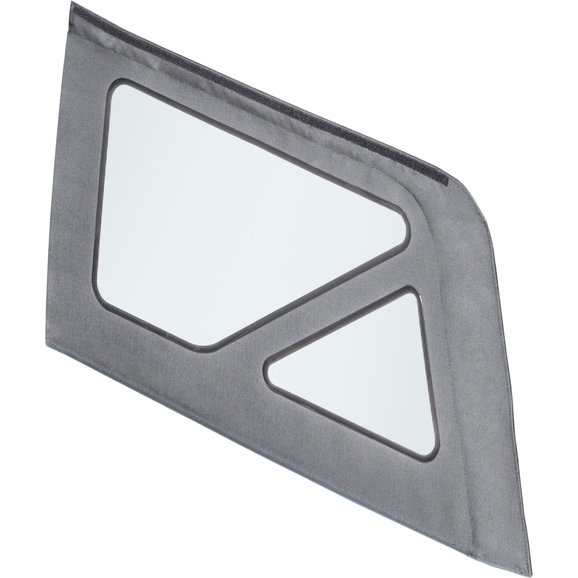
Is there any chance that you'll design the sliding window for the 2 door soft top (left and right side/rear) windows?.

jscherb
Expedition Leader
@Jeff I wasn't sure if my question should be posted in the barn door or this thread.
Is there any chance that you'll design the sliding window for the 2 door soft top (left and right side/rear) windows?.

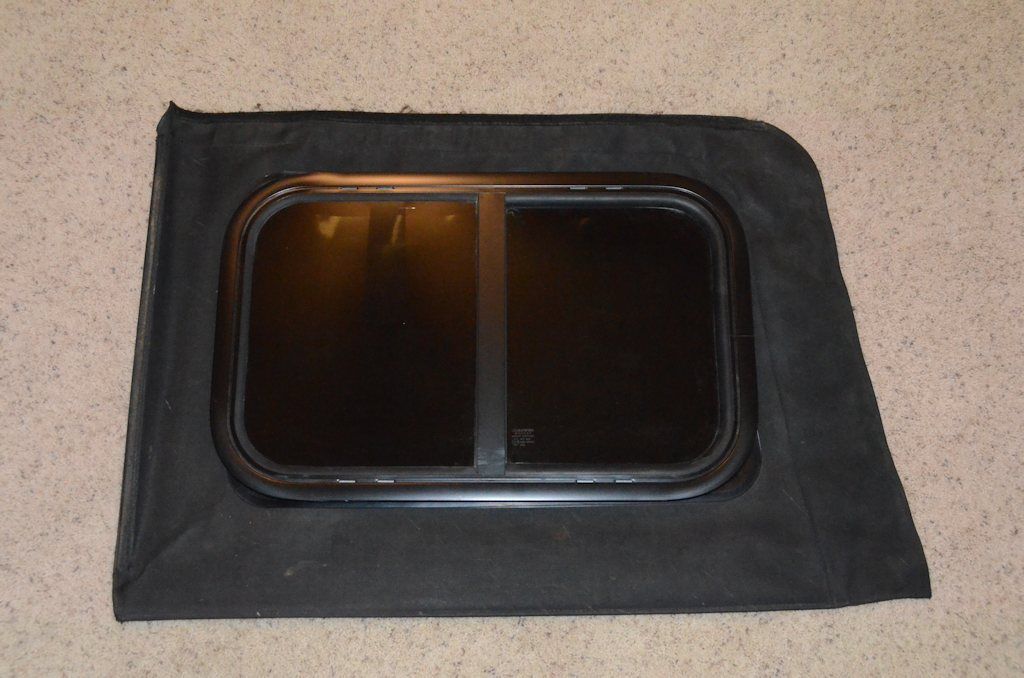
I have already done a design for that, about a year ago. The design uses a slider window and a few simple brackets that add enough rigidity to the soft panel so the panel doesn't flap at speed. I took this photo during the design process, the slider window is just sitting on top of the soft top panel. I didn't build a prototype because it didn't seem that there was much interest in the idea. I posted about it back then to see what interest there might be (although I didn't post the design details): http://forum.expeditionportal.com/t...for-JK-factory-hardtops?p=1981903#post1981903
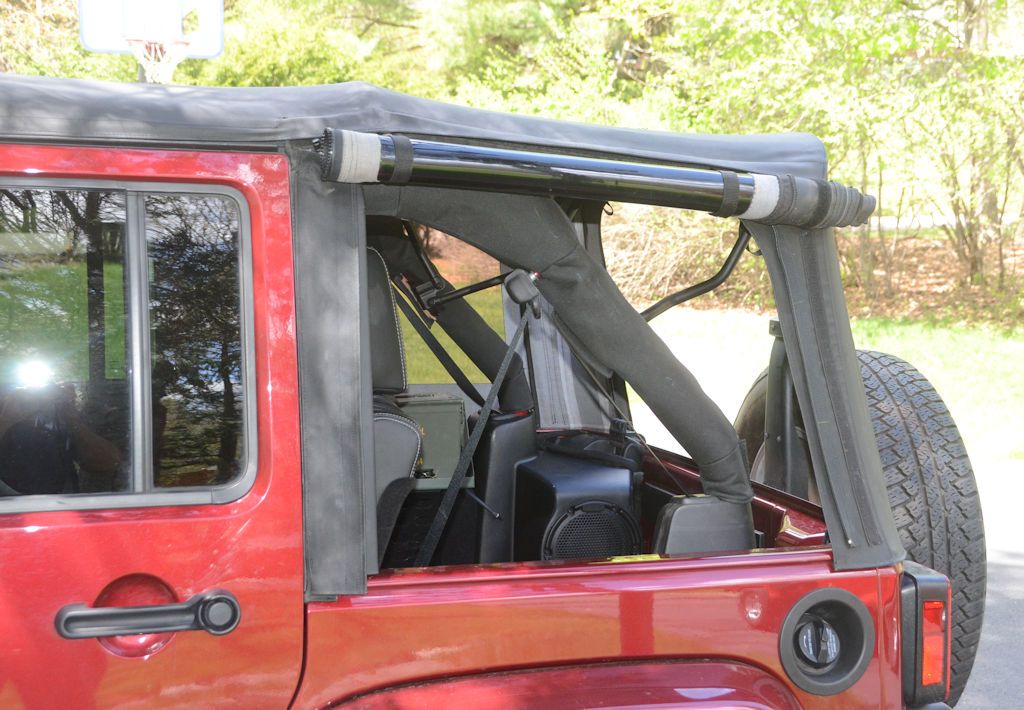
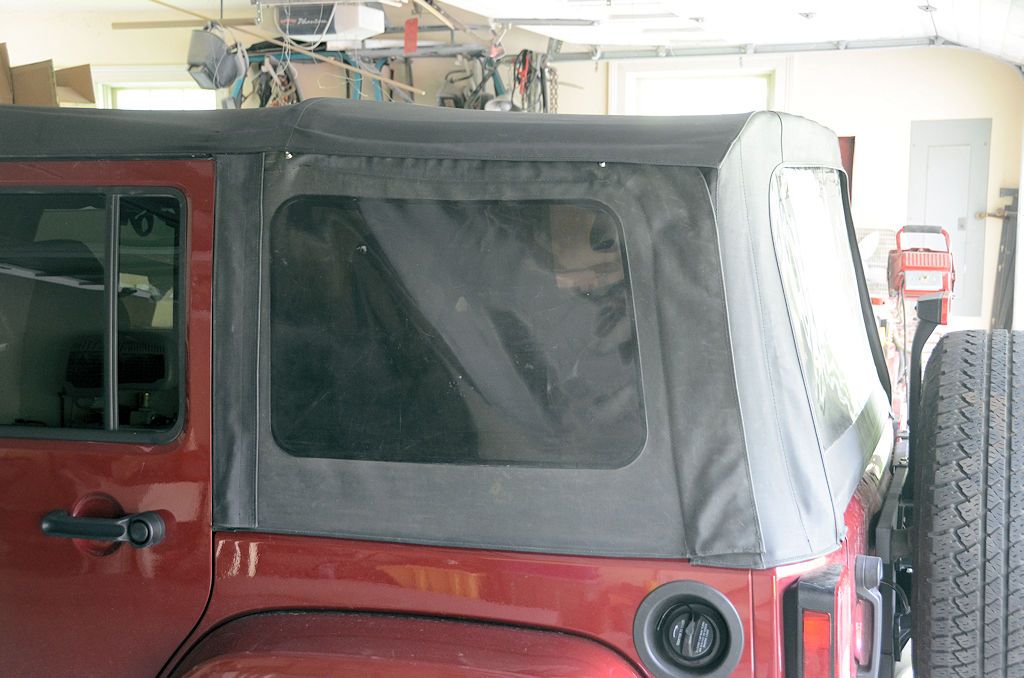
I am interested in doing mods to the soft top though, here's one I did. I've never liked how the soft top side panel don't make the interior very accessible, so I implemented a roll-up version.
Rolled up:
Rolled down:
chadwicksavage
Adventurer
@jscherb, I may have missed this but I've read through quite a few pages and the entire safari cab thread but is anyone currently producing these besides you? Did your design ever make it to production? Thanks!
jscherb
Expedition Leader
@jscherb, I may have missed this but I've read through quite a few pages and the entire safari cab thread but is anyone currently producing these besides you? Did your design ever make it to production? Thanks!
The JK Safari Cab is not in production. I don't believe there would be enough interest in the JK Safari Cab to make it worthwhile to become a commercial product.
chadwicksavage
Adventurer
The JK Safari Cab is not in production. I don't believe there would be enough interest in the JK Safari Cab to make it worthwhile to become a commercial product.
I guess I meant any safari cab. Are yours the ones over at gr8tops for the lj tj yj and cj?
Sent from my iPhone using Tapatalk
jscherb
Expedition Leader
Yes, I designed the Safari Cab for the LJ and TJ that Gr8tops sells. I designed it to fit the CJ and YJ as well but Gr8tops doesn't support those models.I guess I meant any safari cab. Are yours the ones over at gr8tops for the lj tj yj and cj?
Sent from my iPhone using Tapatalk
jscherb
Expedition Leader
In the fall I picked up a second JK hardtop very cheaply. Mostly I bought it for the Freedom Panels, which I used to make the prototype opening skylights. As soon as I brought it home I cut it in pieces to make it easier to store:
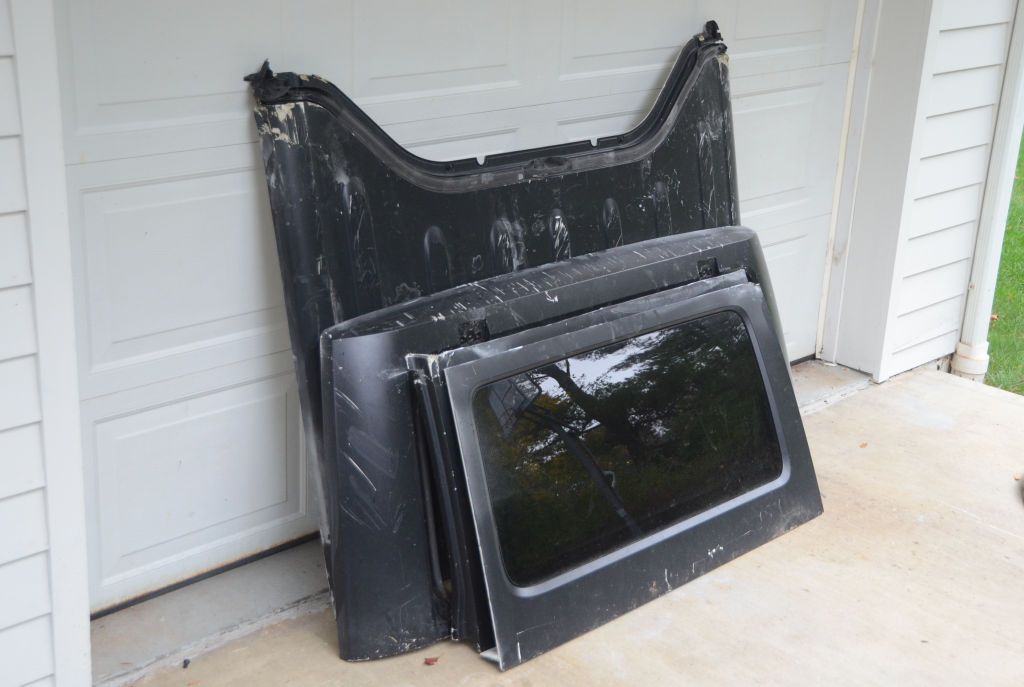
I don't have any plans so far for the roof panel or the rear panel, but I've decided to add flanges to the side panels so they can be used with the modular hardtop conversion described earlier in this thread - the panels have good factory glass in them so they'll be an alternative to the various custom window options I've been working on.
These are the side panels I'll add flanges to. They're dirty from sitting outside at the previous owner's place and from sitting in my garage, but they'll clean up just fine.
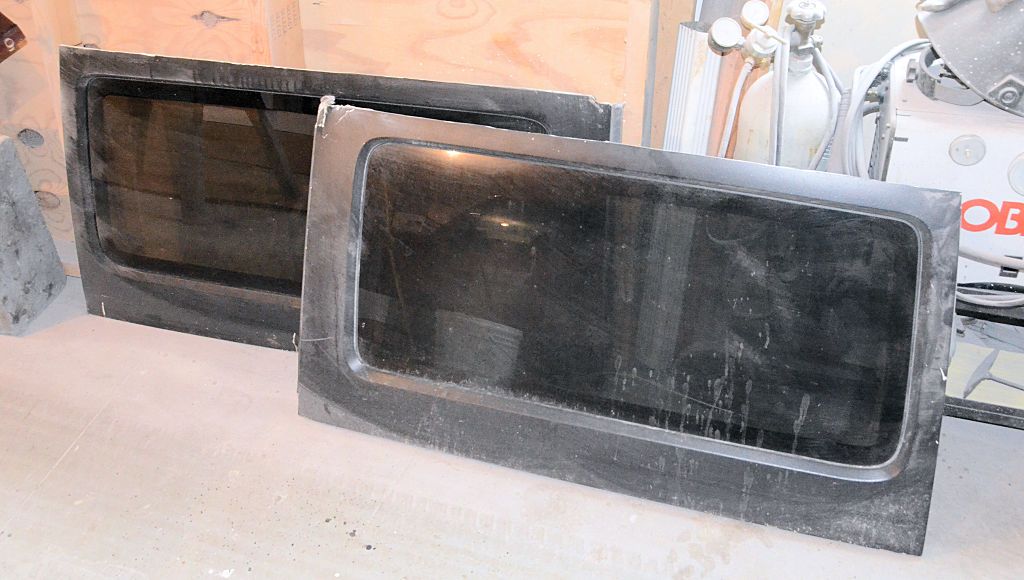
The hardtop was in an accident, so the driver's side panel has a little damage I'll have to fix while I'm converting the panels to modular.
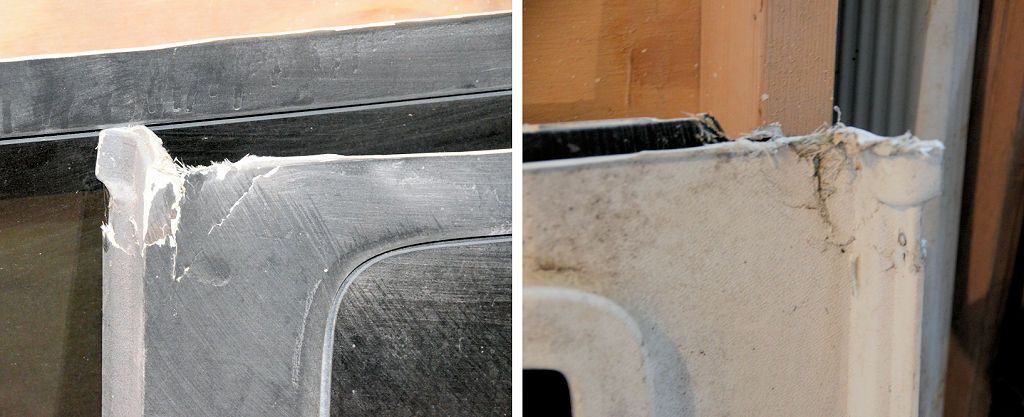
To add flanges to these side panels, I'll make the flanges separately, epoxy them to the panels and then reinforce the epoxy joint. But first I'll fix the accident damage. Details to follow.

I don't have any plans so far for the roof panel or the rear panel, but I've decided to add flanges to the side panels so they can be used with the modular hardtop conversion described earlier in this thread - the panels have good factory glass in them so they'll be an alternative to the various custom window options I've been working on.
These are the side panels I'll add flanges to. They're dirty from sitting outside at the previous owner's place and from sitting in my garage, but they'll clean up just fine.

The hardtop was in an accident, so the driver's side panel has a little damage I'll have to fix while I'm converting the panels to modular.

To add flanges to these side panels, I'll make the flanges separately, epoxy them to the panels and then reinforce the epoxy joint. But first I'll fix the accident damage. Details to follow.
TrailBadger
Banned
@Jeff have you spoke with Greg lately?. he's having troubles locating a seamstress to continue production of his Safari soft tops. http://www.americanconvoy.com
jscherb
Expedition Leader
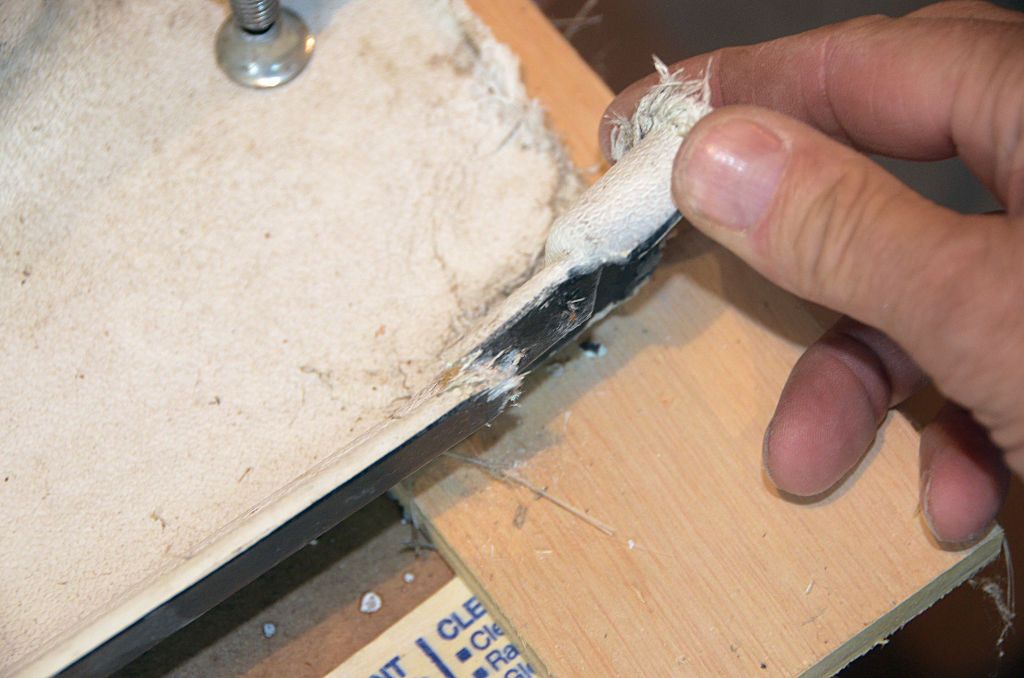
I started on the new side panels by fixing the damaged section of the driver's side panel. The damage involves a crack at the edge, and a larger crack in the panel.
I began by reinforcing the edge crack - I spread it out enough to put epoxy in the crack and then clamped it while the epoxy set. In this photo I'm opening up the crack:
This next photo was taken after I put epoxy in the crack. I used a piece of waxed paper to prevent the clamp from sticking, and clamped the crack closed until the epoxy cured.
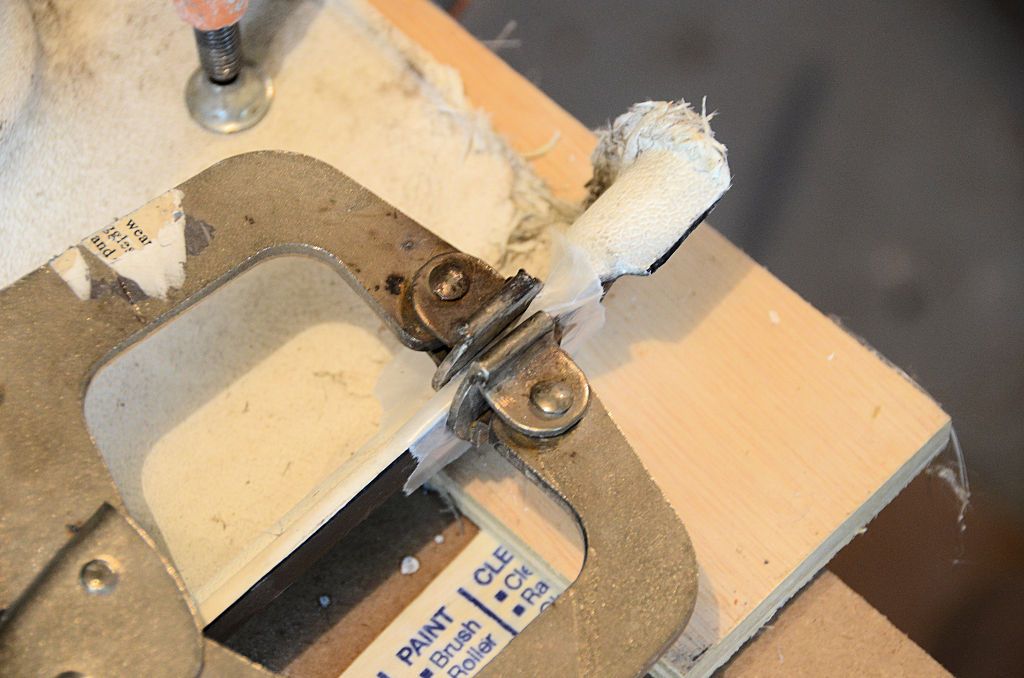
Once the epoxy cured I removed the clamp and the waxed paper. The crack is now stabilized; later I'll put fiberglass on the inside to reinforce the area. In this photo you can also see the larger crack that needs to be repaired.
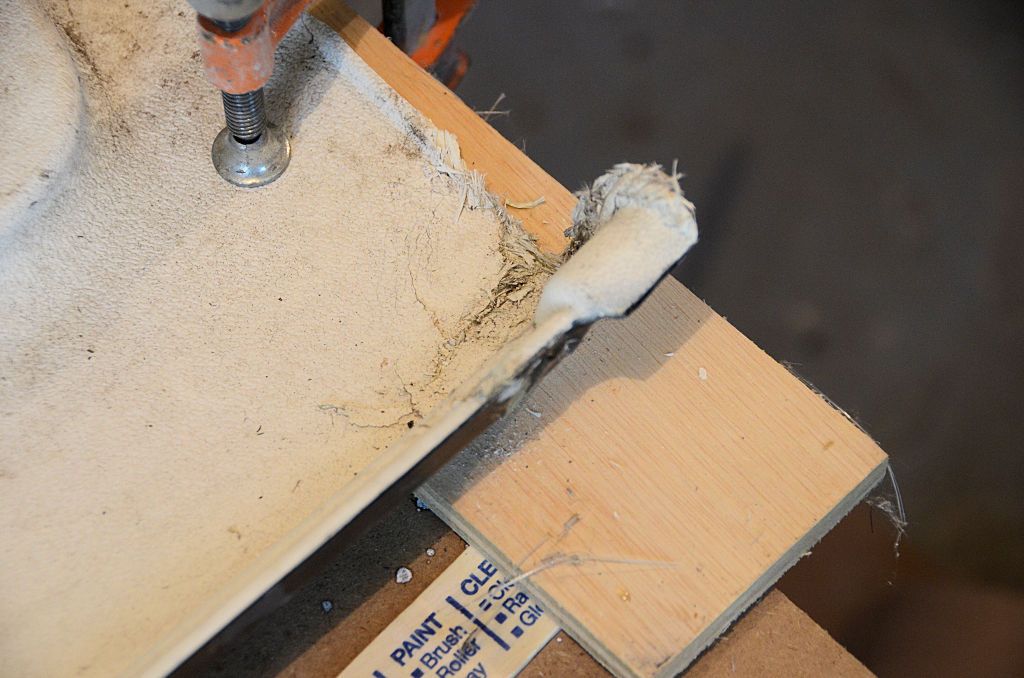
I began by reinforcing the edge crack - I spread it out enough to put epoxy in the crack and then clamped it while the epoxy set. In this photo I'm opening up the crack:

This next photo was taken after I put epoxy in the crack. I used a piece of waxed paper to prevent the clamp from sticking, and clamped the crack closed until the epoxy cured.

Once the epoxy cured I removed the clamp and the waxed paper. The crack is now stabilized; later I'll put fiberglass on the inside to reinforce the area. In this photo you can also see the larger crack that needs to be repaired.

jscherb
Expedition Leader
Greg and I haven't been in touch in a while.@Jeff have you spoke with Greg lately?. he's having troubles locating a seamstress to continue production of his Safari soft tops. http://www.americanconvoy.com
jscherb
Expedition Leader
To fix the larger crack, I started by sanding the paint off in the damaged area, tapering the sanding a bit so I cut a valley along the fracture. I did this on both the inside and outside of the panel.
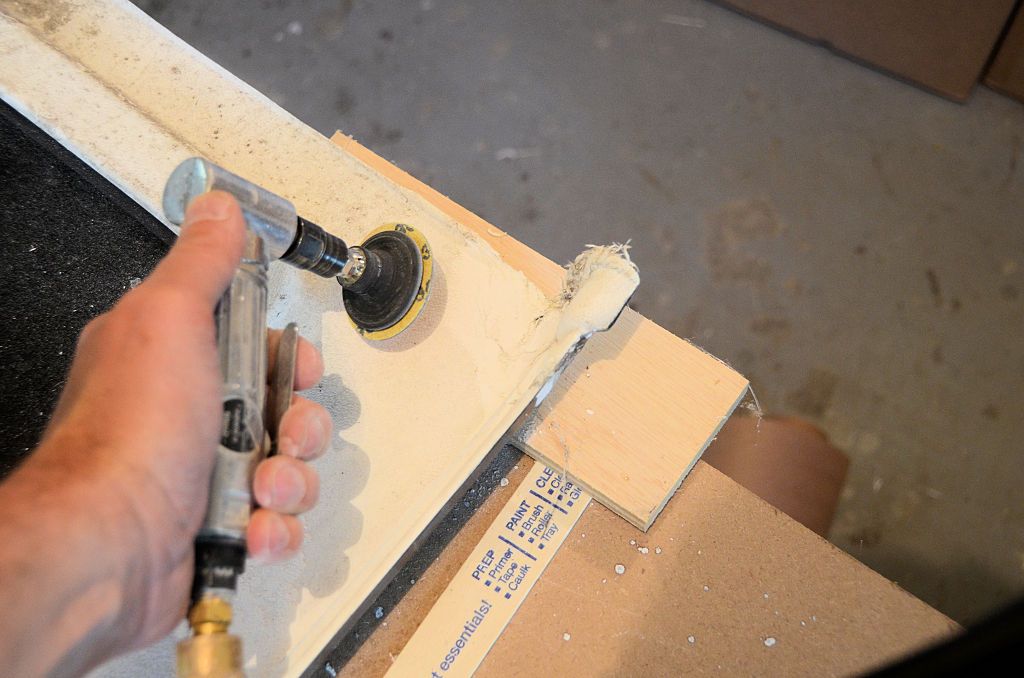
I used a 2" sanding disk in my air-powered angle dir grinder because it's fast and small, but any sander would be just fine, including hand sanding. Inside:
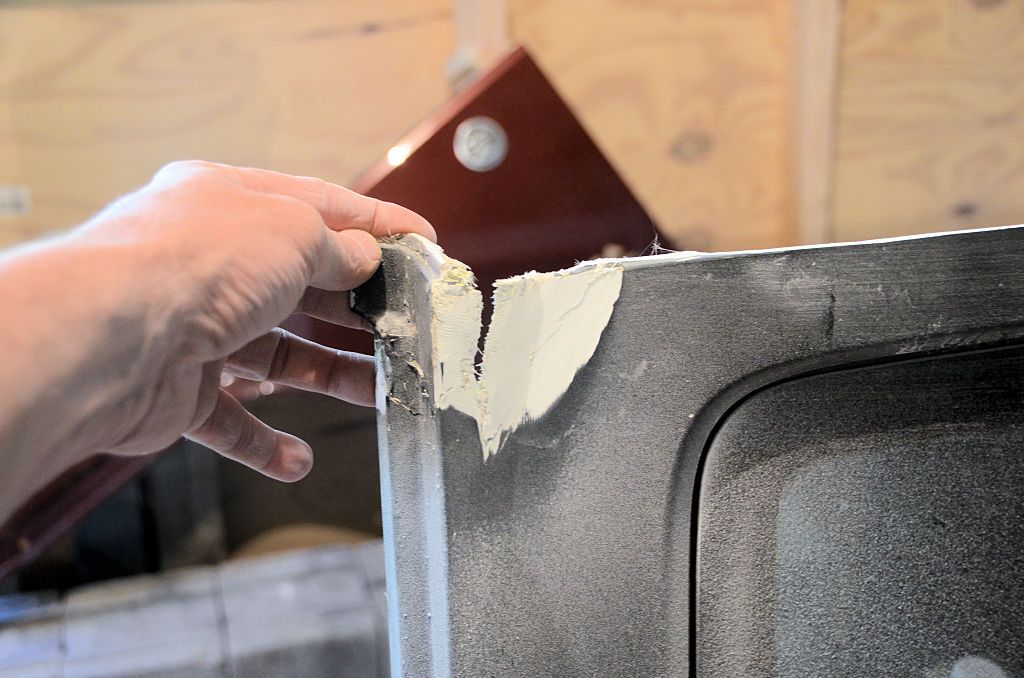
Because the factory hardtop is so thin, sanding a valley on the inside and outside of the crack resulted in sanding all the way through. Not a problem though. Outside:
Since the fracture has deformed the panel a bit, I'll apply a layer of fiberglass to the outside first and then I'll straighten it by clamping a board to the area with a layer of waxed paper between the board and the fiberglass to the board doesn't get stuck to the hardtop. After the fiberglass has cured the clamp will be removed.
On the outside, a layer of fiberglass mat has been applied and soaked with SMC-compatible resin:
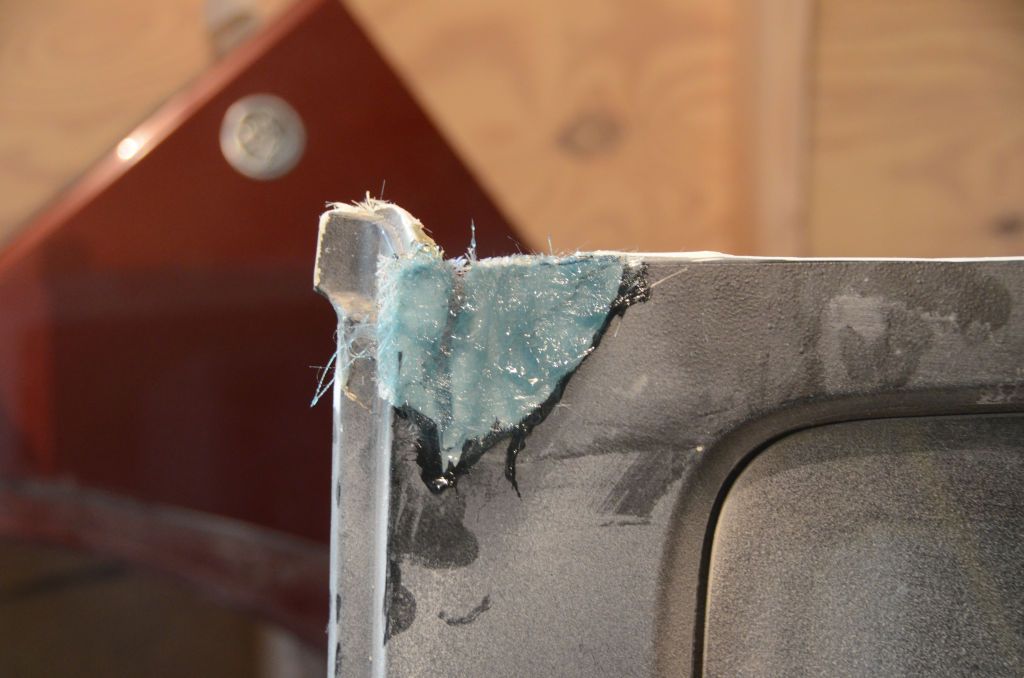
Then the board is clamped in place and a piece of fiberglass mat is applied on the inside, also with SMC-compatible resin.
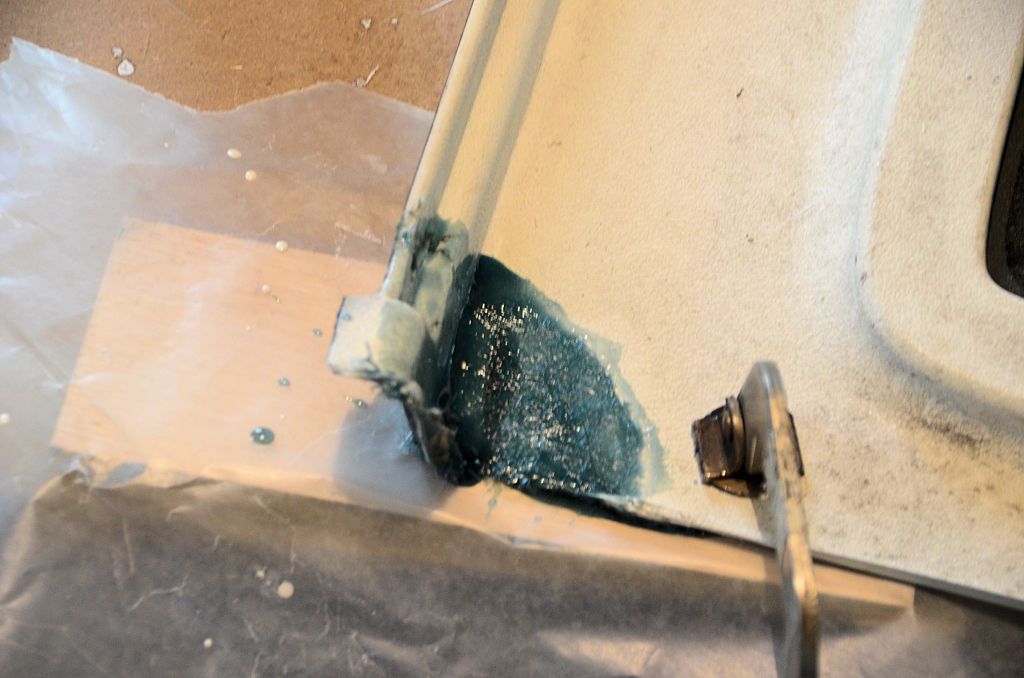
When I'm in the process of bonding the flanges to the panel, I'll be using white-tinted resin, so I'll cover up the repair in the inside with another 2 layers of fiberglass; the extra layers will reinforce the areas and the white tint will hide the repair so no touch-up is required. For now, the single layer of mat will stabilize the area until the final layers can be applied.
Once cured, the clamped board and waxed paper is removed:
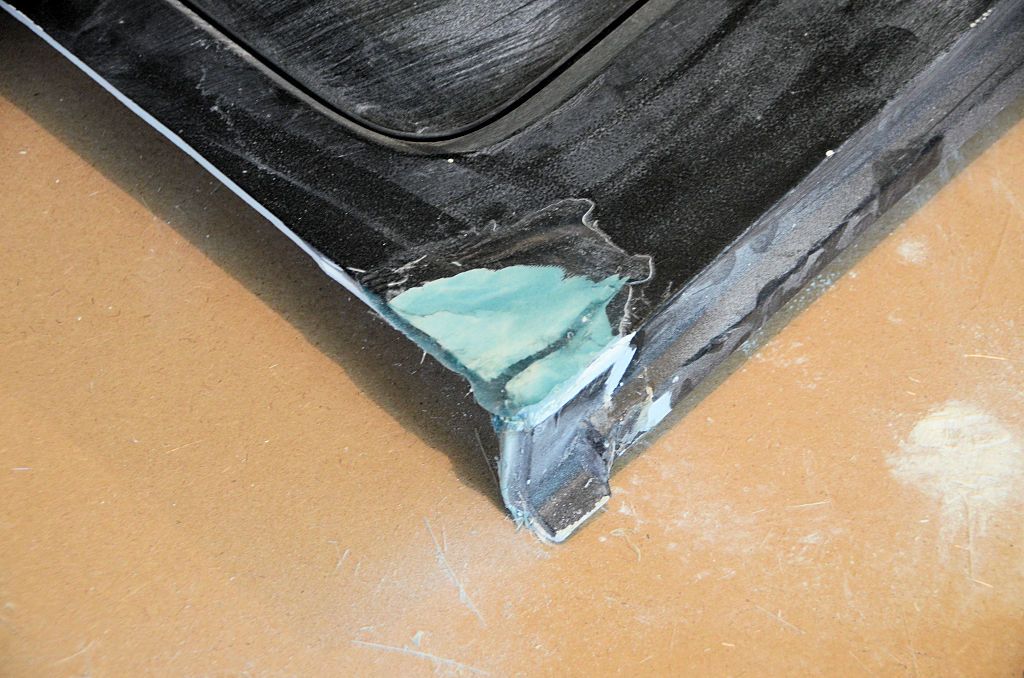
In the photo above the area hasn't be sanded smooth yet - I'll apply some ordinary body filler before sanding to take care of any imperfections in the surface. Because the repair area has a layer of SMC-compatible resin on it, ordinary body filler can be used. Once sanded smooth, MOPAR hardtop paint will be applied to hide the repair.
I used a 2" sanding disk in my air-powered angle dir grinder because it's fast and small, but any sander would be just fine, including hand sanding. Inside:

Because the factory hardtop is so thin, sanding a valley on the inside and outside of the crack resulted in sanding all the way through. Not a problem though. Outside:

Since the fracture has deformed the panel a bit, I'll apply a layer of fiberglass to the outside first and then I'll straighten it by clamping a board to the area with a layer of waxed paper between the board and the fiberglass to the board doesn't get stuck to the hardtop. After the fiberglass has cured the clamp will be removed.
On the outside, a layer of fiberglass mat has been applied and soaked with SMC-compatible resin:

Then the board is clamped in place and a piece of fiberglass mat is applied on the inside, also with SMC-compatible resin.

When I'm in the process of bonding the flanges to the panel, I'll be using white-tinted resin, so I'll cover up the repair in the inside with another 2 layers of fiberglass; the extra layers will reinforce the areas and the white tint will hide the repair so no touch-up is required. For now, the single layer of mat will stabilize the area until the final layers can be applied.
Once cured, the clamped board and waxed paper is removed:

In the photo above the area hasn't be sanded smooth yet - I'll apply some ordinary body filler before sanding to take care of any imperfections in the surface. Because the repair area has a layer of SMC-compatible resin on it, ordinary body filler can be used. Once sanded smooth, MOPAR hardtop paint will be applied to hide the repair.
Similar threads
- Replies
- 4
- Views
- 855
- Replies
- 0
- Views
- 964
- Replies
- 4
- Views
- 1K
- Replies
- 64
- Views
- 11K


