Rutdigger
Watch This!
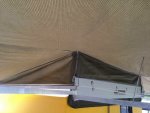
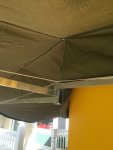
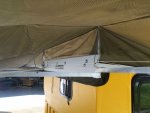
So if you haven't seen this awning before please take a look at it; the thing is simply awesome in my book. I wanted one for my trailer but didn't want to pay the price tag. So whats a guy to do...lol. Yup, build it. I won't bore you with posting every little picture of the fabrication process, because really there isn't a need to. You can build this thing as complicated or as simple as you want. Taking pics of making brackets etc i think is a waste of your talents.
This awning will cover three sides of my trailer and will mount to the upper edge of the outside wall. I left 1" of overhang to bolt to the upper frame of the wall and will fabricate four support brackets that will attach to the roof. The main riser of the frame is 8" in height and holds the 6 awning arms that rotate outward to cover the three sides.
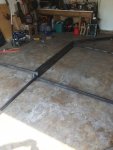
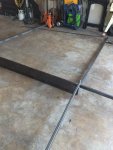
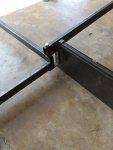
The following pics show you how the awning will look (without the fabric on it yet). Only one side is fully deployed because I ran out of room in the garage, but I think you can get the point and a good look how the arms attach to the hinge, etc. This is the very rough frame, nothing has the trim on yet, or sanded down.

I still need to install the self raising ridge supports. This is what gives this awning the pitched look of a house roof, which is one reason I love this awning. Then fabricate and install the roof support brackets. I made this thing out of metal instead of aluminum for a couple of reasons. Cost and ease of building it. Aluminum is much lighter but I don't have the equipment to weld it and I hate bolt together things. Metal is much cheaper in price also.
It will be ready to start patterning it soon, so be sure and follow along with that. I know I had a ton of questions when I was learning how to pattern and such.
This awning will cover three sides of my trailer and will mount to the upper edge of the outside wall. I left 1" of overhang to bolt to the upper frame of the wall and will fabricate four support brackets that will attach to the roof. The main riser of the frame is 8" in height and holds the 6 awning arms that rotate outward to cover the three sides.
The following pics show you how the awning will look (without the fabric on it yet). Only one side is fully deployed because I ran out of room in the garage, but I think you can get the point and a good look how the arms attach to the hinge, etc. This is the very rough frame, nothing has the trim on yet, or sanded down.


I still need to install the self raising ridge supports. This is what gives this awning the pitched look of a house roof, which is one reason I love this awning. Then fabricate and install the roof support brackets. I made this thing out of metal instead of aluminum for a couple of reasons. Cost and ease of building it. Aluminum is much lighter but I don't have the equipment to weld it and I hate bolt together things. Metal is much cheaper in price also.
It will be ready to start patterning it soon, so be sure and follow along with that. I know I had a ton of questions when I was learning how to pattern and such.

