DIY Composite Camper T100 Expedition Vehicle Build

Figured I should be asking over here as the Maker's are mostly here.. What I gathered is on a deep/long panel pour you are doing several pours? That would eliminate that build up/pressure I thought could happen. You said something about the added pour within 6 minutes to ensure bonding? This leads to what you are finding is a good depth of pour? Foot at a time? LOL... I can see several panels setup with pours happening, music playin' and you running around amongst them all while that beer you opened goes warm...

Good work Matt!
I am doing the larger sections in a series of pours. I think it helps with the pressure build up as you say, but the foam still easily exerts enough pressure to bend the 5mm ply I'm using, so lots of clamping is necessary. I'm still toying with different strategies and making things up as I go along. The main reason for doing multiple smaller pours is that I don't think I can properly mix the larger quantities as well in the short period of time before it starts kicking off.

With the wall sections most my voids are roughly 24x36x.75 inches and I fill them in 3-4 pours and I do one void at a time. It would be nice to set up a bunch of things at once, but I don't have the clamps, shop space, or multitasking skills for that. lol
 

RJ Howell

Active member
I'm about it do some modifications to mine and setup outside storage. I like what you are doing and trying to see how much I can incorporate into my mod's. I still see myself getting the xps board (cause I still can) and working from there. You're pouring intrigues me as to what & how it could happen. I'm awaiting some assembly, yet think I may be working on mine before you get there...

Great work Matt! Keep it up!
 
UPDATE
I've completed the camper floor!

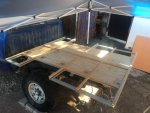
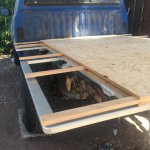
It is a composite panel consisting of a wood frame skinned with plywood filled with polyurethane pour foam and coated in fiberglass and epoxy resin.
floor pic.jpg

The plywood skin is 15/32" 5ply underlayment. It's a bit heavy, but I wanted to make sure the floor was sturdy and given my options at the local shops, this is what I went with. The framing is 1x2" Douglas fir. The frame is held together with Titebond exterior wood glue and pocket screws. And it is attached to the plywood with the same glue and countersunk deck screws. The frame creates a gap between the upper and lower skins that is approximately 3/4" wide and divides the floor into 8 sections that I will fill with pour foam.
IMG_0714.JPG IMG_0716.JPG IMG_0726.JPG

The sections of floor in front and behind the wheel wells were skinned with the same plywood and attached with glue and deck screws. And I used a router to make a 2" lap joint in the plywood.
lap joint.jpg lapjoint.jpg

To fill the floor with foam I had to stand it up on it's side so that I could pour the foam vertically into each section. A section that was 24x38x.75 took about 16 fluid ounces of product to fill and I did it in 3 separate pours. The separate pours allowed me to mix the 2 parts more thoroughly in the short working time before pouring and theoretically allowed the foam to expand vertically more freely so it wouldn't push the plywood skins with as much force.
pour.jpg

I used a flush trim router bit to trim the edges of the floor to match the subframe. Then I used a paste made from epoxy and milled glass to coat the exposed foam edges and fill cracks or knots in the plywood. Then sanded the top and edges smooth and coated them with 6oz fiberglass and epoxy resin. The resin I am using is relatively low viscosity and soaks into the wood very well.
flush trim.jpg filler.jpg thumb.jpg
 
Last edited:
UPDATE CONTINUED

The bottom side was a similar process but with the added difficulty of working around the mounting hardware. I really took my time filling in any gap around the mounts and letting the resin soak into the wood and filling it in again before moving onto the fiberglass.
mount fill.jpg fiberglass bottom.jpg

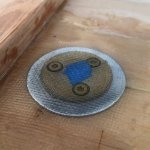
The mounts are T-nuts with large fender washers that I glassed into the bottom sheet of plywood. They line up with tabs welded onto the subframe and will allow me to attach the wood camper to the steel subframe with ten 10mm bolts.
tnut.jpg floor.jpg 9871E813-53AF-49F4-B5DA-41559896D172.JPG

I attached the floor to the subframe with 4 tubes of Sikaflex 252 and compressed it in place with the mounting bolts and clamps around the outside edge. At the recommendation of people on the internet I got a cheap pneumatic caulking gun and that helped a lot in getting a consistent bead with the thick caulking and getting it done quickly so I could get the floor on within the manufacture recommended time.
caulking.jpg caulking clamped.jpg

While the Sikaflex cured I attached all of the little panels I made while testing the pour foam to build my wheel wells. I attached them using pocket screws and epoxy paste and then glassed the inside of each wheel well so that I wouldn't have to do any inverted glassing once they were in place. The wheel wells are attached to the floor with pocket screws and epoxy paste and all the seems are given 2 layers of 6oz fiberglass before coating the tops with fiberglass and resin.
wheelwell glassing.jpg wheelwells screwing.jpg floor mounted pic.jpg
 
Last edited:
UPDATE

I've got all of my lower walls done!
pic 19 copy.jpg
I started with the forward wall, the one right behind the cab. It is a 1x2 Douglas fir frame skinned in 5mm plywood and filled with 2# pour foam.
pic 1.jpg pic 2.jpg
The excess foam was cut off and the forward edges were routed to give them a 1" radius curve.
pic 3.jpg pic 4.jpg
I then glassed both sides of the panel with 6oz fiberglass cloth and epoxy resin and drilled pockets for pocket screws in the vertical frame members.
pic 6.jpg pic 7.jpg
I pulled the subframe/floor away from the cab for access and attached the wall with epoxy/fumed silica paste and 4 pocket screws.
pic 8.jpg
Once the paste cured, I could remove the clamps and glass the joint. I used a chopped glass, fumed silica, and epoxy mix to add a radius to the inner joint, then coated both sides of the joint with 2 layers of 6oz fiberglass cloth.
pic 9.jpg
The rear wall was done with the same process, but in 2 sections so I could leave a gap in the middle for the door.
pic 10.jpg
 
UPDATE CONTINUED

The passenger side wall was also built with the same process and designed around the wheel well.
pic 13.jpg pic 14.jpg
The rest of the walls will separate the internal space of the camper into different storage areas. These are made of a single sheet of 5mm plywood and minimal 1x2 framing with no insulation. I cut 45 degree angles down the length of the 1x2 framing and rounded the edge with a sander so I could glass over it without having to do as much epoxy filler work to get good joints.
pic 15.jpg
Both side of each wall were coated in 6oz fiberglass. Each wall panel was attached to the structure with pocket screws, epoxy past and 2 layers of 6oz cloth on both sides of every joint.
pic 17.jpg pic 18.jpg
Aside from it taking way longer than I want it to, I'm pretty happy with how things are turning out and getting more comfortable with my process.

Here is the video of this part of the build.
 
UPDATE

The permanent structure of the camper is done!

2.jpg

If you remember from my last update, I am basically just building the camper from the bottom up, so the next step was to build this big sheet of 3/8ths inch plywood that was to be my countertops and the bottom of my cabover. I put it together from 3 sheets of plywood. All of the joints were routed off to make 2 inch wide lap joints and the cabover section has a frame of 1x2 Douglas fir stripping.

1.jpg 3.jpg

I coated the bottom side of this big panel in 6oz fiberglass and epoxy before heaving it up on the camper where it was attached to the top edge of the walls with wood glue and countersunk deck screws and then all the seams were done with a past a epoxy, fumed silica, and chopped strand fiberglass, then coated with 6oz fiberglass and epoxy resin.

4.jpg 5.jpg

The inner-popup walls were constructed in the same way as the lower insulated walls with 5mm plywood on a 1x2 Douglas fir frame filled with polyurethane pour foam and coated in 6oz fiberglass and epoxy resin. Then they were attached to the camper with wood glue and countersunk deck screws or pocket screws. Then all joints were done with the same epoxy past and fiberglass process. The tricky part was the windows. since the camper is a popup I had to consider clearance between moving parts and having sufficient thickness in the window frame for the window clamp rings to "clamp" properly. I ended up making the window frame out of leftover 3/8 inch plywood and routing out some of the 1x2 framing to set the window frame into the panel and sanding down the edges so I could glass over them.
6.jpg 9.jpg 7.jpg 8.jpg

Next came insulation for the cabover. Luckily we recently got some XPS products back in stock in California. Unfortunately the only 25psi compressive strength foam I could find was in 2 inch thickness, so I cut the foam to fit between the frame members then used the saw to cut the foam down to the appropriate thickness using the frame as a guide. The results were not pretty, but it got the job done.

10.jpg
 
UPDATE CONTINUED


I used epoxy thickened with fumed silica as a thin past to attach the foam to the bottom sheet of ply and to the frame. And also to attach a top sheet of 5mm plywood. Then I coated all the seems where the 5mm plywood meets the walls in epoxy, chopped strand past and covered the whole thing in a layer of 6oz fiberglass cloth.

11.jpg 12.jpg

Finally, I added these little sections of 5mm plywood coated in 6oz cloth and glassed in place. They provide some separation between our cabover(bed) and countertops. They will help hold the mattress in place and act as gussets for the popup walls.

13.jpg 15.jpg

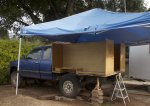
That completes the permanent structure of the camper. It is completely incapsulated in epoxy and fiberglass and has proven strong enough for me to climb around on as I have started work on the popup roof.

14.jpg 2.jpg


Here is the YouTube video if you want to see the process in more detail.


Forum statistics

Threads
188,360
Messages
2,903,734
Members
230,227
Latest member
banshee01
Top