DIY Composite Camper T100 Expedition Vehicle Build

RJ Howell

Active member
I'll have to take it on and off the truck a couple times during the build, but I'm not anticipating needing to remove it often after that, so I can deal with PITA, but doable.

Two things working for you I don't have.. You're young! X2 LOL!

I am anticapting redoing the sides. I like the looks and added storage of flaring the sides. I'm thinking of a hooking point that I could do so I could lift the cabin off in the garage/shop and incorporate it the remodel. I'm liking the hoisting off vs. jack lifting and I still can lower it on to another trailer and park it if required.

Again, just food for thought since you're in build state.
 
UPDATE

Well, it's been slow going, but I managed to put a little time in on the build.

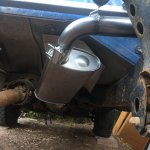
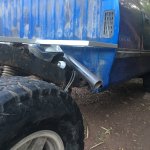
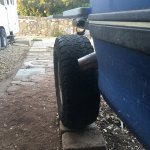
I decided to reroute the exhaust while I had easy access. The old exhaust was in poor shape and I wanted to have it dump in front of the rear tire to open up more room for potential storage ideas and ground clearance in the rear of the vehicle.
exhaust1.jpg
I used some pre-bent tubing from amazon, cut it, and welded it together to route the exhaust the way I wanted it. I also replaced the rusted out stock muffler with a Flowmax super turbo muffler. Internet reviews said it was quite and the size/shape worked for the space I had.
IMG_0675.JPG
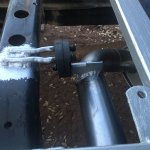
I reused the stock exhaust hanger studs off the muffler and welded them on to this frame crossmember and used a bit of scrap angle iron I had around to make the lower hanger and welded it onto the new exhaust. The bushing is a Toyota exhaust bushing that would normally be used at the T100 tailpipe.
IMG_0676.JPG
As with everything I do, it's not pretty, but it gets the job done.
IMG_0672.JPG IMG_0674.JPG IMG_0668.JPG

Here's the video if you're curious.
 

BajaSurfRig

Well-known member
I did look for any PU or EPS type 9 in my area, but didn't find anything that suited my needs. Found some PU, but only in thicker sheets that would have resulted in a lot more work and expense.

I'm going to give the pour foam a try as soon as I can. At the cost of any alternatives that I have found so far, it will be much cheaper even if I end up wasting product with the overfill-and-shave down technique.

You might want to reach out to figerglass supply shops. The Craft here in San Luis Obispo carries a ton of different types of foam for boat building, shaping surfboards, etc...

I recently stopped by and they had full nidacore sheets.

Rad looking build!!!
 
You might want to reach out to figerglass supply shops. The Craft here in San Luis Obispo carries a ton of different types of foam for boat building, shaping surfboards, etc...

Thanks. I checked in with Fiberglass Hawaii in Ventura. They normally carry lots of different foams for surfboard and boat building, but they only had PU blanks. Everything else was out of stock indefinitely.

I tried out some small panels with the pour foam and am feeling pretty good about it so far. I think that if I rework the layout of the internal framing and get creative with clamps, I can make it work.
 

1cambo

Active member
I have finally started my new build!

This truck will be THE BEST... at nothing!

My build platform is a 1995 Toyota T100, extended cab, 4x4, 3.4L V6, 5 speed manual trans. My wife, dog, and I have already lived out of this truck with a very basic DIY camper while traveling through Mexico and Central America for 1.5 years.
View attachment 661716
We learned a lot during that trip and have decided that we want to improve our foul weather living conditions. The goals for the new build are a fixed queen size bed, indoor composting toilet, indoor kitchen, insulation, maintain enough storage for all our toys, and maintain the vehicle's on and off-road driving performance relative to our previous camper set up.
The plan is to build a hard-sided popup camper out of DIY composite panels.
View attachment 661720View attachment 661722View attachment 661723

The panels will be constructed of 5mm plywood, .75" XPS foam board, 1x2 dimensional lumber, 6oz fiberglass, and epoxy resin. All wood will be soaked in epoxy and all exposed surfaces will be laminated with fiberglass inside and out and all joints will be reinforced with additional fiberglass tape. The camper will be mounted on the truck via a steel subframe. The subframe will be constructed of 1x2 rectangular tubing and bolt to the 6 stock bed mount locations on the truck frame.
View attachment 661724
This little video may better illustrate the idea:


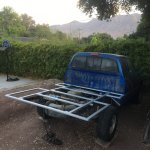
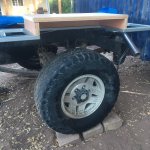
I've removed the old truck bed and rear bumper and cleaned up the truck frame to start work on the sub frame.
View attachment 661745
I'm new to welding, but the mig and self dimming helmet have me feeling way more comfortable than when I briefly tried stick welding 15 years ago. I'm excited to get started!


People either love the T100 or think I'm an idiot for driving one. So, to help folks on the internet criticize me more accurately I'm going to share some relevant info here:

Price= $2,500 usdlength = 209.1"width = 75.2"height = 70.1"
max payload = 1960 lbscurb weight = 4040 lbsturning circle = 43.3 feetTorque = 220 lbs-ft
Estimated fuel efficiency = 15/18 mpgAve. fuel efficiency with old camper = 15.5mpgfuel capacity = 24 galHorse power = 190
I have followed you guys for a while!
One thing regarding your choice of vehicle ( and where we differ) is the power and fuel economy is less than my Cummins diesel! And it’s a 1 ton..
Not sure how well my next build will be on fuel though as it is a COE and that flat face on the truck will be a lot like pushing a sheet of plywood down the highway!
Oh ya, forgot to mention, it was because of you I chose and bought a Snomaster!
I strongly considered a Dodge with a Cummins, but they only came in the full size trucks (~7 inches wider than T100) and the older ones that I could potentially afford have a horrible turning radius (4 more feet than the T100 if I remember correctly). With the number of times we struggled to get down city streets or into parking stalls with our T100 in Central America, I really didn't want to go any bigger.
 
UPDATE

I tested pour foam as a core material for composite panel construction. Really I was testing my ability to use it. The pour foam I used is 2 lbs density floatation foam from Totalboat: https://amzn.to/3lKDlcu
The numbers look pretty good compared to the XPS board I was planning on using.
pour foam vs xps.jpg
The main challenges with the pour foam are that the working time is 15-30 seconds depending on temperature, and that it exerts enough force as it expands to easily bend the thin plywood skin. Since I am working outside, I can't do much about the temperatures. Lots of clamping and supports will hopefully combat the expansion force.
The positives of building with pour foam over the foam board are that it has good adhesive properties, so no additional adhesives are needed, and it conforms to the space that you pour it into, so no need to shape the foam or fill knots is the wood to get a tight fit and good adhesion. It's also completely cured and sandable in 15 minutes or less.
thumb1.jpg
I decided to make the panels that would potentially become my wheel wells as a way to test the construction process and get used to working with the pour foam. I messed up the conversion from gallons per cubic feet to ounces per cubic inches and over filled my first couple panels, but I got it dialed in a bit better as I went on. I was also testing what the foam was like after it cured. I found that it cut easily with any saw, but I preferred a a finer toothed blade. It also sanded nicely with 80 grit paper on a sanding block, so I was able to shape and clean things up to a satisfactory level.
image1-3.jpeg image0-7.jpeg image2-3.jpeg

Chick out this video if you want to see the pour foam in action and watch me make a mess ?


It poses some challenges, but I found working with the pour foam manageable and since XPS is still not available to me, I am going to continue construction with this technique. I still intend to join the panels together with screws and thickened epoxy and laminate everything with 6oz biaxle fiberglass cloth and epoxy resin.
 

Attachments

  • thumb2.jpg
    thumb2.jpg
    301.5 KB · Views: 15

Alloy

Well-known member
UPDATE

I tested pour foam as a core material for composite panel construction. Really I was testing my ability to use it. The pour foam I used is 2 lbs density floatation foam from Totalboat: https://amzn.to/3lKDlcu
The numbers look pretty good compared to the XPS board I was planning on using.
View attachment 675364
The main challenges with the pour foam are that the working time is 15-30 seconds depending on temperature, and that it exerts enough force as it expands to easily bend the thin plywood skin. Since I am working outside, I can't do much about the temperatures. Lots of clamping and supports will hopefully combat the expansion force.
The positives of building with pour foam over the foam board are that it has good adhesive properties, so no additional adhesives are needed, and it conforms to the space that you pour it into, so no need to shape the foam or fill knots is the wood to get a tight fit and good adhesion. It's also completely cured and sandable in 15 minutes or less.
View attachment 675365
I decided to make the panels that would potentially become my wheel wells as a way to test the construction process and get used to working with the pour foam. I messed up the conversion from gallons per cubic feet to ounces per cubic inches and over filled my first couple panels, but I got it dialed in a bit better as I went on. I was also testing what the foam was like after it cured. I found that it cut easily with any saw, but I preferred a a finer toothed blade. It also sanded nicely with 80 grit paper on a sanding block, so I was able to shape and clean things up to a satisfactory level.
View attachment 675367 View attachment 675368 View attachment 675369

Chick out this video if you want to see the pour foam in action and watch me make a mess ?


It poses some challenges, but I found working with the pour foam manageable and since XPS is still not available to me, I am going to continue construction with this technique. I still intend to join the panels together with screws and thickened epoxy and laminate everything with 6oz biaxle fiberglass cloth and epoxy resin.

The foam (too hot) shouldn't have a 500% cell size which means the mfg. spec for R valu and dencity should be used for comparison.

 
The foam (too hot) shouldn't have a 500% cell size which means the mfg. spec for R valu and dencity should be used for comparison.

I watched the video. It's well done and I definitely agree that it would not be appropriate for that application. Much bigger voids with un known blockages. It makes way more sense to follow his advise and open up the walls to update all the electrical and plumbing while you're at it. One major difference in the products used is that his foam exerts 40psi as it expands while the foam I'm using exerts 5psi.

It sounds like you must have some experience with these foams, so I appreciate your input, but I'm not sure what you mean by "500% cell size". I assume it should have 100% cell size, but what size is that? Sorry, I'm learning as I go here and not sure what you are referring to.
 

Alloy

Well-known member
I watched the video. It's well done and I definitely agree that it would not be appropriate for that application. Much bigger voids with un known blockages. It makes way more sense to follow his advise and open up the walls to update all the electrical and plumbing while you're at it. One major difference in the products used is that his foam exerts 40psi as it expands while the foam I'm using exerts 5psi.

It sounds like you must have some experience with these foams, so I appreciate your input, but I'm not sure what you mean by "500% cell size". I assume it should have 100% cell size, but what size is that? Sorry, I'm learning as I go here and not sure what you are referring to.

Yeah spray foam is another thing I've done. Still have an old Gushmer FF-1000 sitting in the corner.

1628529747208.png

500% in relation to XPS you're comparing to. Also 500% difference in cell size from the edge to the center of your panels.....EPS or ISO foam would provide more consistent results.

With the amount thermal transfer through the wood (R1/inch) +/- R1or2 in the foam isn't going to make much of a difference to overall insulation value of the panels.

Something else to keep in mind is the wood is vapor (moisture) permeable from inside and out.
 
Yeah spray foam is another thing I've done. Still have an old Gushmer FF-1000 sitting in the corner.

500% in relation to XPS you're comparing to. Also 500% difference in cell size from the edge to the center of your panels.....EPS or ISO foam would provide more consistent results.

With the amount thermal transfer through the wood (R1/inch) +/- R1or2 in the foam isn't going to make much of a difference to overall insulation value of the panels.

Something else to keep in mind is the wood is vapor (moisture) permeable from inside and out.
Thanks Alloy.
The inconsistency is concerning. The cell size in the center of the pour closely resembled the cell size of the foam when it is allowed to free rise (free expand).
I went back and looked at the data sheet again for the total boat pour foam. It has a density of 2.1 pcf foot when allowed to free rise, but it states elsewhere that it has a MOLDED density of 3.3 pcf. So, I guess I should have expected the smaller cell size. Unfortunately the Data sheet doesn't have values for compression strength or R-value for MOLDED foam.
 

RJ Howell

Active member
Figured I should be asking over here as the Maker's are mostly here.. What I gathered is on a deep/long panel pour you are doing several pours? That would eliminate that build up/pressure I thought could happen. You said something about the added pour within 6 minutes to ensure bonding? This leads to what you are finding is a good depth of pour? Foot at a time? LOL... I can see several panels setup with pours happening, music playin' and you running around amongst them all while that beer you opened goes warm...

Good work Matt!
 

Forum statistics

Threads
188,020
Messages
2,901,228
Members
229,411
Latest member
IvaBru
Top