Dreadlocks outfitting of InTech Discover

dreadlocks

Well-known member
aye, lots of garbage SS out there to avoid.. so far everything passing the magnet test w/some super strong magnets.. before I had "Stainless" clamps but the damn worm screw was not stainless, ******.. why.. now got real stainless steel clamps from a reputable manufacturer.. price is often the key indicator, good stainless aint cheap, and its rarely made in china.

copper would be nice if I was going for a steampunk look, I do use it on my Westy all the time tho heh.
 

dreadlocks

Well-known member
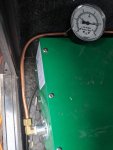
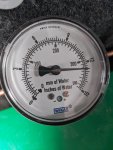
Fitted a Swiss Pressure Gauge to the low pressure side, this should make adjustments for the furnace much easier and diagnosing issues in the field like bad regulator, gas leaks, no gas, etc.. NOS deal off ebay for $20

IMG_20200801_175513.jpg
IMG_20200801_175627 (1).jpg

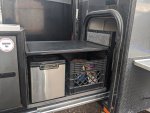
Also painted up all the supports and added a small piece of aluminum square to close the gap.
IMG_20200801_175819.jpg
IMG_20200801_175833.jpg

Love the finishing touches..
 

dreadlocks

Well-known member
So my regulator is why my Propex is giving me issues, damnit.. shoulda known.

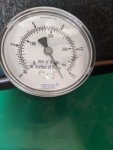
So the propex is running at ~10.5in, full load w/everything else on its at 10in.. that seems good, however the issue is the "lockup" pressure dont stop rising.. What I've been reading said after shutting all loads off it should not rest more than 30% more than 10.5, and be under 14in.. mine just keeps creeping up, checked it this morning and found it pegged
IMG_20200802_131913.jpg

That explains the "Flame Instability" fault, when I heard it happening from the outside it sounded like it was blowing its flame out.. Guess its time to put a higher output regulator on here for the genset, I thought these regulators seemed to be highly regarded.. mebe it was just bad luck? Not sure if I should go w/same brand at higher output just to make install easier on me or try another brand..

Also explains why it seemed like the propex would be more likely to run through the night w/out issue w/the wave heater running, and if I ran propex alone it never seemed to make it through the night w/out faulting.
 
Last edited:

dreadlocks

Well-known member
So flipped water system design on its head again this weekend, tossing all the previous plans..

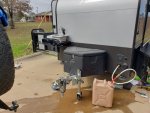
Now I'm thinking of getting a 1/4 thick aluminum flat bar, 2-3in wide and spanning these two 16in structural supports on the front of the trailer:
IMG_20200802_142320.jpg

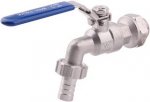
Then in the center of that bar, drill through into the slide out area and fit up one of these Fully Stainless Steel Lockable Ball Valves externally:
61QjBEqfv3L._AC_SL1500_.jpg


The sheet metal where I want the faucet is too thin to support it, thus the bar mounted flush to provide that rigidity.. couple upsides to this design that make it better I think:
  • No Moving Plumbing going to slide out that is liable to fail and leak..
  • Water Available with slide out closed.
  • Any Spillage on this counter top has nothing under it to get wet.
  • Easy access to water on the road, for refilling dogs water and etc.
I'm also moving the tank inside, for now it'll just be plumbed up to my 7gal aquatainer in a milk crate I bolt down somewhere in the back, but I finally found a nice tank that will fit inside over the axles and not interfere w/payload capacity.. its a 17g frontrunner tank, so its not cheap.. will just plan for it now and add it down the road.
 

Tkhawk

Adventurer
Here's what I did for water on my Explore. I got a rv quick disconnect shower and mounted it where you are talking about, I cut 3 pieces of 2" dowel rod to put between the inner and outer skin to add rigidity. I bought an extra qd hose section and replaced the hose with a folding faucet. I put a shurflo pump inside so I can pump out of water cans or other sources or I can hook it to a faucet if I happen to be camping somewhere with water. It works well and I'm happy with it, I may add a permanent tank somewhere in the future.
20200222_143000_copy_2016x1512.jpg
 

dreadlocks

Well-known member
very clever, nice work.. thanks for sharing..

Originally I was gonna do an external hookup for the tank like that but last time we went out one of the water containers kinda exploded and got a bunch of blankets wet.. luckily here in Colorado we dried em out in a few hours.. but if that happened visiting family in Oregon it'd never dry out.. I had packed it deep in the back, then pulled it out mid-trip and couldn't get it back in place, so like an idiot I left it poorly secured.. having the ability to get fresh water on the road w/out digging through the cargo would be a huge win IMO.

When I mount a permanent large tank inside I'll put a 3-way valve and tap there so I have the ability to put a portable container back in service.. that way when I add the onboard water filtration system I can fill the portable container up from a river/lake and switch over to it without contaminating my potable water tank.. I'm also not gonna put an external filler port in so refilling it back up at improved camps will involve filling the portable one up and transferring it to the onboard tank by hand.

I still want an internal faucet I think, but not for dishes or anything.. just drinking water, my plan right now is to put a small RO faucet in the counter top inside under the microwave.. then I found a stainless steel bread pan thats like ideal dimensions to recess into the counter, can put a 1/4in stainless rivnut into the bottom for a drain hooked up to a little tube that goes around the slide out and dumps under the trailer.. the inside and outside faucets will be inches away from each other so the plumbing should be nice and simple.

I'm thinking eventually I'll put an on demand hot water heater in a pelican case on the front above the faucet.. originally I had abandoned the plans because I was reading about issues with em working at altitude.. but I think I figured out thats a problem for the heaters w/low oxygen sensors that say you can run em "indoors if adequately ventilated", find a model that says OUTDOOR ONLY and without a low o2 sensor and they should run fine at any altitude.. or bypass the sensor all together and convert it to an outdoor only model.
 

dreadlocks

Well-known member
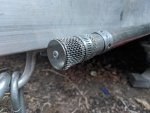
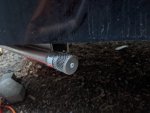
Made these two screens for the Propex heater, Stainless Steel #10 Wire Mesh, with two stainless steel washers pop-riveted together after using a C-Clamp to press em together.. this should stop any road debris, wasps, and most importantly my son from shoving rocks in here.. yes, I found a bunch of recycled asphalt from the storage area in the flexible tubes.. cute lil monster just loves playin with his camper..

This design should not really restrict airflow, mebe be a bit of a diffuser which is good. I expect some discoloration and pitting on the rivet over time.. not really supposed to use aluminum fasteners on stainless plates, but its not like its holding anything important or heavy.. hopefully just gets a nice patina and thats it, time will tell.

IMG_20200804_200210.jpgIMG_20200804_200541.jpg

I've got a bunch of stainless mesh left over that I'll cut up and make tube caps for any open framing like you see behind the intake pipe.. thinking I'll just cut it to size to slip in barely and then rtv it in place.
 
Last edited:

dreadlocks

Well-known member
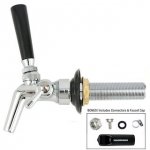
just more design thoughts on water system, think I'mna do beer taps for the water faucets.. for starters, seems like the Colorado thing to do here right? seriously tho I can get nice bulkhead fittings for passing through any thickness, all stainless steel, protective dirt caps, growler fillers for attaching hoses, even locks if I needed.. they need someone holding em open to operate which I see as a bonus to waste less water, can get em with nice flow control valves too.. I'll plan for 2 separate hot/cold faucets but just work on cold water for now.. mebe a 3rd for actual beer one day? Seriously tho thinking of a mini growler keg in the Engel and making it a mini kegerator if I can, would be more space effective and be a great excuse for hunting down breweries for a refill.
s-l1600 (3).jpg

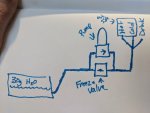
and I came up with a rather clever solution for easy freeze proofing, I'm going to take this motorized ball valve and wire it in parallel with my water pump.. I will route all the hard water lines from the tank so they gravity drain back into the tank, best to keep those off the floor anyhow for freeze protection.. The valve will be wired Normally Open to close when the water pump is turned on, isolating the high pressure output and low pressure input on the pump and working like any other water system.. just draws a little bit of power when valve is changing state but then none after that... When I shut off power to the water pump, 4 seconds later the valve will go back to open state and bypass the pumps internal check valve, relieving the pressurized side, then if I open the internal drinking water faucet inside all the water will gravity drain right back into the holding tank.. they have a 2 wire version of this if one wanted simpler wiring, its got a constant power consumption tho when opened but its only 30mA

awesome drawing skills:
IMG_20200808_181010.jpg

This will let me drain all the water pipes just by shutting off the pump, waiting a few seconds, then opening up a faucet to break the siphon so everything gravity drains right back into the holding tank.. considering Ive already spent plenty of time traveling in sub freezing conditions with this trailer I wanted a way to drain all the lines quick and easy even between stops when I'm not heating the inside, and perhaps overnight with that external faucet I dont want frozen in the morning.

Found a better tank than the front runner, its a 30g 46"L x 13"W x 12"H for pretty much the same price.. long and square, perfect for fitting right under the drivers side bunk over the axle and much more capacity than the 17g frontrunner... with 30 gallons things like quick showers are gonna happen far more frequently.. if I wanted to try for an external filling port, its an option.. and nicely its a clear tank so the box I make around it just needs a window for a level indicator.. knowing me I'll likely still install at least one float valve inside for a low water alert that kills the pump and must be manually overridden so we always have some water in reserve.
 
Last edited:

dreadlocks

Well-known member
Installed a new LP regulator today, same model as before but now its the High Output variant (291H) off ebay for $29.. swapping it out was quick and easy, out the box it was way too high pressure so I tuned it down to 11.5" on my gauge, then I shut it off and it locked up at 12.5", and held there.. Old one was locking up at 14" and creeping up til it was off the chart.. so this new one is behaving much like I was reading they should, and the stove is self-igniting now w/out needing a lighter.. Also noticed when furnace was running the pressure needle was stable, the old regulator the heater made it vibrate, sounds like its running smoother.

I really frigging hope next time I go up to >9500ft the furnace runs all night long
 

dreadlocks

Well-known member
I hate plumbing, but here we go..

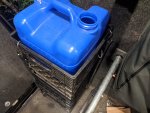
Starting off in the back I made a custom milk crate rack two carry the two water jugs, bottom one is bolted down to the floor/wall, top one is held down w/bungees.. 14 gallons of water, I'll have to swap the primary tank when it empties.
IMG_20200815_201642.jpg

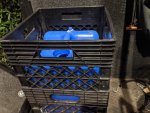
Take the top container off, here is my extra deep custom milk crate.. cut the bottom off one (using it as a lid on another) and then riveted it to a whole milk crate w/that stainless steel plumbers tape as straps.

IMG_20200815_201729.jpg
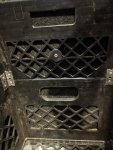
Inside:
IMG_20200815_201741.jpg

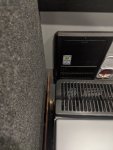
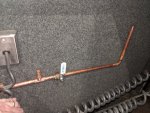
Ive got a bulkhead fitting that should fit the cap and let me plumb the lower container up to the copper pipe you can see peaking out from under the tip out, was gonna use sharkbite fitting to convert to PEX between the tank and the hardline.. but lowes was outta PEX in short lengths so thats coming later.

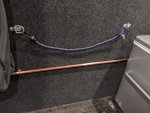
Copper Pipe runs along the driver side and into the slideout behind the fridge:
IMG_20200815_201839.jpg
IMG_20200815_201850.jpg

Here is the manifold on the front of the trailer for the pump and drain line.. a Sharkbite to Pex coupler going on the Tee before the valve feeding the pump, then a SharkBite Tee going ontop of the leg to the right for the pump output and to the faucets.. this is the end of the copper run, its Pex from here on out.
IMG_20200815_225756.jpg

Decided just to use a good old fashioned ball valve for draining system back into the tank, its within easy reach since I can pop open counter top..

Tomorrow I'll take the pump outta my Westy for temporary use here, then mount it up, and hitup Home Depot and see if they have PEX in stock.
 
Last edited:

ITTOG

Well-known member
Running water will be a game changer. I like the idea to have the water flow back to the tanks by gravity. I will have to implement that if I ever add water to my camper given I mainly camp in winter.

Sent from my Pixel 3a XL using Tapatalk
 
Last edited:
New member here. Wife and I bought a 2019 Explore last week and I found this thread and had to join these forums. This is impressive work to be sure. I have already installed the victron battery monitor!

Quick questions, I am digging your roof rack solar setup. Is the roof rack width the same between the explore and the discover? I assume it is, but could not find any info. The cross bars look to be spaced a bit different. Also, I already have a SmartSolar 75/15. From what I can tell one of your 335W panels should be manageable with an open circuit voltage of 70.9V and short circuit current of 5.9 amps. Does that sound right?
 

dreadlocks

Well-known member
I'm not sure explore dimensions, sorry.. a 75/15 is not big enough, my 325W solar panels will output ~27A charge current, nearly double what that SC can output.. would be a huge waste... nominal PV wattage for a 75/15 is 220W
 

Forum statistics

Threads
188,036
Messages
2,901,450
Members
229,411
Latest member
IvaBru
Top