You are using an out of date browser. It may not display this or other websites correctly.
You should upgrade or use an alternative browser.
You should upgrade or use an alternative browser.
EarthRoamer XV-JP "Northwest Edition"
- Thread starter WhereTheHellIsJames?
- Start date
mhiscox
Exp. Leader Emeritus
Not a lot going on with the XV-JP these days, as it seems to be working just fine. It did really well on the trip to southern Utah, though I felt a bit guilty having all of the comforts of home on what was supposed to be a rugged camping trip. Being able to cook inside in a "kitchen" with things stored in drawers was a really nice thing, as was having thermostatically-controlled heat from the petrol heater. And all of the mechanicals were well suited for the job, as it was no hassle on any of the trails we went on, but was still plenty comfy for the long trips to and from Oregon.
I did work on fixing one little problem before leaving on the trip . . . something that had been a little annoying but not quite enough to fix. The problem was with the top of the top half of the rear door falling away from the truck and not sealing tightly.
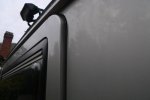
This sealing has been steadily getting worse since the truck was built, and it's not really difficult to understand the problem. The entire top half of the door is made of a fiberglass molding that is well bolted to the top of the lower half, but it has no other support. There's no frame or other attachment points, so it's been increasingly drooping to the rear.
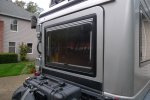
It's not really been a big issue. There's a simple aluminum rail that Paul added to keep any water from getting in, and even though the top doesn't seal well, I've never noticed much wind noise from the area, and there's enough weatherstripping that there's no noticeable amount of wind/cold getting in. You get a little noise from it flexing when it's bumpy, not much, though, because it's a light and non-metallic piece.
My impetus for taking action after several years was the expectation that, if I didn't fix the gap, dust from the Utah trip would get in and make a mess of the cabin. (It did, anyway. ) So I thought that it'd be a good time to find a way to close it tight, and went through about a dozen ways to push the top of the door tight against the seal. Most of the brainstorms involved either a lever clamp screwed into the main body to press against the door, or some big-headed screw knob going through the door into a threaded insert in the door frame.
However, the clamp idea was going to look goofy, and there wasn't as much thickness to the relevant part of the door frame as I wanted for the threads-in-the-frame plan. Then I channeled Paul, who always wants everything as simple as possible, and realized I had a quick-and-dirty fix available for which most of the work had already been done.
It turned out that because the aluminum drip rail was very solidly mounted, it was easy to drill two holes through the drip rail,
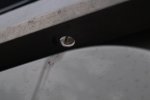
and then buy the matching diameter clevis pins,
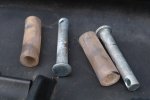
and find some tubing with an ID matching the pins' thickness. (The tubing is reddish because the trail dust was fine enough to get into what seemed like zero space between the pin and the inside of the tubing. Amazing stuff, dust.)
Anyway, deployment is stone simple . . . push hard on the top of one side of the door, put the pin in through the top of the rail, and then push the tubing on to protect the door's finish. Repeat for the other side.
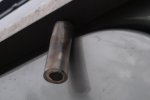
It takes just seconds and when you're done with the bumpy and/or dusty part of the trip, the pins just get pulled out. By sheer luck, the pins can be stored securely in the holes of the rear shackle pins.
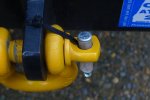
And then you can snap-fit two plastic plugs into the holes in the drip rail:
It may be that these aren't strictly necessary--surface tension might have kept water from dripping through--but for a quarter each, it was worth it just for looks.
Overall, this solves the problem. The gap and flex on the top half of the door is gone and the seal is really tight. And it's only about 30 seconds to deploy the pins or 30 seconds to get them out to restore use of the rear door. Obviously not rocket science--and I write this stuff up mostly for historical purposes so a new owner knows why he has two holes in his drip rail--but it does the trick.
I did work on fixing one little problem before leaving on the trip . . . something that had been a little annoying but not quite enough to fix. The problem was with the top of the top half of the rear door falling away from the truck and not sealing tightly.

This sealing has been steadily getting worse since the truck was built, and it's not really difficult to understand the problem. The entire top half of the door is made of a fiberglass molding that is well bolted to the top of the lower half, but it has no other support. There's no frame or other attachment points, so it's been increasingly drooping to the rear.

It's not really been a big issue. There's a simple aluminum rail that Paul added to keep any water from getting in, and even though the top doesn't seal well, I've never noticed much wind noise from the area, and there's enough weatherstripping that there's no noticeable amount of wind/cold getting in. You get a little noise from it flexing when it's bumpy, not much, though, because it's a light and non-metallic piece.
My impetus for taking action after several years was the expectation that, if I didn't fix the gap, dust from the Utah trip would get in and make a mess of the cabin. (It did, anyway.
However, the clamp idea was going to look goofy, and there wasn't as much thickness to the relevant part of the door frame as I wanted for the threads-in-the-frame plan. Then I channeled Paul, who always wants everything as simple as possible, and realized I had a quick-and-dirty fix available for which most of the work had already been done.
It turned out that because the aluminum drip rail was very solidly mounted, it was easy to drill two holes through the drip rail,

and then buy the matching diameter clevis pins,

and find some tubing with an ID matching the pins' thickness. (The tubing is reddish because the trail dust was fine enough to get into what seemed like zero space between the pin and the inside of the tubing. Amazing stuff, dust.)
Anyway, deployment is stone simple . . . push hard on the top of one side of the door, put the pin in through the top of the rail, and then push the tubing on to protect the door's finish. Repeat for the other side.

It takes just seconds and when you're done with the bumpy and/or dusty part of the trip, the pins just get pulled out. By sheer luck, the pins can be stored securely in the holes of the rear shackle pins.

And then you can snap-fit two plastic plugs into the holes in the drip rail:

It may be that these aren't strictly necessary--surface tension might have kept water from dripping through--but for a quarter each, it was worth it just for looks.
Overall, this solves the problem. The gap and flex on the top half of the door is gone and the seal is really tight. And it's only about 30 seconds to deploy the pins or 30 seconds to get them out to restore use of the rear door. Obviously not rocket science--and I write this stuff up mostly for historical purposes so a new owner knows why he has two holes in his drip rail--but it does the trick.
mk216v
Der Chef der Fahrzeuge
#1 So I hear you saying that you want moar rugged on your camping trips. Yessuh, we can make that happen. 
#2 If you access the camper cabin from the inside(ie move from driver/pass seat and into cabin, using the tuck and roll method), and then want to disembark using the rear door, how many licks of a Tootsie Pop does it take to remove the pins and exit the vehicle? :elkgrin:
#2 If you access the camper cabin from the inside(ie move from driver/pass seat and into cabin, using the tuck and roll method), and then want to disembark using the rear door, how many licks of a Tootsie Pop does it take to remove the pins and exit the vehicle?
mhiscox
Exp. Leader Emeritus
Yeah, but I was hoping for something during the next few years, before I'm old and decrepit. (Oops, too late.)#1 So I hear you saying that you want moar rugged on your camping trips. Yessuh, we can make that happen.
If you go to the cabin to the cockpit from the inside, that means the weather was so gruesome, or the situation so sketchy, that you wouldn't care to get out the back door anyway. (And it's not a tuck and roll, merely a duck and crawl while obsessively minding your head. Piece of cake for someone as agile as you.)#2 If you access the camper cabin from the inside(ie move from driver/pass seat and into cabin, using the tuck and roll method), and then want to disembark using the rear door, how many licks of a Tootsie Pop does it take to remove the pins and exit the vehicle?
Seriously, the pins are mostly for long-term bumpy stuff; the top of the door isn't that wobbly. I think I only had the pins in for the Shafer/White Rim and the Cathedral Valley days. The rest of the time it wasn't important.
Overland Hadley
on a journey
Amazing stuff, dust.
Utah dust is amazing stuff, almost as persistent as water.
PaulJensen
Custom Builder
Seriously, the pins are mostly for long-term bumpy stuff; the top of the door isn't that wobbly. I think I only had the pins in for the Shafer/White Rim and the Cathedral Valley days. The rest of the time it wasn't important.
Keeping the pins in will prevent further sagging... Brilliant fix...
If you store the Jeep indoors, you could rig up a strap like turnbuckle thing to tension the door back to vertical... Fiberglass has memory and it might help to bring it back to a better fit...
Keeping the pins in will prevent further sagging... Brilliant fix...
If you store the Jeep indoors, you could rig up a strap like turnbuckle thing to tension the door back to vertical... Fiberglass has memory and it might help to bring it back to a better fit...
Assuming that the top of the door is curling outward out of plane, perhaps some kind of brace on the inside that attaches to the top and bottom of the door and and tensions the two straight? Picture a 4 foot level (i.e. straight edge) working against the curl. Only more elegant, obvs. Just a thought.
mhiscox
Exp. Leader Emeritus
Thanks for the suggestion; I think it would likely work. Indeed, we've collected three or four techniques that would probably cure the droop. The issue is that this problem is, post drip-rail, just a little thing, really not much of an annoyance at all. So fixing it was a good trade for ten minutes with a drill bit and some pins, but not much more than that.Assuming that the top of the door is curling outward out of plane, perhaps some kind of brace on the inside that attaches to the top and bottom of the door and and tensions the two straight? Picture a 4 foot level (i.e. straight edge) working against the curl. Only more elegant, obvs. Just a thought.
If the situation gets worse, then it'll be worth actually fixing the problem. But as things are now, there's a problem only on trails, and for that, using the pins works pretty well.
mhiscox
Exp. Leader Emeritus
Idle hands and all that, so it's time to belatedly write up September's change in the solar panel on the XV-JP.
Long-time readers of this thread will remember that when the camper was sitting outside while Paul Jensen worked on the interior, it had some really serious leakage up in what's come to be called the "nose cone." If you care to go back to Post #196, you can read about the pretty impressive/depressing amount of water that got in.
![P1110135[1]_thumb[1].jpg](http://lh4.ggpht.com/-Q8LKNVw8XBU/Tv6oik7nJCI/AAAAAAAAIso/W_KT6U65eaM/P1110135[1]_thumb[1].jpg?imgmax=800)
Paul traced it to poor sealing around the XV-JP's solar panel, which was held in place with some caulk and some aluminum strips

which were held down by small screws attached to a narrow flange molded into the fiberglass:
![P1110145[1]_thumb[1].jpg](http://lh6.ggpht.com/-KWUwTSacH-I/Tv6oz-qcuwI/AAAAAAAAIvI/VVbyPwks_-8/P1110145[1]_thumb[1].jpg?imgmax=800)
The screws, just regular sheet metal screws (about #6s), went straight into the fiberglass.
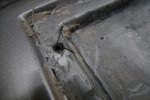
By setting the panel into an impressive bed of caulk and retightening everything, Paul got the leak stopped. However, when I had occasion to be checking pressure in the roof-mounted spare, I decided to also check out the status of the panel. What I found was the several of the screws had loosened, and when I tried to tighten them, they'd apparently vibrated around enough to strip out their holes. Indeed, there were some places where I found bits of fiberglass chipping off the flange.
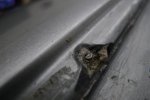
This was the sort of thing that could only get worse, so I decided to fix it. And as I thought about it, the fact that the solar panel was seven years old and that I could probably get a newer, and probably more efficient model, made it an even better idea.
But what really swayed it for me was the realization that the nose cone surface was a long way from being flat and that the solar panel had been bent to fit the curve, requiring warping it a couple of inches at each end and putting it perpetually in tension against the small screws and the aluminum strips. Given the situation, it seemed smarter to go with a flat panel that would have no stress on the mounting.
Life was pretty straightforward from that point on. The new panel (left)--100 watts versus the previous 75 watts (IIRC)--was a tiny bit larger:

and it attached easily with sizable machine screws--screwed into nutserts I set into the fiberglass--using custom attachment feet made specifically for the panel:
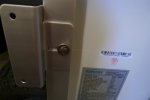
The depressed area where the old panel fit was left alone. Since it's all covered by the new panel, no one will know it is there, and the fact that a bit of water can gather in the depression doesn't seem like it'll be an issue. Having the new solar panel up off the roof hasn't produced any noticeable change in wind noise or drag, which is probably not surprising given all of the more aerodynamically-offensive stuff on the roof.
I'm feeling good about the change. The new mounting seems a lot more "right" than the previous method of forcing down the ends of the old panel and holding them under tension. As things were going, it's likely the integrity of the screws would have gotten worse and the leaks would have eventually reappeared.
This is the most instructive photo. If you look at the distance between an end of the new, straight solar panel and the point under it where the old panel was flush fit, you can deduce the substantial amount of bend required to get the old panel positioned.

If you also consider the higher wattage and the fact that I now have a new unit instead of one seven years old, the change in panels seems worth the modest amount of effort it took.
Long-time readers of this thread will remember that when the camper was sitting outside while Paul Jensen worked on the interior, it had some really serious leakage up in what's come to be called the "nose cone." If you care to go back to Post #196, you can read about the pretty impressive/depressing amount of water that got in.
![P1110135[1]_thumb[1].jpg](http://lh4.ggpht.com/-Q8LKNVw8XBU/Tv6oik7nJCI/AAAAAAAAIso/W_KT6U65eaM/P1110135[1]_thumb[1].jpg?imgmax=800)
Paul traced it to poor sealing around the XV-JP's solar panel, which was held in place with some caulk and some aluminum strips

which were held down by small screws attached to a narrow flange molded into the fiberglass:
![P1110145[1]_thumb[1].jpg](http://lh6.ggpht.com/-KWUwTSacH-I/Tv6oz-qcuwI/AAAAAAAAIvI/VVbyPwks_-8/P1110145[1]_thumb[1].jpg?imgmax=800)
The screws, just regular sheet metal screws (about #6s), went straight into the fiberglass.

By setting the panel into an impressive bed of caulk and retightening everything, Paul got the leak stopped. However, when I had occasion to be checking pressure in the roof-mounted spare, I decided to also check out the status of the panel. What I found was the several of the screws had loosened, and when I tried to tighten them, they'd apparently vibrated around enough to strip out their holes. Indeed, there were some places where I found bits of fiberglass chipping off the flange.

This was the sort of thing that could only get worse, so I decided to fix it. And as I thought about it, the fact that the solar panel was seven years old and that I could probably get a newer, and probably more efficient model, made it an even better idea.
But what really swayed it for me was the realization that the nose cone surface was a long way from being flat and that the solar panel had been bent to fit the curve, requiring warping it a couple of inches at each end and putting it perpetually in tension against the small screws and the aluminum strips. Given the situation, it seemed smarter to go with a flat panel that would have no stress on the mounting.
Life was pretty straightforward from that point on. The new panel (left)--100 watts versus the previous 75 watts (IIRC)--was a tiny bit larger:

and it attached easily with sizable machine screws--screwed into nutserts I set into the fiberglass--using custom attachment feet made specifically for the panel:

The depressed area where the old panel fit was left alone. Since it's all covered by the new panel, no one will know it is there, and the fact that a bit of water can gather in the depression doesn't seem like it'll be an issue. Having the new solar panel up off the roof hasn't produced any noticeable change in wind noise or drag, which is probably not surprising given all of the more aerodynamically-offensive stuff on the roof.
I'm feeling good about the change. The new mounting seems a lot more "right" than the previous method of forcing down the ends of the old panel and holding them under tension. As things were going, it's likely the integrity of the screws would have gotten worse and the leaks would have eventually reappeared.
This is the most instructive photo. If you look at the distance between an end of the new, straight solar panel and the point under it where the old panel was flush fit, you can deduce the substantial amount of bend required to get the old panel positioned.

If you also consider the higher wattage and the fact that I now have a new unit instead of one seven years old, the change in panels seems worth the modest amount of effort it took.
westyss
Explorer
Looks good Mike, one thing I made sure I did when installing solar panels was to have something to guide or deflect branches up and over the panel. Looking at that last image you can imagine a branch getting drawn in and stuck under the panel maybe causing some damage. Thinking back on our short cut that we took on the WABDR if you know what I mean.
mhiscox
Exp. Leader Emeritus
Thanks for the reminder. I recognized that potential problem when I was doing the install, then completely forgot to take any action. (Sadly, probably not the only thing I've spaced.)Looks good Mike, one thing I made sure I did when installing solar panels was to have something to guide or deflect branches up and over the panel. Looking at that last image you can imagine a branch getting drawn in and stuck under the panel maybe causing some damage. Thinking back on our short cut that we took on the WABDR if you know what I mean.
Time- and annoyance-wise, that was one of the longest short cuts imaginable, wasn't it? You guys were saints to come along.Thinking back on our short cut that we took on the WABDR if you know what I mean.
Ford Prefect
Expedition Leader
Time- and annoyance-wise, that was one of the longest short cuts imaginable, wasn't it? You guys were saints to come along.
My boys have taken to saying that I "take long cuts"... LOL Guess you did that too eah?
Overland Hadley
on a journey
My boys have taken to saying that I "take long cuts"... LOL Guess you did that too eah?
Those are the best!
sarconcepts
Adventurer
Cool to see we all take the winter hibernation months to catch up on our upgrades (before we beat 'em up next season)
also nice to see you're keeping up with buffing out the sunburst copper strips on a regular basis!
also nice to see you're keeping up with buffing out the sunburst copper strips on a regular basis!
Similar threads
- Replies
- 21
- Views
- 3K
- Replies
- 2
- Views
- 2K
- Replies
- 4
- Views
- 2K
- Replies
- 22
- Views
- 4K
