You are using an out of date browser. It may not display this or other websites correctly.
You should upgrade or use an alternative browser.
You should upgrade or use an alternative browser.
Expedition TrailBlazer Project
- Thread starter JamesDowning
- Start date
JamesDowning
Explorer
They are made by a company called Tanos. They're called "systainers". They come in all shapes and sizes and all lock together. Kinda like legos in a way.
http://www.systainerworld.com/Tanos_Empty_Systainers_s/3.htm
I'm considering buying more and swapping all of my gear into them. Not bad prices either when compared to some of those other exotic cases.

http://www.systainerworld.com/Tanos_Empty_Systainers_s/3.htm
I'm considering buying more and swapping all of my gear into them. Not bad prices either when compared to some of those other exotic cases.

Last edited:
JamesDowning
Explorer
In my ongoing attempt to make camping better and easier, I rigged up a little table that hangs off my swing-out. I got this idea from TACODOC http://www.expeditionportal.com/forum/showthread.php?p=757041#post757041 and Safari Pacific http://www.expeditionportal.com/forum/showthread.php?p=423159#post423159.
I wanted it to be easily removable and to tear down in a snap. The result is pretty easy to pack away (though the table's a bit large... still working that problem out), and the whole system is very light.
The idea is that food prep will be done on this table, with the stove setting on a stand beside it.

I used a simple shelving bracket system from Rubbermaid. Drilled a hole in the shelf bracket and added an eye screw to the bottom of the table. The eye screw goes between the halves of the shelf bracket, and the clevis pin is inserted through it, thus holding the bracket to the table (or vice versa).

The vertical wall mount was cut into small pieces and mounted to the swingout arm. The swingout was drilled and tapped. The allen-head machine screw was key here because it didn't interfere with the bracket as a hex-head screw would.

Both mounted... As you can see, it takes up very little room.

View from the bottom with the table mounted.

The setup is actually surprisingly stable. Easily holds up 40 lbs. No reason to worry about bumping it either, it's all locked in pretty tight.

I may go out and find a thinner/nicer piece of wood to use for the shelf, but for now I think this will work fine.
I like it because it doesn't use any guy wires as I've seen in other setups similar to this, and leaves the entire top of the table open for use. Also, because it's spaced away from the vehicle's rear hatch, it doesn't impede access to the items in the back of the truck.
I wanted it to be easily removable and to tear down in a snap. The result is pretty easy to pack away (though the table's a bit large... still working that problem out), and the whole system is very light.
The idea is that food prep will be done on this table, with the stove setting on a stand beside it.

I used a simple shelving bracket system from Rubbermaid. Drilled a hole in the shelf bracket and added an eye screw to the bottom of the table. The eye screw goes between the halves of the shelf bracket, and the clevis pin is inserted through it, thus holding the bracket to the table (or vice versa).

The vertical wall mount was cut into small pieces and mounted to the swingout arm. The swingout was drilled and tapped. The allen-head machine screw was key here because it didn't interfere with the bracket as a hex-head screw would.

Both mounted... As you can see, it takes up very little room.

View from the bottom with the table mounted.

The setup is actually surprisingly stable. Easily holds up 40 lbs. No reason to worry about bumping it either, it's all locked in pretty tight.

I may go out and find a thinner/nicer piece of wood to use for the shelf, but for now I think this will work fine.
I like it because it doesn't use any guy wires as I've seen in other setups similar to this, and leaves the entire top of the table open for use. Also, because it's spaced away from the vehicle's rear hatch, it doesn't impede access to the items in the back of the truck.
FjFairlady
Observer
That is nicely equipped for any trail. Nice.
shovelbill
Observer
beautiful rig you built there for sure........one thing i'd like to mention though. on the swing away. you may want to add an angle piece and use some rubber or delrin to have it land on before clamping it closed.....that's a lot of weight for the spindle to carry by itself.
nicest Trail Blazer i've seen...............cheers, Bill
nicest Trail Blazer i've seen...............cheers, Bill
JamesDowning
Explorer
Thanks Bill. I have considered adding an extra support that will help support the arm. Luckily the arm is currently dampened very well by the hi-lift handle keeper resting on the tail gate, so at least there are no harmonic vibrations present, which seem to be one of the common failure modes of tire carriers.
shovelbill
Observer
no problem man....can you tell us how your fuel economy has changed from stock with all the improvements you've completed. have you weighed her loaded in trip form?
i watched the videos on Offroadtb....very cool stuff. that's the type of trips i enjoy and what i'm building my K5 for.
i watched the videos on Offroadtb....very cool stuff. that's the type of trips i enjoy and what i'm building my K5 for.
JamesDowning
Explorer
no problem man....can you tell us how your fuel economy has changed from stock with all the improvements you've completed. have you weighed her loaded in trip form?
i watched the videos on Offroadtb....very cool stuff. that's the type of trips i enjoy and what i'm building my K5 for.
Economy-wise, I find the biggest factor is roof-stuff. With nothing on the roof I can get 18mpg on the highway pretty easily.
From what I recall, I get about 15mph highway with the roof loaded up with all the junk you saw in those videos. For that reason alone I've been trying to really rethink things. I'm currently planning to tear out the rear seats and utilize that area more appropriately.
I have not weighed it loaded down in trip form... I'd assume it's somewhere around the GVWR - maybe a tad beyond - 6k lbs?
As an unrelated update... I just got my new Edgestar fridge in. Currently trying to work out where to fit it in...
Last edited:
JamesDowning
Explorer
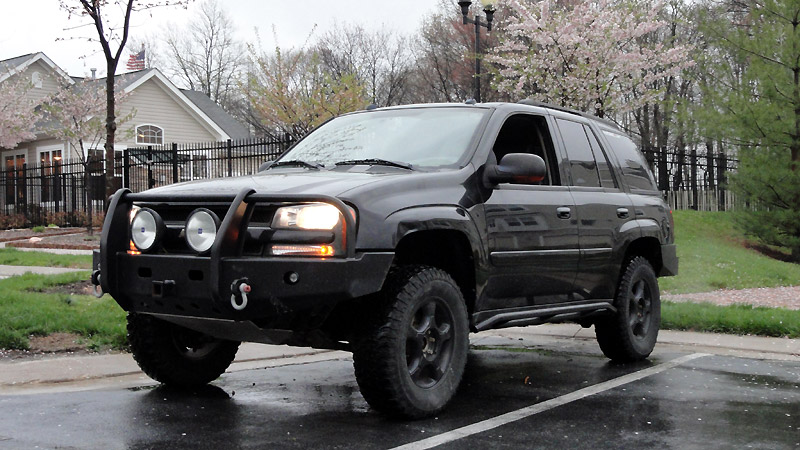
Bit of a suspension upgrade.
My front end had begun sagging under the weight of the front bumper, plus when on the trails, I was getting higher suspension compression than I desired when coming off large bumps. So I wanted to upgrade to a stiffer spring, and maybe get a little extra lift in the process.
I was able to demystify the factory spring part numbers from GM. There are 9 springs available from GM for the Trailblazer. They all have the root part number of 1512588*. The * is 1-9. After doing some research I found some details on these parts. 1 is the weakest spring and 9 is the stiffest spring, with the full range between them.
After doing the math with the spring specs, I settled on a spring that should bring me to a height slightly above where the suspension sat prior to the front bumper. I settled on 15125887 with a 70 N/mm spring rate.
Mine came with the #3 springs from the factory, below you can see a comparison. Same resting length between the springs, but there's a difference in wire thickness.
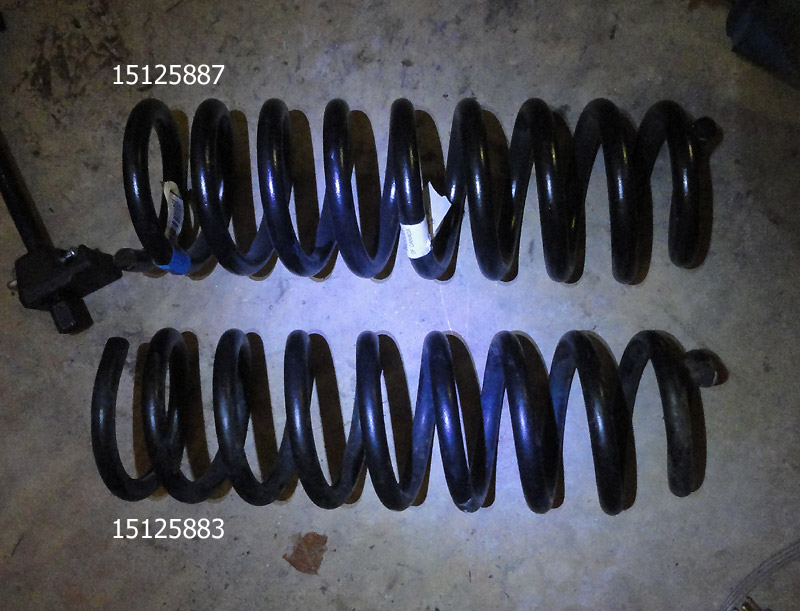
When pushing the suspension higher than 2" (which is what I had installed so far) I was worried about binding the IFS ball joints, and also topping out the strut when going over bumps.
To try to reduce the topping-out of the suspension some, I added some washers below the upper strut bushings, in order to allow the suspension to articulate downwards a little further. I tested this range with the CV shafts, and it didn't seem to cause any binding of the joints.
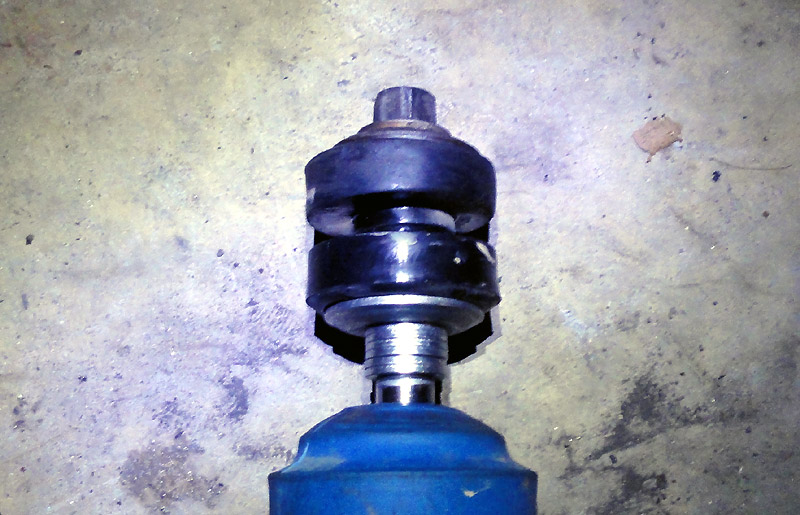
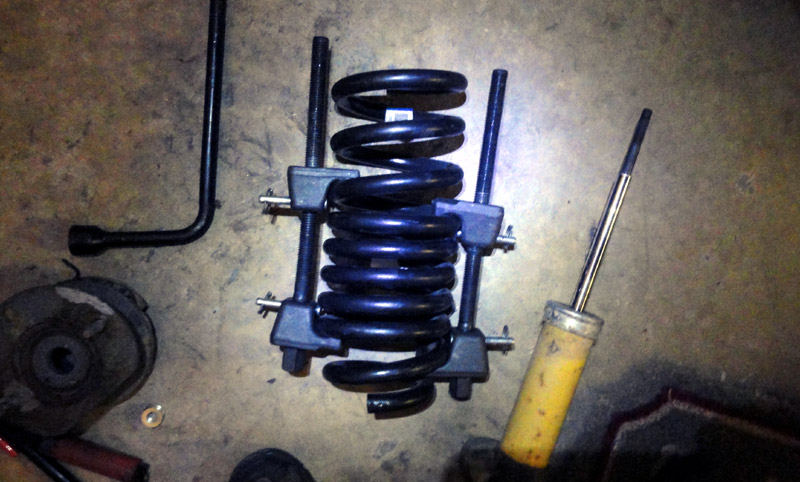
Here's one of the new springs compressed and ready to reassemble into the strut.
To combat the ball-joint issue, a few of us with Trailblazers realized that flipping the upper control arms left-to-right, and vice versa would improve the ball joint angle in a lifted scenareo. Below you can see them flipped with the new springs installed. Not much to see really.

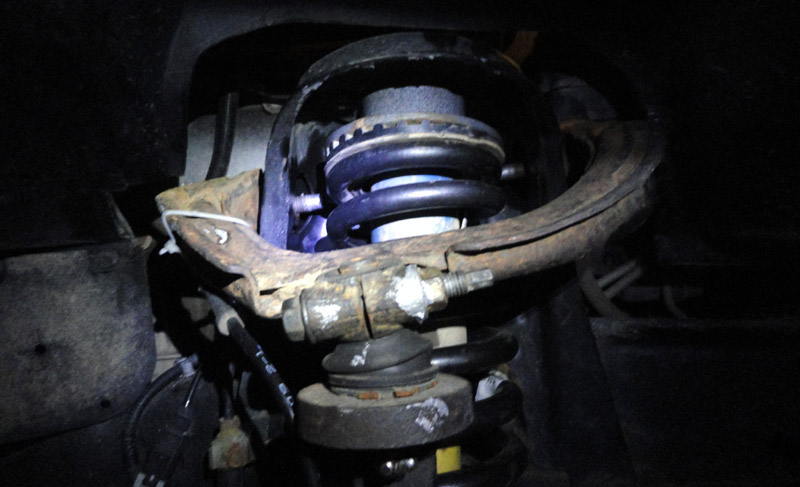
End result is 1" higher than it sat pre-front bumper. Just about right I think. The ride is noticeably stiffer, but not too stiff.
My front end had begun sagging under the weight of the front bumper, plus when on the trails, I was getting higher suspension compression than I desired when coming off large bumps. So I wanted to upgrade to a stiffer spring, and maybe get a little extra lift in the process.
I was able to demystify the factory spring part numbers from GM. There are 9 springs available from GM for the Trailblazer. They all have the root part number of 1512588*. The * is 1-9. After doing some research I found some details on these parts. 1 is the weakest spring and 9 is the stiffest spring, with the full range between them.
After doing the math with the spring specs, I settled on a spring that should bring me to a height slightly above where the suspension sat prior to the front bumper. I settled on 15125887 with a 70 N/mm spring rate.
Mine came with the #3 springs from the factory, below you can see a comparison. Same resting length between the springs, but there's a difference in wire thickness.

When pushing the suspension higher than 2" (which is what I had installed so far) I was worried about binding the IFS ball joints, and also topping out the strut when going over bumps.
To try to reduce the topping-out of the suspension some, I added some washers below the upper strut bushings, in order to allow the suspension to articulate downwards a little further. I tested this range with the CV shafts, and it didn't seem to cause any binding of the joints.

Here's one of the new springs compressed and ready to reassemble into the strut.

To combat the ball-joint issue, a few of us with Trailblazers realized that flipping the upper control arms left-to-right, and vice versa would improve the ball joint angle in a lifted scenareo. Below you can see them flipped with the new springs installed. Not much to see really.


End result is 1" higher than it sat pre-front bumper. Just about right I think. The ride is noticeably stiffer, but not too stiff.

my1stcummins
Adventurer
Wow, that is one sweet looking TB. I must say in stock form they are rather buick-blah but this is quite a transformation. Do you have the v8?
JamesDowning
Explorer
Nope, the I6. Not a huge difference in power numbers between the two.
JamesDowning
Explorer
Starting the homemade roof top tent
I normally only post finished projects, but I thought this one would be fun to share during it's progress. I thought about just buying a roof top tent, but I thought it would be fun to create my own. So here I am... I have a few napkin sketches that I've worked on since last October, it was really a matter of finishing up some other projects and finally starting this one.
Here's the initial layout of the tent base and testing of the wood and hinges. I used 21/32 sheathing because I refuse to pay $50 a sheet for the nicer plywood. It's actually much stronger than I had originally planned, so I think I will be able to leave out some of the structure that I was going to add (which should be a nice weight savings).
I took some time to sand it down a bit to get rid of the majority of splinters.
Here is is laid out on the stands:

Here is a detail of the stainless steel hinges. They mount with 1/4"-20 bolts to press-in nuts. I still need to re-drill them with different holes. I got these from a different roof top tent from compactcampingconcepts.com. It was the one part that I was originally unsure of how to make, but luckily found these.

Folded, it will probably stand 9" above the roof rack, not including the ladder:

Treating it with some water sealant. It's currently drying:

Next step is to lay out the hoops.
I can't promise that progress will be fast, but I hope to realistically have this done in a few months, I've got a few other projects that I also need to work on. Never enough time!
I normally only post finished projects, but I thought this one would be fun to share during it's progress. I thought about just buying a roof top tent, but I thought it would be fun to create my own. So here I am... I have a few napkin sketches that I've worked on since last October, it was really a matter of finishing up some other projects and finally starting this one.
Here's the initial layout of the tent base and testing of the wood and hinges. I used 21/32 sheathing because I refuse to pay $50 a sheet for the nicer plywood. It's actually much stronger than I had originally planned, so I think I will be able to leave out some of the structure that I was going to add (which should be a nice weight savings).
I took some time to sand it down a bit to get rid of the majority of splinters.
Here is is laid out on the stands:

Here is a detail of the stainless steel hinges. They mount with 1/4"-20 bolts to press-in nuts. I still need to re-drill them with different holes. I got these from a different roof top tent from compactcampingconcepts.com. It was the one part that I was originally unsure of how to make, but luckily found these.

Folded, it will probably stand 9" above the roof rack, not including the ladder:

Treating it with some water sealant. It's currently drying:

Next step is to lay out the hoops.
I can't promise that progress will be fast, but I hope to realistically have this done in a few months, I've got a few other projects that I also need to work on. Never enough time!
Last edited:
JamesDowning
Explorer
Small updates, figuring out some of the details:
Support adjustments:

Testing the adjustment system, it appears to hold quite well:

Drilled extra holes in the stainless bracket, obtained proper hardware (button heads on the outside so it won't snag the fabric), testing the support attachment:

Same thing, interior side (flattening the tube has turned out to be a bigger challenge than I expected, I think next time I will try a torch in conjunction with the hammer):

It's coming along slowly.
Support adjustments:

Testing the adjustment system, it appears to hold quite well:

Drilled extra holes in the stainless bracket, obtained proper hardware (button heads on the outside so it won't snag the fabric), testing the support attachment:

Same thing, interior side (flattening the tube has turned out to be a bigger challenge than I expected, I think next time I will try a torch in conjunction with the hammer):

It's coming along slowly.
JamesDowning
Explorer
Thanks for the pointer. Despite your warning, I did take my torch to the tube, but it didn't seem to make much of a difference, it still turned out ugly.
I didn't originally think a vice would have enough clamping force to flatten the tube enough, but I guess I overestimated the strength of the EMT. I did a quick test today and they looked really good (thanks for the pointer). So I'll be using that method on the final parts.
I didn't originally think a vice would have enough clamping force to flatten the tube enough, but I guess I overestimated the strength of the EMT. I did a quick test today and they looked really good (thanks for the pointer). So I'll be using that method on the final parts.
Similar threads
- Replies
- 4
- Views
- 1K
- Replies
- 1
- Views
- 1K
- Replies
- 33
- Views
- 9K
- Replies
- 8
- Views
- 2K
