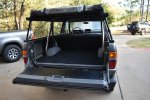
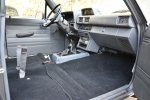
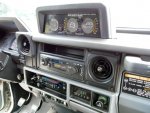
First Foray into 4Runners - My 1st Gen Build

Summit Cruisers Jr

Well-known member
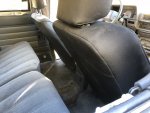
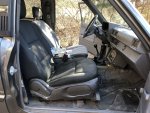
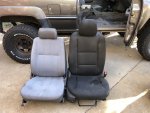
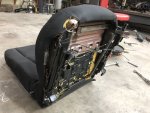
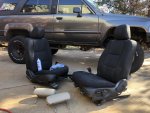
Scored some 2015 police interceptor seats yesterday for $60. Also got a couple 1999 RX300 headrests for $12. I was hoping the seats would still fold fordward with these headrests but no luck. At least I have some when time comes to completely redo the interior.

I wasn’t really planning to buy seats, but after seeing how similar in size they were, I wanted them. After pulling the manual passenger seat, I was kind of committed. I didn’t realize the driver’s was 6 way adjustable, but I got a battery and went through the controller and finally figured out how to move it so I could get the bolts out. It also has adjustable lumbar (not via air so they won’t self adjust with changing altitude) which I’m really stoked on.

I’m think I can build new mounts for the rear, and modify the fronts to move them to a new spot on the rails and they’ll bolt up.
A96D2F1F-E469-46F8-B7C5-4A1A36D8F419.jpeg

046C11E7-64EA-4119-B20D-04B8D910A64C.jpeg

9CBE8B6B-CF46-4352-ACC1-5165179B7669.jpeg

035ADA64-4D3C-4015-BF65-082BB031A4E3.jpeg

38F65648-62C6-467C-B094-A1DD80E6681A.jpeg

CE4A9E76-0BB5-4885-9474-02C4962A0A02.jpeg

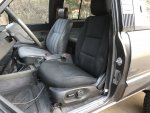
Couldn’t resist and went ahead and started playing with the wiring for the driver’s seat instead of working on swing outs. It is now almost ready to bolt in.
F97F00D4-478E-427B-8D92-F2808D03DDDD.jpeg
 
Last edited:

Summit Cruisers Jr

Well-known member
Driver’s seat is mounted and wired. I’m super pleased with how supportive it is and the higher driving position. I went back to the yard yesterday and pulled a 4 way adjustable headrest for the passenger seat since it didn’t have one. I will have to relocate the brackets on the passenger seat so I don’t think I will be installing it for awhile.

When I was on the way home from the yard, a loud hissing sound started all of a sudden at mid to high rpms and the 4runner was down on power. I ordered an exhaust manifold gasket as it looked to be the suspect. Thankfully I found no cracks in the header which was my original worry.

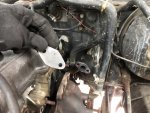
I pulled stuff off and out of the way and discovered the lower front bolt to be more or less sitting in the hole sheared off at the block. I have no idea how long it’s been broken, but it had a pretty good build up of black crap on it, and since replacing it and the gasket, the 4runner is much quieter.

7F55C7CB-1498-4117-B4C8-5A036D4EB57B.jpeg

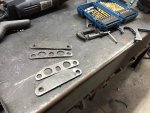
I made block off plates for the air injection tube. I didn’t want to fully delete the egr system in case I end up needing it someday, but no one locally could source just the flange gasket for it so I just blocked it all off.

1854BC0B-0D21-4982-B115-A80C93E2DA87.jpeg
E81EA9D4-9B97-4CEE-A858-6D5AC87CEFB6.jpeg

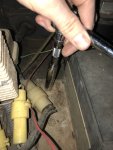
If you’ve ever dealt with extracting a bolt from a block, you know this is a satisfying looking start.
8294943B-EB17-4EFA-AD4D-063D0EE76ADB.jpeg
And there it is
596FC4F9-6A4A-4BBC-97CB-9B52AC64C42C.jpeg
 

Summit Cruisers Jr

Well-known member
We finally got some decent snow the other day. Unfortunately, most of it fell after it was dark, and the next day was nearly 60* by 11am so it was gone before we could get out and have any real fun.
510BC519-0E01-4A0F-A926-C1E0E493769E.jpeg

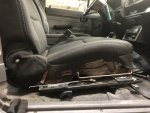
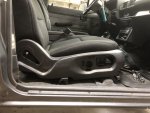
I ran 5ft short of metal for some swing out parts I needed to cut and with the metal yard not being open on Sunday, I set to work mounting the passenger seat. It took a lot longer than expected, and I still have some work to do to enable it to slide forward as well as tilt from just pulling the seat back adjust lever.

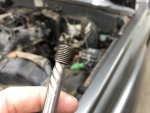
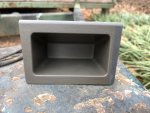
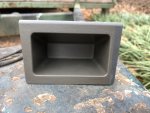
In addition to finishing up the seat mounting, I built a new shift knob the other day for fun by pressing a shaved nut into a cut off handle bar with lock on ODI grip. I also added two 1999 RX300 heated seat switches in the cut outs above the stereo that I will eventually put into the seats.

Back to the seat swap...

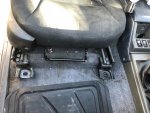
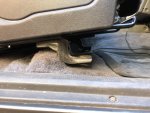
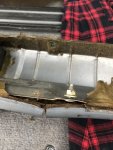
I ended up drilling out all eight rivets holding the sliding rails onto the oem seat. Then I unbolted the rails from the Ford seat (which took several hours just trying to figure out how to get the dang thing apart with all its plastic clips, torx, hex heads, and screws). Then using the torx and supplied threaded nut squares from the ford seats I took a ton of measurements and placed the seat where I was 99% sure it needed to be and placed tackwelds in non obvious areas to test fit it.

While trying to come up with a game plan for the sliding and tilting mechanism, I realized I needed to space the passenger side of the seat ever so slightly higher to be able for this to possibly work so I added some 3/16” steel legs that were also a little wider as these ford seat rails were about 5/8ths an inch narrower.

That checked out and I proceeded to mark/drill the spots, and bolt them up.

I probably won’t dive into the slide forward feature for awhile as I need to get the batch of swing outs shipped within the next couple weeks and then I’ll be building up a new mountain bike, but that is definitely going to be a tricky project when I get to it.
2E68523E-B1D8-4B5B-B69C-E7C1D7605A1C.jpeg

Here you can see the spacer plates I added on to bring the mounting holes far enough out to center into the oem rails as well as clear the mechanism attached to the rod that will eventually attach to an undetermined location to enable tilting and slide.

C0B064F0-3E2C-4B29-B502-04E0F4737668.jpeg

263883BA-B000-454B-A660-57550A47A24B.jpeg

5C7BC0CC-43C5-4FD9-8D26-169EE78B5330.jpeg

Now I just need to figure out how to clean this heavy duty cloth as they’re really getting on my nerves. Hopefully they’ll clean up decently so I can stop thinking about them until I can have all seats reupholstered.
 
Last edited:
Summit Cruisers Jr

Well-known member
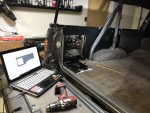
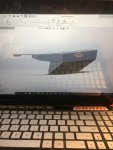
Update time: TLDR: I’ve been playing around a lot on Solidworks in my free time.

First off, I dug through the disconnected and questionable wiring connections (or lack of) under the driver’s kickpanel and got my done light working. In doing so, a beautiful sounding buzzer has started alerting me and anyone in the vicinity that my door is open. I know a lot of people hate it, but I find it hilarious so it is staying.

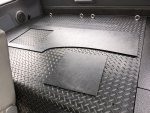
I just picked up my first CNC’d 3/16” textured ABS cargo panel on Friday. I’ve since made some design tweaks and altered some places to more closely follow the lines back there. Hopefully I’ll have V2 in my hands at the end of the week.
502921

Seeing this panel in here has made me realize how gross my carpet really is. I don’t think I’ll be going for a full color change in the interior like I originally thought as I don’t want to mess with the headliner. I am debating between black or dark gray carpet...kind of leaning towards dark gray and black seats and panels.
502922

A little bit of progress on a non winch front bumper. I wanted something with a more modern design that still closely followed the contours of the 4runner’s front fenders and whatnot. I am still playing around with angles as I don’t want it to be super “edgy” or “boxy” but finding a happy medium has been difficult.
502920

Back in January I started designing a new top as my fabric is all trash. I had even thought about pop tops and if I could incorporate one into the factory hardtop. Since I have no experience with fiberglass, I kind of scrapped that idea. I also read that the sliding window seals are NLA so I didn’t really want to do anything with the OEM hardtop if I can’t make it as good as new.

Loving my canback, I designed a new top that would mostly work with the canback frame. This would use an aluminum top with removable roll down side windows that could be replaced with rigid aluminum panels...but then I saw this

502924

photoshop of a GFC top on a 1st gen the other day and it really got me thinking about the pop top idea again and how prime the 4runner is for that if it weren’t for the stock roll cage.

To be continued...
 
Last edited:
Summit Cruisers Jr

Well-known member
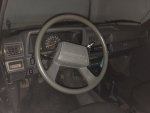
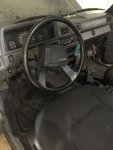
Swapped out my gray/green steering wheel for a black one out of an 86 4runner. It came with a black steering column cover that hadn’t been cut up to install a cruise control stalk so I started removing that port installed non working system.

504200

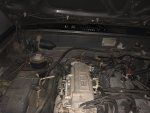
Entire black harness going above the top of the engine bay was removed.
504197

My metric HF socket set came with 10,11,13,14 etc and no 12. Never thought I’d actually end up finding a use for the 11mm long socket.
504198

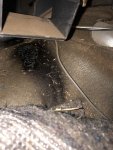
Some wiring loom/wires at some point in time got really hot on the trans tunnel. No idea what was there.
504199

All done. It turns out that the black ‘86 steering column cover was drastically different and didn’t fit. All said and done took 1.5-2 hours. I’ll eventually fill the hole in the column cover with plastic epoxy and then paint it black.
504201
 

Summit Cruisers Jr

Well-known member
I tossed some dirty LX450 wheels in the back and ruined the carpet with grease. New carpet is now something I will probably be ordering in the next week. I just can’t decide if I want black or dark gray.

Black seems like it could be too much and would show every spec of grass etc. it would however be very clean and I could possibly end up with an all black interior at some point.

Dark gray seems like the more sensible thing to do but I go back and forth. Kind of learning towards dark gray right now.

Otherwise, I got some little things tidied up on the 4runner over the past couple days.

New group 24 interstate battery
Inclinometer installed
Dash light bulbs replaced with clear/yellow bulbs (the green covers wouldn’t peel off the bad bulbs so I couldn’t use them)
Painted some interior parts and chased down some loose/broken pieces under the dash that were rattling.
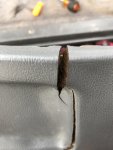
I added plastic epoxy to the bottom of my shifter surround where it was starting to crack.
I also plastic epoxied the cruise control cut out on my steering column cover. Need to do a little more work and then etch in some texture with a razor blade/paint it.

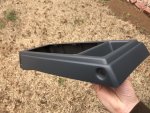
Absolutely destroyed the brittle plastic passenger side vent which I’m still really made about. You would think they would have designed something a little more removable than that but oh well. Hopefully they interchange with some other Toyota’s as they seem to be NLA.

Most of the plastic had turned green from the sun. Nice to see gray on my console and shifter surround again.

507769

507772

Not sure how I feel about the color. I still need to wire in the power for the inclinometer backlighting so I’ll probably get some new green bulbs for the cluster.
507771

I’m no dash expert but it seems like mine is too far gone to repair. I may look into somehow using some foam to completely reshape it and then recover it with leather.
507768
507770
 

Attachments

  • 9E1CBDD1-1BE7-4123-B89C-2D0F103468E0.jpeg
    9E1CBDD1-1BE7-4123-B89C-2D0F103468E0.jpeg
    2.6 MB · Views: 19
  • Like
Reactions: bkg

Summit Cruisers Jr

Well-known member
Last Thursday I picked up version 3 of my quarter panel cover and a tailgate cover. Both need one more round of revisions until they’re perfect. I also painted my rollbar bronze a couple weeks back to match my wheels.510324

I just found out I’ll be working in Kansas City all summer so I need a way to haul both my mountain bike and gravel bike up there. Since I will be putting the hardtop back on, and my northshore only hauls mountain bikes, I knew I needed a bedside mounted rack. Right now I have a boost front axle holder, but will be getting one for a standard drop out fork so my gravel bike can go on the side and my northshore can haul my mountain bike.
510325

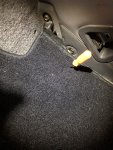
Yesterday afternoon, my stock interiors black carpet with mass backing showed up. Overall pretty nice quality, but some annoyances.

First off, the cargo area carpet did not have the fiber material on the underside like the stock carpet did. This really bugs me as it is now a lot more uncomfortable back there and I need to do something before I consider sleeping in there again.

Second off, the fiber material on the back seat floor section was glued on off center and at an angle. If it had been centered, it would have been perfect, but some lazy person working that day just tossed it on and I had to do an insane amount of trimming to get my door opening trim to fit. Things like that bug me. I much would have rather had to glue that fiber insulation on myself but oh well.

Third off, the rear seat split in the carpet was cut a little weird. Due to the thicker mass backing, it also doesn’t quite stay tight to the seat back when they are in the upright position. It gets bunched up a tad bit and doesn’t fit perfect like I wanted it to but oh well.

After originally tracing out the cargo area carpet onto the new one in addition to the holes, I realized that was bad. The carpet and sewed edge bottomed out on the roll cage sooner than the old carpet meaning a lot of the tiny precise little holes I had made with a hot knife were pointless. Thankfully it’s black and you would never noticed them otherwise.

From there on out, I used an orange pick to locate holes and then an exacto knife to cut out a hole around that.
510319

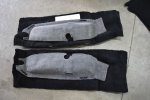
The rear wheel well covers were not cut out for the roll bar and they did not have sewed edges. For now, I’ve decided not to install the new ones as I basically have roll bar delete fabric if I choose to do something else in the future.
510322

510323

510320

I need to paint my column cover black, and I’d also like to do my console, shifter surround, and stereo surround, but none of that is a priority.
510321
 

battleaxe

Captain Obvious
I had similar annoyances with mine when I swapped out the brown for black.

One thing to consider with the dash, especially if you're doing a UZ swap, you could swap in a 2nd gen dash. It's been done on some first gen pickups, and I think I saw a Taco dash swapped into a 1st gen 4runner at one point too...

It's definitely an all or nothing ordeal though.

Nice to see some progress on the truck, I'm super jealous.
 

Summit Cruisers Jr

Well-known member
I had similar annoyances with mine when I swapped out the brown for black.

One thing to consider with the dash, especially if you're doing a UZ swap, you could swap in a 2nd gen dash. It's been done on some first gen pickups, and I think I saw a Taco dash swapped into a 1st gen 4runner at one point too...

It's definitely an all or nothing ordeal though.

Nice to see some progress on the truck, I'm super jealous.

Interesting. I wasn’t aware that was a swap people were doing. Seeing some pics of some late 80s early 90s 70 series interiors and dashes has had me dreaming. Unfortunately, all parts are probably harder finding than a new first gen dash. No way an LHD 70 would ever be wrecked and in a local pull yard.

I think this is from a bj73/74. Looks like it even works with the same inclinometer I just spent way too much money for so that’s a plus haha
510541

510542

One can dream
 

battleaxe

Captain Obvious
I wouldn't say it's a swap that people are doing, just that it's been done a few times. If you took your time, a second gen interior would look fantastic I think. But you need everything including the dash bar and HVAC to make it all work.

Funny thing is, the 70 series interior is still a great looking setup. At least in my opinion.

The inclinometer is very similar, I think it's all the same guts. (I have one of each, and no I will not sell them... Haha)

Not that there's anything wrong with the first gen interiors, they just age poorly and it's impossible to find decent LHD replacements.
 

Summit Cruisers Jr

Well-known member
I wouldn't say it's a swap that people are doing, just that it's been done a few times. If you took your time, a second gen interior would look fantastic I think. But you need everything including the dash bar and HVAC to make it all work.

Funny thing is, the 70 series interior is still a great looking setup. At least in my opinion.

The inclinometer is very similar, I think it's all the same guts. (I have one of each, and no I will not sell them... Haha)

Not that there's anything wrong with the first gen interiors, they just age poorly and it's impossible to find decent LHD replacements.

Ah makes sense. A couple one off swaps here and there for whatever reason. I prefer the squared and blocky dash in the first gen to the smoother 90s designs. All things considered, it would probably just be easier to make a mold of my current dash, smooth it out, and then build a new foam top. Then I don’t have to worry about finding/making a inclinometer housing. It does look like they are a tad different from the 70 series but I’d bet have the same guts.
 

GTV

Active member
I’m no dash expert but it seems like mine is too far gone to repair. I may look into somehow using some foam to completely reshape it and then recover it with leather.
View attachment 507768

I did automotive upholstery for years, a good low cost and easy to install solution is a dash cap. We used Coverlay https://coverlaymfg.com/?setcookie=true but there are others as well. Recovering a dash in leather/vinyl is seriously labor intensive, expensive and leather will shrink up in just a few years if it is in the sun. Not the way to go.
 

Summit Cruisers Jr

Well-known member
I did automotive upholstery for years, a good low cost and easy to install solution is a dash cap. We used Coverlay https://coverlaymfg.com/?setcookie=true but there are others as well. Recovering a dash in leather/vinyl is seriously labor intensive, expensive and leather will shrink up in just a few years if it is in the sun. Not the way to go.

Yeah that’s a good idea. I’ve seen some on amazon for around $100, but I’m not even sure one would fit over this dash with how dried out and cracked it is. In my mind it seems simple enough to recover, but that’s how all of my projects start out so I appreciate your insight on that process being lengthy.

The foam has separated so much from the metal inner dash that my inclinometer doesn’t even sit level on level ground. In some spots it’s close to an inch off from the metal and I feel like I’d be dealing with clearance issues all over with the cap.

As much as I’d like to get something in there that looks a lot better in addition to recovering the seats, I will probably just leave the interior as is for the foreseeable future. It will likely end up being parked outside all summer and it can’t really get any worse.
 

Forum statistics

Threads
188,182
Messages
2,903,497
Members
229,665
Latest member
SANelson
Top