Fleetwood Neon Modified for off road

SCARDUP

Observer
It's out of the garage! Rides smooth. Spent all day tightening/replacing screws and one rivet, sanding off rust spots, then priming and painting the frame. Holy cow this thing has lots of storage space. It swallowed all my crap except one tub full of the kitchen.

View attachment 281023

Baddandy, did you install that roof rack? It looks to be installed with brackets in the roof. Are they right above the roof lifting beams? Is the bracket bolted through the roof with bolts visible on the interior? Some more photos would be much appreciated and any info you might have on the components. I have a cobalt and I need to get a rack on it before the summer camping season.
 

BADDANDY

Adventurer
No, I didn't put it on, it came that way, there's 4 bolts for each mount, but how I can't see them from the inside, I don't know. It is solidly mounted though.
 

BADDANDY

Adventurer
Hopefully 3" more than the almost 2" it has settled with the weight on the tires, that's as far as the shocks will allow too. Doesn't sound like much, but it's probably 5" more than stock as the axle didn't even droop when I raised it off the ground with the stock springs. Scott designed the kit to limit max compression at the point the springs are flat. That looks to be 3" more than it is now.
 

MountainD

Adventurer
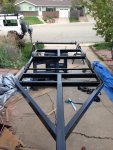
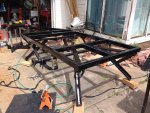
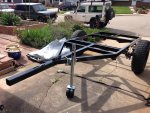
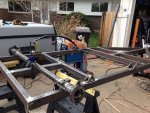
Another good day of work. Got the hangers set, not fully burned in until I flip the chassis, but located and partially burned. Got the axle completed---had to clamshell sleeve the 2-5/8" DOM tube with 2x6" pieces of 3" OD DOM tubing so that I can use standard U-bolts (that way if I ever need to get a spare, I don't have to search for 2-5/8" Ubolts, just make life easier in the future) and got the spring perches burned in. Painted the axle. Added a section of 3" square tubing between the rear shock mount cross brace and the rear cross member so that if I have to recover the trailer, the rear will be beefy (I'll be adding a couple D-Rings).

The stock Samurai hangers had a 35.5" separation in the front (I am using Trailgear front springs) but with my 3" shackles, I think that it too wide as the shackle angles unloaded were inverted and when I measured the springs and calculated the fully loaded stretch, the shackles would be almost vertical where they should be angled back around 45 degrees, although mine I am guessing will be closer to 40 (but I have my reasons). In lieu of the 35.5" separation, I am closer to 34", maybe even a little less. We will see what happens when it is fully loaded (worst case I have some cutting/welding to do...).

Got a coat of paint on the bottom and sides of the chassis (expect for a few areas where I still have some welding). I'll flip it tomorrow and (weather permitting, it is raining now) I will paint the other side and potentially start ripping off stuff on the Neon to prepare for the swap!

Then, I will need to fabricate the side fenders/storage shelves, cut the tongue to the correct length, and get the hitch ordered up! Camping season coming soon!!!
2015-04-25 14.38.40.jpg2015-04-25 18.04.03.jpg2015-04-25 18.04.20.jpg
 

VanIsle_Greg

I think I need a bigger truck!
I love these little trailers. If I had to do it all over again, I would probably pick one up over the CDN M101 and do a conversion like this. Not saying I don't like my trailer, it is great... just like these a lot.

Enjoying these builds.
 

MountainD

Adventurer
First big obstacle... and although I knew this when I started, just haven't come up with a great solution for raising the pop-up.

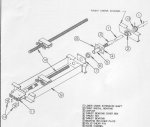
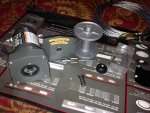
The new tire size and location will be directly in front crank location. On a Neon, it is located on the side of the trailer just in front of the tire, but with larger tires and wanting to get a good weight balance, the 33" tires will obscure where you would insert the crank handle. This sort of trailer has a whiffletree design and works by pulling cables as it travels along a large screw--when it turns, the whiffletree pulls all 4 cables the same amount at the same time and the top rises.

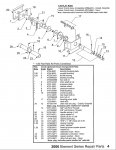
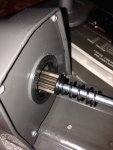
There is a secondary mechanism that acts as a safety catch from the screw unwinding. Between this and the frame rail, there is about 5" and not much room between the crank and the plywood bottom of the trailer. Since there is just not enough physical room to put something like a high torque motor into, I think I will possibly weld a sprocket to the crank arm and run a chain to a sister sprocket welded to a small harbor freight winch---I would remove the cable from the winch and possibly weld a sprocket to the winch spool for the opposite side of the chain. That seems like a good, economical solution (about $48 for a 2500lb winch with Harbor Freight coupon).

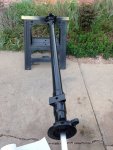
Any other possible suggestions? A couple photos of the whipple tree and the locking mechanism....

Wiffletree.jpgcrank mechanism.jpg
 

BADDANDY

Adventurer
Sounds like a plan. My top is a bear to raise. I need to look into it. I also need to extend the handle or get a chuck for my drill.
 

silvrzuki77

explorer
I went down to harbor freight and bought a impact gun just for my stabilizer legs. Wonder if you could do the same or is the hole completely covered?
 

MountainD

Adventurer
The hole is completely covered, by about 10" of tire. I have a game plan in theory-- there is a high torque gear motor for tarp systems, about $150. they have a 90 degree output shaft so I might be able to get it to fit for a direct drive or, if it doesn't, then run sprockets/chain to relocate it. Just sourcing dimensions and costs now. Waiting for some more parts to arrive and getting hitch ordered today or tomorrow.
 

BADDANDY

Adventurer
I crawled underneath and lubed all the pulleys, bent out some of the pulley bracket edges, and inspected the worm gear drive assy. I also found that a PO had replaced a crank drift pin with a 3" nail bent into a S which was wearing a ring into the frame and removing some wood from the floor. I replaced it with a bolt, washers and nut, and did the same to the next drift pin about an inch away that was ready to fall out. She cranks 50% easier now.
 

MountainD

Adventurer
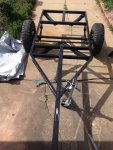
A bit more work between rain showers. Since I have no room indoors, it is all in my driveway. I got the 31" BAL C-Jacks installed, greased up all the wheel bearings and got them installed along with the axle on the frame so it is a rolling chassis now. Started work on the fenders and I cut off all the metal on the existing Neon frame with the exception of the leaf springs so I am really close to moving the box over onto the chassis.

Does anyone have advice on types of shocks for the trailer? Not sure about best bang for the buck, so advice is always appreciated.

Got a 2500lb Harbor Freight ATV winch for under $50 and disassembled it. I have removed the spool and wire and am modifying the bracket width so that I can run a #40 chain on a sprocket--I am welding the sprocket onto the gear that you see sticking out the end of the winch motor which the chain will go around and the other end of the chain will go over a gear on the current lifting shaft. I will add two pillow bearings onto this shaft as well on each side of the gear to take wear and tear away from the wiffletree mechanism. I am also going to add a couple limit switches to the wiffletree so that I don't over extend the cables.

I just ordered all the brake lines and components so I can hook up the hydraulic disc brakes and the handbrake. Hopefully order shocks tomorrow. Hitch is ordered and should be arriving this week. :) COMING TOGETHER!
9 Frame with bal c jacks.jpg10 Frame and wheels.jpg13 Winch disassembly.jpg14 winch gear.jpg11 Arial view.jpg
 

silvrzuki77

explorer
Monroe makes trailer shocks, i have used them in both my builds with great luck! The have several different lengths, pretty robust, and cheap!
 

BADDANDY

Adventurer
As light as a trailer is, go cheap and light duty. They'll probably rust out before they fail. If you get the right stroke.
 

Forum statistics

Threads
188,486
Messages
2,905,529
Members
230,494
Latest member
Sophia Lopez
Top