Flippac build-out

trailscape

Explorer
Great idea on that awning mounting. I wanted to do something like that for lighting myself.

I have that same set of lights though and they filled with condensation after some rain. Still work fine though.
 

Arclight

SAR guy
I got the interior wood painted, hardware installed, and the metal sanded and painted just in time for a weekend trip up to Carson City, NV for Nevada Days.

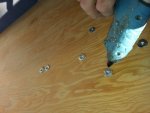
The first step was replacing the temporary self-tapping screws in the wood with T-nuts. I drilled 5/16" holes for the 1/4-20 hardware, and added some hot glue to make sure none of the inserts fall out if they don't get used right away.

20141027_120319.jpg

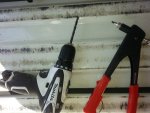
Next, I replaced the sheetmetal screws with rivnuts, using my Harbor Freight rivnut tool:

20141028_153755.jpg

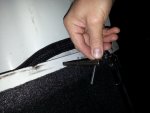
These install very much like pop-rivets, and leave a threaded hole behind. I like to drill and then hand-ream the last few thousandths of an inch for a tight fit:
20141028_215732.jpg

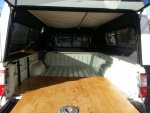
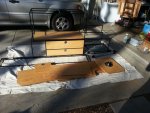
Installing the floor:
20141028_155939.jpg

The finished interior parts ready to install:
20141028_160059.jpg

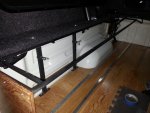
Installing the bench. The tubular steel frame goes in first, followed by the side panels, which are secured to the floor with 1" Aluminum angle brackets and 1/4-20 bolts.
20141028_221945.jpg

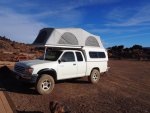
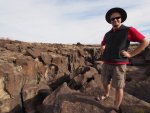
Flippac deployed on the road (Fossil Falls, CA)
PA311016.JPG

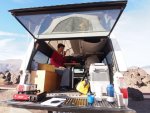
Having breakfast:
PA311013.JPG

The falls:
PA311022.JPG

Welcome to Nevada!
PB011068.JPG

Now back on the road...

Arclight
 
Last edited:

Arclight

SAR guy
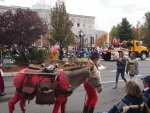
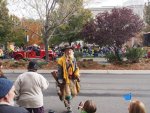
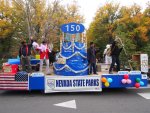
Okay, it looks like the site had timed out on me while I was posting. Attachments should be fixed. In the meantime, here are a couple more of Nevada Day. This state knows how to celebrate!


PB011070.JPG
PB011089.JPG
PB011084.JPG

I noted that all of the guns and all of the beards seen on the street were real.

Arclight
 
Last edited:

GroovyDad

Wanderer
Thanks for posting your build. I was thinking of using square tubing for my ATC Shell build's cabinetry, but wasn't sure if that was the way to go. You did an awesome job on your interior ans it's given me a lot of ideas.
 

Arclight

SAR guy
Thanks for posting your build. I was thinking of using square tubing for my ATC Shell build's cabinetry, but wasn't sure if that was the way to go. You did an awesome job on your interior ans it's given me a lot of ideas.

Thanks! I've learned a couple of things from this build that might help you:

1. My first cargo rack was made out of 3/4" and 1" square tubing. This was a lot heavier, and it turns out that 1/2" is plenty strong. If you have a long, unsupported span you're better off building a vertical beam to prevent sagging. This is just a second 1/2" square tube anywhere with 1/2-1" vertical separators.

2. If you're doing shelves, I would get them first and build the box the drawer slides will attach to before building anything else. I had some minor fit-up errors that made installing the drawers much more time-consuming.

3. On the subject of fit-up, consider buying a piece of 1/2" steel plate or getting a slab of something flat to work off. Small errors in flatness will accumulate.

4. Make a cardboard template of your truck's floor, then try fitting everything you want to use on the floor of your garage. Make cardboard mock-ups.

Hope this helps!

Arclight
 

eblau

Adventurer
How is that harbor freight gun holding up? I am considering buying one for installed about 24 smaller rivnuts.
 

Arclight

SAR guy
What table/ mount did you use. Im trying to find one that does not require a recessed mount.

I'm using the "Sequoia" from Camping world:
http://www.campingworld.com/shopping/item/sequoia-table-leg-system/74002

I found that at 27", it was a big high. So I cut it down. In hindsight, I would probably cut the riveted side rather than the epoxied-in plastic side. When not deployed, there is a plastic cap over the assembly in the floor, and it only sticks up about 10mm.

Arclight
 

Arclight

SAR guy
How is that harbor freight gun holding up? I am considering buying one for installed about 24 smaller rivnuts.

The HF Rivnut gun is fine. I will say that the steel or machined 2-piece Rivnuts from McMaster-Carr definitely hold tighter if you need lots of strength.

Arclight
 

Arclight

SAR guy
Since the Desert Rendezvous is coming up soon and it will likely be hot, I decided to get motivated and finish mounting the ARB awning I purchased last year. I also want to be be able to put a removable rack on for hauling things like kayaks, and have a place to mount side-facing off-road lights.

As anyone who has one knows, the Flippac is tricky to mount things to. You have to deal with the following:

1. The lid is not considered a great place to mount things to, as it flips over and is not really designed to have penetrations.
2. The sides have a limited number of places suitable for drilling holes. There is a 1.5" square steel tube running the length of the shell. You can access it by drilling 1.0" down from the top of the shell, as measured when opened. On the driver side, the interior lights are mounted to plywood squares that need to be avoided, and on the passenger side, the the Aluminum extrusion for the hammock is riveted to the tube. On the outside, whatever you hang needs to be able to clear the latches used for popping the top. The crank attaches on the driver-side and needs to be able to sweep through 180 degrees unobstructed.

With that in mind, I designed a set of roof mounts out of stainless steel. They mount with two 1/4-20 bolts. On the top, there is an "artificial drip rail" which can hold a roof rack base. The front mounts have a flange for mounting my flood lights, and the awning itself attaches with 2.5" door hinges. I got the inspiration from this thread:

http://www.expeditionportal.com/forum/threads/129921-ARB-Awning-on-fiberglass-camper


I had a 4" strip of 12GA stainless steel sheared at the local metal yard, and laid out the design with a scribe. The drip rails are 1/2x1/2" SS square tubing that I milled the top off. I cut out the pieces on my Harbor Freight bandsaw, and cut down the hinges to make the awning sit close to the truck. Everything is TIG welded together.

Here are the finished articles being checked for flatness. I didn't take the slope of the sides into account, and had to cut, bend and reweld my front pieces, then straighten out the heat warps.

20150317_170430[1].jpg

Next up: Measuring and drilling into the Flippac.

Arclight
 

dman93

Adventurer
As anyone who has one knows, the Flippac is tricky to mount things to. You have to deal with the following:

2. The sides have a limited number of places suitable for drilling holes. There is a 1.5" square steel tube running the length of the shell. You can access it by drilling 1.0" down from the top of the shell, as measured when opened.

Does the 1.5" dimension come down to the centerline of the steel tube, so there is sufficient clearance away from the walls of the tube for rivets or rivnuts to form over? Also, do you know where the wires for the driver's side lights run?

-dman
 

Arclight

SAR guy
After careful measuring, I determined that 1.25" down from the top would cause you to just barely intersect the bottom of the inside of the tube. I would go 0.75-1.0" to be safe.

Arclight
 

Forum statistics

Threads
188,306
Messages
2,905,242
Members
229,959
Latest member
bdpkauai
Top