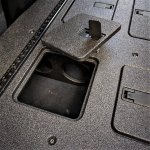
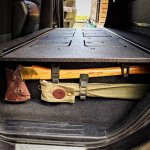
Once every six years, I have to apply a coat of finish to our house. This was the year. A tedious job and one that I don't look forward to but it needs to be done. Four weeks of works. Gad!
And now I have six years to goof off.
Back to the fun projects.
I've been busy getting all the parts in hand for the three main projects I need to get done in the next six weeks: 1) get the Engel fridge installed, 2) add the lift struts to the FWC, and 3) finish the storage space behind the front seats in the Tundra.
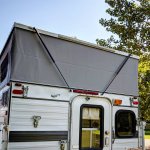
The Engel fridge has been delivered. The Suspa gas springs are here so I can add lift assist to the roof of the Grandby. I've also discovered the very nice folks at Steeves Agencies here in Winnipeg. They are a distributor for Southco (compression latches for the storage platform in the Tundra), Accuride (slides for the Engel fridge) and a bunch of other useful stuff. They are kind of like a specialty shop for Overland builds - and really nice helpful folks as well. It's nice to find a business that cares about helping their customers, even small ones. With all this stuff in the shop and the house painting done, its time to get to work.
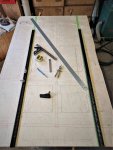
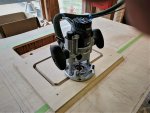
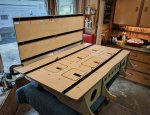
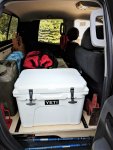
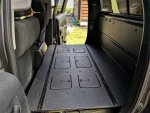
Finishing off the storage area in the Tundra is first up. The build will end up having three parts. The foundation, the platform and the back panel. These will be installed separately to make up the unit. It's just easier that way. When we last left off, I had developed the shape for the front-to-back frames. Over the last couple of days, I've built the steel mounting brackets and the rest of the wooden components.
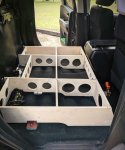
So there's kind of a lot going one here. In fact, this part is by far the most complicated of the build: I wanted to avoid drilling any new holes and use the existing mounting points for the seats and seatbelts, I needed to have room for the front seats to have full range of travel both back-and-forth as well as recline, I had to be able to remove the whole base as a single unit, it had to be strong and of course the frame had to be flat and level both left-to-right and front-to-back so the deck would be level. There is going to be a fair amount of weight in here and it needs to stay put even if I got into an accident. The material is 5/8" Baltic birch plywood and the mounting brackets are 1/8" steel.
Why all the holes?
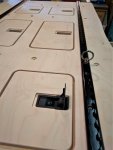
I wanted lots of ventilation in case water or wet gear gets into the 'cellar' (that's what I've decided to call the space underneath the deck). As is typical with pickups, the heating/AC vents for the back are under the front seats. The openings let air move around the cellar. The issue always arises: How big can the holes be without significantly compromising strength? I have a full proof solution. I ask my son. He has a degree in aerospace engineering - always use the resources available.
Why no holes on the ends?
I didn't want stuff accidentally falling out when I open the door. I also think some specific tools (axe, saw, walking poles) are going to end up getting attached on these surfaces. Access to the cellar will be through six removable panels, one for each compartment, cut into the deck that will fit on the top. Each of these access panel will be held in place by a compression latch similar to the way Goose Gear mounts their panels.
How did I decide how deep to make the cellar?
The depth is controlled by the compressor for the Firestone lift bags on the rear suspension.
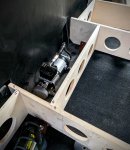
I suspect someone may be concerned about having the compressor enclosed. This compressor is only for the air bags and never runs for more than 10 to 15 seconds. The large holes immediately in front of it should allow for enough cooling. I have an ARB in the engine compartment for the tire work.
The hardest part of this build so far is getting the mounting points where I think they needed to be for strength. The front points were the trickiest.

It's kind of hard to see what's going on but I made an L-bracket for the front of each of the longitudinal cellar frames. These get sandwiched between the seat bracket and the floor of the truck. These brackets will always be left in place. The frame will get bolted to the bracket with a couple of 1/4" bolts each time the cellar is installed.
The next step is to glue the whole frame together in place so none of the brackets go out of alignment. I will use epoxy and after it is set, I'll remove the whole framework and make epoxy fillets in the corners of each of the joints for added strength.
If you are wondering how I'm going to finish this whole mess, I will have it Line-Xed. Our local franchise has been very supportive and helpful. It will cost a few bucks but Line-X is tough.
That's it for today. Stay tuned as this build moves forward.


