From Build To Adventuring... A 1950 Dodge B2B Pickup Story

GoldiesGarage

Well-known member
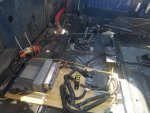
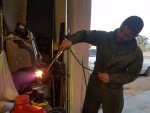
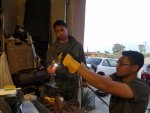
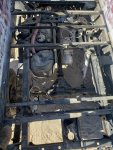
On our way back home from the F&L hose, we checked out a shop to do the exhaust work. First shop wanted $500 and the truck for 2 days. We were not ready to let a shop have it for 2 days. Left and checked out another one. They said they could do It same day and mount our stacks for $500. My Brother agreed. I took about 3 hours for them to finish. Since we didn't have the front clip on, we didn't know what dimensions to stay within.

The biggest problem with our exhaust is that the passenger side is facing forward. Future turbo?? If you buy us one :) You might remember we pushed the engine over to the Passenger side. Now we have header problems. We need to do a 180 to it to the back of the cab. We choose to run the 180 up & back down. We are betting /hoping the hood and the front clip will still fit.

20180504_122624.jpg

20180504_124213.jpg

20180504_130248 60.jpg

20180504_141147.jpg

Once we got home and test fit the front clip. Guess what... Yep, you are right...It did not fit (No fault of the muffler shop). The Up portion wanted to live where the passenger fender resides. In the priority of things the fenders win over the exhaust. I guess we are forced to learn how to make our own exhaust. We were tryin to avoid this but I guess it is whatever. The build must continue.
 

GoldiesGarage

Well-known member
Buttoning some other thing up.

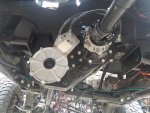
Can't drive the truck without steering. We bought a Summit Racing steering column. Borg Warner U joint. Some DD shaft cut to length and we are in business.
20180506_131452.jpg

20180429_102817.jpg

So we wouldn't have to reach under the floor to shift the transmission. We add a Lokar 4L80e 21 inch double bend shifter. PRNDL for the win. We built our transmission access panel out of 1/8 diamond plate steel.
20180429_111322.jpg

20180506_131459.jpg

For the Transfer case we bought a JB fab shifter. Since we can control our front & rear axle independently, we need a twin stick shifter.
20190323_104052 60.jpg

20190428_153237.jpg

We made a battery tray by using the 2006 Chevy battery tray and some 1/8 diamond plate. We were able to use the factory battery door in the floor.
20180511_074914 60.jpg

20180511_074927.jpg
 

GoldiesGarage

Well-known member
So we have been thrashing on this Blue Beast for about 5 months at this stage. We both would drive to our parents house every weekend to put as many hours in as we could. Reason being, my Boot of a Brother (Ish) is going on his 1st deployment. He wanted to do a donut in the truck before he left in a month. Who wouldn't... right?
20180505_185244.jpg
At some point I got it wired enough to start.
Click here for video :)
**Video of this beautiful 1950 Dodge B2b with the LS engine starting would be there but the computer says the file is corrupted.** :(
20180505_185356.jpg
See the corruption in this photo after start : (


When this happens, it's not that far away moving on it's own. T minus 30 days to: reinstall the front axle, install drive shafts, remake passenger side exhaust, purchase & install a radiator and E-fan, cut/bend the brake pedal & bleed brakes, install gas pedal, and figure out how to put fuel in the gas tank.

Cutting/bending the brake pedal
20180425_192906 60.jpg

20180425_193054 60.jpg

Radiator found a home. This is a Summit Racing LS Conversion Radiator with four 10 Inch fans. Ish is figuring out how to reroute the exhaust.
20180518_174203.jpg

Doing some clearance checks
20180513_164717.jpg
 

GoldiesGarage

Well-known member
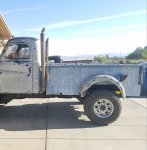
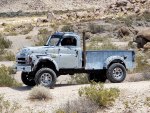
With Ish gone and the truck now drivable. The truck needs a bed. With being the only one left, I guess I'm doing this solo. It will have to grow in all 3 dimensions.(Length, Width and Height) I added 18 inches the length. 12 inches was added to the height. If I remember correctly 10 inches was added to the width.
20180607_171635.jpg

20180607_195042.jpg

I wanted a modern yet vintage vibe/flow with the bed. I moved the rear fender to match the side step height. Drilled out some new holes, threw some type of foam between them. Finished off with some bolts. Later, I filled the old fender bolt holes.

20180611_132047.jpg

20180611_132116.jpg

20180611_134314.jpg

20180611_173733.jpg

20180611_180413.jpg

I came up with a trick way to do the bed floor. Just have to make it a reality.
 

GoldiesGarage

Well-known member
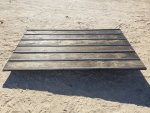
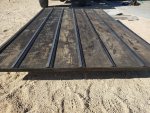
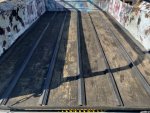
After much deliberation with myself, I was able to come up with this for the floor of the bed.
20210103_105924 60.jpg

20210103_105943 60.jpg

20210103_104454 60.jpg

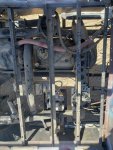
4 Bolts and a two man lift and it's out. This is what is underneath - factory 26 Gallon fuel tank, Vlair twin air compressors with a 2.5 gallon tank and the transmission cooler with a fan have found this space as their home. Maybe some sort of water system, if I can find one that will work for the rig.
20210103_105800 60.jpg

20210103_105739 60.jpg
 

ITTOG

Well-known member
Bed floor looks good. Is it real wood or metal made to look like wood. I can't tell on my mobile.

Sent from my Pixel 5 using Tapatalk
 

GoldiesGarage

Well-known member
Bed floor looks good. Is it real wood or metal made to look like wood. I can't tell on my mobile.

It's real wood. I think it is pine. The cheapest at Home Depot. Oak is SUPER expensive. The "rails/dividers" are metal for hand railing bought at the local metal shop.
 

GoldiesGarage

Well-known member
So with the Bed widened, lengthened and given some more height. I needed to paint it. I didn't want to paint to stand out very much and give it a retro vibe. I decided to try my hand at a lace paint job. I used spray paint to do the job because I didn't want it to look so far out of place. Not like I was going to come out OMG don't scratch the paint type of paint job. The hardest thing about doing a Lace job is finding the right lace pattern. I went to the local fabric store and meandered around. Some of this lace fabric is over $50 per yard. I think the one I used was about $12 per yard. this is how it turned out.
IMG-20210112-WA0002.jpg
Since I was back there, I decided to add the rear tail lights. Many moons ago, on a slightly overcast California day, I was junkyard diving and came across an old bus. I seen the lights and thought they looked super cool. I knew one day a project will come across the could use it. This is that project. I had to do some correction holes so the light was straight. I also curves the base of the lights to match the fender better. I added these LED strips that have Running lights, Brake lights, and sequential turn lights all in one small package. I drilled out 2 holes so I can insert the LED strip in the sealed beam light. Put some clear adhesive glue thing in there and VOILA... working tail lights.
IMG-20210112-WA0008.jpg

IMG-20210112-WA0012.jpg

IMG-20210112-WA0014.jpg

20190602_131506 60.jpg
 
D

Deleted member 9101

Guest
Love your build! I can't wait to do a similar build(2wd not 4wd) when my daughter is old enough to help.
 

GoldiesGarage

Well-known member
Thanks, as all projects it's a work in progress.

Whatcha thinking of building with her? Something old, really old or more modern?
 

Forum statistics

Threads
188,214
Messages
2,903,905
Members
229,665
Latest member
SANelson
Top