Gen 3 Timing Belt job + spark plugs check list (3.8L)

SampaGuy

Member
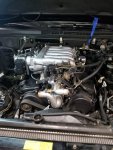
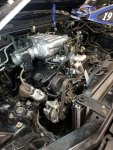
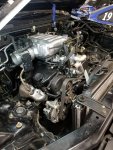
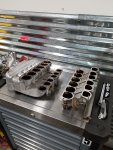
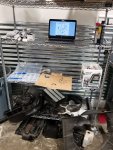
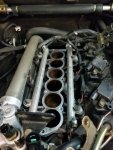
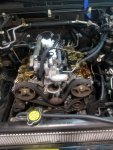
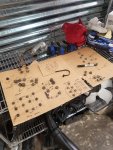
Today was a good day, I have things 90% disassembled. Like they say, this job is not for the faint of heart lol.

I quickly realized coffegoat's write up is for a 3.5L, not the 3.8L. The write up is still very useful because it shows the order of taking things apart (thanks coffeegoat!), and then i refer to the FSM for the specific details (the 3.8L specific FSM is easily downloadable online). The 3.8L has a very different intake manifold and ignition system (only 3 spark plug wires), doesn't require removal of AC compressor, and a few other small things from what i've noticed so far comparing to the pictures in the write up.

My trouble areas today (where I wasted time) and things for other newbies to watch out for:

  • The two black connectors in the wiring harness that have a metal retaining clip. Took forever to figure out how to open them, i was looking for tabs to press but you simply remove the retaining clip and it will disconnect.
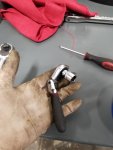
  • The rear bolt of the intake manifold. Holy hell. This is a bolt that you cannot see, you have to feel for it with your hand. Using a wrench sucked, I finally found the best tool for it is a tiny 1/4" swivel ratchet which made it really easy, see picture.
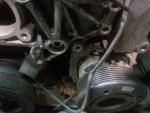
  • The rear bolt of the powersteering pump. What a pain, no room for a ratchet so you have to use a wrench and turn 1/8th of a turn each time.
  • Dropped bolts and tools inside the engine bay. Having a long magnetic pick up tool really saved me
  • There are places on the intake manifold where say you need a 10mm socket. A 1/2" 10mm socket does not work, its too big for the cavity and does not fit, only a 1/4" socket will fit.
 

Attachments

  • 20190514_130411.jpg
    20190514_130411.jpg
    1.8 MB · Views: 28
  • 20190514_130426.jpg
    20190514_130426.jpg
    1.8 MB · Views: 27
  • 20190514_163748.jpg
    20190514_163748.jpg
    1.3 MB · Views: 24
  • 20190514_130426.jpg
    20190514_130426.jpg
    1.8 MB · Views: 27

SampaGuy

Member
Some more pics.
 

Attachments

  • 20190514_164225.jpg
    20190514_164225.jpg
    2.1 MB · Views: 21
  • 20190514_191052.jpg
    20190514_191052.jpg
    2 MB · Views: 23
  • 20190514_163803.jpg
    20190514_163803.jpg
    1.4 MB · Views: 23

SampaGuy

Member
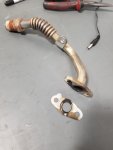
This exhaust return/recirculation pipe gasket seems to be leaking. Is this something any parts store will carry? Is this a generic part or Montero specific?
 

Attachments

  • 20190514_150000.jpg
    20190514_150000.jpg
    1.2 MB · Views: 14

SampaGuy

Member
Also my coolant was disgusting, it has probably never been changed. It was brown and there is some white sludge and white foam (thankfully no strawberry milkshake, if that's even a problem on these cars).
 

Michael Brown

You followed me, so now we're both lost
Yep. Not for the faint of heart. Make sure you put a new o-ring on the metal pipe that enters the back of the water pump housing. It will eventually leak and you will have to take the whole intake off again to reach it.
 

RyanY

Adventurer
This exhaust return/recirculation pipe gasket seems to be leaking. Is this something any parts store will carry? Is this a generic part or Montero specific?
The gasket for the EGR tube is probably not going to be available at your local parts store but it might be worth it to check anyway, maybe it's a shape that's common to other vehicles as well. Keep in mind that the gasket has to withstand hot exhaust gas temps so a typical fiber gasket won't survive.

Flushing your cooling system would be a great idea since your coolant is nasty.
 

SampaGuy

Member
I don't see how the big aluminium accessory mount plate can be removed without removing the AC compressor. It is in the way by just 1/4" or so. I've been jiggling the plate for last 15 minutes (all bolts removed) and AC compressor bracket does not let me get it out. Can anyone familiar with the 3.8L help? I really don't want to remove AC compressor.
 

Attachments

  • 20190515_104915.jpg
    20190515_104915.jpg
    1.7 MB · Views: 16

SampaGuy

Member
Got the AC compressor out. Finally looked at the timing belt, it was definitely not changed recently (I just recently bought the car at 136k miles, it was best example I could find by far, but came with zero records as it was traded in at a used car dealership). So most likely it was on its second belt and I'm changing it now 16k miles late.

For future reference, I have read on internet forums that you do not need to remove the AC compressor if you have the 3.8L. That was not the case for me, the AC compressor bracket is in the way of removing the accessory plate. Unbolt the compressor from its bracket, and move it forward a bit so that you have access to the bracket bolts. Loosen the bracket bolts and then you should have enough room to wiggle the accessory mount plate out.
 

SampaGuy

Member
Ok so my problem now is I'm looking for 1. EGR tube seal and 2. Timing Belt cover seals and 3. large seal between accessory mount plate and front crankshaft. These have failed / are brittle and should be replaced. These are very random seals, hoping parts store will have them.

EDIT: I just ordered a full engine gasket/seal kit, should have done that from the beginning.
 
Last edited:

mahlerous

New member
Do your Crankshaft position sensor, and valve cover gaskets. There is a Gen3 maintenance write-up with all the required parts

Just curious which write-up you are thinking of, there seems to be several and each has a bit of useful info but it's spread-out...
 

SampaGuy

Member
Finished the valve cover gaskets / spark plugs / plug wires today, and timing belt and water pump are out. I really underestimated the time it takes to clean out the valve cover gaskets and get the rails straight. Plus, I couldn't move my timing belt to the timing marks until I put the valve covers back on, since the timing marks are actually on the valve covers. I also discovered my crankshaft seal was leaking and made a mess of the bottom timing cover, i cleaned it up.

Tomorrow i start early on the camshaft seals, then crankshaft seals, then install new waterpump, new timing belt and then goal is to have everything reassembled by evening.
 

normal_dave

waytoomuchwritinginposts.
Wanted to derail a moment to comment on the Continental "Contitech" timing belt kit for the 3.8L offered through Rock Auto, and elsewhere. It doesn't specifically say what brand components it has, but my brother got one for his newly acquired '05, and it was a very pleasant surprise.
Aisin water pump/Aisin gaskets
Koyo idler pulley
Koyo tensioning pulley
Mitsubishi hydraulic tensioner (in Mitsubishi packaging, and dealers show them discontinued...)
Contitech timing belt, made in Germany. Very good looking piece. Their other products are good, I expect the belt to be as well.

Since those of you with the 3.8L that have had to order the tensioner separately, now you have another option, at least while they still have stock available.
517668

While the 3.8L has it's benefits, that A/C compressor sure adds a level of difficulty and time to the project. No real shortcuts there. Compressor must be out of the way, to reach compressor bracket bolts, then bracket really should be removed, to be able to pull the aluminum accessory tree. I tried to just loosen ours to gain access, but as a result, re-assembly of the aluminum accessory "tree" was a challenge vs. the 3.5L.
 
Last edited:

SampaGuy

Member
Hey guys, I am back on the road and it runs great. I did have some unexpected bumps on the road. I will make an in-depth post later this week when I have more time.
 

SampaGuy

Member
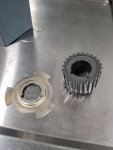
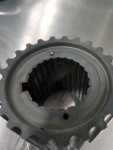
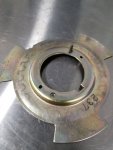
Here is what happened. I got the top of the engine done first (valve cover gaskets, spark plug tubes, spark plugs, wires, intake manifold gaskets, REMOVAL of secondary butterfly valves), put the top of the engine back together, then moved on to the front of the engine. I finished it and put everything back together, and I mean 100% everything buttoned up. Then to my dismay the car would not start, it would sometimes only fire up in one or two cylinders. I had my mechanic friend take a look and we opened the front covers back up to check the timing marks. They were fine. My mechanic friend then plugged in a computer (I forget the exact name of the instrument) to read the crankshaft position sensor signals (which I replaced). The signals were 180 degrees from what they were supposed to be, top dead center on the crankshaft position was exactly opposite to top dead center from the camshaft position sensors. We figured out that I had put the crankshaf position sensor plate without lining up the pins. This is easy to do, because if you look at the FSM, they just show you the order that the sensor plate / spacer / sprocket go together, but you cannot just follow the diagram on the FSM and put each piece back on the crankshaft in order. You have to assemble these 3 pieces together outside the engine (put them all together with the pins) and then put them on the crankshaft as one piece.

I found this thread with someone else who had the same sensor plate problem. It is not hard for it to happen so pay attention!
https://www.expeditionportal.com/fo...3-8l-crankshaft-sensor-plate-question.157350/

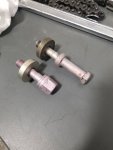
So, I disassembled the whole engine again and removed the new timing belt to get to these parts. Sure enough I had broken the pins on crankshaft sprocket due to not lining them up. I ordered the new parts (about $60 each piece and hard to find locally, I did not have time to have it shipped and live without a car any longer). Then I tested that the engine would start with the timing belt exposed, and it did. Then I put it all back together and now it runs great.

Lessons learned:
  1. When you have your new timing belt on and it is still exposed (you have not put everything back together yet), you can start the car as a test without having any of the accessories mounted. I started my car without accessory belt, AC compressor, powersteering pump, alternator, etc. everything was still uninstalled. Just put your MAF back on the throttle body. That way you can test if everything is ok before you spend hours reassembling.
  2. Be very careful with the Crankshaft Sensor Trigger Plate / spacer / crankshaft sprocket. You need to put these three items together before you put them back on the engine. You can use a small hammer to tap the 3 pieces into the pins so that they hold together at the correct position. The key on the crankshaft is not enough to hold them together, since it is too short and does not go all the way to the crankshaft seal. This will all make sense when you are there looking at these pieces.


This was probably the most rewarding mechanical project I have ever done and I have learned so much. After basically having to do the job twice, I feel like I can take this engine apart with my eyes closed. I have owned cars for over 5 years and didn't know them as well as I know the 3rd Gen Montero, after only owning it for about 2 months.
 

Attachments

  • 20190516_122411.jpg
    20190516_122411.jpg
    790.3 KB · Views: 28
  • 20190516_164753.jpg
    20190516_164753.jpg
    1,020.6 KB · Views: 28
  • 20190517_114638.jpg
    20190517_114638.jpg
    760.9 KB · Views: 26
  • 20190519_133003.jpg
    20190519_133003.jpg
    585.8 KB · Views: 24
  • 20190519_132941.jpg
    20190519_132941.jpg
    476.9 KB · Views: 22
  • 20190519_132936.jpg
    20190519_132936.jpg
    593.5 KB · Views: 22

Forum statistics

Threads
188,287
Messages
2,904,901
Members
229,961
Latest member
bdpkauai
Top