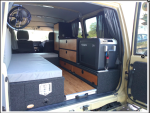
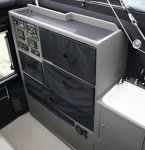
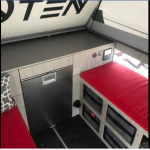
Very definitely, though if you use 1/4" (really 5mm) baltic birch plywood that's pretty light too and def stronger. Coroplast will give you rigidity along the flute/chanel lines, but can be flexible. If you anchor the walls on the side it would be pretty impact forgiving. It's just much easier, cheaper and quicker to work with. No sawing, dust, sealing, finishing, etc. I'm using 4mm but there is a stronger, still light 6mm available, but not at Home Depot.
Thanks! Not sure exactly how you mean "sheathing" WRT the drawer, but just to be clear, the drawers are actually completely made of coroplast, but with some corner and edge reinforcement which actually can be optional. There's no inside frame. The strength comes from the folding. Don't have construction process pictures, but I was garage cleaning this morning and found my cardboard drawer template so I marked it up quickly:
View attachment 700414
Here's a quick how to:
1) Layout and cut the drawer blank (I like a quick cardboard mock-up to verify it's gonna fit first)
2) Slit the top layer ONLY of the two fold lines that go in the direction of the channels/flutes
3) Lightly score with a utility knife the other two fold lines that go across the flutes. (I also run a rotary pizza cutter along the line using a straight edge to break down the little walls). ALL the cuts/scores of the fold lines are done inside the box only. Gives you smooth bottom edges and corners.
4) Fold it up and tape the corners.
You could stop here for a really light duty box if you use good tape. I've made boxes with 2" Gaffer tape that have held up for years. Read on for a more durable one . . .
5) Clean the inside corners with isopropyl alcohol and lightly scuff with ~120 grit sand paper (using the VHB primer as well is even stronger)
6) Apply VHB tape to the corners (dashed lines in the picture) and roll it or press for a good adhesion
7) Fit 4 corner braces of hardware store 3/4' alum angle that you've cut to the box height in the corners and roll/press again. Oh, first clean and scuff the alum angle too. No need for primer on it.
8) If you want real side rigidity, you can buy some hardware store/Home Depot 1/4"aluminum plywood trim channel for edging. You can just press fit this. It will be held by the alum corner braces plus the coroplast
No need for a frame otherwise. The bottom fold lines on each side give rigidity. The drawer I made for my back seat platform is holding 20lbs of stuff and I take it out to store in the house, so I VHB'd another full piece of coroplast on the inside bottom of the drawer for a little more bottom support as its quite long.
I made the drawer in the camper exactly as described and its quite rigid.
If you're gonna work much with coroplast, get one of these:
Amazon product ASIN B00DTNNTTY
Makes it real easy to cut either 1 or both layers along the flutes. You can also use it to make coroplast hinges, and you can make corner reinforcements with it.


