Go big or go home:

IdaSHO

IDACAMPER
Thanks, but all the wood is going to be completely envapsulated in layers and layers of strong and impenetrable marine-grade epoxy. No oxygen or moisture will be able to reach it, even on the corners.

And the epoxy will be protected from UV by paint over it.

What type of ply did you use?

Unless you are using a good ply, without glass the epoxy will check/crack/fail.
Its not a matter of if, its a matter of when.

The only reason I was able to go without glass on my build is because I used a legit BS1088 Okoume ply
 
Last edited:

1000arms

Well-known member
What type of ply did you use?

Unless you are using a good ply, without glass the epoxy will check/crack/fail.
Its not a matter of if, its a matter of when.

The only reason I was able to go without glass on my build is because I used a legit BS1088 Okoume ply
Would I be correct that you chose a specific Marine Grade Plywood to avoid checking of your epoxied plywood?

Would I be correct that although you strove to build yourself a lightweight camper, and encouraged @MTVR to do the same, you think it would be best for his camper if he added the additional weight and cost of fiberglass?
 

ExpoMike

Well-known member
We've gone back and forth as to whether to do desert sand or woodland camo. I guess we still have at least a couple of days to decide...
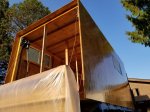
I am in a similar issue of color. I am down to three colors, two of which are similar to yours.
 

MTVR

Well-known member
Four coats of marine-grade epoxy on the left, right, and front outer walls, as well as to the inside of the nesting area for the drawbridge.

We previously applied six coats to the roof, and the bottom of the floor has three. The outside of the basic structure is now absolutely waterproof. No more tarping it every night and untarping in the morning.

We hope to paint it flat woodland green this weekend.

The drawbridge is still in progress, but at least we can winch it up and down. We plan to install the rigid polyiso foam board insulation, foam around it to seal any gaps, urethane glue and screw the outer plywood on, fit it to the opening in the back, fill, sand, and epoxy it, mount the hinge, fab our spare tire carrier, and so on...20200930_180042.jpg
 

nathane

Active member
What angle is the drawbridge going to be at when lowered? Given the height of the truck bed it looks like it will be mighty steep unless it's articulated and double height/length?
 

MTVR

Well-known member
The drawbridge will be horizontal when we're using it as a platform.

When we are loading motorcycles, it will depress below horizontal, but nowhere near the ground- we plan to use a 9-foot motorcycle ramp on the end of it to bridge the gap.

And we have a third winch that will mount high up on the front wall to the right of the front door, to pull motorcycles up that 17-foot composite "ramp" into the garage.
 

Alloy

Well-known member
What will be done to keep the door opening from twisitng (going out of square / cracking the epoxy on the roof ) while going down the road?

Is that Dyneema or steel cable? A bend like that over the roller on steel cable will cause fraying which is nasty on the hands.
 

MTVR

Well-known member
The drawbridge door opening is already very stiff, because of the 3/4" plywood exterior sheathing that is bonded to the framing AND each adjacent section of framing (floor to wall, wall to ceiling, and so on) with fantastically strong urethane construction adhesive.

It will be somewhat stiffer when we bond the inner 3/4" plywood to it.

But to answer your question fully, we also plan to triangulate the corners as much as possible, by structurally tying every lateral internal member into the walls/floor/ceiling. So for example, there will be cabinets in both upper corners that will extend all the way to the rearmost part of the interior.
 
Last edited:

1000arms

Well-known member
Four coats of marine-grade epoxy on the left, right, and front outer walls, as well as to the inside of the nesting area for the drawbridge.

We previously applied six coats to the roof, and the bottom of the floor has three. The outside of the basic structure is now absolutely waterproof. No more tarping it every night and untarping in the morning.

We hope to paint it flat woodland green this weekend.

The drawbridge is still in progress, but at least we can winch it up and down. We plan to install the rigid polyiso foam board insulation, foam around it to seal any gaps, urethane glue and screw the outer plywood on, fit it to the opening in the back, fill, sand, and epoxy it, mount the hinge, fab our spare tire carrier, and so on...View attachment 615480
Any more progress?
 

MTVR

Well-known member
Any more progress?

We've had so many interruptions- most recently, I had to fly to Texas for a few days to buy a ranch. It will serve as a central base of operations for our exploration of the U.S., and it has a 2,300 square foot shop with 17' tall doors, to store our MTVR in.

Today, in spite of the increasingly sketchy weather, we were back at it. We sank the last 12 of 28 box-to-bed mounting bolts. We are both super-stoked about that.

Tomorrow, we plan to start cutting and installing the 3.5" thick polyiso foam insulation boards in the walls and ceiling, and then foam the gaps, to make them airtight...
 

MTVR

Well-known member
To make a long story longer, it appears that we may be moving from Oregon to Texas right before Thanksgiving. There isn't enough time to finish our build, but we'd like to get it fully mounted (done), get the exterior presentable, and get it fully insulated, so that we can sleep in it on the way.
 

Forum statistics

Threads
188,213
Messages
2,903,866
Members
229,665
Latest member
SANelson
Top