GOVE Global Overland Vehicle Economical build.

heimbig

OnTheRoadAtLast
American Force Wheels

wow, looked this up on
http://www.americanforcewheels.com/accessories/adapters
and sure enough they now have 2011+ F450/550 19.5 to 22.5 wheel adaptors $1200 for 4. they appear to be identical to what is on earthroamer, can anyone confirm?
According to their site these adapters work with:
22.5-Rear Inside Steel Wheels with Aluminum Outers
22.0- Rear Inside Aluminum Wheels with Shaved Faces Or
22.0- Both Rear Inside & Outer Aluminum Wheels with Shaved Faces
24.0- Rear Inside Aluminum Wheels with Shaved Faces Or
24.0- Both Rear Inside & Outer Aluminum Wheels with Shaved Faces
26.0- Rear Inside Aluminum Wheels with Shaved Faces Or
26.0- Both Rear Inside & Outer Aluminum Wheels with Shaved Faces
that would have been a great option for me to consider, certainly going to be much lighter and look better - although the look of black wheels is kinda growing on me.
4-21-15:the adaptors are hard to find but still there: http://www.americanforcewheels.com/AFZ170 note their site says their products are for 3/4 and 1 ton only. use google to find the adapters - I have to wonder why it is so difficult to find.
 
Last edited:

heimbig

OnTheRoadAtLast
now that I look closely at the photo I have to wonder what is going on because the F550 lug holes form a 225mm Bolt Circle and a 22.5 hub hole is 220.19mm (8.669) so the amercian force wheel photo doesn't line up with that - so I'm guessing that is the wrong photo.
 
Last edited:

flylow4500

Observer
I was at earth roamer looking for a set of adapters, they sent me to American Force. They led me to believe they have the adapters made for them, to their spec.

Each of the American Force adapters weighs 45ish pounds.

outside of tire to outside of tire is 94.5" or 7.875' for the 89365 with the dish out like ER uses on the back.
 
Last edited:

heimbig

OnTheRoadAtLast
Options for 22.5 alcoa with American Force Wheels Adaptors

A bit of summary:
The Alcoa 89365 is the 'super single' style, Inset 3.12, and cannot be run as a dual and is the wheel earthroamer apparently uses all around, which makes the front 10" wider than stock 19.5. The 89465 wheel has Inset 5.96. flylow4500 told me: on his dodge he "chose to use different wheel for the front and rear. I used part number 89465 (dish in) for the front and 89365 (dish out) for the rear" and he says it is about 8' wide in the rear. but earthroamers don't look 8' wide to me.
Alcoa wheels that work: http://www.alcoa.com/alcoawheels/no...p?q=h&cat=758&system=&size=22.5+x+9.00&circle=
At any rate I'm not changing, but the combo Alcoa/American force would have weighed 10 to 20 less than all steel. ALSO the cost would be very similar to the Steel wheels - maybe a bit cheaper for the aluminum option. Of course with the steel you can get exactly the inset you want.
It is interesting to see new options appear.
 
Last edited:

heimbig

OnTheRoadAtLast
Winch emergency shutoff, Fuse, Security lighting, other electronic bits

After attending winching class at overland expo I felt I needed an in-cab emergency shut off and not just rely on the fuse. So I needed a place for a Blue Sea 7701 ML Solenoid (relay) that wouldn't involve rerouting or adding any 4/0 cable and while I was working on my fenders the perfect spot presented itself. Little orange line is air:
4-0-1.jpg
The solenoid requires power only to turn on or off, no power used once switched. The switch itself is lit.
After install (sorry such a bad picture below), with smaller red cable to the front winch, and 4/0 cable from fuse. The solenoid not only kills both front and rear winches but also the motorcycle crane/winch and all the accessories in the garage, truck bed boxes, aux tank fuel pumps, as well as the connection to the camper and its 12V input / 12v output charging system - but not vehicle lights.
4-0-4.jpg
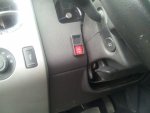
Remote switch in dash mounted included in Blue Sea #7701 (5 little wires go from here to the solenoid):
4-0-a1.jpg
Below are the 4/0 cable connections from the truck Aux battery, front winch ground cable, and fuse holders (see next photo)
At left you can see a small black box above the firewall - a wireless receiver - (blue wire is antennae) that allows me to turn on the 4 (mounted in bumper) Rigid Industries D2 LED lights. There is a set of relays I installed near the bumper to allow me to isolate the remote control and in-cab function of driving lights allowing me turn on the driving lights and floodlights separately from the cab but one fob turns on all 4 of these LED headlights.
The same fob also actuates a wireless receiver in the garage controlling the Rigid Industries 96411 M-Series SR-Q White Floodlight Flush Mount backup lights (and similar relay for their use as backup lights).
A different fob controls left and right (independently) M-Series SR-Q Floodlights that are (or will soon be) mounted flush high on each side of the camper (approximately above the truck rear passenger doors). This allows remote control, with 2 fobs: 1) all front and rear LEDs 2) left only camper side mounted LED and/or 3) right only camper side mounted LED.
All of these lights are off-road only legal and remote control fobs allow me to use them for security from inside the camper or while parking the rig in some remote place or walking up to the truck and want a LOT of light shining on any bad guys. I should wire in the air horn too :)
4-0-6.jpg
Below:
Wireless receiver on left
Small fuse holder system made with ABS plastic attached to firewall. Mounted blue sea (various amp #7050 #7054) (3 little white) push button reset only circuit breakers for various things - with room for more breakers.
Blue Sea Systems #5503 ANL fuse holder (500 Amp ANL fuse not installed and cover not on) battery connected on right, big solenoid connect to left.
power connections on the hot side of the ANL fuse going to the small fuse holder with spare wire for future.
4-0-7.jpg
That's it. Up next: Mexico
 
Last edited:

DiploStrat

Expedition Leader
Last spring I gave in and installed 2x68 watt solar panels. These are very light (7 lbs each?) and attached directly to the roof. I followed the unisolar PVL-68 panel instructions, pretty straight forward. I used 10/2 SEOOW Portable Cord to connect to the CTEK d250s Dual charger (which includes MPPT controller) already installed.
I punched a hole through the roof (left on picture below) and installed the 10/2 cable. I used painters tape on the ceiling to seal it up then used 3M Marine 5200 Adhesive Sealant in blue package (not the quick cure 5220 stuff in red package) the 5200 sealant 'flows' slowly for about a day into any cracks and crevices. Most of the flow occurs over the first 2 hours, you may have to 'top off' the adhesive or you'll have a depression. If you don't close of the bottom opening thoroughly with tape or something it will flow right out. It takes 7 days to set up but wow it works great.
What can I say the panels work. But not terribly useful. In Mexico last summer I'd estimate that we got an extra day out of the batteries for every 3-4 that we camped. Since we didn't use A/C, or microwave, or stay in one place longer than 4 days we never needed the generator. With 80 degrees at night and 95 to 105 during the day the fridge ran almost constantly and we kept fans running most of the time too - so we had a pretty good load.
The panels below might look oddly spaced and we have room for more but we want to be able to walk on the roof and you are not supposed to walk on the panels so that is probably the limit for us.
View attachment 255299
View attachment 255300

Not surprising that you didn't find solar very useful; 130w of solar is a sneeze in a hurricane for a rig like yours - and you went with less efficient panels. Get your solar kit up to around 500w of free mounted glass panels and you will be seeing well over 30A of charge in good sun. What I am basically trying to say, and not succeeding, is that your solar kit is so small that it is a bit like putting a lawnmower engine on a semi and deciding that internal combustion engines aren't practical.

The one great advantage of solar, even a rig as small as yours, is that it continues charging late in the day, giving you a better absorb/acceptance charge and this will contribute to better battery life in the long run.

 
Last edited:

westyss

Explorer
Not surprising that you didn't find solar very useful; 130w of solar is a sneeze in a hurricane for a rig like yours - and you went with less efficient panels. Get your solar kit up to around 500w of free mounted glass panels and you will be seeing well over 30A of charge in good sun. What I am basically trying to say, and not succeeding, is that your solar kit is so small that it is a bit like putting a lawnmower engine on a semi and deciding that internal combustion engines aren't practical.

The one great advantage of solar, even a rig as small as yours, is that it continues charging late in the day, giving you a better absorb/acceptance charge and this will contribute to better battery life in the long run.


This is true but there is also another potential problem with these panels and that is how they are being hooked up and what type of charge controller you are using.
They dont produce a very high voltage.
If you have hooked the two panels up in parallel where you are only getting the very low voltage at Pmax (Vmp)of 15.4 V then with voltage drop from the wiring depending on size and length could be significant enough that the controller cant cram the power back into the battery, the controller that you are using with this set up and how it was wired could solve the issue, if you have an mppt controller that can accept the total voltage of 30.8 volts then wire the two panels in series to get the 30 volts into the controller and let it maximize the flow into the battery, that is really the best way of using these panels. Now depending on what is consuming your power it most likely will need additional panels but wiring it up to get max output from the controller is a good start.

I have three of these panels on my rig and they are hooked up to a controller that can accept up to 70 something volts IIRC so they are wired in series putting out 47 or so volts that the controller makes full use of to keep those batteries charged up, and the nice thing about these is they will start producing some power in very low light or when the sun is not very high in the sky extending the time they produce power.

Really the best way is to estimate the amount of power to be consumed, add a whole lot to that number then design the solar system to accommodate it.
 

heimbig

OnTheRoadAtLast
uni-solar panels are very light weight (17.5 lbs for 2), require no air gap under them, are not terribly sensitive to partial shade, but are not very efficient per square foot.

The max output voltage is 16.5 each. The max input voltage of the CTEK d250s/smartpass MPPT controller is 23 Volt. so wiring these in series would be a bad idea. Instead I used oversized 10/2 SEOOW Cord for the panel to MPPT connection attaining similar loss as going high voltage. I actually got over 140 Watt output in full tropical sun - so I think I did ok.
 

DiploStrat

Expedition Leader
Series or Parallel

Wiring panels in series or parallel is almost as hot a topic as PWM vs. MPPT. (I'll let dwh explain that one.)

-- Pro series: You will get lots of voltage which will make an MPPT controller happy. Probably don't want to go much above 18v with a PWM controller.

-- Pro parallel: Less loss if one or more panels are shaded, as is usually the case, especially where you have a lot of trees.

In any case, you want to size your wiring properly for minimal voltage loss.

In the end, however, watts is watts, whether you measure amps or volts and recharging batteries takes lots of watts and lots of time. More time than you expect as the charge rate drops dramatically once your batteries are about 80% charged. Thereafter it is simply a matter of time. Lots of time and this is where even a small solar kit is so much more economical than a generator or your vehicles alternator.
 

Garbonz

New member
AC setup?

I've looked through the thread and son't see any details on the AC install? Can you provide.

Thanks
 

heimbig

OnTheRoadAtLast
AC setup

not sure what you are referring to. the AC setup is a 5000 BTU window mount unit - that is the standard way Phoenix builds them and is what I wanted (I did NOT want something on the roof). In my case it was supposed to blow cool air over an under-counter refrigerator however, I made a last minute change to a full size refer, this blocked the A/C and made it much less effective - well really not effective, I'm going to move the A/C to the window between the camper and the truck. Which means the emergency 'escape' pass-through will be much less effective - I'll still be able to remove the A/C in about 30 minutes so no longer an emergency escape method. But I'll still use it when I know ahead of time I need it. I really have little choice.

5000 BTU seems to be plenty of cooling but stuffed behind the refer is just not the right place.

you can see the covered A/C unit in this photo, just behind the rear drivers side door:
http://www.expeditionportal.com/forum/attachment.php?attachmentid=169539&d=1372358559&thumb=1
 

heimbig

OnTheRoadAtLast
For sale, GOVE stuff, on the Equipment for sale forum, tires, bumper, winch extension

Stuff I have left over from the build:


Last edited:

Forum statistics

Threads
188,182
Messages
2,903,497
Members
229,665
Latest member
SANelson
Top