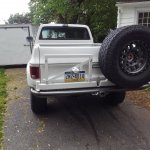
Great White: A Chevy K10 Build

Ouiwee

Observer
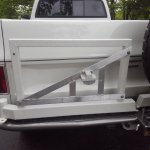
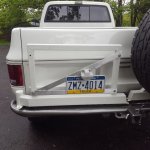
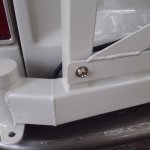
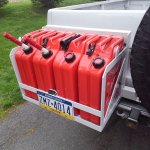
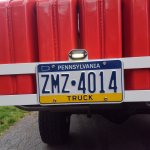
I got the rear rack back from paint and installed. Notice the titanium bolts that hold on the license plate--just like the bolts on the fender flares. I might swap out the ordinary stainless bolts that hold the rack on as well just to be stupid.
513751

513752

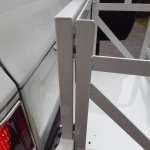
I turned some spacers out of delrin to make up the difference between the 1.5" tube and the bottom 2" tube.
513753

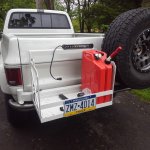
The rack can hold other things as well.
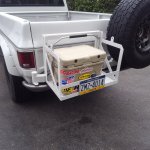
513754


I intend to add a hinged aluminum plate on the back side of the swing-out that drops down when the swing-out is open. It can be used for a work surface, someplace to put a stovetop, and so on. I started working on a flat panel that will use the same bolt holes and hold the license plate and light. I should have that sorted out this weekend.

I have to work out the locking bar that slides through the tabs on top. Some 7075 aluminum might work well. The rack is really light and holds my weight without too much flex.

The AC is flushed, lubricated, and reassembled. It held 25 inches of vacuum over night. The weekend should see cold air blowing in the cab. This thing is really coming together.
 

chilliwak

Expedition Leader
Nice looking bumper Mr Quiwee. Did you fabricate that yourself? Thanks for posting pics. Cheers, Chilli...?
 

Ouiwee

Observer
He pretty much built everything but the original truck.

That might be a bit of a stretch...

I got some work done this weekend. The swing out license plate holder looks like so.

514311

514312

I'll likely have to figure out how the rear view camera will mount to the swing out. I'd like to augment the back up-lights but don't know which way to proceed. I could mount a light bar on top.

514313

But somehow I don't think the light would make it through the tire. Another approach is to mount a pod on each side. I might not be able to see directly behind, however.

514314

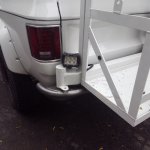
Maybe not a crappy old light I took off the Army truck, but you get the idea. I also put a rubber bumper on the side there to avoid the rack hitting the side of the truck. I need to get some gas struts installed so they don't open farther than I want.

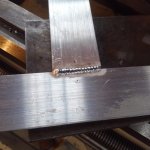
At least my aluminum welding has improved.

514315

And in further news, the AC is working just fine. The LT4 hardly changes idle at all despite not having an idle bump when the AC is turned on.

I got around to insulating the floor and installing some carpet (after the requisite swearing). The difference in noise level is profound.
 

Ouiwee

Observer
I have been doing regular inspections when I drive any significant distance. I noticed a slight bit of oil on the oil pan near the front. I kept my eye on it and sure enough the front crank seal was leaking very slightly. I put a new seal in it yesterday and took it for a trip today. The bottom is as dry as a bone now. There are no leaks whatsoever from the drive line.

For those who might go down a similar path, the crank seal should not be lubricated when installed. I put a slight bit of oil on the ATI damper hub prior to pressing it on the first time. I don't believe the seal broke in properly because of the oil. It could also be that I nicked it at some point as well.

If I were to do it again, I would buy a new front crank seal and just install it while the damper is off.

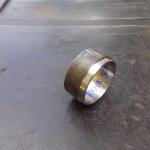
I made this tool from a piece of pipe to install the seal.

518544
 

Adventurous

Explorer
For the backup lights, you could also mount a single row bar or pod between the two rails on the rear bumper. You might experience some light cutoff up high with the Jerry can holder on there, but otherwise it may be cleaner than trying to put a bar on the swingout.
 

Ouiwee

Observer
I installed the Dakota Digital CRC-1000 cruise control today. It ordinarily plugs into the OBD-II port, but the gauge cluster (DD BIM-01-2) is connected through the port. So, I tapped the CAN at the interface instead. The unit interrupts the signal coming from the accelerator pedal and uses the speed sensor through the ECU to adjust speed.

I had to install a relay to actuate the clutch cut off. The top of pedal switch is currently used by the ECU and is closed except when the pedal is pressed. The problem is the cruise control is looking for either a 12 v or ground, depending on which you choose. The switch currently has 12 volts going through it when the clutch pedal is up and none when the pedal is pressed. So, I wired a relay that provides ground when I hit the pedal.

For some reason, the unit needs 12 volts on the hot side of the brake switch as well as 12 volts on the cold side when the brake is pressed and ground when it is at top of pedal. The ground can be tricky with LED lights, which I have, but it worked in my case.

I put the additional wires in a new Packard female connector and crimped them all together and inserted the connector into the plug instead of splicing into the wiring. I had to use a 10 gauge connector on the one side since the switch is connected to other things (e.g., trailer brake controller).

The electronics all work in unison, so I get a light in the cluster for cruise on and so forth. The cruise is slightly noticeable at low speeds (e.g., 40 mph) but nice and smooth at highway speeds. Using the Dakota Digital gauges and controllers makes this a very simple affair and I have accurate readings and much more data than the stock cluster.

I'd rather DD keep the same colors as GM, but they differ for the controls on the stalk:

GM -> DD
Blue -> Red (power to switch)
Green -> Brown (cruise on)
Red -> Green (Set/coast)
Yellow -> Yellow (Resume/accelerate)
 

Ouiwee

Observer
I have decided to install a secondary oil cooler in the front just between the cross member and bumper. I'll have the parts this week and it shouldn't take too much time to do. I'm hoping to go wheeling this weekend, so will have to get back to it after that. I still need to install a power steering cooler at some point...

I took the truck on a visit today that totaled 270 miles. It was through the mountains of central PA and about 75% highway at just under 80mph. The remaining 25% was 45 to 55 mph mostly and some traffic in Harrisburg. I didn't have the cap on the truck and no tonneau cover over the bed. The spare tire sticks out over the tailgate and grabs some air, I'm sure.

It required 18.2 gallons of fuel, which amounts to just about 15 mpg. I'd hazard to guess that with the spare in the bed, a tonneau cover, and keep it around 70, maximum possible is 20 mpg and realistic best is maybe 18. So, if someone else decides to go with an LT4, those are my numbers with a new, completely broken-in power plant.

I was tickled with the last set up if I got 12 mpg. I think the old CUCV gets 20 no problem...but won't go over 65 mph.
 

Ouiwee

Observer
I got the titanium bolts for the rear bumper rack.

524444


It is bling, I confess.

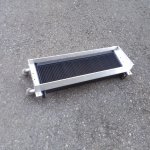
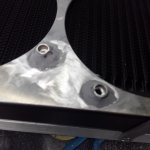
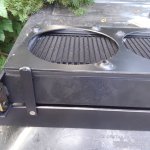
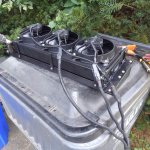
The oil cooler fabrication is underway. The shroud will angle the cooler to help scoop air from under the truck and make room for the two 5.5" fans that go behind it.

524445

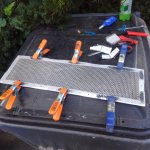
The bottom is shown up here and will be covered with a stainless steel mesh to provide some impact protection and keep gunk out of the cooler. The Canton thermostat routes oil through the cooler when the temperature exceeds 215 degrees Fahrenheit. The thermal electric switch that turns on the fans will be located on the cooler circuit and turn on at 200 degrees, which means when oil is routed through the cooler the fans will turn on.

The oil-to-water 'cooler' on the LT4 strikes me as more of an oil warmer. With 12-15 quarts of oil in the system, it is important to get the oil up to temperature as soon as possible and the 'cooler' is good for that. Once the water temperature is high and the engine in boost, I don't think there is much capacity left to cool the oil. An auxiliary cooler the size of this one should pull a significant amount of heat out of the engine (Setrab Series 1, 60 row). I will evaluate a small scoop on the bottom of the intake path to the cooler for highway use. It ought to get good air flow at highway speed where I am putting it.
 

Ouiwee

Observer
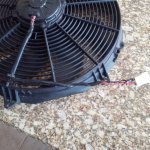
Thermal stress test 2 has produced some results. The Spal 30102113 fan does indeed pull a bunch of air. However, if you read the fine print (unlike I did) it should not be used in temperatures over 176 degrees or for continuous use in excess of an hour. If you do not heed the warning, here is what you get.

524842

I cannot understand under what automotive conditions this fan could be used since any radiator will produce temperatures in excess of 176 degrees. Further, I cannot fathom what sort of circuitry would be required to make sure the fan doesn't run for more than an hour at a time.

Don't buy this fan.
 

chet6.7

Explorer
I put a Spal in front of my AC condenser to run when the truck is idling because the Ram AC/fan clutch programming is poorly implemented.It seems I am lucky,I haven't used the fan much,thanks for the heads up.
I just used your part number,I don't have the same model Spal fan.
The quote below is from Summit Racing.
"This fan is designed for use in paved oval stock car racing. The fan motor is not sealed and should not be used in the following conditions. 1. High dust, dirt, and/or wet environments. 2. Unusually high ambient temperatures (exceeding 176 degrees F). 3. extended/continuous modes of operation exceeding one hour in duration. Standard warranty conditions do not apply to this fan."
 
Last edited:

Ouiwee

Observer
I replaced the ruined fan with one that pulls 1900 cfm and it works just fine. I drove 500 miles through the mountains on Thursday in 105 degree road temperatures with the AC on with no trouble.

However, even in 90 degree temperatures, the fan pulls so much air that the engine does not reach operating temperature (which is 200 degrees for the LT4). I currently have a diode on the AC +12v turn on circuit that kicks on the large fan. I believe it might make more sense to have a pusher fan on the AC condenser that operates independently from the ECU and turns on when the AC is activated. That way, the ECU would be commanding both puller radiator fans.

The oil cooler, which has come a long way, will be independently controlled by a separate Davies Craig fan controller. I can set the controller to a 220 turn-on temperature to sync with the Canton thermostatic valve.

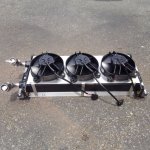
Here is an update on the cooler.

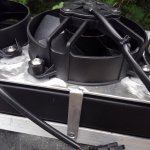
525824

525825

I made some spacers out of 3/8" aluminum tube to accommodate the fan mounting plane. Rather than fumble around in the field looking for where the spacers fell, I just epoxied them to the bracket. Not the best picture.

525826

525827


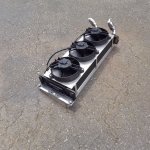
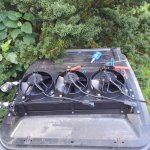
I have it painted and mounted. I'll take some additional pictures today. I think the location is just about perfect for picking up fresh cool air. The three fans should pull a significant amount of heat out of the radiator.
 

Ouiwee

Observer
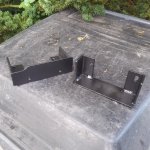
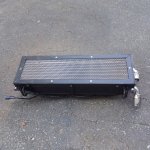
I painted it last night. Here are the side brackets that mount the cooler inside the frame.

525831

Here you can see the gasket that seals around the cooler.

525832

525833

Back side view with Deutsch connectors installed.

525836
 

Ouiwee

Observer
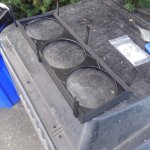
And the rock shield, given the location it is reasonable to expect some debris. The entire perimeter is loaded with epoxy once the initial position is set. The epoxy is surprisingly strong in this usage--I have used it on other applications with good results.

525837

525838


I have the wiring harness started.

525839
 

Forum statistics

Threads
188,343
Messages
2,905,866
Members
229,959
Latest member
bdpkauai
Top