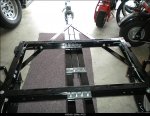
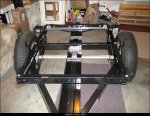
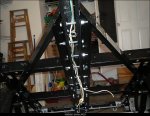
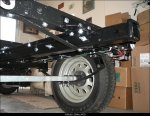
Harbor Freight (type) Trailer Suspensions

krick3tt

Adventurer
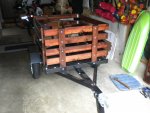
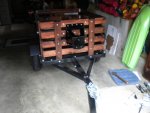
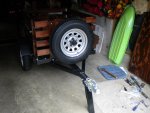
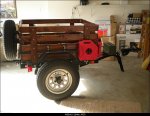
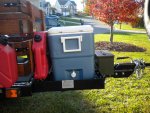
Never did think about an upgrade to the suspension as the trailer performed well as is. Did make a box for it with a top that can be locked but also removed by slide out hinge pins. Mounted cans on the fenders and a propane tank on the front of the box. The top has a bit of a rail to secure items. The box can be unbolted to attach a different arrangement to the trailer frame.DSC03771.jpg
 

jgaz

Adventurer
If you wanted to cover more of your build I don’t think anyone would complain, I know I wouldn’t.
For example, when you describe your trips you speak of what went right or what you learned. Real experience is always interesting to read.
Your tent cot idea is very well done.
Edit: I did find your smaller build thread from 2011? that answered some of my questions.
 
Last edited:

rnArmy

Adventurer
If you wanted to cover more of your build I don’t think anyone would complain, I know I wouldn’t.
For example, when you describe your trips you speak of what went right or what you learned. Real experience is always interesting to read.
Your tent cot idea is very well done.
Edit: I did find your smaller build thread from 2011? that answered some of my questions.
I would be happy to do that. Stay tuned....
 

rnArmy

Adventurer
In the beginning... We'll go back to around 1995.

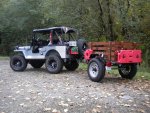
I bought a little 4' HF trailer frame like the red one below to pull behind my little Willys flatfender (46 CJ2A) when I was stationed at Ft Gordon, GA.

four foot trailers.PNG

It had a plywood floor, and I put wood slats on it for the four sides. I used it to haul base camp camping gear behind the Willys when I'd go on a four-wheeling trip (anyone remember Tellico in NC?). It worked fine. In 1996 my wife decided she wanted to become a hermit in FL while I was getting ready to go to WA to grad school. So we got divorced. I had to sell my 56 Willys truck (ouch), and I traded in my 1990 Isuzu Pup for a 96 Dodge Ram 1500 4x4 to flat-tow my Willys to WA. She got the trailer (later she sold it to her friend and they pulled it behind a large motorcycle). But I always remembered that little trailer.
 

rnArmy

Adventurer
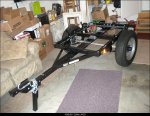
Fast forward to 2008. I'm stationed back at Ft Lewis, WA, and now have a wife and three kids (one heading to college), along with another Jeep (98 TJ). And I decided I wanted another little trailer, and I didn't have a lot of disposable income. I saw on Harbor Freight's website the black one in the picture in the previous post. For some reason I really liked the two additional supports for the tongue, so I ordered it. It had a metal floor, and like before I put wooden slats around the four sides.

DSCN0294.1jpg.jpg

One of the first things I learned was I needed something on the tongue so when it wasn't connected to a vehicle, it would sit level. So I bought a fold-down tongue stand, and bolted it to the tongue.

Another thing I learned, was I needed a place to put the spare tire. I ended up bolting laying it flat and bolting it to the tongue in front of the tub.
 
Last edited:

rnArmy

Adventurer
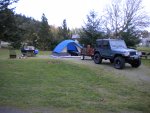
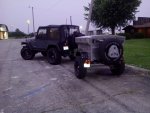
So the first real trip we took with the lil' trailer was around the Olympic Peninsula with the TJ. We loaded up the Jeep and trailer, and headed out for a few days. Notice the spare tire bolted on the front of the trailer.

Paul and Keith heading out.pngPaul and Keith Jeep camping75.JPG

I put a board across the back of the trailer to use as a table for cooking. For our gear, we placed a tarp in the empty trailer, put our gear on the tarp, and then folded the tarp over the gear and strapped it down. It basically worked. It rained a lot on this trip, and it leaked just a little. And it was mostly paved roads. The trailer tracked just fine behind the Jeep.

Some of the things we learned on this trip:

1. There's not much you can put inside the back of a TJ. Having a little trailer really helps. Look how high stuff is stacked in the back of the TJ in the first picture above.

2. There's gotta be a better way to keep your stuff in the trailer dry and accessible besides wrapping it up in a tarp. Even then I was thinking some sort of aluminum box for a tub.

3. We were running a pretty big drop hitch to keep the trailer level (and it still wasn't level). There had to be a better way to do this. And notice I hadn't put the drop-down tongue stand on the tongue yet.

Paul and Keith Jeep beachside81 (2).JPG
 
Last edited:

rnArmy

Adventurer
So after that first trip, I set about trying to fix the areas for improvement.

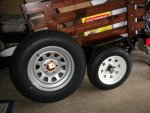
1. I decided larger (taller) tires were needed to raise the trailer up some. 205/75/15" is a very common trailer tire size on a 15" rim 5 on 4.5" bolt pattern, so I got three of those (always have a spare!). However, in order to get them to work on the trailer, I needed a wider axle. The factory axle on mine was a 4 on 4" pattern, and it wasn't wide enough for the new tires to mount without the tires being pressed against the tub (even if I did find a bolt pattern adapter). A lot of folks think all you need is a bolt pattern adapter (or convert the hub from a 4 on 4" to a 5 on 4.5" pattern) and you can mount up anything. Nope. They don't make spacers/adapters that wide, and even if you had one made, it would cost more than a new axle would, and you'd end up bending that little spindly axle that comes factory on the trailer. Axles are actually fairly cheap if not going with electric brakes.

2. I also mounted the new axle below the factory slipper springs for additional height.

Jeep tires 002.jpg

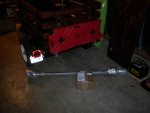
3. While waiting for the axle to arrive, I also wanted to address the ability to carry extra fuel. When out in the middle of nowhere (either overlanding or on the highway) having extra fuel is insurance. There were times I was out that I was wishing I had extra fuel just-in-case. So I mounted a four-gallon Kolpin fuel cell to the back of the trailer's tub. It is also resting on top of the little D-ring mount thingies I put on the back of the trailer's frame.

New axle 001.jpg

4. One thing I learned doing this is now I needed to raise the fenders, and move them out some to cover the new tires on a wider axle. Which I did.

5. Now I needed to mount the spare tire differently. The new wheels with the 5 on 4.5" bolt pattern is the same as the TJ's. So I got a TJ spare tire carrier, and mounted it to the front of the trailer tub with the tire resting on the frame (so the wood slats weren't supporting all the weight). It worked out well.

Jeep trailer spare and gas 005.jpg

Jeep trailer spare and gas 008.jpg
 
Last edited:

rnArmy

Adventurer
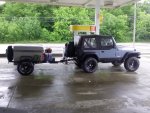
So that's how the trailer was when I took it to Moab (2011). It was a two-day drive from WA, and I was carrying basically camping stuff to set up camp (stayed at a KOA outside of Moab). I wasn't "living out of the trailer". The trailer pulled just fine. Having the extra gas made me feel better when in the middle of nowhere. Still using a tarp to cover all the gear in the trailer, which works if you're just traveling, but is a pain if you're wanting to get in & out of it.

driving to Moab 002.jpg

A couple of things I forgot to mention earlier:

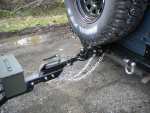
1. My back bumper, while having a 2" receiver on it, it didn't have the loops for the safety chains. So they had to be welded on (two pictures down).

2. And to be safer when towing, I got a pair of bumper/frame brackets from ROKMEN to tie the bumper to the frame.

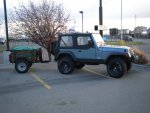
I still needed something to raise the tongue just a little more. And I wanted to be able to pull the trailer using a pintle hitch. So to fix that, I had a piece of 2" receiver tube welded to a section of square tubing, and bolted it to the end of the tongue. Now I had a slightly longer trailer tub, with the ability to use either a 2" lunette ring (for using a pintle hitch), or using a piece of square tubing with a regular 1&7/8" coupler for a ball mount.

trailer hitch mods 003.JPG

pintle and lunette ring.png

And I also realized I needed a place to carry trailer "stuff" like spare lug nuts, socket for the lug nuts, paperwork, a spare hub, bulbs, etc. So I mounted an ammo can on the tongue in front of the trailer.

I also decided I wanted to carry even more fuel, so I put a 1.5 gallon Kolpin jug in front of each tire on the tub. Three gallons might not seem like much, but 3 gallons x 15 mpg equals another 45 miles I can travel.

Pumpkin and Jeep trailer 322.1JPG.jpg
 
Last edited:

rnArmy

Adventurer
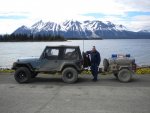
The next trip (my buddy and I) was a three-week trip up to Alaska and Canada. I knew we needed to do something better than the tarp thing for securing gear. So I came up with the idea of a vinyl liner for the tub (which I had an upholstery shop make). Essentially, it was a large square vinyl bag that lined the bottom and sides of the tub, and folded over the top (like putting a plastic bag in a trash can). Then a separate piece went over the top (think a separate shoe box lid) and was strapped down.

Jeep and trailer with liner.png

Alaska%20remainder%20of%20trip%20004.jpg

The trailer did fine. A few lessons though:

1. The trailer went airborne a couple times when hitting potholes. No flex in the factory slipper spring suspension.

2. All that movement rubbed wear spots on the inside of the liner.

3. It was a major pain when wanting to get into the tub. The liner set-up kept stuff dry though. However, the cooler was in there, and stuff was packed on top of the cooler. So if you wanted to stop along the drive and get a soda, it was a production to get into the tub and into the cooler. And the cooler took up a lot of space inside the tub - needed to address that. A cooler tray in front of the tub?

4. We picked-up a 10' pop-up canopy during the trip after camping one night in the rain in Whitehorse, so that got strapped to the top of the gear (in above picture). But there was no way we could take all the gear we wanted without the little trailer. I was definitely earning its keep!

5. Sometimes we would unhitch the trailer depending on the campsite. The pintle hitch and lunette ring setup really made it easy. And no, we did not find it noisy.

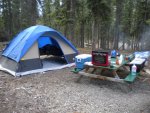
Alaska camping set-up.jpg
 
Last edited:

rnArmy

Adventurer
Ok.. next duty station was Ft Campbell, KY. I was only there for two years (and eight months of that I was in Afghanistan). But I made a lot of changes to the trailer based on lessons learned. One of the things I did was a cooler tray for the front.

Before I could start on that I had to swap ends with the spare tire and the Kolpin 4 gallon fuel cell. Notice I have an axe mounted behind the spare tire attached to the tub (I was already bolting extra stuff to the outside of the tub). And in this picture, if you're observant, you'll see I've already swapped out the suspension (I guess I did the suspension before the cooler tray).

This goes into more detail and shows more pictures (click on it and scroll down):

Mini Harbor Freight (type) Trailer Ultimate Build-Up Thread - Page 68 - JeepForum.com

New truck tires and trailer mods 001.JPG

Then I got one of those 2" receiver hitch tray things, and removed the hitch parts. Then I narrowed it to 36" wide (took a section out of the middle). I reinforced the front and back with angle iron, and bolted it to the front of the trailer. It worked out nice!

New truck tires and trailer mods 004.JPG

trailer tray updates 010.JPG

Now before I did this, I checked to make sure I could still pass the "90-degree" test. It is a simple test; can your trailer be attached and 90-degrees to your tow vehicle and not be hitting anything? I could. It is kinda important your trailer can pass this test, especially if going off-road.

trailer tray updates 001.JPG

But afterwards... fail. I needed to extend the tongue. Not only that, but my tailgate was hitting the cooler before opening all the way. A tongue extension was in order. A lesson learned I guess - plan on domino effects whenever making changes to your trailer!

trailer tray fail.1.JPG

trailer tray fail.2.JPG

But I was happy with how the tray worked out. It is very solid. The cooler fit on the tray just fine, and the 4-gallon Kolpin fuel cell fit between the cooler and front of the tub. I'm still extremely pleased with how this cooler tray turned out. It so frees up space inside the tub. And we have ready access to drinks when driving, and when cooking on the tailgate, it is nice having the cooler right behind me. The cooler also serves a second purpose totally unrelated to storing food (more on that later). But now I just had to extend the tongue to pass the 90-degree test.

trailer tray fail.3.JPG
 
Last edited:

rnArmy

Adventurer
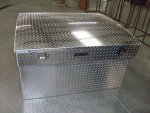
It was about this time I ordered the diamond plate aluminum tub. I'd been wanting one for years. I found a place that made diamond plate aluminum dog hunting boxes for trucks, and saw they knew how to bend and weld aluminum well. We emailed back-and forth a bit, and agreed on a design, measurements, and a price. I ordered it, and they built it and shipped it to Nashville, where I picked it up. FINALLY!!!!!

Just think of it as a big aluminum diamond plate truck box in the shape of the old WWII Jeep trailers. Which is what I wanted. This shape just looks right when pulled behind a Jeep. And it still needs to be something I can pull behind the Willys.

I had considered having a bear box built (a bear proof box), but they couldn't/wouldn't make one in this WWII trailer shape (we communicated). It would not have been certified bear proof (a technicality), but would have been built to the specs of their bear boxes. This actually would have been stronger than what I have now. If I had just wanted a rectangle box built to put on the trailer's frame (with a base of 40" x 50" by about 27" tall), this may have been the route I would have gone. No regrets though - I'm very happy with what I've got.

IGBC Certified Bear Boxes | Mad Cow Metal Works

trailerbox.4.JPG

trailer box.5.JPG

trailer box.6.JPG

But before I could mount it on the trailer frame, I needed to strip it of the current wooden sides, remove the metal floor, and extend the tongue. Mounting the box was actually the easy part once all that was done. Next up: Tongue extension/frame reinforcement. And no welding involved.
 
Last edited:

jgaz

Adventurer
Thank you!
I forwarded this thread to my nephew. I’m afraid his trailer project stalled after I left Michigan and he moved to Colorado.
 

rnArmy

Adventurer
Thanks! I'm trying to keep this to a "lessons learned" focus, and not a "how-to" focus. A more detailed write-up can be found in the trailer thread below.

Start here and keep scrolling: Mini Harbor Freight (type) Trailer Ultimate Build-Up Thread - Page 86 - JeepForum.com

So next was to extend the tongue, and get the frame ready for the box. I moved the factory tongue forward, but now it was only supported by the front crossmember of the trailer, and not attached to the middle crossmember. So I took some angle iron, and ran it as far forward as I could, and all the way back to the rear crossmember (and actually a little beyond). I sandwiched the factory crossmember between the angle iron, and also added a 24" section of 2" receiver tubing at the rear, and had it sticking out about 8" further than the rear crossmember (for the spare tire to rest upon). Lots of bolts to tie everything in together. I also reinforced where the angle iron attached to the factory crossmembers. Pictures tell a lot:

Trailer extension.2.jpg

You can see how I spread the load across the crossmembers and added additional bracing (painted silver). It helps with any twisting the tongue might experience when off-road.

Trailer extension.3.jpg

It is actually a pretty clean design and execution.

Trailer extension.4.jpg

I really made sure the two pieces of angle iron were tied in to each other, along with attaching in multiple places with the factory tongue piece. I also had to extend the wiring since was extending the tongue length.

Trailer extension.6.jpg

A good shot of how the receiver tube was placed in the rear, and of the modified suspension in place.

Trailer extension.8.jpg

In a nutshell, it worked! Now the trailer has a spine all the way to the back (instead of stopping in the middle of the tub section). The cooler tray was removed during this modification, and was put back on once we were done putting the diamond plate tub on the frame.

A lot of the frame reinforcements are done with what I call "shallow channel". I get it at Home Depot. It is 2" wide and 1/2" tall channel that is 1/8" thick. I use it a lot on the frame, and to reinforce the tub when attaching things to the tub itself.

Shallow channel.1.jpgShallow channel.2.jpg
 
Last edited:

rnArmy

Adventurer
So the tub was built to my specs. At the bottom, they fold it under one inch, and then weld a thicker piece of aluminum on top of that for the floor. I didn't think much of it until I went to get ready to mount it to the frame. Basically the frame was drilled at the top for the box; we set the box on the frame, marked the bottom of the tub where the holes were, then removed the tub and went to drilling.

The frame is 2" wide at the top. But with only a 1" lip, it meant we had to drill holes on the edge of the lip (half on, and half off). Not ideal; ideally you would want the lip 2" wide (with the floor overlapping the lip by 2"). Therefore when you're attaching the tub, you're running the bolts through the lip and the floor. So lesson learned: if you're going to order a tub or have one built by Diamond Deluxe, specify a 2" lip around the bottom.

Also, with these types of trailer frames, they use a C-channel design. Which is quite strong actually when all put together, but you have a small ledge on either end where the cross member slide into the edge pieces.
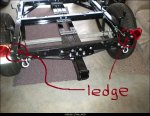
Trailer extension.7 - Copy.jpg

So to fill the gap when putting the tub on, I placed a piece of 2" angle that was 1/8" thick on either end, and used it to tie-in the tub on both the horizontal and the vertical plane.
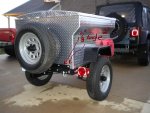
trailer done.4 - Copy (2).jpg

So once the holes were drilled in the tub, it was a simple matter of attaching it to the frame, and putting the cooler tray back on. I then swapped over the gas cans and spare tire carrier to the new tub. Anything that was attached to the tub had some of that shallow-channel attached to the inside to reinforce that panel of angle iron.
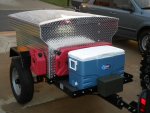
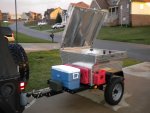
trailer done.1.jpgtrailer done.2.jpg

I still hadn't put in the tie-downs for the cooler yet; it's just sitting there for photo purposes.
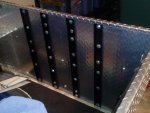
Trailer uprights.jpg

And of course, I also found a pair of aluminum diamond plate fenders for the tub, and bolted them in place. I painted them black just for contrast.
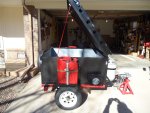
 

rnArmy

Adventurer
So far I was very pleased with how the trailer was coming along. But I decided the tires were looking a little small on the trailer, so I decided to go bigger. Not much bigger. I went from 205/75/15" to 235/75/15". But I was kinda limited to wheels since the axle was a little on the narrow size (set-up for the 205/75/15" tires). So I found a set of racing rims (DOT approved) by Bassett that had a 3" backspacing to keep the tires from being too close to the tub. Worked out fine. I was more wanting to go wider to give the trailer more stability since it was now getting taller. I think the axle was still on top of the springs at this time.

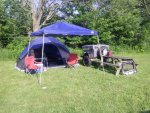
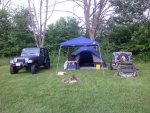
So this was the set-up we used when we took the TJ and trailer to the Bantam Jeep Festival in PA, where we participated in the Guinness book of world records largest Jeep parade. The trailer did just fine; tracked beautifully, and I know I keep saying it, but there's no way we could have brought everything we did without the trailer. Our usual camp set-up is a 10x12 tent with two oversized army cots, and a 10' square pop-up canopy. Along with all the food and cooking gear. And don't forget chairs, folding table, etc.

Bantam.6.jpg

At this point I had swapped the 1.5 gallon Kolpin fuel cans on the sides for 2.5 gallon jerry cans. And that's a water can inside the trailer's spare tire. The shovel is attached with quick-fists.

Daystar Cam Can 2 Gallon Potable Water Container Kit GreyBlue - Jeep DJ-3 1956-1958 | KJ71035RB|Northridge4x4

Bantam.3.jpgBantam.4.jpgBantam.5.jpg

So when we were driving home, road was wet, and I was coming off the highway and making a hard turn, and the trailer was trying to tell the Jeep where to go. Not too bad, but still a little concerning. The trailer, while still relatively light weight, was starting to gain some weight. And my tall short wheel base TJ with lockers front and rear is not the ideal tow vehicle. So I decided electric brakes might not be a bad idea. And that would involve a new rear axle
 
Last edited:

Forum statistics

Threads
187,908
Messages
2,899,807
Members
229,071
Latest member
fireofficer001
Top