HazVan - 2002 E-350 SuperDuty 7.3l PSD

turbodiesel

Active member
Inside has changed a bit since I last posted what it looked like. Also welded up a cargo carrier for above the aluminess box. Mostly as a cheap way to mount ski racks on the back. Buying the steel to make my own was more expensive than buying a harbor freight one and customizing to my needs. Economy of scale I guess... Removable cross pieces at not pictured, paint is drying.
 

Attachments

  • PXL_20210101_235219565.jpg
    PXL_20210101_235219565.jpg
    1.7 MB · Views: 45
  • PXL_20210102_005245896.jpg
    PXL_20210102_005245896.jpg
    1.5 MB · Views: 49
  • PXL_20210102_005259487.jpg
    PXL_20210102_005259487.jpg
    1.6 MB · Views: 50
  • PXL_20210102_005745086.jpg
    PXL_20210102_005745086.jpg
    1.5 MB · Views: 49

Bikersmurf

Expedition Leader
Swapped out the transmission cooler for a trucool cooler. Fairly quick, took about two hours. I have the bypass as well but haven't installed it yet.
6cd464ecbbea393bd96cf7e7aba59011.jpg
80894b1838bdfa02861b200b332b034a.jpg
96ca1992af6f476bf9e2ca97028a9332.jpg
I’ve been looking at a couple of different TruCool options. Which on did you go with?
 

turbodiesel

Active member
I’ve been looking at a couple of different TruCool options. Which on did you go with?
Tru-Cool Max LPD4739 4739 40,000 GVW Low Pressure Drop Transmission Oil Cooler with Thermal Bypass

It's very good. I need to install the bypass as the temp rarely exceeds 150 in non mountain grade driving. I suspect in winter conditions it'll be necessary to get the transmission up to temp.
 

turbodiesel

Active member
@turbodiesel Maybe I missed it in your build but what's the bench seat from? Happy with it?
Ford Transit 15-19 31" 2 person seat new take out. Bought it of eBay for $300 with mounting rails. I'm extremely happy with it. It's easy enough to remove and installation wasn't bad. I added aluminum plates underneath to reinforce the mounting points. It also has headrests but I remove them unless someone is sitting there; that allows me to see out the back.

I needed 31" to fit my van but it's a little small with two adults for a long road trip. For eating at the table it's fine though. Kids have no issues.
 

iggi

Ian
Ford Transit 15-19 31" 2 person seat new take out. Bought it of eBay for $300 with mounting rails. I'm extremely happy with it. It's easy enough to remove and installation wasn't bad. I added aluminum plates underneath to reinforce the mounting points. It also has headrests but I remove them unless someone is sitting there; that allows me to see out the back.

I needed 31" to fit my van but it's a little small with two adults for a long road trip. For eating at the table it's fine though. Kids have no issues.

Thanks!
 

Bikersmurf

Expedition Leader
Tru-Cool Max LPD4739 4739 40,000 GVW Low Pressure Drop Transmission Oil Cooler with Thermal Bypass

It's very good. I need to install the bypass as the temp rarely exceeds 150 in non mountain grade driving. I suspect in winter conditions it'll be necessary to get the transmission up to temp.
Sounds like the one I saw. I wondered if the Bypass was necessary... but based on your numbers it sounds beneficial. I’m sure my stock one leaves something to be desired (9k+ rig empty, 8.5’ tall, 7.5’ wide).
 

turbodiesel

Active member
Sounds like the one I saw. I wondered if the Bypass was necessary... but based on your numbers it sounds beneficial. I’m sure my stock one leaves something to be desired (9k+ rig empty, 8.5’ tall, 7.5’ wide).
I'd suggest installing without it and then testing. It shouldn't be too much effort to cut the line and put in the by-pass. I was waiting on my winter trips to make the final call. Those didn't happen with Covid, so I haven't added it yet.

I think in winter it might be needed. Depending on who you ask/read 150/160/170 is the ideal temp. In my view if it's between 140-180 that's a'ok.
 

turbodiesel

Active member
Started tearing down the axle to regear the front axle from 3.73 to Yukon 4.30.

Bearing removal was a huge problem with removing the external snap ring. Try cheap ring pliers, they broke. Channel lock brand snap ring pliers set, while very nice, was too bulky. Returned. If you have to remove the wheel bearing on a 2005+ F250/350 axle, the tool for the job is KNIPEX https://www.amazon.com/dp/B0002YYMDK/

Trust me, with that it took less than 30 seconds to remove both.

Axle removal was brute force. Get a large pry bar, I used a 36" Estwing, and pry side to side until it just pops loose. Took longer than I thought it would but just keep at it.

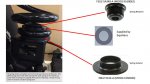
Knuckle removal is optional, but the ball joints were pretty worn and needed to be replaced.

Finally was able to remove the diff after draining the rest of the gear oil. It was surprisingly easy. Take large pry bar, stick it behind the diff and between the housing and leverage. Out the diff came.

Next up is the tedious part of preloads and bearing replacements.
469e41582d403921f5b1d0c27d5201a9.jpg
e3b1767befc2b2fdd938b6fbb5ae74d2.jpg
bdd05c7abf3b1872642a7f8e28c6df29.jpg
89c0480ef5982188a77068b69ff9d64b.jpg
63f72236858ebf2539b642c997f48299.jpg
 
Last edited:

turbodiesel

Active member
Installed the spring perch and bolted it down. One thing to note is the shock point for the spring perch needs the Ford 24-06213-32369 nut with the little arm. I originally tried putting a 3/4" nut on there and realized no wrench would fit in there. Definitely a couple minutes of confusion. It's also supposed to use Ford W500765-S439 bolt, but as I was prepping I checked my spreadsheet and they never arrived. I used the McMaster grade 10 bolts in it's place.

Sanded and gave the axle a first coat of paint. Not looking for show room quality here, just clean off surface rust and paint it to help keep it from coming back.

Got the pinion and seals out. Working on the bearing chase. Then it'll be on to test fitting the new gear.

708d89f0b2a44f947d4d74b95e65f268.jpg


ce467009f668597223e3f27a0f406513.jpg


6c87faa8af7a6eb6c003c6416153bdb3.jpg
3cc541722b33815ad95921c331b7f46f.jpg
c7efefb7e41fcb8e924d0879a40a7c29.jpg
 
Last edited:

turbodiesel

Active member
Already made a mistake in not looking at my spreadsheet on install order. Radius arms need to be installed on the axle before the MG Shock/Spring mounts.

Lower spring mounting orientation diagram
 

Attachments

  • user6701_pic40144_1552152103.jpeg
    user6701_pic40144_1552152103.jpeg
    82.7 KB · Views: 19
Last edited:

turbodiesel

Active member
Refreshed the ball joints in the front axle. The top ball joints were original and totally shot. Not hard to replace if you're already tearing the axle down. Which you basically are required to inorder to do the replacement.

Replaced with Moog ball joints as I don't want to ever tear this axle down again.

bb14a72c9e811f23fc9d51c8a79bf90e.jpg
80034a9f4ed285d9f40f6268587324e3.jpg


Pro tip for installing the ball joints, they get installed in the same order they are removed. Remove bottom ball joint, then top, then install bottom ball joint, and install top. (Picture here is upside down)
 
Last edited:

turbodiesel

Active member
Diff regear continues as well. Disassembled the old pinion and removed the gear from the carrier. Awaiting a shop press to finish the assembly. Highly recommend a 12" brass drift for getting pieces out. Next to impossible with a 6" or 7" drift.
fab7bcec62660b2d61564c63335d7f39.jpg
2900cab62dba03bca4e80a918d3624fa.jpg
80a07dcb252fd861aac5b4e15ab508b2.jpg
 

Forum statistics

Threads
189,830
Messages
2,921,418
Members
232,931
Latest member
Northandfree
Top