Fuso Box Build 1 of 2(to accomodate photos)
Hey friends, Been a while, and we've been busy! We've been so busy, in fact, that I have neglected to add anything here for way too long. That changes today- prepare for a long post!

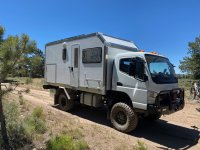
Today I am going to talk about creating the box on the back of our Fuso. To be transparent- we paid Allan at Overlander Global to lead our box build at his shop. The terms of the deal were that he would be responsible for getting us a composite box mounted to the truck, with windows and doors included- the interior was up to us. It was also part of the deal that Heather and I offer our (mostly unskilled) labor for the course of the build to get it done in time. Man, am I glad that we made this happen- we learned so much in this build, and I feel so confident in this truck, and fixing problems as they come up. I took my whole 2 weeks vacation, but we didn’t know if we’d get it done! 16 twelve-hour days in a row(minus one rest day) and we drove home with a box on the back of our house. I’ll make a future post on the interior as well.
We also put together a video of this- feel free to take a look here:
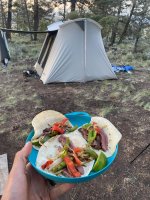
We spent just over two weeks at Allan and Francie’s house. We setup camp in a corner of their property, and cooked our dinners and breakfasts there, while Francie cooked us amazing food for lunch each day(not to mention the espresso!) While I learned so much about fabrication and expedition trucks while here, the hospitality that Allan and Francie showed us will be the thing that sticks with me forever from this experience.
The Subframe:
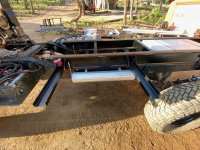
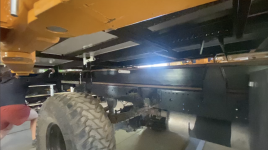
We actually spent a weekend at Allan and Francie’s house in February to build the subframes for the truck. This gave us a big head start on our build. The truck has two subframes- one that bolts with super strong u-bolts to the frame of the truck, and another subframe that serves as the base of the camper box. Both are made from thick steel in various sizes and gauges. We painted the frame that was the base of the box in February, but left the frame that would bolt to the truck raw, and put it into Allans barn. There would be a ton of modifications needed to this subframe, so it made sense not to paint it until all that was completed.
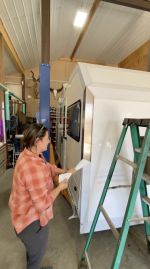
All of this work revolves around the “panels” which are essentially 2 inch thick foam, covered on each side by a strong fiberglass. Allan had purchased these panels a while back, which was good for us, because it meant he got them before the pandemic price increases! He eventually planned to build these panels as a spec build, but he offered them to us, assuming we liked the design, which we did! We knew there would be some modifications needed to the design to suit us(specifically adding a giant door under the bed to accommodate bikes), but when you have a master craftsman like Allan to help, anything is possible.
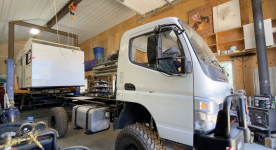
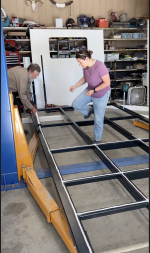
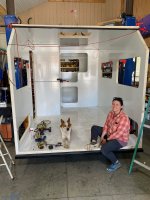
The first morning, we got straight to work, and pulled the camper subframe into the workshop. This thing probably weighs 600 lbs, and moving it is not easy! We then laid down glue onto the top of the subframe, and hoisted our floor panel which is about 7 feet wide, and 15 feet long, on top of the subframe. We did a little dance on top of it to set the glue, and just like that, we had a floor! We weren’t done yet for that day, and in the afternoon we put up our side walls, rear wall, and interior bulkhead wall! The process was basically lay the glue, then clamp the panels together, and let them sit. While I am jealous of many components of Allans shop, one thing that stood out was his assortment of clamps- he must own over 100 clamps, and by the end of this build, we used nearly every one.
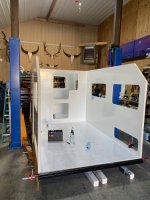
We were astonished at how fast the first bit came together- after just a day of hard work, we had 5 of the 8 main panels attached! But Allan made sure to warn us that while this process was fast, we were still going to have to work hard to meet our 2 week deadline.
The next day we hoisted the roof above our heads and lowered it onto the box of the truck. We clamped it together to cure, and got to work in other areas, At this point we brought in our kitchen cabinets through the front of the box(which was still open) because we knew they would not fit through the door.
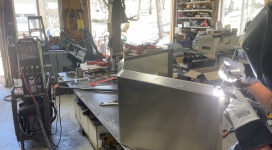
The amount of steel prep that this build entailed really surprised us- I’d estimate that there are over 40 hours of active angle grinding with a wire wheel. Each and every piece of steel needed this cleaning to ensure that our welds were strong, and our paint would stick. Putting the hours in at this point surely will help us down the road. It was a dirty job, and tiring too! July in Gunnison can be hot, and keeping a handle on a bucking grinder while wearing the proper PPE really took it out of us.
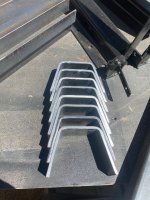
Our first steel work was building the hangars that would hold our truck boxes. We had ordered Bawer boxes ahead of time, and we test fit them on the subframe, and then chopped, prepped, and welded the steel bars that would hold them. We then got to work on the brackets that would connect the truck subframe to the box subframe. There were 8 brackets, each with 2 pieces(one for truck subframe, and one for box subframe.) These were made out of thick steel, which is good, because they are the crucial connection between these two pieces. The two halves of the brackets are held together by a very thick bolt, along with a spring. The spring allows the truck frame to flex as it’s designed to, while not flexing the box(which is not designed to flex.) Cutting, bending, grinding and welding these parts took the better part of a day. And after welding, we then needed to grind it all again to make it smooth and paintable!
The next exciting job was giving the truck frame a haircut. To make room for the spare 37” tire to be mounted under the truck in the desired spot, we had to cut about 4 inches off of the truck frame. This was essentially the only modification we made to the actual Fuso frame. Due to the strengthening done at the factory, Allan avoids welding to the truck frame if he can avoid it.

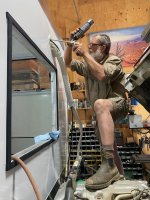
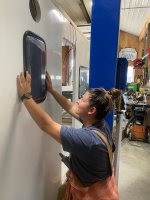
We often found ourselves switching from truck/ subframe work to camper box work multiple times per day. Waiting for glue to dry made us need to pivot away from the box build, meanwhile waiting for paint to dry made us need to switch back to the box. At this point we switched back to the box, and installed our windows. We used Arctic Tern windows and doors, and these things are prime! The windows are dual pane, which we’ll sure be happy about in the winter. They have integrated blinds and bug mesh, which do a great job keeping out bugs and light. Installing these was actually pretty quick. The holes were pre-cut from the factory, so it was a matter of fitting the windows into the holes, and then screwing the windows in. Surprisingly there is no glue needed for the windows- they have integrated seals.
The next big task was installing our larger fuel tank. I picked up a ~ 50 gallon tank from DTI trucks that had come off a Hino truck. Installing this larger tank took us the better part of a day- we needed to reroute the hoses, and I decided to install a marine diesel filter ahead of the stock filter at this time. Pre-filtering the fuel will come in handy if we ever get into areas with less than perfect fuel quality. It also has a water separator that is easy to view, and easy to drain. Anything we can do to keep our engine happy, we will do! The nice thing about this Hino tank was that the sensor that was installed works the same way as the stock Fuso sensor, so it was just a matter of connecting the wires! It also had an extra take-off port that we later used for our Truma heater/hot water heater. We did need to weld a bracket onto the aluminum tank to mount the filter, but Allan assured me it was safe!

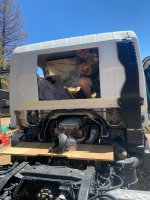
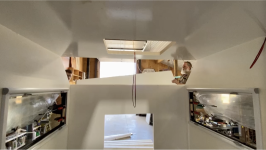
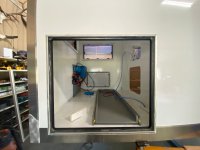
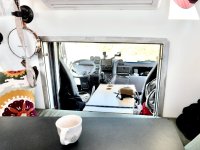
Next up was perhaps the most gut-wrenching part of the build. It was pass-thru day. The pass thru allows us to move between the cab and box with relative ease. The dog also enjoys the feature. The creation of a pass-thru is not pretty- it involved pulling out the glass rear window from the truck cab, and then making that hole significantly larger with an angle grinder. Just as it was with our previous van builds, this part is nerve-racking because you can’t uncut your vehicle. Thankfully Allan had done this before, and was more than happy to hack our truck apart.
