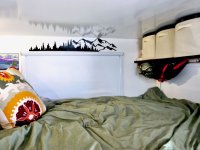
Heather and Dana's 2007 Fg140 Camper Build

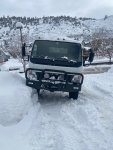
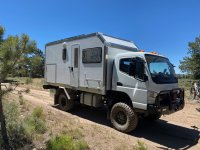
Hey folks, my wife(Heather) and I (Dana) are in the process of building out a 2007 Mitsubishi Fuso FG140 into an expedition camper. We've owned vans, trucks, and Subaru's, and are pretty stoked to have something with the capability of a truck, and the space of a van. We have purchased our truck, and have been first focused on the chassis. We are working with Allan at Overlander Global in Gunnison to build a subframe and composite box, which we will do in July. We will then build out the interior of the camper to make it capable of longer term travel. We have dreams of hitting Alaska, Canada, and South America with this rig. We are documenting our journey on YouTube, but I also wanted to document in text here. I've already learned so much about overland travel and our truck via this forum, so hope I can add some value to others. I'll use this thread for our vehicle build out- both the chassis and the box. Here's a picture of our truck as it currently sits after a 2 foot powder day last week!IMG_4925.jpeg
 
FUSO Chassis Modifications

In this post I’ll detail how we settled on the Fuso platform, our search and pickup process, and our chassis exterior modifications. We’ve made a few videos of these steps, which I’ll leave links to in case you want to follow long.

Heather and I have owned a lot of adventure vehicles over the years. We’ve had multiple Subarus, a couple F-150’s with Four Wheel Campers on them, and two vans. We’ve trended towards larger vehicles over time, and really loved the amount of space that our most recent vehicle, a RWD Sprinter van offered. But, with the Sprinter we really missed being able to wander down forest service roads, and know that we could get ourselves out confidently. We heavily considered a 4x4 sprinter, but decided that we should continue our trend and go just a bit bigger! So after lots of thinking about different trucks, we decided that the Fg140 was the platform we wanted to build on because of the relative simplicity, ability to burn high sulfur diesel, and high payload capacity.

We spent many months searching ExPo, Craigslist, Facebook, and more. Through our search we ended up meeting Allan at Overlander Global in Gunnison, Co, who hosted us at his shop to check out a rig, and talk us through his awesome Fuso projects. We were sold on the platform, and after about 5 months of shopping, we found a Fuso FG140 in Oregon, put a deposit down, and flew out to pick it up. It is a 2007 FG140 that was used as a wildland firetruck its whole life. It only had 45,000 miles on it, and had been in a garage most of its life. The pickup went fine, but driving a Fuso with zero weight in the back was a bumpy ride to say the least. We also got pulled over because we had open wheels(no fenders/flaps) but we eventually made it back to Durango.
IMG_4513 (2).jpeg


While our original thinking was to buy a ready to roll expedition truck, or to plop a camper on top of a Fuso, we fell in love with the vehicles rolling out of Allans shop, and decided that it would be worth the higher expense and the longer wait to build with Allan. Allan listened to our long term plans, and suggested that we build the subframe and habitat box shell with him, and then take on the interior build out ourselves. This feels like a great way for us to get in on a very solid foundation, but still put our own touch on our rig. So far Allan has given us so much of his time and expertise in our build. He always has time for my silly questions, and we are already indebted to him for the help he’s provided. We plan to build the box in July, and get to work on the interior shortly after that. I’m so excited to learn more from this legend.

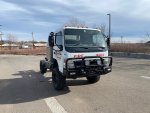
Once we got the truck to Durango, we immediately brought it up to Allans shop and installed our new suspension and wheels. We used Alcan springs out of Grand Junction CO for the leaf springs, Bilstien shocks, wheels from Fuso Off Road, and Toyo tires. Allan guided us through the install, and taught us a lot about how the truck works. Tackling a big project with someone who knows what they are doing brought me a lot of confidence for taking on other projects down the road, and the knowledge we gained will be helpful when things inevitably go wrong far away from a garage.

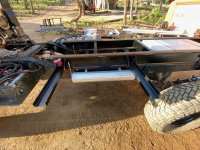
After installing the wheels, tires, and suspension, I made a new friend on Facebook who opened his shop to us to do the next bunch of work. Gabe lives in Ignacio CO, and let us spend the week between Christmas and New Years in his woodstove heated shop working on the truck. Over this time, we installed our bumper, winch, and lights, as well as doing a full fluid flush. We used an ECB front bumper(again imported by Tony at Fuso Off Road), which took us 14+ hours to install. The instructions were a bit challenging, but after a few calls to Allan, and many conversations with Gabe and Heather, we got it installed. We then installed a Sherpa 17,000 pound winch, and ARB Solis lights. Later in the week I did a full fluid flush, changing the engine, transmission, transfer case, and differential oils. I’d only ever done engine oil changes by myself in the past, but a video from Outliers Overland was greatly informative to help know the right oils, the right amounts, and some tips and tricks that made things easier. The hardest part of this was getting the thick oil back into the differentials. Finally, I scraped the minimal amount of surface rust off the frame, hit it with Coroseal, and then painted black over that. The frame now looks good as new, and ready for our box.

IMG_4750.jpeg
Next up is the interior of the cab. We have already started building our cab electrical systems, sound deadening, and creature comforts, but I’ll save that for a future post. Let me know if you have any questions or comments!
 
Fuso Box Build 1 of 2(to accomodate photos)
Hey friends, Been a while, and we've been busy! We've been so busy, in fact, that I have neglected to add anything here for way too long. That changes today- prepare for a long post!

IMG_8726.jpeg

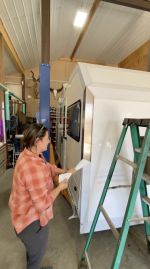
Today I am going to talk about creating the box on the back of our Fuso. To be transparent- we paid Allan at Overlander Global to lead our box build at his shop. The terms of the deal were that he would be responsible for getting us a composite box mounted to the truck, with windows and doors included- the interior was up to us. It was also part of the deal that Heather and I offer our (mostly unskilled) labor for the course of the build to get it done in time. Man, am I glad that we made this happen- we learned so much in this build, and I feel so confident in this truck, and fixing problems as they come up. I took my whole 2 weeks vacation, but we didn’t know if we’d get it done! 16 twelve-hour days in a row(minus one rest day) and we drove home with a box on the back of our house. I’ll make a future post on the interior as well.

We also put together a video of this- feel free to take a look here:

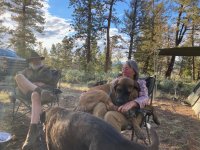
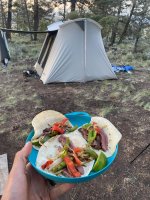
We spent just over two weeks at Allan and Francie’s house. We setup camp in a corner of their property, and cooked our dinners and breakfasts there, while Francie cooked us amazing food for lunch each day(not to mention the espresso!) While I learned so much about fabrication and expedition trucks while here, the hospitality that Allan and Francie showed us will be the thing that sticks with me forever from this experience.
1704419130396.jpeg

The Subframe:

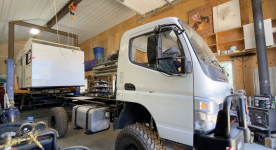
We actually spent a weekend at Allan and Francie’s house in February to build the subframes for the truck. This gave us a big head start on our build. The truck has two subframes- one that bolts with super strong u-bolts to the frame of the truck, and another subframe that serves as the base of the camper box. Both are made from thick steel in various sizes and gauges. We painted the frame that was the base of the box in February, but left the frame that would bolt to the truck raw, and put it into Allans barn. There would be a ton of modifications needed to this subframe, so it made sense not to paint it until all that was completed.
Screenshot 2024-01-04 at 6.46.34 PM.png

All of this work revolves around the “panels” which are essentially 2 inch thick foam, covered on each side by a strong fiberglass. Allan had purchased these panels a while back, which was good for us, because it meant he got them before the pandemic price increases! He eventually planned to build these panels as a spec build, but he offered them to us, assuming we liked the design, which we did! We knew there would be some modifications needed to the design to suit us(specifically adding a giant door under the bed to accommodate bikes), but when you have a master craftsman like Allan to help, anything is possible.

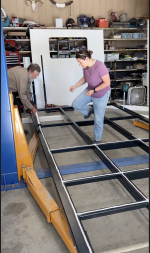
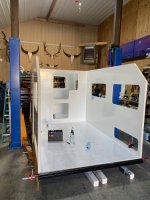
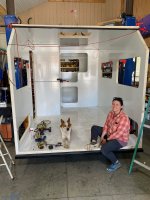
The first morning, we got straight to work, and pulled the camper subframe into the workshop. This thing probably weighs 600 lbs, and moving it is not easy! We then laid down glue onto the top of the subframe, and hoisted our floor panel which is about 7 feet wide, and 15 feet long, on top of the subframe. We did a little dance on top of it to set the glue, and just like that, we had a floor! We weren’t done yet for that day, and in the afternoon we put up our side walls, rear wall, and interior bulkhead wall! The process was basically lay the glue, then clamp the panels together, and let them sit. While I am jealous of many components of Allans shop, one thing that stood out was his assortment of clamps- he must own over 100 clamps, and by the end of this build, we used nearly every one.
1704419237646.jpeg

We were astonished at how fast the first bit came together- after just a day of hard work, we had 5 of the 8 main panels attached! But Allan made sure to warn us that while this process was fast, we were still going to have to work hard to meet our 2 week deadline.

The next day we hoisted the roof above our heads and lowered it onto the box of the truck. We clamped it together to cure, and got to work in other areas, At this point we brought in our kitchen cabinets through the front of the box(which was still open) because we knew they would not fit through the door.
1704419259873.jpeg

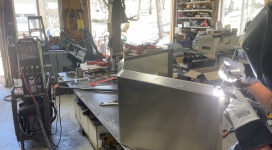
The amount of steel prep that this build entailed really surprised us- I’d estimate that there are over 40 hours of active angle grinding with a wire wheel. Each and every piece of steel needed this cleaning to ensure that our welds were strong, and our paint would stick. Putting the hours in at this point surely will help us down the road. It was a dirty job, and tiring too! July in Gunnison can be hot, and keeping a handle on a bucking grinder while wearing the proper PPE really took it out of us.

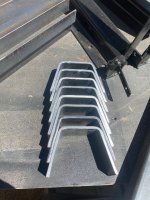
Our first steel work was building the hangars that would hold our truck boxes. We had ordered Bawer boxes ahead of time, and we test fit them on the subframe, and then chopped, prepped, and welded the steel bars that would hold them. We then got to work on the brackets that would connect the truck subframe to the box subframe. There were 8 brackets, each with 2 pieces(one for truck subframe, and one for box subframe.) These were made out of thick steel, which is good, because they are the crucial connection between these two pieces. The two halves of the brackets are held together by a very thick bolt, along with a spring. The spring allows the truck frame to flex as it’s designed to, while not flexing the box(which is not designed to flex.) Cutting, bending, grinding and welding these parts took the better part of a day. And after welding, we then needed to grind it all again to make it smooth and paintable!
1704419287670.jpeg

The next exciting job was giving the truck frame a haircut. To make room for the spare 37” tire to be mounted under the truck in the desired spot, we had to cut about 4 inches off of the truck frame. This was essentially the only modification we made to the actual Fuso frame. Due to the strengthening done at the factory, Allan avoids welding to the truck frame if he can avoid it.
1704419315916.png

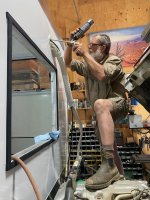
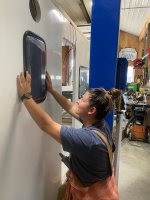
We often found ourselves switching from truck/ subframe work to camper box work multiple times per day. Waiting for glue to dry made us need to pivot away from the box build, meanwhile waiting for paint to dry made us need to switch back to the box. At this point we switched back to the box, and installed our windows. We used Arctic Tern windows and doors, and these things are prime! The windows are dual pane, which we’ll sure be happy about in the winter. They have integrated blinds and bug mesh, which do a great job keeping out bugs and light. Installing these was actually pretty quick. The holes were pre-cut from the factory, so it was a matter of fitting the windows into the holes, and then screwing the windows in. Surprisingly there is no glue needed for the windows- they have integrated seals.
1704419335790.jpeg

The next big task was installing our larger fuel tank. I picked up a ~ 50 gallon tank from DTI trucks that had come off a Hino truck. Installing this larger tank took us the better part of a day- we needed to reroute the hoses, and I decided to install a marine diesel filter ahead of the stock filter at this time. Pre-filtering the fuel will come in handy if we ever get into areas with less than perfect fuel quality. It also has a water separator that is easy to view, and easy to drain. Anything we can do to keep our engine happy, we will do! The nice thing about this Hino tank was that the sensor that was installed works the same way as the stock Fuso sensor, so it was just a matter of connecting the wires! It also had an extra take-off port that we later used for our Truma heater/hot water heater. We did need to weld a bracket onto the aluminum tank to mount the filter, but Allan assured me it was safe!
1704419346623.png

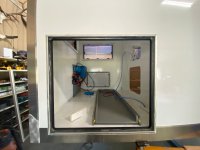
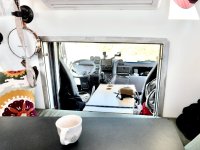
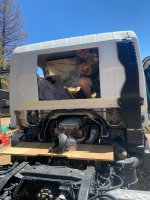
Next up was perhaps the most gut-wrenching part of the build. It was pass-thru day. The pass thru allows us to move between the cab and box with relative ease. The dog also enjoys the feature. The creation of a pass-thru is not pretty- it involved pulling out the glass rear window from the truck cab, and then making that hole significantly larger with an angle grinder. Just as it was with our previous van builds, this part is nerve-racking because you can’t uncut your vehicle. Thankfully Allan had done this before, and was more than happy to hack our truck apart.
1704419367161.jpeg
 
Fuso Box Build 2 of 3(to accomodate photos)
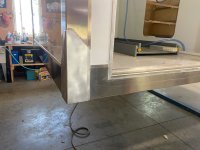
Cutting the hole was the fast part. We next needed to custom fabricate 3 aluminum frames that would allow for the accordion-like rubber to close the gap between truck and cab. Allan created these pieces, which fit together great. These frame pieces eventually got glued into the cab, the box, and onto the accordion rubber that would keep out the weather.
View attachment 813600

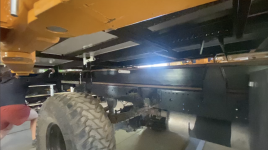
Next we switched our attention back to the truck sub-frame. We glued rip-cut trex decking onto the trucks frame, and then used machinery and muscle to move the subframe onto the truck frame. We then secured the truck subframe to the chassis of the truck, making it one unit!


After the frames were created, it was time to cut the hole in the front panel of the box, which had not yet gotten glued onto the rest of the box. We had to test fit that panel onto the truck box, and then maneuver the truck under the box so that we could get a measurement on where to cut. We did it this way so that we could cut the hole in the front panel for the pass thru while it was lying on the ground. Having gravity pull down on the track saw track makes life a lot easier!
1704421470241.png

We Marked the panel with where the hole would go, pulled the truck back out, took the panel back off, and then cut the hole for the pass thru. We then glued the front panel to the box, and cut and glued the 45 degree angle piece to the box. The box now had all its walls!
1704421506966.png


Next we glued the pass thru frames to both the cab and the box. We followed this by fabricating some mounts for the grey water tank, and installing it onto the truck subframe. I also installed the air tank for out onboard air at this time.

1704421544140.jpeg

We once again switched back to the box. Our next step was installing the edges. The edges protect the panels on the corners, add strength, and also act as a trim to cover the glued together areas of the panels. These are custom bent aluminum pieces that Allan sourced from a local metal supply shop. We needed to cut them to the right length, and also weld a few together that weren’t long enough. This was a multi-day process.

1704421568641.png

We took a rest day around this point as we had worked a bunch of days straight. Allan and Francie came to OUR campsite for a change, and we had a fun night eating tacos and swapping stories.

1704421581811.jpeg

After the edges were done, and wed had some rest, we also needed to instal corner caps- these are the trim peaches that go on top of the edges. Allan custom fabricates these from aluminum plate. Honestly he’s an artist. Here’s one of the corners getting glued, and ready to be installed after Allan fabricated it:

1704421594185.jpeg

And here’s a photo once the corner was installed:

1704421604693.jpeg

The next step that we tackled was the bike door. In the above photo, you’ll see that the giant whole is already cut, and there is trim installed around the door frame. We custom built this door frame- we took aluminum sheet, and put a custom Z bend on it, as we couldn’t find a product locally that matched out needs. Again I am astonished at the level of detail Allan put into this. We also needed to create a custom door, which we framed with more custom bent aluminum. We riveted on the door frame, and used scavenged Arctic Tern latches that Allan had lying around- this way all our hatches and our front door use the same key- a nice touch!

1704421632796.jpeg

We were getting close! The last few days were a blur- the group was working together like a well tuned engine, and we were crushing projects left and right. While our list was long, we just kept checking items off.

1704421645423.jpeg

After the bike door, we built a custom mounting bracket for the AC mini-split and ran the lineset for it. We then mounted the box onto the cab for the final time, and cinched it down!
1704421661302.png
 
Fuso Box Build 3 of 3(to accomodate photos)
Next, we fabricated and installed these beautiful aluminum fenders onto the truck to keep mud off the truck.
1704421796532.png

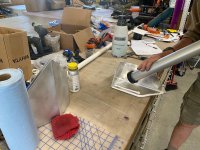
We also installed the mini split units onto the front and rear of the truck, and connected the lineset. This was honestly a pain in the butt. Installing these in a house is one thing, but adapting it to work in a truck was a whole other issue.
1704421812826.jpeg

At this point we looked around, and realized all that was left to do was clean the shop, pack up our camp and drive the thing home. We were so thrilled to have a box on the truck, but we also recognized that the work was far from finished. Next we needed to build out the interior of the box. And unfortunately, we would not have Allan(or his shop) to help here. We eventually got thru it- but that’s a story for another evening. We said our goodbye’s and drove our new home back to our apartment.

1704421847029.jpeg
 
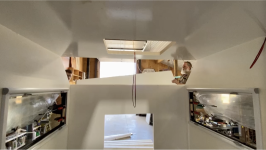
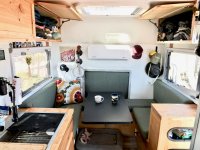
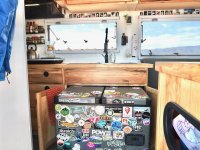
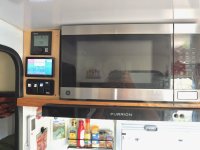
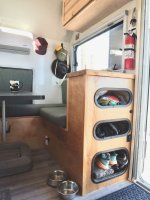
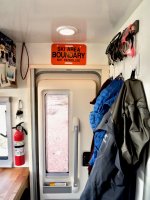
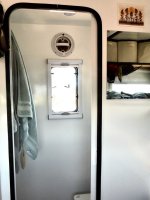
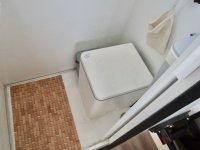
So we finally got around to shooting the interior of our camper! We were under the gun to move into it, as our apartment lease was ending, so there isn't much documentation of the process. But it was very similar to the van build process, which is well documented across the internet. Biggest difference was that everything gets glued to the walls- cabinets, bed frame, etc. All glued.

Video of the Interior posted here:


P1012712.jpeg

P1012769.jpeg

P1012803.jpeg

P1012678.jpeg

P1012780.jpeg

P1012757.jpeg

P1012738.jpeg

P1012627.jpeg

P1012603.jpeg

P1012592.jpeg
 

nlindesmith

New member
Hey yall,
Beautiful build! Where'd you source your pass-through components from? That's #3 or 4 on the list for me behind and EGR delete, mini split, and rear mounted spare tire.
 

Forum statistics

Threads
188,370
Messages
2,903,831
Members
230,227
Latest member
banshee01
Top