Hilux_Max's New D4D Hilux from OZ

STAGE 2

Adventurer
Honestly, I seriously think you yanks are behind the 8-ball when it comes to diesel technology...I wish you guys could be on the diesel bandwagon as the size of the US market it would help develop more products for us to use elsewhere in the world.

Its not us yanks its the bums we send to washington. There is no reason why we shouldn't be able to import any of the vehicles toyota sells down under, or why diesel couldn't be more popular.
 

daverami

Explorer
Its not us yanks its the bums we send to washington. There is no reason why we shouldn't be able to import any of the vehicles toyota sells down under, or why diesel couldn't be more popular.

You are being very polite in using the word bums.
 

Uys

Observer
I honestly do not understand the issue with these new diesels and the US?

The new diesels are way more efficient and cleaner than almost all petrol engined vehicles so I cant see how they can be such an emmissions issue.

The new generation Prado diesel for example gets 8.5 litres per 100 km.....thats 28 miles per gallon for a vehicles that is huge!!!!


My 3 litre D4d runs at 8.2 l/100km.
 

Hilux_Max

Adventurer
small update......

i have removed the front ARB winchbar i had on which i have sold, thought id post some pics of the hilux "frontless" in preparation for a custom tube winchbar-

P1000441.jpg

I tied the spotlights to the grille just to get an idea of the position the spotlights will be in when all is done and the massive increase in approach angle Ill be getting.....
P1000437.jpg


P1000436.jpg


i have also removed the front washer bottle to make room for both larger tyres later and also more room for barwork.

Before-
P1000438.jpg


After -
P1000439.jpg

P1000440.jpg


washer bottle will be relocated into the engine bay.
 

Hilux_Max

Adventurer
I got a hi-lift jack for xmas and was thinking bout where to mount it.......i dont have a roofrack so couldnt mount it there or a spare wheel carrier.....wasnt too sure how to mount it on the inner side of the tub so decided to mount it on the head board of the tub.

Being a tight-******** decided to make my own mounts plus because it was a custom fit.

I had some angle iron, a ****load of bolts to go through and set about it.....i cut the head off two bolts that just fit through the holes of the jack and welded them to the angle brackets....i also made a backing plate to help hold it and spread the load a little on the heads board upright supports.

Heres the bunch of parts for one side -
P1000446.jpg


I found out that a 22mm landcruiser wheel nut fits perfectly onto the bolts thread so i will use that to mount it up :D

And here is how it would mount up with the headboard fitting between the 2 lower plates. I also used some rubber to help dampen vibrations -
P1000445.jpg


And here it is all fitted up, good thing is i can still use my tonneau cover -
P1000447.jpg


P1000448.jpg


I'll only be mounting it for offroad trips, no need to have it there for daily duties.....i have a landcruiser 78 series bottle jack that works for my height in case i need to change tyres around town in case of a flat.
 

Hilux_Max

Adventurer
Well I was supposed to get a fabricator to build me a custom tube front bar and rocksliders whilst I was on these 2 weeks holidays.

Unfortunately that hasnt eventuateddue to certain reasons so I am going to have to revert to plan B....which is to purchase a new style of front bar that is currently under development here in Australia for the new hilux. It'll be released end o Jan 2010, and I now have one on order.


Heres some (development) pics without the top hoop-

xroc3.jpg


xroc2.jpg


xroc1.jpg


And one being developed (with top hoop) on a Prado 120 -

13336_221954240488_777875488_2952875_4294171_n.jpg


The other thing I have found out is that there someone about to release some extra wide sidemount flares for the current hilux in March.....these will be a good inch wider than SR5 flares, mount through original SR5 flare holes in the quarter panel or drill new holes in SR's to mount aswell as under the lip of the guard due to their size.

They should comfortably cover a 12.5 inch wide tyre with zero to -12 offset.

Heres a pic of the style on a current triton -
!BdPbL-g!Wk~$(KGrHqMOKkUEq4+BGQcQBK4DNnNHyw~~_35.JPG


And Im helping a friend develop some rock sliders for the hilux here locally thanks to some help from fellow member Uys off this forum.
 

Hilux_Max

Adventurer
This morning I went and got me self an Aftermarket Washer Bottle Kit from the local Auto Accessory Shop.

Its a 1 litre bottle with an external pump on it (Toyota ones are internal in that they directly suck from a hole in the bottom of the washer bottle) thats mounted to the bottle underside.

The kit comes with everything you need to mount it to any vehicle....switch, wiring, clamps etc for 29bux and its a 1 litre bottle.

P1000464.jpg


I pulled the factory plug back up to the engine bay and scotch locked the 2 new wires in....I didnt want to cut any wires or solder as I may change the setup down the track.....for now I needed something that works.

I mounted it to the side of the engine bay as you can see in the pics below. I pulled the hose back under the guard and through a hole into the engine bay...I looped it around a couple times as I said before I may need the length later on for a different custom setup.

P1000465.jpg


The pump is abit noisier....and a little bit weaker but it does work adequately for my needs.....One question thou....with the hilux washer nozzles...how do I adjust them?

I tried moving the tip but nothing was happening, Just want to adjust them abit higher to make up for the less power the new motor has.

Down the track Ill get a stainless washer bottle made up thats abit larger and fits in that location better and will use the factory Hilux washer motor aswell....but for now I'm happy with it and I have more room under the guards.

Also cleaned everything up under the grille and headlights that had "body colour" on the metal and I spray painted it all a gloss black finish so when the tube bar goes on it wont look so dicky.....

Next update should be the barwork.....all going well.
 

Hilux_Max

Adventurer
Havent updated this thread in while so thought I would since Ive made a few changes to my hilux......Im just going to cut and paste off another forum the updates below.....the hilux is on its way to becoming my ultimate offroad/expedition truck......

Because of my original plans of getting a fabricator to custom make my front tube bar and sliders didn't eventuate, I was forced to look for an alternative.....I didnt want to go another ARB bar or Ironman Bar as the style of the bars although they do look good hang too far forward (kept getting hung up on them) and weigh to much......so I ordered a set of rock sliders from Millweld and got the 2nd made Xrox Bar c/o Matty from Monster Rides.....highly reccomend both of them, customer service was first class...something that I have trouble finding lately.

Anyway, here are the pics -

P1000521.jpg


P1000522.jpg


P1000520.jpg


P1000517.jpg


P1000523.jpg


I havent fitted the Xrox bashplate they have provided because it clashes abit with my own bashplate design but Im confident I can get them to work well together with a bit of work.

will need to do something with the rear quarters and departure angle to match the increase approach angle the bar has given me.

So I decided that now I have better approach angle with the new front bar, I needed to do something with the ***** end to match it and improve departure angle....so I've decided to do a rear 1/4 panel chop.

Ive got one week of work left before I go on long service leave (and the fact that my 3rd child is due in 2 weeks) so thought over that time Id hopefully find enough of it to complete this chop.

Heres what I have in mind from a Tacoma in the US -

l_82284f3ca52f17eb7aee6ffa33807888.jpg


l_a919c9186e31e68c55945f55c8d29919.jpg


l_ab571d79504b1f0e451ebe13c47242e6.jpg


After I cut it, I will paint the exposed metal with rust proof paint and then seal it with some rubber pinchweld sealer to go over it.

I will fab some new side brackets for the tow bar and raise it higher to suit but will leave it low enough below the tailgate for room for some tube when I eventually get round to making a tube rear bar to go along with the towbar.

I will also fabricate some mudflaps and brackets to use in the meantime to keep the law off my tail. The brackets will be removable so when offroad I can take the mudflaps off.

The following tacoma is my inspriation....( Yes Faux by 4, love your truck...Wyatt your is nice too but bit too Blingy...LOL)
fauxby4.jpg
 

Hilux_Max

Adventurer
He has a removable mudflap that he take off for offroading.....I plan to do the same thing.

Below is a diagram of what he did....basically its two tube steel pieces, he used circle tube, Ill try and use square tube, but one slide inside the other. The shorter "inner" tube gets welded into place off the side of the chassis rail, the longer tube that has the rubber mudflap tech screwed into it slides over the smaller one and is held on with a bolt going through both. Simple. Then get some chain to hold the mudflap back abit off the tyre.
mudguard.jpg

In the pic below you can see the mudflap bracket stub sticking out of the side of the chassis rail -
2696192300100142503S600x600Q85.jpg


Here is a "Paint" photo edit of what the back end of the hilux I hope to look like?
Picture0872.jpg

The new lowest point of the tub will be much higher than the rock sliders, so realistically almost everything the rock sliders get over I shouldnt hit the tub.....in most cases :roll:

Here is some close ups of what I plan to do....Im going to try and follow the "lines" of the hilux's tub, that is the shape of the moulds in the panel work so it wont be exactly a horizontal cut, but angle slightly towards the front -
chop1.jpg


chop2.jpg


Like I said, later on Ill make a rear bar for it, but in the meantime Ill have the clearance Im wanting/looking for and with the mudflaps fitted it'll still be legal and not attract too much attention....I hope :oops:

Its not for everyone I know but its what I want to do to achieve a departure angle with my current ride height to match the increase approach angle I now have with the front Xrox bar.....then along with the improved ramp over angle I will achieve by "clocking the crawler box" that Ill be installing I should have the clearance that a much higher hilux has without the mods.
 

Hilux_Max

Adventurer
Appendices

Here's a couple pics of Tacoma's that have had the rear quarter chop done fitted with custom bars. Not sure which way Im going to go yet...have time for that. Hopefully with some sort of tyre carrier built in.

Plate Type Rear Bar
moab08guystrip028.jpg


rokbumper2.jpg


Tube Type rear Bar
P7241359.jpg


P7241362.jpg


P7241360.jpg


Ok, got a friend to make up for me the mud flap brackets that Ill use once the chop is done.....the design is slightly different to that planned above....

I ended up with an outer sleeve that gets welded onto the chassis rail....35mmx35mmx2mm thicksquare tube....500mm long and the inner tube is 30x30x2mm and 370mm long.

The inner tube slides into the shorter welded on outer tube nice and tight (the way I like it ;) ) and Ill drill a hole through both and put a bolt through to hold it in.

Rubber sheet (Mudflap) will tech screw into the longer inner tube. Hope all that makes sense? Pic below.

P1000548.jpg


So I got some time to do some more preparation work on the rear quarter chop....I removed the rear flares off the tub....strewth, couldnt beleive there was that much mud in the bottom of each side of the flares...no ****, would have been a good 2kg of mud all up...all different coloured layers...would have been a geologists dream to work out were each layer came from......

Without Flares
P1000545.jpg


Tyres Hanging out heaps with no flares
P1000544.jpg


Well, heres the view for those that havent jumped under their tubs yet of the brackets supporting the sides of the tub -
P1000546.jpg


As you can see I removed the mudflaps, then was the fun part to remove the plastic clips with the inbuilt thread for the mudflap screws....great fun....NOT
 

Hilux_Max

Adventurer
Removed the two 12mm bolts and drilled out the 3 spot welds on the right hand side....
P1000547.jpg


Once the spot welds are drilled out, wiggle the panel around abit to break the seal the spot welds have left....

In the pic below, Im holding the stub of the mud flap bracket where it will be welded on roughly....and Ive drawn a texter line of approximately where the cut will be going on the inner side.
P1000549.jpg


The bracket on the left you see hanging is removed by a couple of bolt at the top of it.....I left it on there for now as I put the mudflaps back on to keep driving it this week. After the week is up, I wont be driving the hilux hardly anything for a while so this save sme time later on when it comes to the actual chop.


Heres a pic of the line Ill be taking...the top of the tape is where the cut will be....Im not going perfectly horizontal for two reasons....

1st is it'll be too high above the side of the chassis rail and make mounting the mudflap bracket more difficult, and secondly, it follows the indentation in the side of the tub....so it'll look better.
P1000550.jpg


Thats it for now...hopefully next weekend Ill get some time to pull the light and wiring out, tape it up properly and begin cutting.
 

Hilux_Max

Adventurer
I managed to do a little this morning and a little this afternoon on the hilux.

Pulled the spare tyre out, removed the tail lights and pulled the wiring out so its not in the way when i cut......i also drilled out the spot welds holding the panel to the brackets inside it. So that when i cut it will come apart easier then ill cut the brackets to suit seperately later.
P1000580.jpg

I also taped her up and drew a guide-line that ill follow when i cut...had to double check on both sides to ensure it was even.
P1000582.jpg

P1000583.jpg

I toyed with the idea of having a perfectly horizontal cut but it would have ended up too high above the chassis rail directly behind the tyre and having it slightly tapered will suit the way im gonna do the mud flaps later.

Too late to turn back now.....my neighbour thinks Im nuts for cutting up a new truck (well, almost 3 years old anyway), I told him if I bend the bottom of it offroad, the dint quite possibly could bend the panel work much higher up than the cut.......he understood, but walked off still shaking his head.
 

Hilux_Max

Adventurer
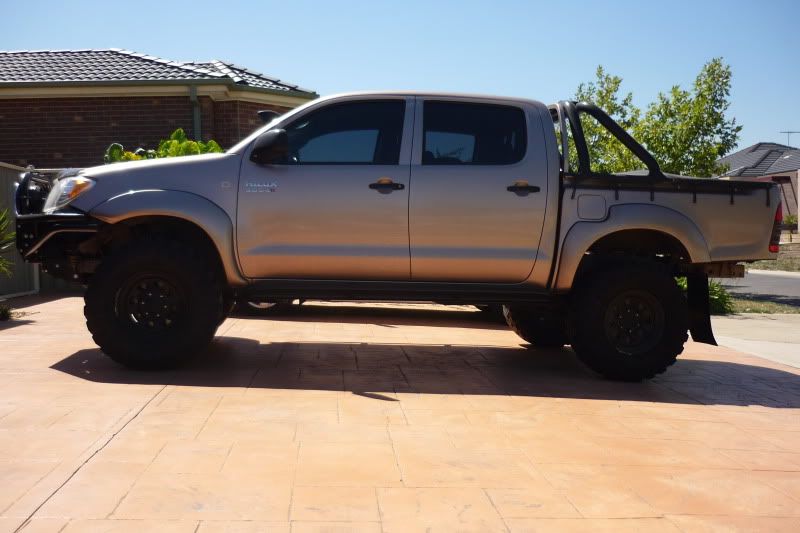
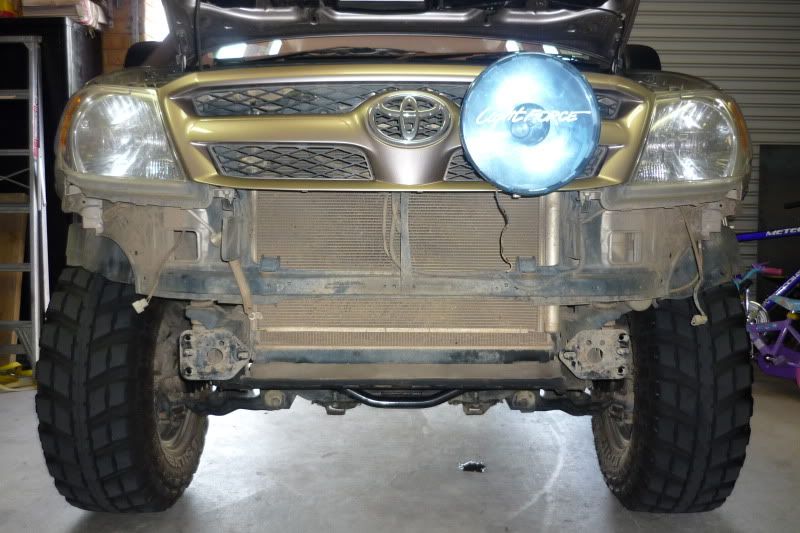
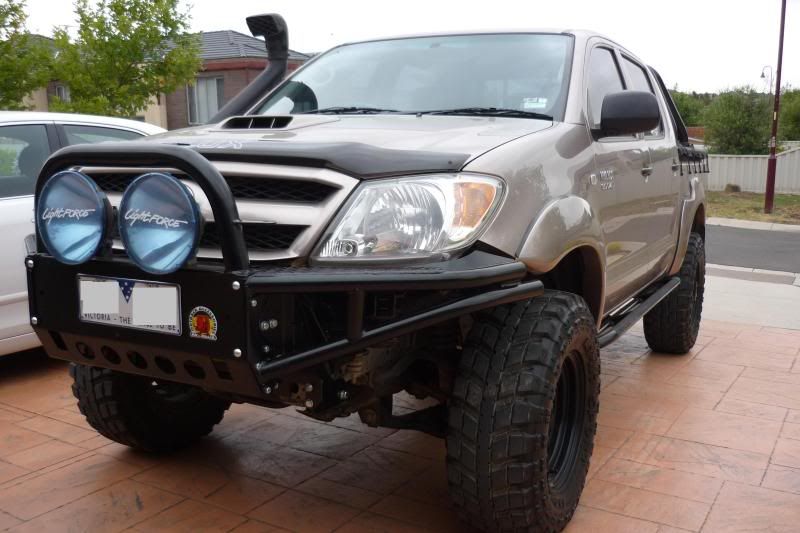
all done.....only a few minor things left to do like tidy up the wiring, fit the number plate...fit some recovery hooks....the removable mudflaps but all in all it came out exactly like my photoshopped pic a few pages back. am thinking of leaving the towbar plug plugged in and tied out of the way and only fit the towbar if i need it which is rare.

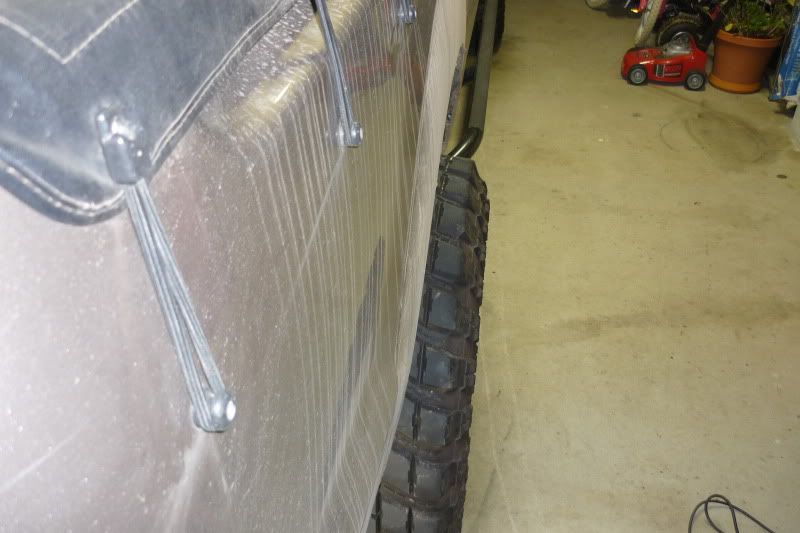
the quarter panels are only very slightly looser, as in they flex a tad bit more than before but no where near anything to worry bout.

the tailgate still shuts properly thou clips the right hand side a tad as you slam it, but when locked no problems, no flex.

cant post pics atm, got the little one in me arms trying to put him to sleep while i type this.....

lots of scrap metal on the garage floor......i did use rust kill paint on all exposed metal surfaces and fitted the pinchweld rubber too.

edit:

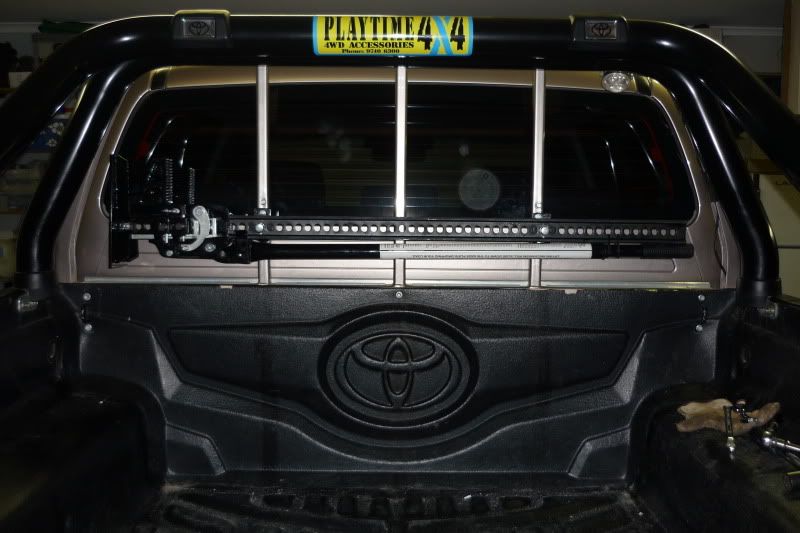
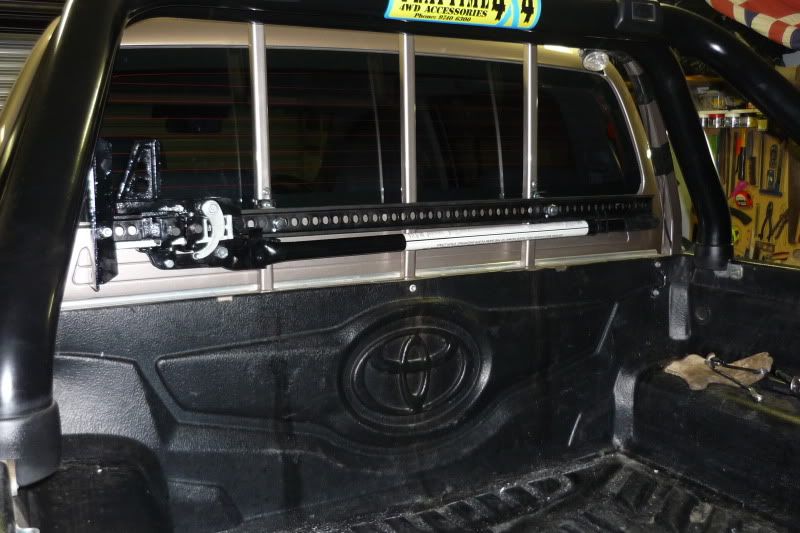
here are the pics, not the best coz they are in me garage but you can make it all out....once everthing is done, ill fully detail the truck, something i havent done in ages.

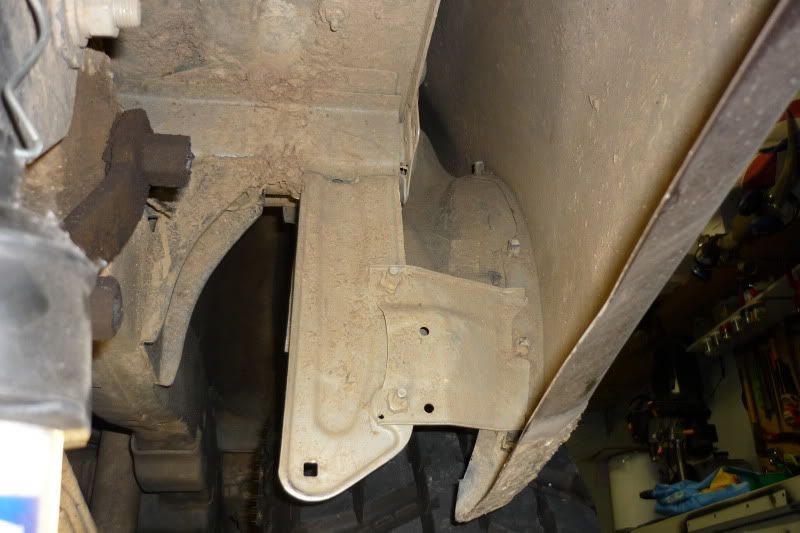
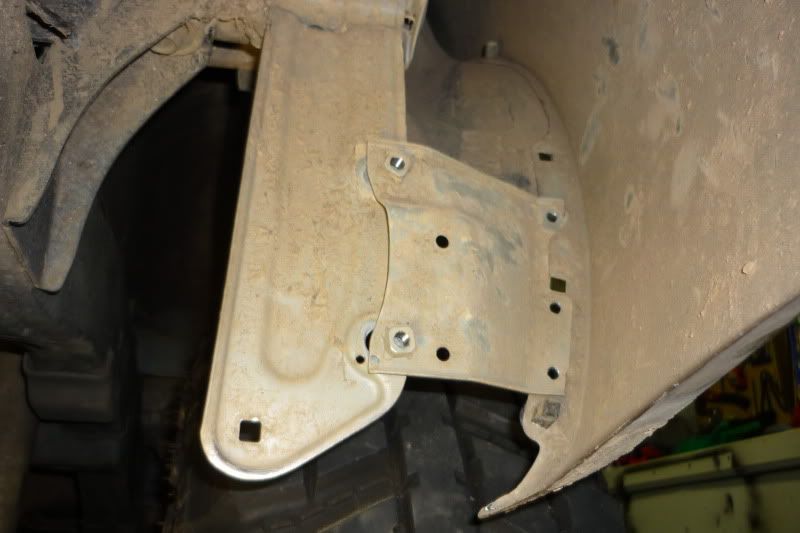
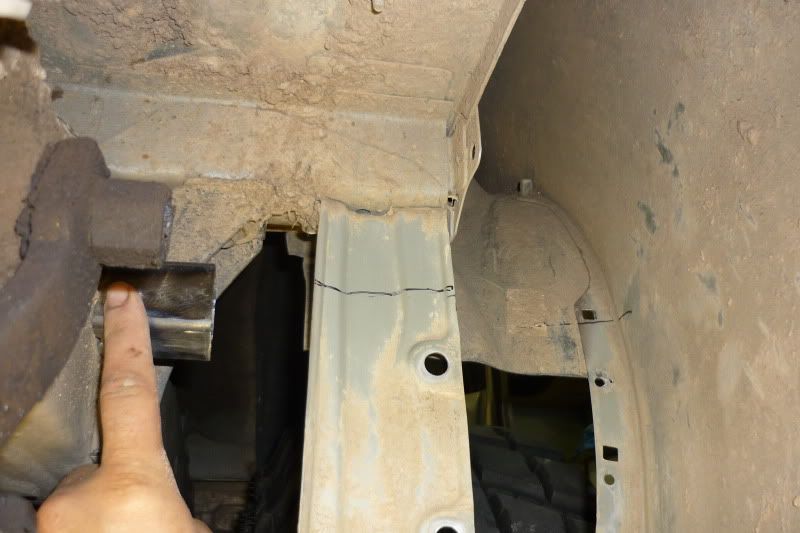
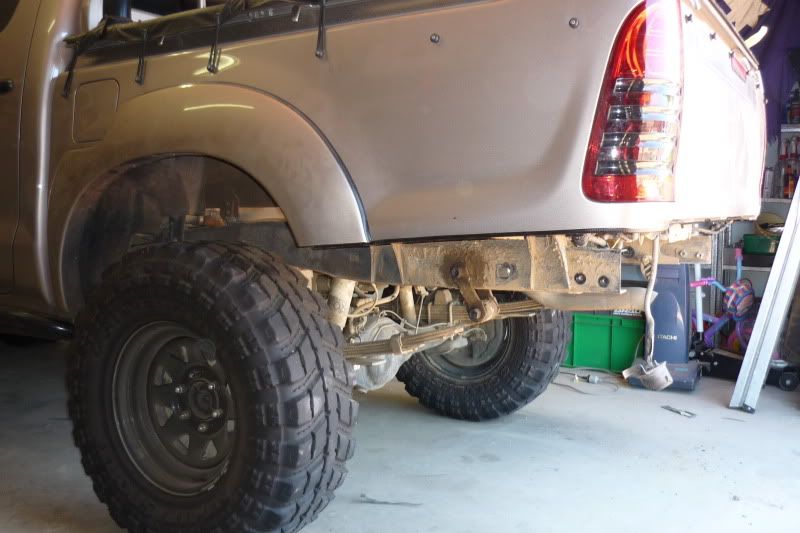
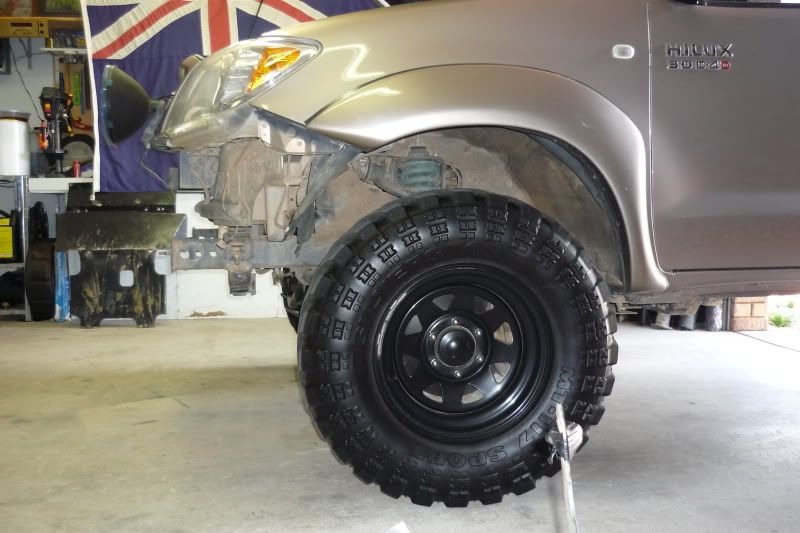
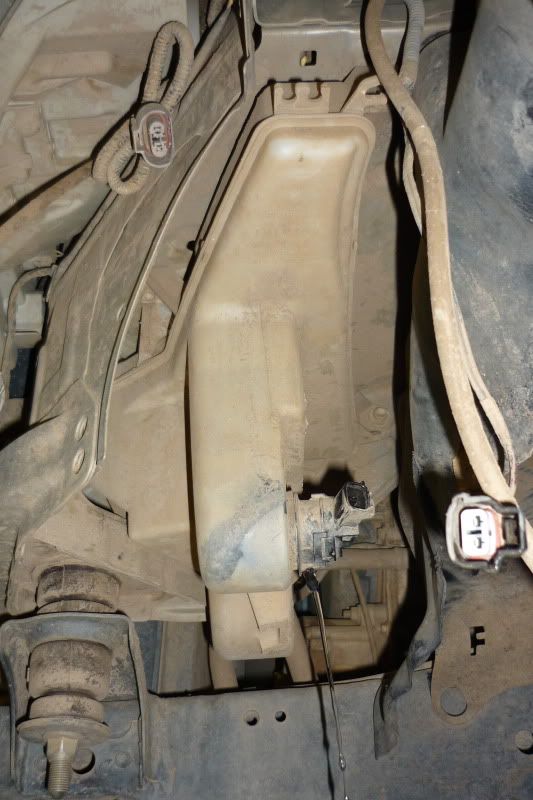
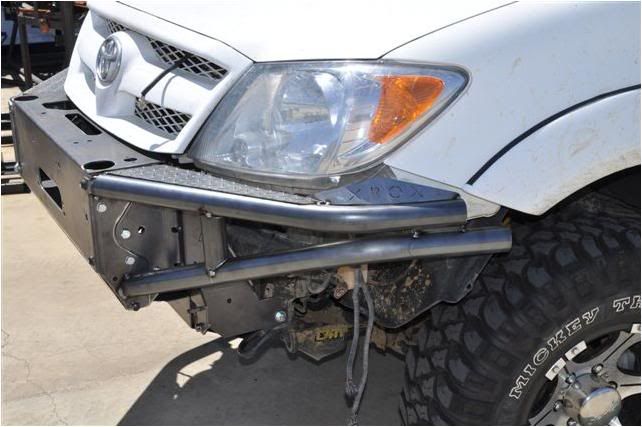
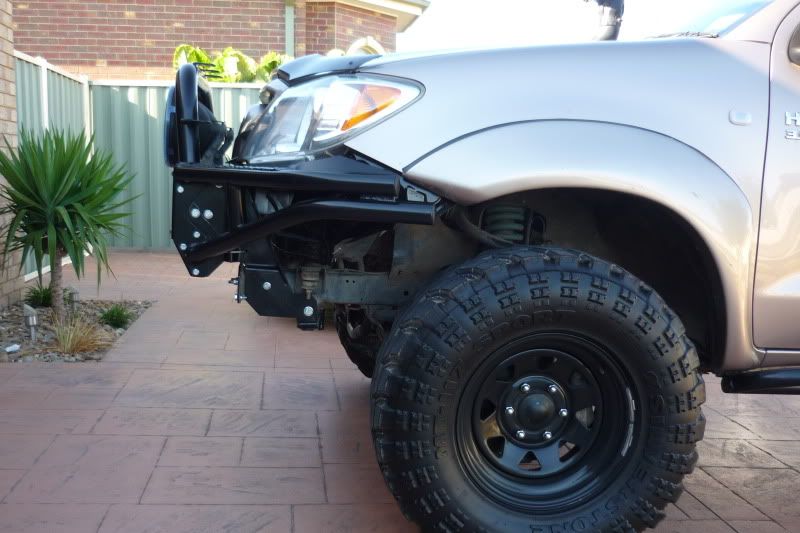
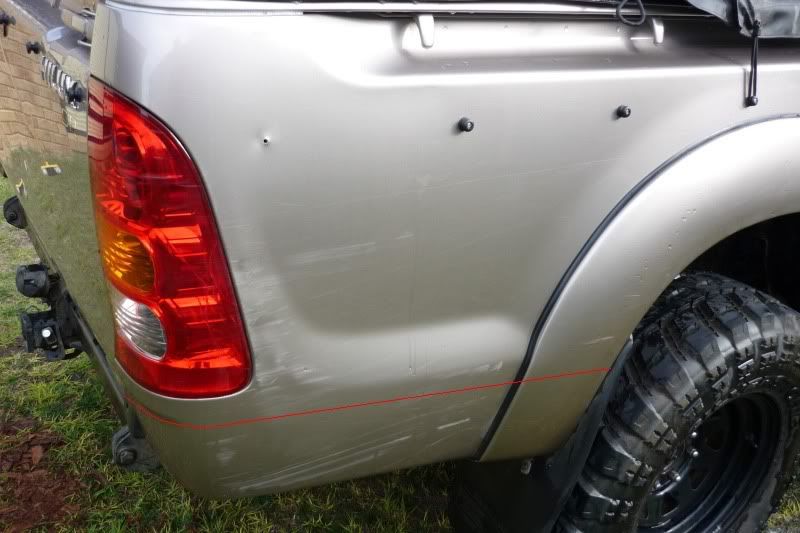
here you can see the extra steel supports exposed on the corners after the outer panel has been cut off.

P1000584.jpg


P1000585.jpg


P1000588.jpg


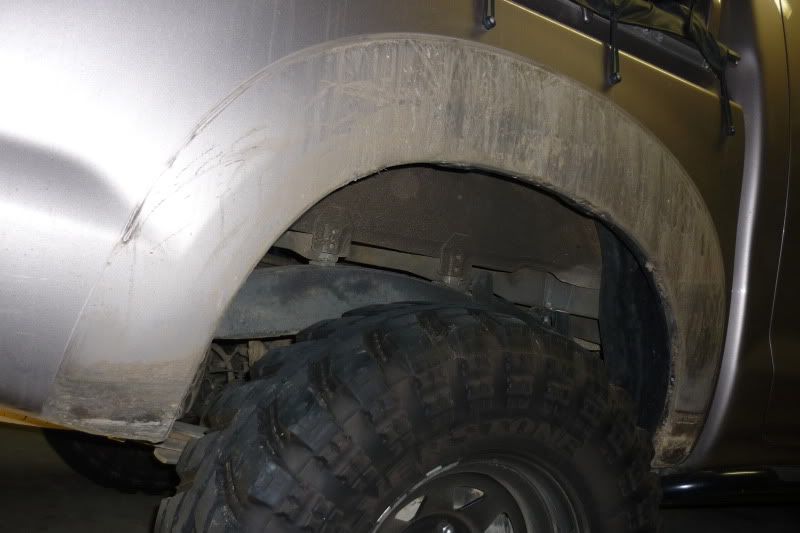
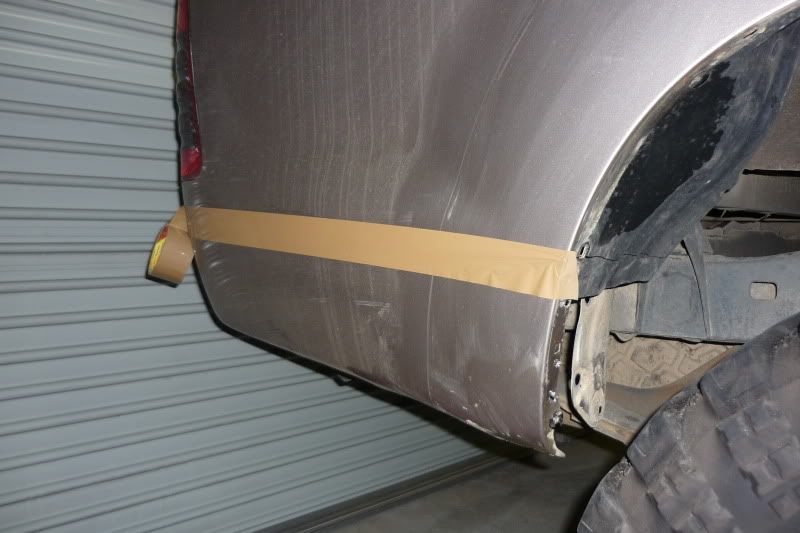
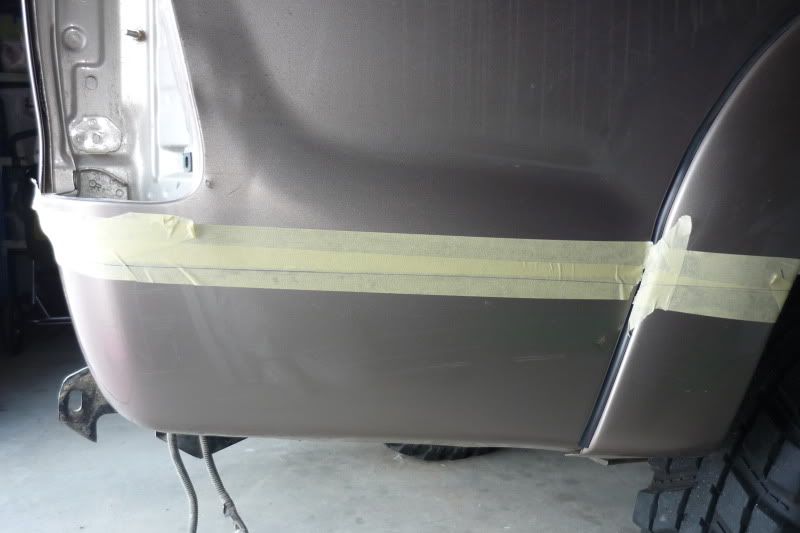
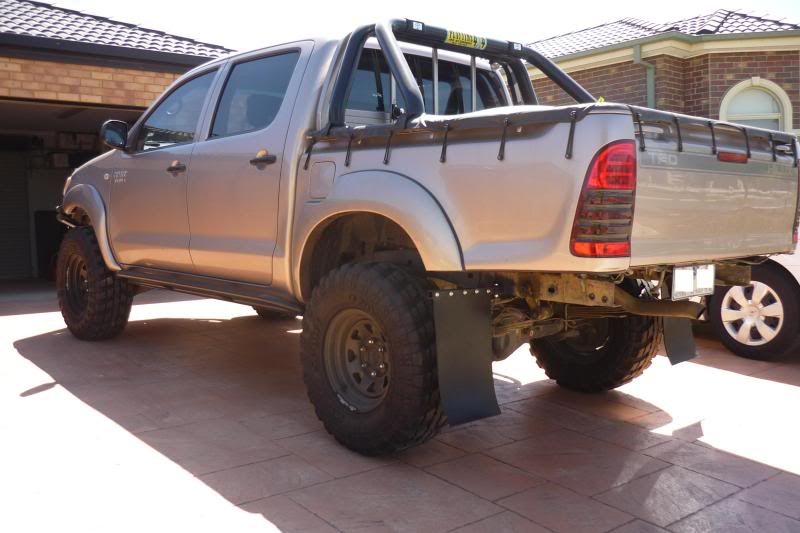
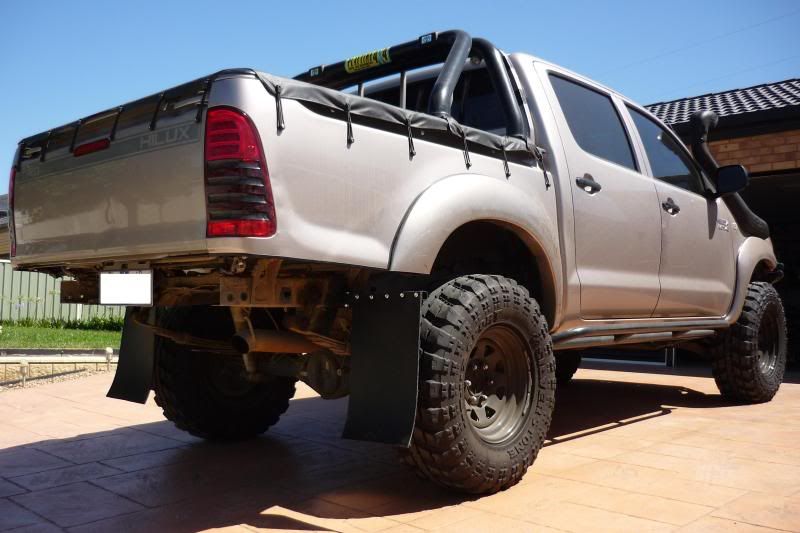
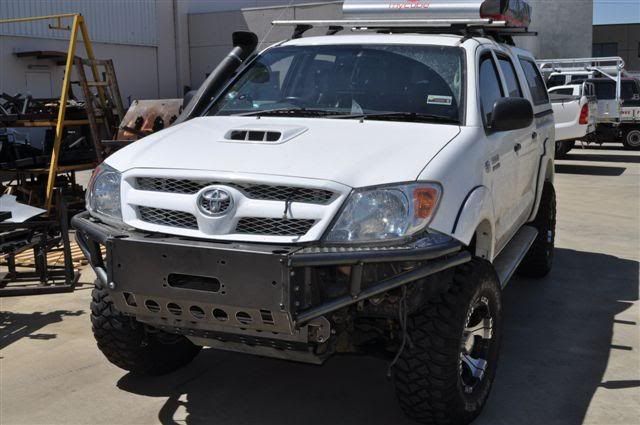
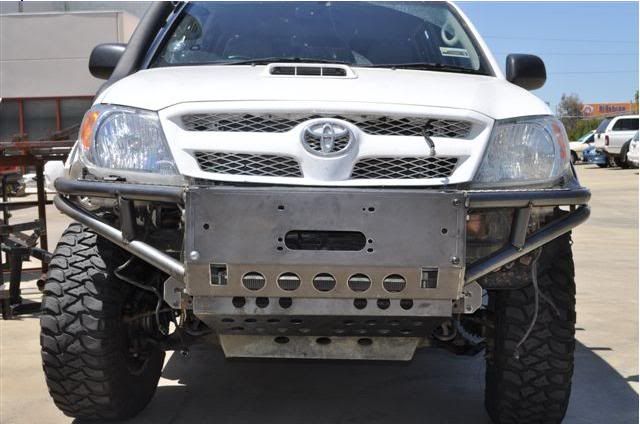
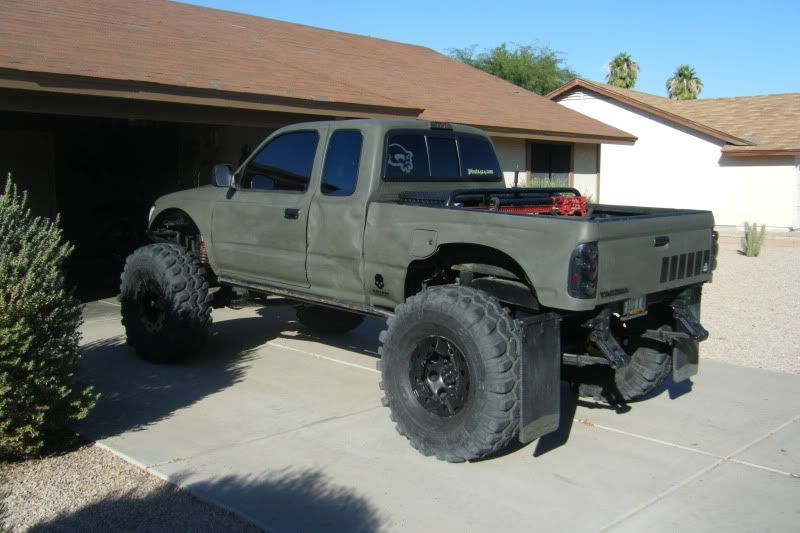
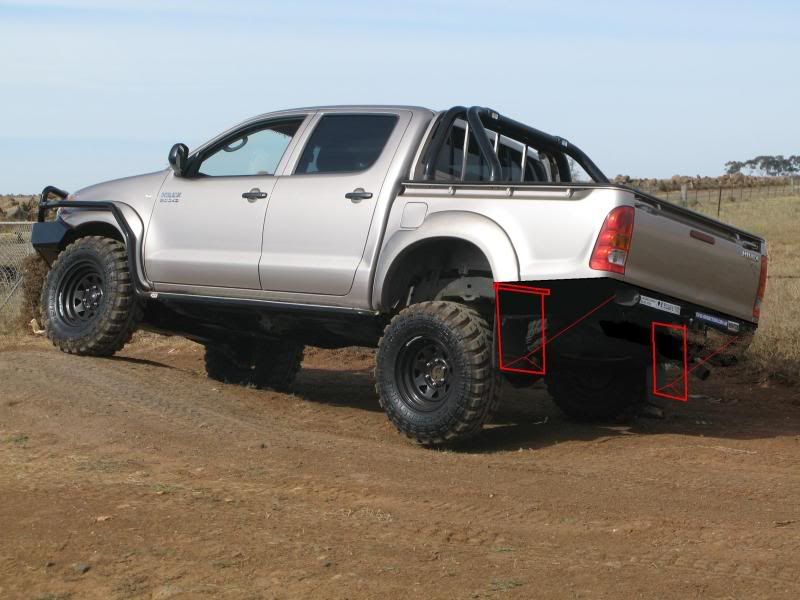
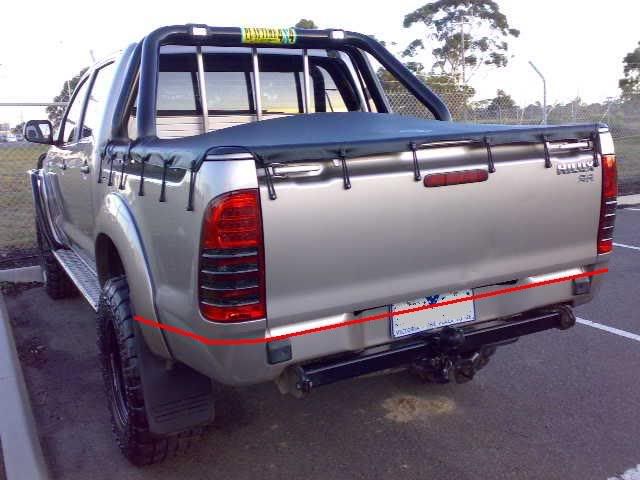
and a selection of a few more. i wanted to follow the bottom of the tailgate at the rear and taper it downwards towards the tyre.

P1000587.jpg


P1000586.jpg


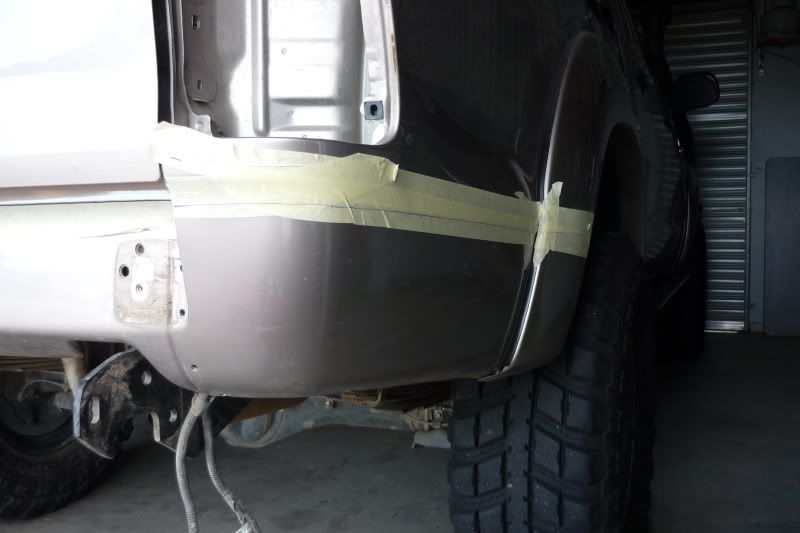
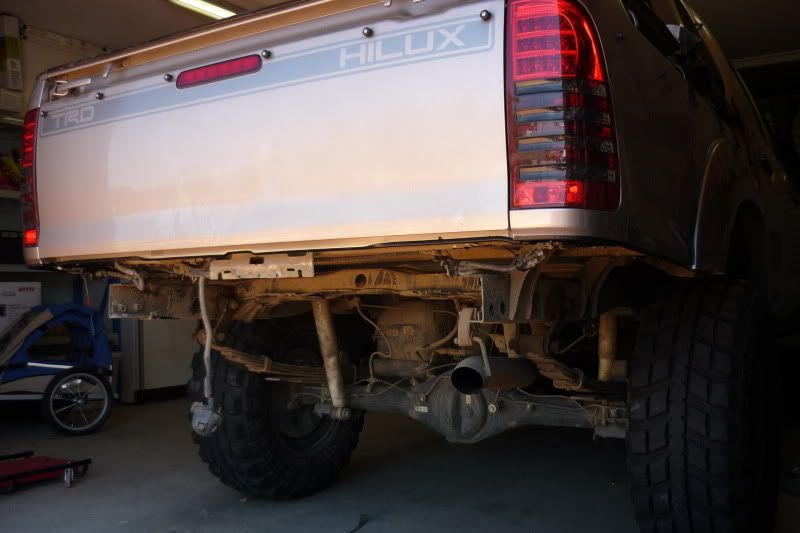
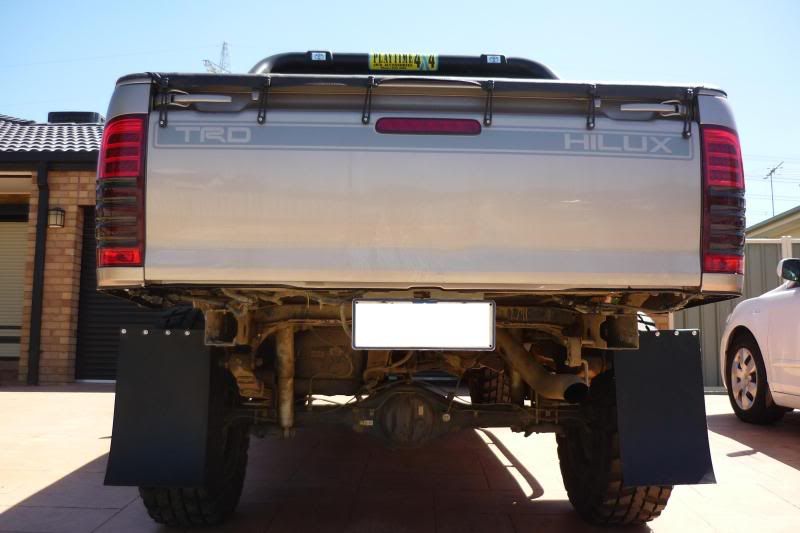
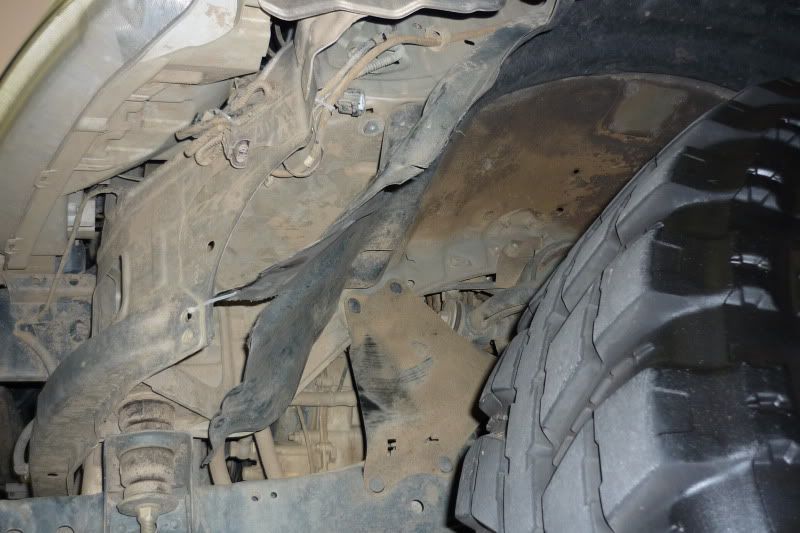
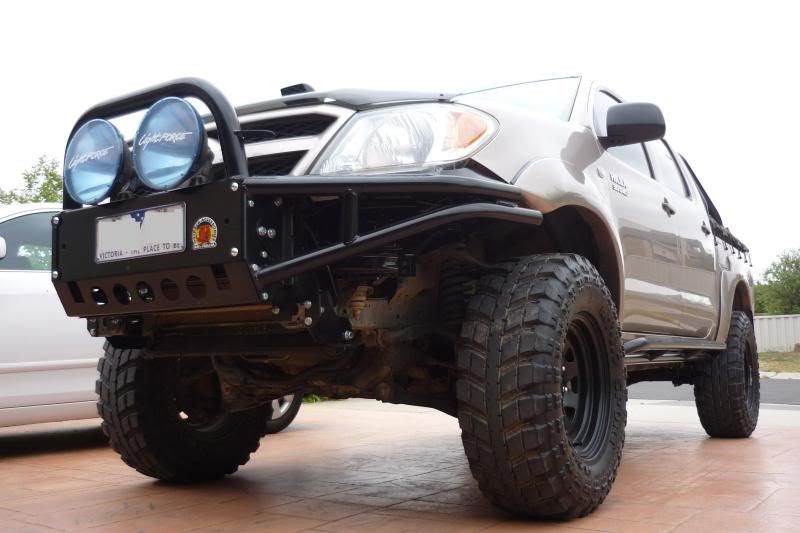
yes, the chassis is abit exposed, but should be hidden abit better eventually when i get some sort of rear bar fitted.

you can see the number plate support panel is still there, that'll stay for now till i mount the number plate on a hinge so i dont destroy it offroad.....


so what do you think guys?

both positive and negative comments appreciated, i understand its not something most people would do and im probably the only one dumb enough to do it first, but you live only once and you learn as you go along.....hopefully others have picked up something from my little bit of butchery.

tip: use a 4 inch thin blade for outer panel and if you have access to a 9" grinder, use that for the corners, would have made my life so much easier if i had a larger grinder!
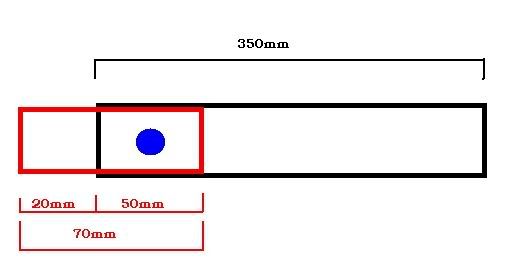
 

Hilux_Max

Adventurer
So for those of you that have been following some of my progress, you would have realised that I have recently completed a rear 1/4 panel chop and the fabrication of removable heavy duty mudflaps......

The thread dedicated to that can be found here - http://www2.newhilux.net/phpbb/viewtopic.php?f=41&t=5255

But I have taken some updated pics of the hilux this arvo after completing the removable mudflaps and thought you may be interested in seeing the finished product.

Side View
P1000589.jpg


Left Hand Rear Quarter
P1000592.jpg


Right Hand Rear Quarter
P1000590.jpg


Rear View
P1000591.jpg

some may wonder why i left a space above the mudflaps between them and the tub - its room for barwork to go over the top of the mudflap at a future stage. And yes, the mudflaps go past the edge of the flare, its needed to cover the whole width of the tyre, i may fit some rubber flexi flares to the edge of the fibreglass flare to cover the tyre better and make it look more legal.

As others have said, some sort of rear bar with recovery points would complete it.....anyone willing to make one "pro-bonno" ? ;)

Id love something like this with the wheel carrier -
So for those of you that have been following some of my progress, you would have realised that I have recently completed a rear 1/4 panel chop and the fabrication of removable heavy duty mudflaps......

The thread dedicated to that can be found here - http://www2.newhilux.net/phpbb/viewtopic.php?f=41&t=5255

But I have taken some updated pics of the hilux this arvo after completing the removable mudflaps and thought you may be interested in seeing the finished product.

Side View
P1000589.jpg


Left Hand Rear Quarter
P1000592.jpg


Right Hand Rear Quarter
P1000590.jpg


Rear View
P1000591.jpg

some may wonder why i left a space above the mudflaps between them and the tub - its room for barwork to go over the top of the mudflap at a future stage. And yes, the mudflaps go past the edge of the flare, its needed to cover the whole width of the tyre, i may fit some rubber flexi flares to the edge of the fibreglass flare to cover the tyre better and make it look more legal.

As others have said, some sort of rear bar with recovery points would complete it
 
Last edited:

Forum statistics

Threads
186,728
Messages
2,889,452
Members
226,872
Latest member
Supreet.dhaliwal
Top