workingclass
New member


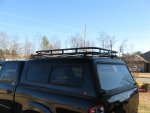
Finally some progress, a lot of progress. So after getting the scratch together for the materials and the dies for my buddies bender the rack is complete (for now). Most of the fab work was completed on a Saturday with some time after work to finish up the fab for the light brackets and expanded metal floor. It runs the length of the Cruiser and sits at 1.25" off the roof, so nice and low. The design is nothing new or special and was designed with adding a RTT in the future. The front half is reserved for the camping gear and the fuel/water cans when needed. I used 3 gutter mounted towers per side to help spread the load and 2" wide cross bars attatched to each tower. The rest is 1" DOM tubing with .090 wall thickness. The last step will be powder coat but for now a simple clear coat to help prevent rust until I can afford the powder coat. All in all a fun project and learning experience. Hope to fab up a set of Slidders and front/rear bumpers in the near future.