Homemade Roofracks.

trleix77

New member
:Wow1:
I searched and didn't see anything dedicated to home built roofracks. I thought it might be a good thread to have one with images etc all centralized.

I'm asking about since I'm contemplating building one. There are some outstanding roofracks on the market that can be purchased and there's a part of me that knows it would just be easier (and maybe better) to just purchase one of those. But I like a project, I like making things exactly how I want them and if I can do it for less money, all the better.

These aftermarket ones come to mind:
Rhino-Rack Backbone w/ Pioneer Platform #1
Mule rack
Baja Rack
Hannibal
FrontRunner


But I still want to explore my options with building one and would love some ideas. So if you'd please share any home built roofracks with images and a description, likes and dislikes etc that would be great.

If there is a thread on this somewhere already that I missed somehow, I'll gladly delete this one.
 

theksmith

Explorer
I have been looking around and I remember about a tubing system that is almost like what AEV/Rhino rack uses to make their racks out of. Anyone got a link to that.? Rhino does not make a rack the size I want so I figure order up the material and build it myself.

Front Runner sells their slats and side rails individually, as well as a bunch of different pieces to hold them together. not the cheap way to go though! someone must sell something similar in more of a wholesale capacity...
 

VanIsle_Greg

I think I need a bigger truck!
I just worked on a new roof rack for the XJ. It is based off of (inspired by) the ARB racks I have seen online. I set about designing it to pretty much cover the entire roof of the XJ, and to carry my new RTT for me.

Start to finish.

Mike welded it up in his shop...between working on his house reno and finishing another rad offroad trailer. Tubes all bent up and tacked together. Deck going on.


Got it home to my place, prepped it for paint and drilled it for the lights.


MANY coats of paint later...


Finished painting it. You cant really make it out, but I dipped the legs and the clamps in Plastic Dip (x 3 coats) to keep it from damaging the drip rails and paint. That stuff is amazing.


Backup lights in place... well protected too. Here you can also see the tie down loops.


RTT mounted up. This is an O-Spec tent prototype. Think Tepui or CVT... and this one is Camo.


Nice tent, fits perfectly up there with room for a propane bottle and some chairs or gear.


And done. Nice sunny day on the coast. Just need to get the front Plexiglas wind deflector cut and installed. Should help cut down some of the wind noise and buffeting. Not that it appears to be all that noisy?


ADVW/Liam

Adventurer
No. But it is based off the flat land 4x4 plans. But I modified it a bunch. Incorporated a rear winch, and remove able Jerry can mounts. I also don't like the post style mounts like are most commonly used. I wanted a cradle style to roll my tires up into. I also incorporated lights into the bumper. I just figured it out as I went.


Awesome Idea on the Winch mount! I might have to "borrow" that!
 

GadgetPhreak

Observer
I designed a rack specifically for Search and Rescue use in my 1972 Pinzgauer 710M. I went with the soft top Pinz so I could get 8 searchers in the back, the challenge was their gear. On Christmas Day I managed to get all 8 in with their packs on their laps, but it was a tight squeeze. So the designing began.

I wrote up my design doc and sent it over to Mule Expedition Outfitters in Issaquah and then sat down with Joe and we started working through the specifics. Initially we thought about using an off the shelf rack but decided we could better follow the lines if we went full custom. Along the way we decided to create 8 "buckets" in the rack, one for each seat space, and designed them to fit a SAR pack.

We built the whole thing out of aluminum so it weighs in at just under 200lbs. We cut "Search" and "Rescue" into the front panel. We also designed in a pad on either side for a snap in LED spotlight so I can mount it right or left side as needed during a mission.

Here's a few pictures of the build and finished product. I should put up a build thread at some point, you can see some more pictures and follow daily progress at http://facebook.com/SARPinz if you're interested.

bee786c85e2ef422c884a030317850f0.jpg


b6634e12cb07b4baa5915cca7885c0f7.jpg


0f1a7c3f11ba5c57378b0f5d091900e3.jpg


d2270f1c22cbff0568ae48d62128c766.jpg


9900505e9d4915a2da123283a6b8e92e.jpg


Sent from my iPad using Tapatalk
 
Nice job on the rack. What did you use for the top?

It's called duraplate. It's a composite material used on semi trailers. It 2 pieces of steel sandwiching some fancy plastic. It's cool stuff. Very rigid. And I wish it was perforated. I drilled all those suckers by hand to lighten it up. After doin it I figured I'd only reduced the weight by like 5%. Hours spent on it. And now I took it off. Anyone in SoCal wanna buy it? It gives u infinite tie down options.
 

LukeD

Observer
http://forum.expeditionportal.com/threads/59846-Homemade-roof-rack

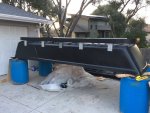
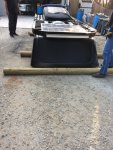
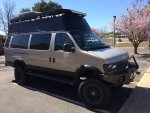
This thread was the inspiration for my ATV ramp creation. I couldn't bring myself to pay someone else $2500+ for a roof rack that would have been a PITA to leave the van and specify every little detail.

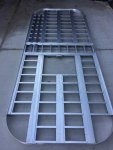
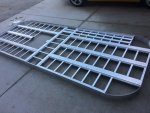
Required (3) $100 Harbor Freight ramps at 20% off, so $240 in ramps and another $100 in flat bar, bolts, and rivets. No welding, used a harbor freight grinder with cutoff wheel to do all the cuts.

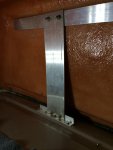
Mounts made from 3/16th 4" flat bar with an 11ft x 2" flat bar backing and some reinforcement brackets.

Total naked weight is 85 lbs

Etch primed it and used left over monstaliner to paint the bottom and around the edges, left the top bare since no one will see it.

IMG_0593.jpgIMG_0594.jpg2017-02-27 17.20.15.jpg2017-03-01 18.00.57.jpg2017-03-06 19.15.50.jpg2017-03-04 17.14.15.jpg2017-03-09 12.32.34.jpg
 
  • Like
Reactions: WVI

TeamDoty

Cpt. TeamDoty
Harbor Freight ATV Ramp based roof rack

Hi,

I built this last Summer prior to spending a couple weeks onroad/offroad in CO. My truck serves many, many roles so I can't have something permanently mounted. In addition, I wanted something fairly light weight and of course, cost effective. Given I don't have a tubing bender and only a wire feed flux core welder, I'm also a bit cornered into something I can fasten together. On top of all that I don't have a ton of extra space to store it when I'm not using it so I wanted to try to make a fold-able rack. There are 5 members of TeamDoty so we ground camp - no rooftop tent for us! Here's what I did...

I settled upon "kit-bashing" 2 sets of Harbor Freight folding aluminum ATV ramps - these can be acquired with coupons for about $80:

http://www.harborfreight.com/super-wide-tri-fold-loading-ramp-90018.html

I combined these with some aluminum angle, some sheet aluminum, rivets, fasteners, etc. The base for the design is an older model TracRac ladder rack... the TracOne model - I picked this up used on CL for about $200:

https://www.etrailer.com/Ladder-Racks/TracRac/TA27000-01.html

I started by disassembling the steel bars/brackets at the end of the ramps that rest on the tailgate and since I needed 4 sections only of the 6 total I now had (2 ramp sets = 6 sections) I took apart some of them and put the hinges in locations so I could tri-fold it on itself. I sectioned the aluminum angle so the would nest with one another when folding. The front fairing was made with some angle along with the sheet aluminum. The plastic eyes on it were from the ladder rack and I use those to pass a tube through to help support a tarp-based awning.

The ladder rack has t-slots on the top surface so I made some t-bolts to slide in there and use them to bolt the rack down through holes I cut in the ramps.

I have a hard folding tonneau cover that can open up partially with this rack assembly installed. Under the rack and on the cover I tied down an auto rooftop soft bag for all our luggage... forward of that right behind the back glass I had 4x 7-gallon water containers (the cover can support about 300lbs.)

Here's a pic of it on the truck (with Cosmo getting in the shot!):

IMG_0001_1.jpg


Close up of the fairing:

IMG_0010.jpg


From behind the fairing a bit so you can see the angle I used (I put a spacer on the bolt on the centerline of the fairing to get it to have a sorta rounded shape):

IMG_0020.jpg

IMG_0009.jpg


Underside of rack so you can see the basic form, the side angle aluminum, etc.:

IMG_0006.jpg


Top down view showing mounting holes in ramps + the relief cuts in the rear angle aluminum to facilitate folding:

IMG_0014.jpg


Top down view of the outboard ramp showing how the angle was offset to facilitate folding:

IMG_0012.jpg


Close up detail of the corners showing the riveted construction:

IMG_0016.jpg


Here's a view showing one outboard portion folded up and the inboard sections being folded on to one another:

IMG_0028.jpg

IMG_0027.jpg

IMG_0022.jpg


Here's a view showing it all folded up for storage:

IMG_0034.jpg


A detail showing the rack folded up and how the slightly offset rear angle pieces nest with one another:

IMG_0031.jpg

IMG_0032.jpg

IMG_0030.jpg


And like all good overlanders, here's a pic of my bottle opener by the tailgate :)

IMG_0004_1.jpg


Over all I'm very pleased with the results. It was cost effective, easy to build with just rivets, drill, bits, jig saw, etc. It's fairly light weight, folds up and stores away nicely. Given the ladder rack is rated at 800lbs. and these ramps are rated at 1000lbs. it's very strong, stable and sturdy. My truck is a 3500 model so the over-roof weight wasn't even noticeable. I mainly carried extraction gear, and other odds and ends that I planned to not need frequently on our trip. It was a great way to get that stuff up and out of the way to leave room under the cover for items we would use on a daily basis during our trip.

(re-edited, Photobucket please stop killing links!)
 
Last edited:

Forum statistics

Threads
188,285
Messages
2,904,865
Members
229,961
Latest member
bdpkauai
Top