You are using an out of date browser. It may not display this or other websites correctly.
You should upgrade or use an alternative browser.
You should upgrade or use an alternative browser.
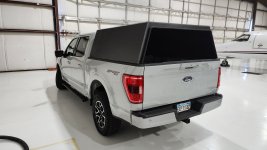
How to build your own Carbon Fiber Camper making your own Composite/Foam panels.
- Thread starter ebrabaek
- Start date
ebrabaek
Adventurer
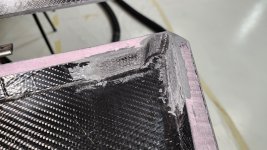
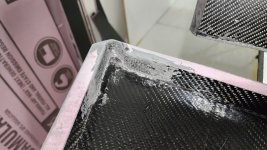
Then it was back to the door. Began routing out the foam in two stages.....
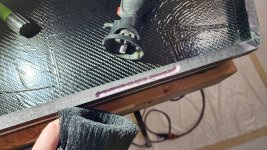
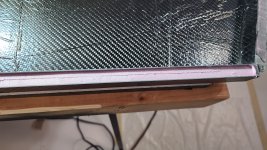
Then filled the void with a small layer of Thixotropic then a strip of Carbon Fiber strip from the left over pile. This is to strengthen that whole flange as the continuous stainless hinge will mount to that.
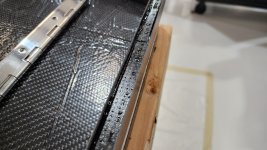
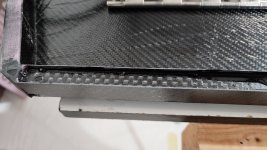
Then THIX...... and a top strip of Carbon fiber as well..... then Thix to seal off the top and auto level the flange... Use a heat gun to increase the viscosity of the THIX if need be.
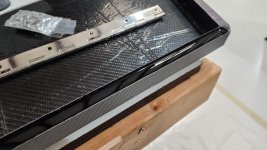
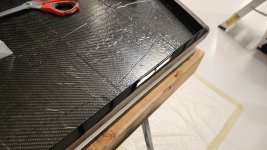
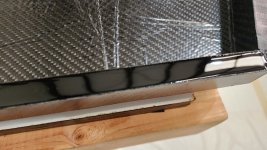
The Stainless screws will thread straight into that surface, and onto the camper. Now curing......


Then filled the void with a small layer of Thixotropic then a strip of Carbon Fiber strip from the left over pile. This is to strengthen that whole flange as the continuous stainless hinge will mount to that.


Then THIX...... and a top strip of Carbon fiber as well..... then Thix to seal off the top and auto level the flange... Use a heat gun to increase the viscosity of the THIX if need be.


The Stainless screws will thread straight into that surface, and onto the camper. Now curing......
Peter_n_Margaret
Adventurer
Noticed the S/S piano hinge.......
You should know about this.....I am using the 18mm x 1.6mm on my new build for doors and hatches, secured to glass sandwich panel with Plexus MA310 adhesive.
 www.carbonhinge.com
It has many advantages over S/S hinge (many of which will be obvious) like dust proof and maybe waterproof. One of the biggest is the time saving.
Made in Oz, but I did see some on a US Ebay site.
Cheers,
Peter
OKA196 motorhome
You should know about this.....I am using the 18mm x 1.6mm on my new build for doors and hatches, secured to glass sandwich panel with Plexus MA310 adhesive.
PRODUCTS | carbonhinge
 www.carbonhinge.com
Made in Oz, but I did see some on a US Ebay site.
Cheers,
Peter
OKA196 motorhome
Last edited:
ebrabaek
Adventurer
Heya Peter.Noticed the S/S piano hinge.......
You should know about this.....I am using the 18mm x 1.6mm on my new build for doors and hatches, secured to glass sandwich panel with Plexus MA310 adhesive.
It has many advantages over S/S hinge (many of which will be obvious) like dust proof and maybe waterproof. One of the biggest is the time saving.PRODUCTS | carbonhinge
www.carbonhinge.com
Made in Oz, but I did see some on a US Ebay site.
Cheers,
Peter
OKA196 motorhome
I did this set up (Stainless) on the last box I build with great success. It does however need a primary mean of a seal which is why I used the big wiper seal. Once that is engaged, there will be no dust from this orifice. Plenty other places ha ha ha, but not here. I am a big fan of good ole fashion Stainless, as they dont easy fail. Predictable and reliable. I was worried on the other box that it might promote corrosion by electrolysis but after 12 months of use I saw nothing. I sincerely appreciate the heads up and suggestion.
Peter_n_Margaret
Adventurer
Mechanical fasteners do cause point loads which can be avoided with adhesives.
I have needed to replace S/S hinge fixings in our 20 year old build truck. Probably due to 200,000+ km of corrugations. I do not expect that with the carbon/kevlar hinge.
Cheers,
Peter
OKA196 motorhome
I have needed to replace S/S hinge fixings in our 20 year old build truck. Probably due to 200,000+ km of corrugations. I do not expect that with the carbon/kevlar hinge.
Cheers,
Peter
OKA196 motorhome
ebrabaek
Adventurer
Correct. That is why I chose the Continuous hinge as it distributes the load very well. One benefit to the use of a carbon matrix is that you can build or engineer the setup in the stress distribution joints. Just screwing a alloy object into a composite anchor will eventually wear beyond its serviceable limit. If you on the other hand create a multitude of joined surfaces to distribute the load it tends to do real well. 20 years is quite respectable I think. This hinge can be replaced in 10 minutes....Mechanical fasteners do cause point loads which can be avoided with adhesives.
I have needed to replace S/S hinge fixings in our 20 year old build truck. Probably due to 200,000+ km of corrugations. I do not expect that with the carbon/kevlar hinge.
Cheers,
Peter
OKA196 motorhome
ebrabaek
Adventurer
Time to work on the rear door, and its mounting. I take extra time to engineer areas of high stress. I normally build it in the panel in this case when I construct it (them) but as this is made up by non specific pieces I did not have this luxury. As my fellow adventurer pointed out above there ate a host of different hinges and they each serve a different purpose but do well within that purpose, and Peter brings up a good point. "Point loads" is something that you always need to pay attention on in composites. Specially as your using alloy fasteners and composites. A fatal flaw, if not addressed with Carbon is that its abrasive resistance properties is like a pencil lead. Sorta.... So once a screw or alloy fastener vibrates loose it will relatively fast "file" through its hole and could simply fall out, leaving the joint exposed. It can happen to all of us. If you are following the XO- Africa expedition you will see what I mean as they are battling the worst roads they have ever seen, things are coming apart. There are a few things you can do to mitigate this. If you screw in alloy fastener directly into fiber, add a layer of epoxy. Sorta like a Danish Layered cake. The epoxy, after it has cured, has this amazing capability to kinda "grap" hold of whatever it is next to. A bit like fly paper but obviously not that sticky. Remember above when I created several layers inside the door flange to bolt the stainless hinge on? That was done in order for the screws to stay. Like a lock nut. On the camper side it is a different problem as we are drilling on a 90 deg through fiber, foam and then fiber. This is why a bonded hinge would not work well in this application and premature failure would be expected. If you bond a hinge to the outer skin on any FRP panel, you are only utilizing the outer composite layer. As that door or window will work, vibrate, call it whatever you'd like, there is a high properbility that it will yank the outer composite layer off the foam and you are now delaminated. It is not the debonding of the epoxy from foam, but simply the foam splitting. In order to achieve the maximum strength in a FRP or any sammich panel really, you need to engage both fiber layers, but that i itself presents an issue. Ya cant torque on foam. I'tl squish. Trying many different solutions over the last many years, I find that if you replace the foam around each fastener with epoxy, you can now torque, while engaging both sides on the panel. It is a time consuming application but this is why it is so cool to do it yaself, as you can do whatever ya want.
All that said, it is time. The rear doos corners was filled with THIX.....and is now curing.
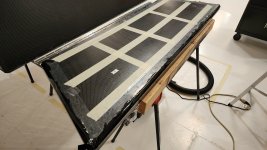
Then after a small hole was drilled to line up the holes for the hinge on the camper side...... they were taped off to prevent any drip through of epoxy.
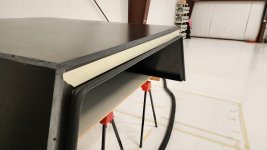
Shell was then sat down on the aft part in order for me to be able to work the holes. Each hole was enlarged with a dremel tool.
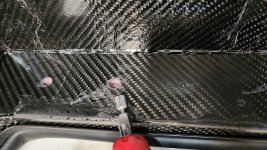
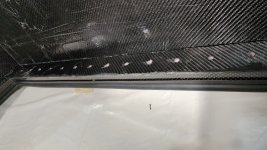
Then sanded in order for the Carbon Fiber tape to get the best bonding surface.
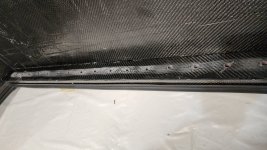
Then a strip of unidirectional Carbon Fiber tape was cut.
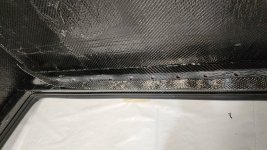
Each hole was then filled with Thixotropic and the carbon fiber tape was laid on top. The strip was saturated with Max Bond 1618 but THIX was below and above it.
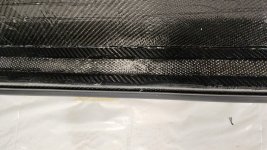
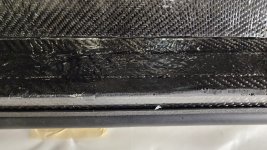
This will now cure and I have 21 M4x25mm stainless hardware due in the next few days. Until tomorrow.....
All that said, it is time. The rear doos corners was filled with THIX.....and is now curing.

Then after a small hole was drilled to line up the holes for the hinge on the camper side...... they were taped off to prevent any drip through of epoxy.

Shell was then sat down on the aft part in order for me to be able to work the holes. Each hole was enlarged with a dremel tool.


Then sanded in order for the Carbon Fiber tape to get the best bonding surface.

Then a strip of unidirectional Carbon Fiber tape was cut.

Each hole was then filled with Thixotropic and the carbon fiber tape was laid on top. The strip was saturated with Max Bond 1618 but THIX was below and above it.


This will now cure and I have 21 M4x25mm stainless hardware due in the next few days. Until tomorrow.....
Last edited:
ebrabaek
Adventurer
Last step in finalizing the rear door. Prepping by vacuming the edge/flange that will get a small layer of Thixotropic. Then a small layer of THIX is applied. Now curing. The Stainless hardware should be here Monday so perhaps then or Tuesday I will mount the door.
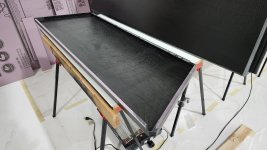
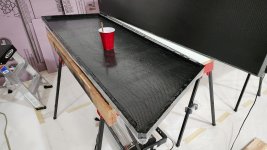
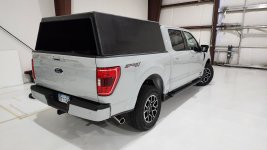
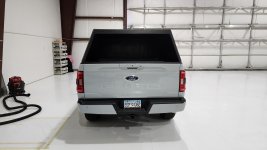
As I turned around, I could not help enjoying the view and thought I'd share.
Have a fantastic week end....
![20240405_101640[1].jpg 20240405_101640[1].jpg](https://forum.expeditionportal.com/data/attachments/730/730792-c5218cb43a1f860ca0a6fb8c91383974.jpg?hash=xSGMtDofhg)


As I turned around, I could not help enjoying the view and thought I'd share.
Have a fantastic week end....
![20240405_101640[1].jpg 20240405_101640[1].jpg](https://forum.expeditionportal.com/data/attachments/730/730792-c5218cb43a1f860ca0a6fb8c91383974.jpg?hash=xSGMtDofhg)
ebrabaek
Adventurer
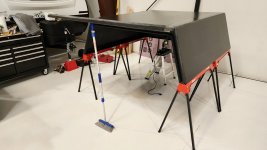
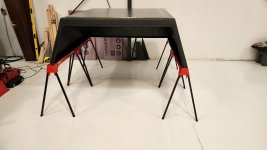
Now to a bit of a change in the landscape. As the main pieces has been fabricated and bonded, now we turn our focus on the hardware. The Stainless hardware for the hinge is delayed via USPS but I suppose that was to be expected. Looks like Wednesday for the door mount now. Anyway, no need for the big table anymore, so I did a re shuffle. This way I can also work on the inside as I begin focus on the mount flange.

ebrabaek
Adventurer
Door hinge hardware came in yesterday.

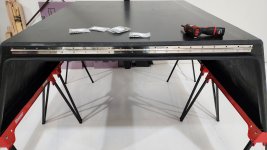
Hinge mounted....
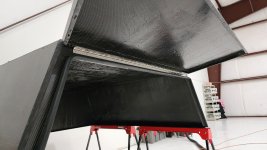
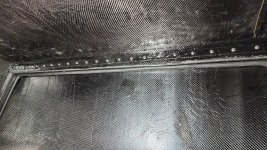
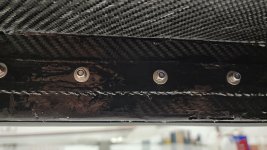
From the inside....
Then as we are getting close to mounting the cap It is time to focus on the top coat. The latches wont be here till Monday along with the gas struts and forward window......But it was time to prep the "edges and corners, so they got a coat of Max 1618 with black pigment, which will be ligthly sanded.
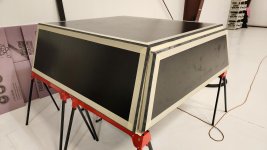
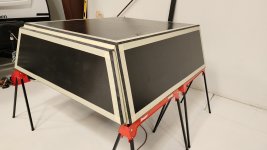

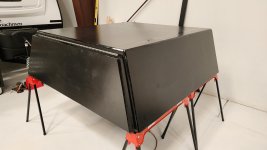
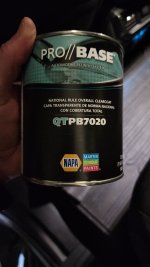
Got the top coat today as well. That stuff is stoopid expensive.... Wow...

Hinge mounted....


From the inside....


Then as we are getting close to mounting the cap It is time to focus on the top coat. The latches wont be here till Monday along with the gas struts and forward window......But it was time to prep the "edges and corners, so they got a coat of Max 1618 with black pigment, which will be ligthly sanded.


Got the top coat today as well. That stuff is stoopid expensive.... Wow...

ebrabaek
Adventurer
Thank you sir.Very nice door work!
ebrabaek
Adventurer
It is a bit hard to illustrate via pictures, but I thought I give it a go anyway. Remember the lower corners of the door that was trimmed to facilitate the wiper seal....
Perhaps this will give you an idea of the setup.
Remember the routing and sanding to make this...??
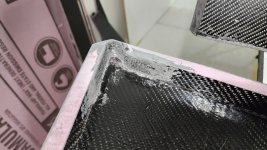
Here it is from the inside right before closing... Water collected around the wiper seal will run down to this point and as the door is tilted a bit forward will run right out and down the crack between the tailgate and side of the bed.
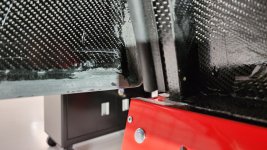
And with it closed.....
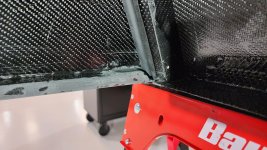
Perhaps this will give you an idea of the setup.
Remember the routing and sanding to make this...??

Here it is from the inside right before closing... Water collected around the wiper seal will run down to this point and as the door is tilted a bit forward will run right out and down the crack between the tailgate and side of the bed.

And with it closed.....

Similar threads
- Replies
- 41
- Views
- 8K
- Replies
- 24
- Views
- 4K
- Replies
- 19
- Views
- 4K
- Replies
- 4
- Views
- 2K

