How to build your own Carbon Fiber Camper making your own Composite/Foam panels.

ebrabaek

Adventurer
It was however time for the hardware for the gas struts and latch striker plates. Onwards to hardware fabbing. There are again so many different ways to do this. Mine no better that anyone else's.
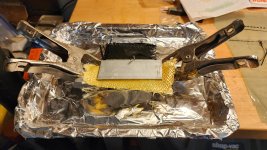
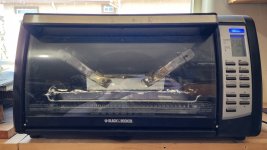
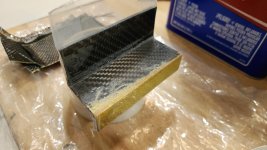
We switch gears and please let me introduce you to Max Bond HTE. It is an epoxy that requires post heat cure. I build a couple of big adventure bike's mufflers with it and its incredible stable to almost 500 deg. F. BUT, it has to be cured after the layup. That does present a few issues. I cure mine at 300 degF for 60 minutes. Cant use anything other than metal. Clamps, tape, etc.
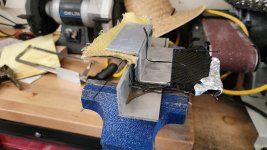
First the bracketry.... Treated with release agent.
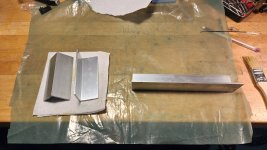
20240411_133320.jpg


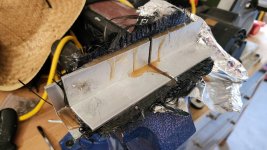
I need to make two 90's with 1 inch in between. 8 layers of 5.7 oz 6K and 2 layer's of K-39 Aramid. This is for the latch striker plates. Again, it will make more sense when you see it in place. The Aramid is in the place for the striker pin of the latch to ensure it does not wear through the Carbon.
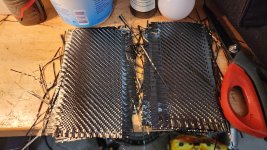
20240411_133330.jpg
20240411_132451.jpg


Then Max bond HTE was mixed and is now being elevated to 120 degF while de gassing a bit. It is thick and impossible not to stir in bubbles while mixing.
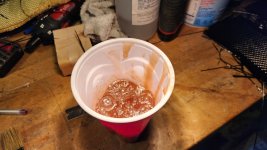
20240411_133324.jpg


Then the layup begins. I tend to lay it all up and then folding it over the "mold"
20240411_134559.jpg


Then held in place with clamps....
20240411_135345.jpg


Then in the oven ramping it up.
20240411_135518.jpg
 

ebrabaek

Adventurer
What is the advantage of Max Bond HTE over the previous resin you used?
The Max Bond HTE is typically used in applications that is exposed to high heat. The 1618 is good up to around 250 deg, whereafter it begins to behave more like plastic. All polymers has the same Achilles heal or should I say kryptonite. Heat. As a particular polymer reaches its max temperature the molecules begins to temporally "unlink" and the whole piece begins to behave like a piece of plastic. Sorta. As you continue to raise the temperature the "unlinking" of the molecules becomes more of a permanent nature and structural damage will occur. So polymers (epoxies) are generally split up in two groups.
1) Requiring NO post heat cure
2) Requiring post heat cure

Number 1 is obviously a beneficial polymer to work with. Pour, mix and saturate napkins.....Done.
Number 2 ya gotta bake it, which presents a whole new sets of problems. Not just do you need an over the size of a meat locker but all the tiny air bubbles that is embedded in the resin and layers will not increase and so you now need to vacuum bag it. Or at least should to avoid the poricity.

In my case I dont plan on the camper getting much above 150 deg F in full sun. That is what past experience have taught me. Perhaps 160 at most, but what other benefit that I am chasing with the HTE is the immense strength that comes with it. The aforementioned polymer linking is much stronger with polymers requiring a post heat cure. This is for the locking hardware and I can use all the strength and stiffness I can get. The above pieces is impossible to break with your hands and very stiff. You would need a big hammer.

That said I use the Max Bond HTE any time I need extra strength or torsional stiffness, not just for high heat tolerance.
 

ITTOG

Well-known member
Thanks for the detail. I am a chemical engineer so understand what you're talking about but didn't know the specific properties of the resin. I have done a few fiberglass jobs and am looking to do more so following your process has been pretty cool. I'm thinking about building one for a buddy.

Sent from my Pixel 7 Pro using Tapatalk
 

ebrabaek

Adventurer
Thanks for the detail. I am a chemical engineer so understand what you're talking about but didn't know the specific properties of the resin. I have done a few fiberglass jobs and am looking to do more so following your process has been pretty cool. I'm thinking about building one for a buddy.

Sent from my Pixel 7 Pro using Tapatalk
That is really cool. Unfortunately I cant add a much deeper perspective, but if you want to dive deep, I would encourage you to reach out to Garald @ Polymer products in Ontario CA. He is the chemist/alchemist who is creating these blends. I'm sure he would be delighted to explore this very much greater detail that I can only dream of.... Him and his team are awesome.

I would suggest to build something small to dap your hands first and then negotiate free ale, single malt highlands, or perhaps coffee for life as this takes some serious time... Ha ha. As I am into the hardware now it gets less monotonous and I am back in the 70's Denmark building Lego again..... Whoooooot
 

ebrabaek

Adventurer
Hardware was then trimmed. I need to prepare you to the land of K-39 Aramid (Kevlar) By just cutting this piece with a high TPI metal blade it is now gone. The teeth are warn smooth. It is crazy really but thats why we use it.
Latch brackets before being cut in half.
20240412_081713.jpg


I am now building up the interface between the brackets and the camper. Added 5 layers of 5.7 oz tape and a section to space it from the wiper seal. Itl make more sense when you see it in place.
Curing.
20240412_100710.jpg


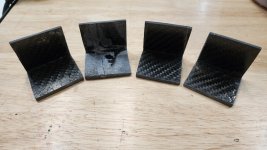
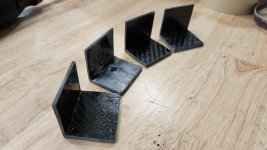
Then the gas strut brackets were cut and trimmed into 4 sections.
20240412_093556.jpg
20240412_093601.jpg


Happy Friiiiiidayyyy.
 

ebrabaek

Adventurer
Snug out to the hanger for a couple of hors before the Lady's woke up.... Bwaaaaamuuuhahahaha.
Latch hardware cut in half.
20240413_114239.jpg


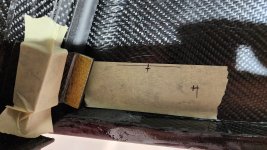
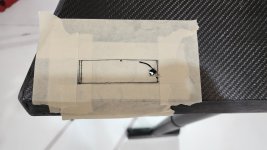
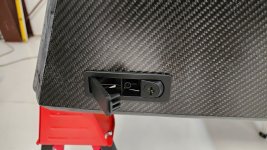
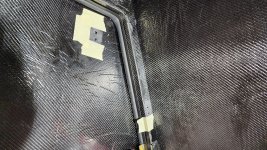
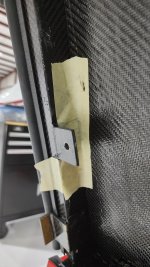
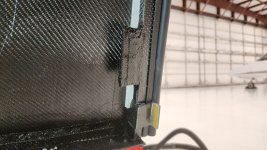
Then came the measuring for the position of the latch bracket. There are really no particular way you do this. Whatever works for you. I positioned the latch on the inside, angled this and that. Sighted down the length, bit my tongue and drilled two wholes representing the X and Y axis. At this point the bracket hardware is held in position 1 inch up from the camper mount flange, and taped in place. Always tape things in place. re-measure before bonding.
20240414_091947.jpg


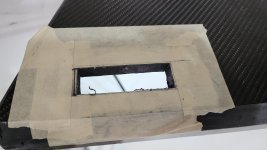
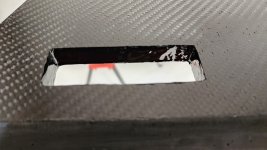
Other side likewise, then use those two holes to trace the cut lines from the outside. Have an espresso..... take a breath, hold ya breath and have another double aaaaaand ........ cut.
20240414_085828.jpg
20240414_090556.jpg
20240414_090630.jpg


From the inside...... Will it line up..... Have another espresso....... and look. Tadaaaaaaaaahhhh.
20240414_090759.jpg
20240414_090800.jpg
20240414_090803.jpg
 

ebrabaek

Adventurer
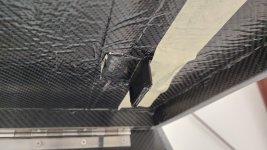
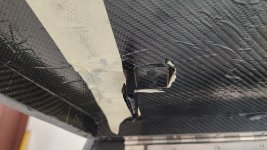
So as I aforementioned you should always arrest the edges and corners when you cut Composite/foam construction. If you done and torque It will eventually work itself loose. It is a privilege you have as a DIY project.
Cut out holes....
20240414_093845.jpg
20240414_093947.jpg
20240414_093953.jpg


Everything lines up nicely so its time to bond. Cover the bottom with tape and work a relatively thing layer of THIX into the surfaces cut. Then yank the tape off.
20240414_101826.jpg
20240414_103249.jpg


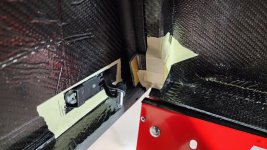
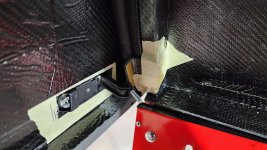
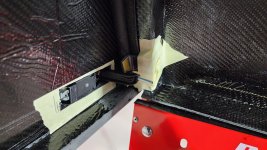
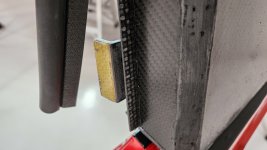
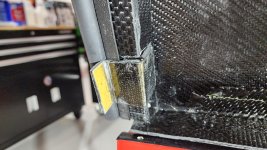
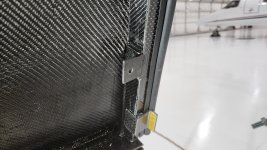
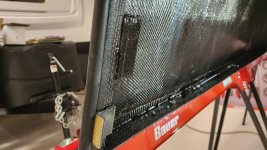
Then the latch brackets were bonded in place. This time we don't need to screw them in to hold both the inner and outer layer of Carbon Fiber. We bond back on the inside and then a 90 deg and bond to the same flange that holds the wiper seal in place. That flange has a grip in both inner and outer layers of Carbon Fiber so were good. Bonding agent of choice...????? THIX it is again.
20240414_102049.jpg
20240414_102114.jpg
 

ebrabaek

Adventurer
The kevlar is more resistant to abrasion?
Absolutely. It is crazy really how resilient it is. Cutting through the pieces I made for the bracket, I wore through a high TPI metal jigsaw blade. Just a few cuts. Done. So anywhere I have flanges that will touch something else, I give it a layer or two of Kevlar. Sanding it is also an exercise in crisis management, as the fibers fray and you can really make a mess of things. The epoxy heats up due to the prolonged friction and now behaves like plastic. So grind with ease. Cool with water, and repeat. BUT..... That is what Aramid/Kevlar does and why with both love and hate it... Ha.
 

Teardropper

Well-known member
Absolutely. It is crazy really how resilient it is. Cutting through the pieces I made for the bracket, I wore through a high TPI metal jigsaw blade. Just a few cuts. Done. So anywhere I have flanges that will touch something else, I give it a layer or two of Kevlar. Sanding it is also an exercise in crisis management, as the fibers fray and you can really make a mess of things. The epoxy heats up due to the prolonged friction and now behaves like plastic. So grind with ease. Cool with water, and repeat. BUT..... That is what Aramid/Kevlar does and why with both love and hate it... Ha.

The stuff is kinda crazy. I used to make Kevlar/S-glass kayaks a million years ago. We had to have two brand-new pairs of Fiskars scissors. One for glass and one for Kevlar. You could cut the Kevlar just fine with the dedicated cutters unless you made one snip with those scissors on glass, and then you had to buy another set for the Kevlar.
 

ebrabaek

Adventurer
The stuff is kinda crazy. I used to make Kevlar/S-glass kayaks a million years ago. We had to have two brand-new pairs of Fiskars scissors. One for glass and one for Kevlar. You could cut the Kevlar just fine with the dedicated cutters unless you made one snip with those scissors on glass, and then you had to buy another set for the Kevlar.
Yeppers. I found that heavy-duty serrated shears will last the longest. Also the auto scissor that I used in the video earlier will work well if you go slow. Simply because it is self sharpening. On the positive side...... I have almost mastered how to sharpen scissors.... Ha.
 

ebrabaek

Adventurer
A bit of catch up here as were readying the ship for a quick hop to the Ozarks and back this Friday.
Door striker plates bonded in place.
20240415_072927.jpg
20240415_073034.jpg


Then holes were drilled like aforementioned to bond both inner and outer layer of the matrix. This time for the liftgate gas struts. Holes were then filled with THIX.
20240415_090951.jpg
20240415_090954.jpg
20240416_065737.jpg
20240416_065741.jpg


The next day, it was time to mount the gas struts.
20240416_072258.jpg
20240416_072304.jpg


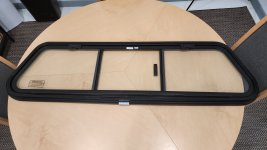
Ohhhhhhh..... and got the forward window in. Good ole Made in the USA.
20240416_075834.jpg
 

ebrabaek

Adventurer
One of the best things about making your own piece, is that you know how it is constructed, and how to improve and add things as you feel. After mounting the gas struts, I was not a fan of how much everything flexed. The brackets were ok, but the interface with the layup did not amuse me, so I decided to add another bracket. In the upper part it spreads the push pressure evenly instead of torquing one side of a 90 deg bracket. No big deal, just takes another day. So after a quick bake with Max Bond HTE another 4 brackets were cooked.... Pun intended.... Ha. They were layered with a couple of 9 oz uni directional carbon fiber tape on the front and back. Is now curing.
20240416_141506.jpg
20240416_141530.jpg


The top also got re-enforced....
20240416_141518.jpg
20240416_141526.jpg


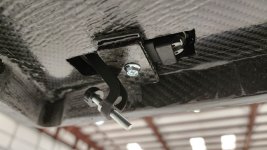
Then a quick fab from the Carbon pile of leftovers yielded a couple of brackets for the inside of the latches.
20240416_141700.jpg
20240416_141708.jpg


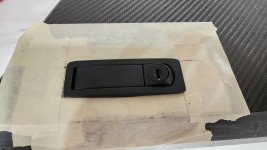
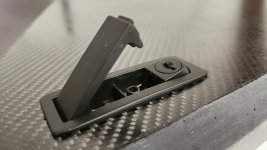
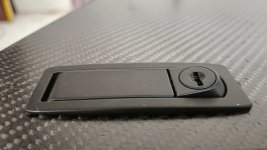
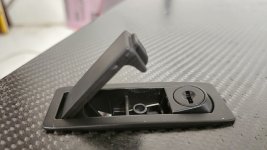
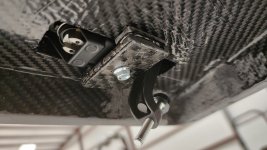
I really dig the carbon/latch combination.
20240416_154006.jpg
20240416_154017.jpg
20240416_154026.jpg
 

Forum statistics

Threads
188,037
Messages
2,901,477
Members
229,352
Latest member
Baartmanusa
Top