You are using an out of date browser. It may not display this or other websites correctly.
You should upgrade or use an alternative browser.
You should upgrade or use an alternative browser.
How to Modify Vehicle Wiring - Starting with the DO NOTs
- Thread starter Big_Geek
- Start date
goodtimes
Expedition Poseur
NEVER cut into the factory wiring harness to connect accessories. Always come off the battery with an accessory fuse block to build new circuits. Having to repair hay wired factory wiring sucks.
Yup.
Solder or crimp all you want (I prefer to crimp, but that's rather irrelevant)- just don't hack the OEM harness. It's a nightmare waiting to happen.
4Rocker
Observer
Having had to replace numerous quick connect splices (item #1 on the list) to keep the turn signals on my bumper from a well respected manufacturer working, I wonder what is the preferred method of splicing into an existing wire? I have tried potting these things with dielectric grease to prevent corrosion but even that doesnt seem to be a viable long term fix.
Those weather pack connectors may be a little pricy but they are absolutely worth it IMO.
Those weather pack connectors may be a little pricy but they are absolutely worth it IMO.
pugslyyy
Expedition Vehicle Engineer Gal
Having had to replace numerous quick connect splices (item #1 on the list) to keep the turn signals on my bumper from a well respected manufacturer working, I wonder what is the preferred method of splicing into an existing wire? I have tried potting these things with dielectric grease to prevent corrosion but even that doesnt seem to be a viable long term fix.
Those weather pack connectors may be a little pricy but they are absolutely worth it IMO.
I usually just use an Ancor/3M heatshrink+adhesive butt connector, 2 wires out one side and one wire out the other.
SoCalMonty
Explorer
Having had to replace numerous quick connect splices (item #1 on the list) to keep the turn signals on my bumper from a well respected manufacturer working, I wonder what is the preferred method of splicing into an existing wire? I have tried potting these things with dielectric grease to prevent corrosion but even that doesnt seem to be a viable long term fix.
Those weather pack connectors may be a little pricy but they are absolutely worth it IMO.
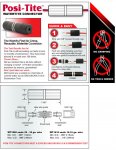
If they can handle over 1 year of submersion in water, I think you're OK.
southpier
Expedition Leader
snow peak of electrical connectors?
if we could keep this thread real, I think it would be more beneficial to all. first website I checked says 3 bucks each. http://www.crutchfield.com/S-cXW6ZB58SMg/p_669PP616/Posi-Products-Wire-Connectors.html great for the extremist, but how many line splices are required in a "normal" wiring job? where possible, wouldn't it be better to make the wiring run without joints?
and where does that leave the terminal connections?
(free sample from Posi-tite website - http://www.posi-lock.com/positite.html)
4x4junkie
Explorer
There is a reason why the connections in OEM looms and in Race cars connections/splices/terminals etc are crimped.
Certainly... Cost & speed of manufacturing. Even if everyone did happen to universally agree that one way was better than the other, it wouldn't make any difference in the manufacturing world simply because crimping it takes about 0.5% as much time as soldering.
Toddz69 brings up a number of very good points. Failure to properly secure your wiring pretty much makes any type of connection you use a moot point.
Big_Geek
Drop Bear
Those posi-tite connectors look great for butt connections, but don't seem ideal for splicing into an existing part of the wiring harness without cutting. Does this make the 'scotch loc' type connectors the best option for splicing to an existing wire without cutting?
Scotch Loc connectors should always be avoided. I cut the factory wire, strip both sides of the cut, strip my new wire, install heat shrink as necessary (before connecting everything), twist the wires together in the appropriate configuration, solder the wires, then slide the heat shrink up and shrink it into place.
This would really be better with pictures...
Big_Geek
Drop Bear
How I Use Crimp Connectors
I started the thread by talking about what not to do, so now I'll add to that by detailing how I install crimp connectors.
First. Here is the crimp connector with which I'm starting:

I use a pair of pliers and needle nose pliers to pull off the plastic cover. Sometimes a little rotation helps.
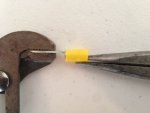
This is what I'm looking for:

I then strip the wire giving myself enough room to work with the bare wire:
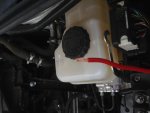
Next, I slip the heat shrink tubing on the wire and slide it out of the way. Make sure you get it a good way away from where you're soldering so you don't get it too hot and cause it to shrink before you have it where you want it:
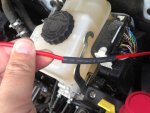
Now slide the bare connector on the wire and get ready for some crimp work:

I like one side of the crimp connector to overlap the other and I compress this together as hard as reasonably possible. If I have more wire exposed toward the connector than I need, this is when I trim that down:
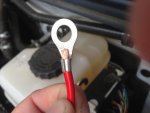
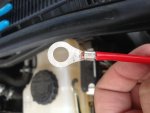
I then solder the connector on using a good bit of solder and making sure the fill in the overlap on the crimp. I try to do this as quickly as possible so as not to melt the jacket of the cable, but that gets to be a bit difficult with 10-gauge wire like I'm using here:
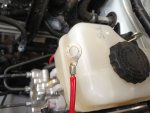
Finally, once the solder joint cools, slide up the heat shrink tubing and hit it with a heat gun making sure to cover all areas of the heat shrink:
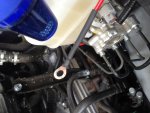
With that, the connector is securely attached and ready for reliable service.
I started the thread by talking about what not to do, so now I'll add to that by detailing how I install crimp connectors.
First. Here is the crimp connector with which I'm starting:

I use a pair of pliers and needle nose pliers to pull off the plastic cover. Sometimes a little rotation helps.

This is what I'm looking for:

I then strip the wire giving myself enough room to work with the bare wire:

Next, I slip the heat shrink tubing on the wire and slide it out of the way. Make sure you get it a good way away from where you're soldering so you don't get it too hot and cause it to shrink before you have it where you want it:

Now slide the bare connector on the wire and get ready for some crimp work:

I like one side of the crimp connector to overlap the other and I compress this together as hard as reasonably possible. If I have more wire exposed toward the connector than I need, this is when I trim that down:


I then solder the connector on using a good bit of solder and making sure the fill in the overlap on the crimp. I try to do this as quickly as possible so as not to melt the jacket of the cable, but that gets to be a bit difficult with 10-gauge wire like I'm using here:

Finally, once the solder joint cools, slide up the heat shrink tubing and hit it with a heat gun making sure to cover all areas of the heat shrink:

With that, the connector is securely attached and ready for reliable service.
Ozrockrat
Expedition Leader
I like one side of the crimp connector to overlap the other and I compress this together as hard as reasonably possible. If I have more wire exposed toward the connector than I need, this is when I trim that down:
View attachment 181689
View attachment 181690
I then solder the connector on using a good bit of solder and making sure the fill in the overlap on the crimp. I try to do this as quickly as possible so as not to melt the jacket of the cable, but that gets to be a bit difficult with 10-gauge wire like I'm using here:
View attachment 181691
Finally, once the solder joint cools, slide up the heat shrink tubing and hit it with a heat gun making sure to cover all areas of the heat shrink:
OK I am just going to throw a few points out here from your photos and then get down off my soapbox.
- Your crimp method of removing the insulation barrel and overlapping the ears shows that you have bypassed all the effort the engineers put into the lug design and do not use the correct tool for crimping (correct size and profile along with not being able to be released without sufficient crimping force being applied).
- The ears that you have bent about are designed to curve inwards as the crimping force is applied. In an uninsulated crimp lug you actually apply an indent crimp to the side opposite the ears. Bending the ears also exposes them to work hardening and possible fatigue.
- Your photo of the soldered connection shows 2 of the areas I concern I posted previously. The flux residue left after soldering can cause corrosion and the wicking of the solder up the cable has basically created a single core conductor altering the flexibility of the conductor and increasing the probability of fatigue.
- By removing the more rigid insulation barrel off the lug you have eliminated the mechanical support usually provided by the interface between the insulation barrel and the conductor insulation.
- The application of heatshrink has applied maybe 1/4 inch of insulation and weatherproofing as well a debatable amount of mechanical support.
- How long does it take you to do a connection??
And just to round it off. Any technician/mechanic I caught using your method would of been disciplined or terminated. Firstly for using unacceptable methodology (and having a solder iron) and then for wasting time (some of our equipment had a $15,000 per hour downtime cost).
But I do think I would prefer to work on something you had done versus the vast majority of automotive electrical work I have seen.
I recommend double ratchet crimp tools by reputable manufacturers. e.g. Greenlee, Thomas and Betts, Klein, Ideal or Ancor. And quality lugs/terminals (We specified Utilux military spec in Australia, I do not know the American equivalent) with 3M heatshrink.
Last edited:
Those posi-tite connectors look great for butt connections, but don't seem ideal for splicing into an existing part of the wiring harness without cutting. Does this make the 'scotch loc' type connectors the best option for splicing to an existing wire without cutting?
Posi-taps work well in my admittedly limited experience.
FordGuy1
Adventurer
Certainly... Cost & speed of manufacturing. Even if everyone did happen to universally agree that one way was better than the other, it wouldn't make any difference in the manufacturing world simply because crimping it takes about 0.5% as much time as soldering.
Toddz69 brings up a number of very good points. Failure to properly secure your wiring pretty much makes any type of connection you use a moot point.
Totally agree, crimp failure or solder failure is going to be a problem. No doubt manufactures do what is productive, but there is merit in how a hand built wiring loom in a 750k T.T truck uses crimp not solder. It is also the worst environment I can think of and we hardly ever see wiring/connector failures. What we use at the Dealership and is required by Ford is the AMP PRO CRIMPER II. It works awesome and the wire will break every time before you can pull out the wire.
Last edited:
Similar threads
- Replies
- 0
- Views
- 432
- Replies
- 0
- Views
- 389
- Replies
- 0
- Views
- 408
