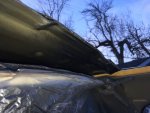
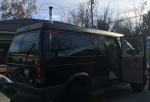
I'M BATVAN! ...a 2006 E350 V10 DIY Ujoint Conversion

vintageracer

To Infinity and Beyond!
Thanks for the detailed pictures or your roof rehab.

I just bought a Sportsmobile Penthouse Van.

Yesterday I called Sportsmobile in Indiana to inquire about their fiberglass "Penthouse" tops and the differences between Ford, Chevy and Dodge VAN "Penthouse" top mechanisms. They tell me the Lift Mechanism in the short or long roof van versions are the SAME for all three makes/models of vans and will interchange. The only "Penthouse" roof difference between the three brands is the fiberglass roof cap itself. Therefore IF you did want to install a "Dodge" Penthouse cap on a Chevrolet it could be possible IF you could re-configure the Dodge Fiberglass roof cap to fit the Chevrolet roof profile as the lift mechanism from the Dodge will work on the Chevrolet or Ford and vice versa. Sportsmobile also said don't screw it up if you try to swap since the molds for the older conventional vans fiberglass roofs are not gone! Of course being the tops are made of fiberglass modifying a top to swap from one brand of van to another is certainly doable if you have fiberglass repair of fabrication skills.

I though everyone might like to know what I found out!
 
Last edited:

Pinnacle Campers

Chateau spotter
So there has been much debate as to the extensiveness of this refurbishment.
In evaluating the parts and pieces there is no doubt that this top was overloaded. The top was never designed to carry a lot of weight. Not to mention the fact that the weight was placed on the outer edges of the roof quite a way from the bearing points of the frame crossbars.
As I have mentioned previously, I don’t intend to put a lot of weight on top but the reality of it is, everything adds up.


As much as I want a walking foot industrial style sewing machine to modify and make alterations to the softwalls, I cant afford the time. I can see making my own alterations turning into a much bigger project. Like extending the soft walls over the cab for more top up interior space.
I also found that my softwalls are “convertible top material” so not really canvas but a heavy cloth backed vinyl. That led me to an upholstery shop. Where the vinyl now sits waiting for a potential match of the original material (unlikely, so black), replacement of the stained front lower panel, and a couple bungee ring loops that had degraded, all for $100ish


Meanwhile, I have been moving forward with the top itself. Speaking of debate, its tough laying out a roof.
I wanted the biggest single solar panel I could get under 200 watts. One of the main reasons being simplicity of attachment and not requiring a rack.
Highly recommended on other vanner forums, I found these “Hitech” brand solar panels on ebay. They are made in USA, and the ebay seller has great reviews.
I was looking at their 180w panel when I noticed this one, https://www.ebay.com/itm/200-25-Watt-12-Volt-Solar-Panel-Off-Grid-RV-Boat-highest-power-12V-you-can-buy/264048386965?ssPageName=STRK%3AMEBIDX%3AIT&_trksid=p2060353.m2749.l2649
This is the 200watt bifacial panel. These cells see light on both sides. The back sheet is clear so any light that passes through the panel or comes in from the sides is harvested. Don’t get me wrong I think this will be a minor gain. But, it’s the same overall size (27x58, ish), and was only $5 more and came with z brackets I actually ended up using so….. will see how it goes, if it doesn't hurt performance....why not?

I also got a maxair fan for xmas! Santa knew I wanted the non remote 6200 because we would lose the remote, and I have also heard it needs direct line of sight. I plan to put a kill switch in my lower control panel so it can be shut off from the lower bed area without getting up.
I had also planned to put the fan in the center of the roof with the panel forward but the 58” length of the panel seemed to crowd the leading edge to much. Then I realized that with the center fan location I likely wouldn’t be able to access it with the top down which I think is dramatically underutilizing its usefulness. Its much different laying these things out without using the top before hand.
So I decided on putting the fan in front of the front push block. I will likely be able to control it from the drivers seat. I do have concerns about noise but ok with making a insulated cover/insert to help with that.
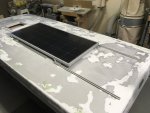
That puts the solar panel in the center. Again, much debate on how to attach. I wanted it as low profile/stealth as possible, yet modify-able for other/replacement panels in the future. I found some 80/20 15 series surface mount t-slot on ebay garage sale. I chose 3’ sections because the top isn’t completely flat, also shipping was cheaper on 4, 3’ sections. These accept ¼”-20 carriage bolts in the slot.
Mocked up it looks like this,
IMG_1799.JPG
I went ahead and glued these down with Loctite PL marine.
The excess t-slot in the rear may be used for a small basket or maybe even just a aluminum plate with slots for straps (future additional solar panel?). Really I'm looking for a place to toss some branches/firewood when there is none available at a camp site specifically. I have found a need to do this and usually toss it all behind the front seat and it makes a mess. The only other thing I would consider putting up there is our two rolled up paddle boards, at 50 lbs. for the pair it might be more than I want to put up there with the top up for any length of time but it would be nice to not have them stuffed under the bed on road trips.
I picked up a new LED brake light to replace the non waterproof incandescent housing. Its size required some “tabbing” of the corners of the old hole with fiberglass tape. At the same time I filled the numerous holes in the top (like 22) with epoxy and faired them out. Some of the bigger holes required a fiberglass tape patch on the bottom before filling from the top.
IMG_1778.JPG
I also epoxied an aluminum backer where the front latches are.
IMG_1776.JPG
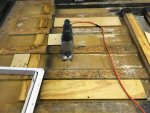
Cut the hole for the fan with a jigsaw. You can see I changed my mind and moved it back a bit. I started thinking about the softwalls folding up in front of it.
IMG_1770.JPG
I epoxied in Baltic birch backers that we pre-coated in penetrating epoxy. The opening got a strip of 4" fiberglass tape.
IMG_1780.JPG
The core.
IMG_1772.JPG
IMG_1795.JPG
The new brake light even came with a test switch/battery.
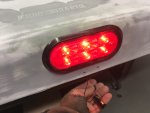
IMG_1938.JPG
More to come!
 

Pinnacle Campers

Chateau spotter
Station Break!
Since I have another E-series project that needed wheels I decided to treat my van to new wheels so it could hand down the old Pro-comps.
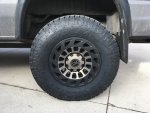
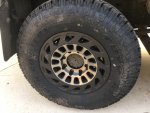
I really liked these Black Rhino Madness wheels. These are 17x9 and they are mounted with new Toyo Open Country AT2's.
IMG_2023.JPG
I'm leaning towards leaving the center caps off. Here is a pic with the rear caps on. Of course I would need to modify the front to get to the locking hubs. Might need to buy some black bolts to fill the threaded holes if going sans caps.
IMG_2015.JPG
IMG_2017.JPG
The old Toyo's have 52K miles and have never seen a balancing machine. They have worn very well and very evenly. Airsoft beads and frequent rotations.
I continued the tradition with the new tires and put 6 oz./170g of .12g of airsoft beads in each wheel, previous had 7 oz. I think.
My previous wheel and tire setup did shake a vibrate a little around 60-70mph. I realized that the new wheels have better hub centricity than the old. The new ones squeezed on damaging the paint on the hub that the previous wheel never did. Hoping to find this was the reason for that vibration and it goes away with these wheels.
The new wheel and tire setup weighs 20lbs more than the old with worn out tires.
IMG_2014.JPG
 

Pinnacle Campers

Chateau spotter
For those following along. I mentioned previously that I damaged my drivers side door. The wind caught it and blew it backwards.
After 2 months of getting in and out the cargo side door I finally decided to attempt a repair.
I had been offered a good (white) door for a 12 pack but I figured it would actually be more work to paint both the black and the raptor liner, tint or replace the window, transfer and replace parts pieces and seals.
From watching Ford van door repair and hinge pin replacement videos on YouTube I realized I didn't want to handle the door much, or move it far from the wiring connector inside which cant be removed without some work.
So I built a stand for the door to hold it very near the position of the open door.
IMG_2055.JPGIMG_2042.JPG
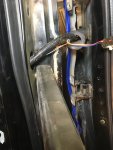
In this pic you can see the jamb bent into the door cavity. Pulling out of the pinch of the outer door skin. So I need to hook the door skin and open it up to allow the jamb to slip behind it again. Some of the jamb lip is forward of the pinch opening so it had to be pushed back a bit, pull the pinch then let it come forward.
IMG_2043.JPG
So I used my pick pulls to get under the door skin pinch and pull it out, working my way up the door.
IMG_2047.JPG
I used some 2' pieces of 1" square tube with a hole on one end bolted to the hinge attachment locations and added two other locations with a M10 Riv-nut. In this pic I moved the bar to the right to get the jamb back in order to pull the lip out. In order to get the jamb back under the lip tension was placed on these using ratchet straps to locations at the other end of the door pulling the bar to the left and levering the jamb back under the door skin fold.
IMG_2048.JPG
Here after the fold was filled with Totalboat 5:1 Epoxy with a syringe I put some protection on the outer side of the door and used numerous clamps and vise grips to work the fold shut.
IMG_2050.JPG
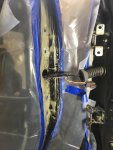
You can also see the 4 levers of square tube and angle bolted to two hinge bolt locations and the two riv-nut locations in between. These are tensioned with ratchet straps keeping the jamb in the fold at the OEM location until the epoxy dries.
 
Last edited:

Pinnacle Campers

Chateau spotter
No caps ******

Agreed,

For those following the door rebuild above, I was having some technical difficulties and went back and edited the info, continued here....
While the epoxy dried I used Dorman kit to replace my hinge pins. My door was sagging and required some adjusting but you just cant beat repining. The steel press in bushings that come stock are junk.
I used a Sawzall with a metal cutting blade to cut the old pins. Punched them out with a drift, and installed the new brass bushing using a bench vise. I reassembled the hinges with some grease.
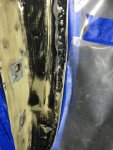
Here is a pic of the door with the hardware removed. You can see the exposed primer edge from before is gone. Plenty of ooze out of epoxy. It was kind of like doing a really bad edge repair on a big ski or snowboard.
IMG_2052.JPG
IMG_2051.JPG
Just before painting the jamb satin black. You can see here the two riv-nuts used to pry the jamb above and below the wire hole.
I bolted the door back up and was so happy to find it works MUCH better than before, closes solid, and after a little adjustment fits very well.
 
Last edited:

Pinnacle Campers

Chateau spotter
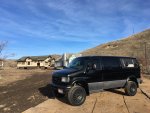
Why not put some axles under those "Wanna Be" trailers in the background of your van picture above for your new "Overland" trailer project????

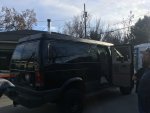
Problem is weight! Those are 4x8 sheets of 1" steel I'm parked on. There is 200 yards length 6 sheets wide laid down to keep the semis that put them there from getting stuck in the mud.
Our neighborhood hospital is undergoing an expansion, like largest construction project in state history type expansion, so these houses were removed and are being stored here temporarily until their new location is ready.
They even moved a 98' Sequoia tree, https://www.idahostatesman.com/latest-news/article158151794.html
 

Pinnacle Campers

Chateau spotter
Been fiddling with the hardware for the Sportsmobile top.
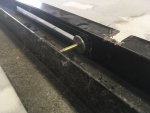
As shown in previous pics on page 12, one pair of crossbar ends slide in the lower frame track. These ends are bolted up with the chain that connects to the spring. The other side of the bolt has a pulley type 2 piece washer that acts as a roller. It glides on a "U" shaped piece of plastic that slides on to the metal track in a slot on the frame.
502660
This is where a lot of slop is. It is what has allowed the ends of the cross bars to touch the bottom and sides of the track and its sloppiness leads to a lack of smoothness when operating the top (I'm guessing).
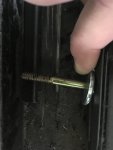
Here you can see the sloppiness fore and aft. (click to expand).
502661502662
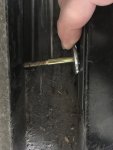
Up, down the slot is to big.
502663502664
and finally the plastic "glide" is also to narrow left, right, and the wrong profile.
502665
So I set about to build new glides that would more closely match the profile and dimensions of the pulley/roller.
First I drilled out the roller to allow for a 5/16 shoulder bolt vs. the 1/4" grade 8 bolt.
Then using alternating passes on the router table and the table saw I cut strips of HDPE. This is a two piece glide that will attach from either side.
First I made a rabbet on the edge with the router, cut the strip off, then returned to the router for the roundover.
These are the strips before cutting to length.
502666
Here is the profile when held together. The small slot will be where it grabs the metal edge of the frame. A good eye will notice the 2 tone raptor lined top in the background.
502667
Since not many adhesives work with HDPE I went ahead and drilled holes for rivets and because of their proximity to the profile I recessed their heads.
502668502669
Continued....
 
Last edited:

Pinnacle Campers

Chateau spotter
502670

The other end of the frame/track has the crossbars fixed mounted.
Here are the holes in the frame. Most will determine from evaluation of the holes that there has been to much weight/force applied. I plan to enlarge these to 5/16" and weld or epoxy washers to either side for strength.
502671502672
Also considering an outboard bracket that will hold the bolt in double shear rather than single. This will have to be evaluated after install.
I also called Nancy at Sportsmobile Indiana. She told me that my top is a "garagable version". It doesn't seem any lower than most SMB tops just longer.
She also sold me 1 yard of the EXACT material that was used for my softwalls. The soft wall panel that was stained very badly has been replaced (for $100) and the softwalls are now reinstalled to the top (top upside down) with 2" strips of expanded PVC sheet.
 

Pinnacle Campers

Chateau spotter
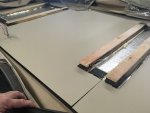
Decided to use 3mm Baltic Birch ply painted both sides with a quality exterior paint for the replacement headliner panels.
The headliner is 53" wide so not a good use of material with 4' widths. The BB is 60" wide and reasonably priced.
I used two sheets to make 3 panels.
I really like wipeable surfaces the more I have to clean the inside of this van.
I had the paint tinted to the light tan of the interior.
502885
I used a smooth foam roller to apply 2 coats to the back (installed top) and 3 coats on the bottom, exposed side.
502894
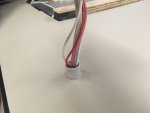
With a PVC reducer coupler chucked onto a large step bit in a drill press I used a file to cut a groove in the coupler. These will act as my "wire drops". The groove will hopefully keep some sleaving zip tied to it while the top goes up and down.
502907
I pre-wired for the top mounted brake light, interior lights, and fan to drop down into my drivers side electrical panel. Passenger side will have solar wiring to drop into the pre existing Victron Solar charger.
I used some foil faced foam board to fill the ribs in the roof held in place by spray foam. Covered the roof with the original reflectix and taped it down with some aluminum tape.
502908
The new push blocks are built. Waiting on some vinyl material that is a match to the darker tan seat material to cover them.
 

Pinnacle Campers

Chateau spotter
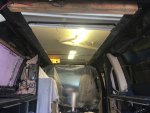
I finally cut a big hole in my roof! Actually the hardest part was cutting up my headliner!
Here I'm contemplating a top fuel dragster type wing element.
506771
As part of this process I decided to raptor line the remaining roof area and my hood. My roof was needing some attention, peeling paint, surface rust, etc.
The new Flatbed build sitting on the other side of the van made for a great platform to work off of and to aid in getting the top itself up there.
At the corners of the hole I added these corner braces. I have seen other rebuilders add them to try to keep the corners from cracking. The rounded corners of the hole itself helps a lot too.
506775
I used one of these Electric Shears from Harbor Freight. It really makes cutting the top nearly effortless. I drilled holes in the corners, and only used my sawzall to cut the metal beams.
506776506777
Used some VHB tape in between the beams and the roof skin then riveted them together.
506778
506779
Wednesday night over some beers and some pork Carnita's I got a couple buddies to help pull the top out of the shop, flip it over, place it on the flatbed, and throw it on the roof.
506781
Its not without its problems though. It doesn't seem to sit all the way down on the gutters. This is with no spring tension and no helper springs.
The mounting points where the top sits on the crossbars is the same, it looks like the crossbars are hitting the frame itself restricting its downward movement. Not sure how this could have been different on the previous van.
Its attached to the crossbars and I'm currently waiting for some help to lift and brace the top up so I can tension the springs.
I have thought about installing the hold down clamps and sucking it down but I think it needs less interference to compress completely.
More to come.
 

Attachments

  • IMG_2174.JPG
    IMG_2174.JPG
    1.7 MB · Views: 49
Last edited:

Forum statistics

Threads
188,207
Messages
2,903,796
Members
229,665
Latest member
SANelson
Top