You are using an out of date browser. It may not display this or other websites correctly.
You should upgrade or use an alternative browser.
You should upgrade or use an alternative browser.
International 3800 adventure bus build
- Thread starter AdventureBus
- Start date
shortbus4x4
Expedition Leader
That's because a front driving axle in those cases is straight with no drop. An I beam front axle has drop to it so it sticks the wheels up in the wheel wells. Trust me in most cases they don't make different cabs, fenders, etc for a 4x4 truck versus a 2x4.
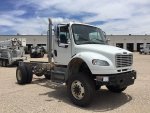
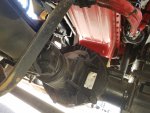
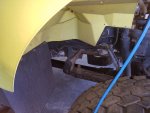
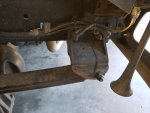
Here's an example of a new 4x4 bus at my dealer for one of my WA school district customers. It is brand new and is getting finished before delivery. It started as a regular 2 wheel drive bus, it was then delivered to Tulsa Truck for a 4x4 conversion. This has a centered front diff with a Cummins 6.7 front sump pan. In the rear they used blocks for the lift to match the front. I have also seen rear subframes built that drop the spring hangers down so no lift blocks are needed then. I know 70s era Loadstars used different front spring hangers between the 4x4s and the 2x4 trucks.
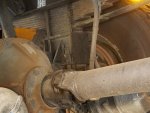
Here's an example of a new 4x4 bus at my dealer for one of my WA school district customers. It is brand new and is getting finished before delivery. It started as a regular 2 wheel drive bus, it was then delivered to Tulsa Truck for a 4x4 conversion. This has a centered front diff with a Cummins 6.7 front sump pan. In the rear they used blocks for the lift to match the front. I have also seen rear subframes built that drop the spring hangers down so no lift blocks are needed then. I know 70s era Loadstars used different front spring hangers between the 4x4s and the 2x4 trucks.

Last edited:
shortbus4x4
Expedition Leader
I'll try to down size the rest of my photos I took of this bus as it won't let me upload them. There are also 3 4x4 engines from various fire districts in the shop right now, I'll get pictures of them this week. Wednesday I'm working on 4 engines that if I remember correctly are all 4x4. OP if you need any pictures of mountings and such let me know, I work on a bit of medium duty 4x4s, mostly International flavored.
shortbus4x4
Expedition Leader
tmckenna13
Member
I was never saying that the they made different cabs. As far as I know the cabs are in fact identical but they have to be raised substantially to clear the driven front axle components. I was just asking how he planned to address that considering he would also have to "lift" the rear to avoid having substantial rake. I'd be curious to see what that bus you posted pictures of looks like. I imagine the first step is now quite high off the ground?I'll try to down size the rest of my photos I took of this bus as it won't let me upload them. There are also 3 4x4 engines from various fire districts in the shop right now, I'll get pictures of them this week. Wednesday I'm working on 4 engines that if I remember correctly are all 4x4. OP if you need any pictures of mountings and such let me know, I work on a bit of medium duty 4x4s, mostly International flavored.
AdventureBus
Active member
A driven front axle would provide an instant 8” lift if nothing else changed at the front of my bus. I would like keep the lift as low as possible, but it may be difficult to keep it between 4-6” of lift.
I wasn’t worried about 12”+ lift to clear a centered front diff initially, but I think keeping it as low as possible will make cross-country trips more enjoyable. I can’t imagine driving across Wyoming in a 13’+ tall bus with a cross wind. The bus is currently 11’ tall with the 12” roof raise. The MVT’s are going to net a 3” raise.
I would really like to see some pictures of the front driveshaft routing with an offset differential, specifically how it clears the exhaust. Also, I’m wondering if it would be best to mount a drop transfer case as offset to the same side as the front diff as u-joints would allow? Or would just centering it between the frame rails suffice?
Most of the trucks on Tulsa Truck Manufacturing’s website use centered front diffs, and the offset-diff trucks appear to have the same amount of lift. They all utilize a 4-6” lift block in the front as well. I’m not interested in that much lift. I’m sure there is a reason they do it that way, probably oil pan clearance issues and it’s probably easier than trying to package it all more compactly.


Sent from my iPhone using Tapatalk
I wasn’t worried about 12”+ lift to clear a centered front diff initially, but I think keeping it as low as possible will make cross-country trips more enjoyable. I can’t imagine driving across Wyoming in a 13’+ tall bus with a cross wind. The bus is currently 11’ tall with the 12” roof raise. The MVT’s are going to net a 3” raise.
I would really like to see some pictures of the front driveshaft routing with an offset differential, specifically how it clears the exhaust. Also, I’m wondering if it would be best to mount a drop transfer case as offset to the same side as the front diff as u-joints would allow? Or would just centering it between the frame rails suffice?
Most of the trucks on Tulsa Truck Manufacturing’s website use centered front diffs, and the offset-diff trucks appear to have the same amount of lift. They all utilize a 4-6” lift block in the front as well. I’m not interested in that much lift. I’m sure there is a reason they do it that way, probably oil pan clearance issues and it’s probably easier than trying to package it all more compactly.


Sent from my iPhone using Tapatalk
baipin
Active member
I would really like to see some pictures of the front driveshaft routing with an offset differential, specifically how it clears the exhaust. Also, I’m wondering if it would be best to mount a drop transfer case as offset to the same side as the front diff as u-joints would allow? Or would just centering it between the frame rails suffice?
Sent from my iPhone using Tapatalk
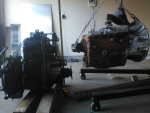
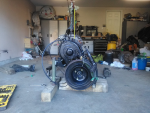
Pick out some potential transfer case candidates, and definitely measure to make sure the driveshaft will fit past your transmission. Do not forget to measure the offset between the input and output along the length of the vehicle - as you can see below it made things in my setup, quite close.
I don't know the measurements of your 8LL, I believe it's quite wide, so a drop case is probably favourable. For example; the Rockwell T-136 case I have, with a 11" vertical drop, only clears my transmission when offset 20° (giving a 10" drop, 4" passenger offset). This is how the case was used in M35 trucks. Mind you, that is with a very short 8" jackshaft that came with the transfer case. If you had a longer jackshaft, then maybe you'd have more options, though the shaft angles always seem to be quite "flat" with these trucks. I found my best driveline angles, front and rear, were with that 4" passenger offset, even in spite of the rear diff being almost centered.
tmckenna13
Member
@HazeltheMooseWagon yup, that ride height is exactly the reason I voiced my concern. A substantial lift in the front of a bus, realistically means the equivalent lift in the rear so you end up with a very long and tall vehicle. Center of gravity would be higher than pretty much anything else on the road, and the side profile gives a lot of opportunity to be pushed around by the wind.
I've never seen any buses like the gray one you posted, but thats pretty much exactly what I pictured in my head. Very cool, but like you said, not great for long haul trips for a handful of reasons.
Unfortunately you don't have the freedom of cab chassis trucks to build the habitat separate from the cab, because in that case the height of the cab would have no affect on the layout and/or height of the habitat.
shortbus4x4
Expedition Leader
They don't raise the cabs, at least all the ones I've worked on. It's all done with the spring hangers and/or blocks on the front springs. Then they use blocks, spring hangers, or rear subframes in the rear to get the height needed to match the front.I was never saying that the they made different cabs. As far as I know the cabs are in fact identical but they have to be raised substantially to clear the driven front axle components. I was just asking how he planned to address that considering he would also have to "lift" the rear to avoid having substantial rake. I'd be curious to see what that bus you posted pictures of looks like. I imagine the first step is now quite high off the ground?
That bus has a 2 or 3 electric RV step that is wired into the door switch so little kids or short people can get on.
shortbus4x4
Expedition Leader
AdventureBus
Active member
My frame already has most of the holes needed to slide the front axle forward 4-3/4”. I think I could re-index the pitman arm a couple splines to make up for the move and add a hydraulic cylinder to the tie rod to relieve any added stresses to the steering box. There’s currently about 2” clearance between the tire and the rear of the fender well while turning and the new tires will have a 3” increase in radius. While the new tires will stick out 5-6” further, I still think they will clear with the axle slid forward.


Sent from my iPhone using Tapatalk


Sent from my iPhone using Tapatalk
AdventureBus
Active member
I have an international 4700 single cab and an international 4900 crew cab
Both are 4x4 with fabco front axles
How can I help?
Awesome! Lucky you! Pictures of everything related to the front axle would be helpful (hood open for best lighting). There are many shots from a distance of 4x4 med-duty front axles on the web, but few detailed shots that are helpful for planning. Below are eight areas I’m most interested in:
• Oil pan shape (details of sump depth and clearance pocket for front diff)
• How far below the frame rails the oil pan hangs (above the axle and w/measurements)
• Front diff interaction with oil pan (with clearance measurements)
• Front driveshaft routing (around oil pan and exhaust)
• Distance between bottom of frame rail and top of spring pad on front axle.
• Drag link angle (maybe a shot from the side and from top-down)
• Jack shaft length and angle (is T-case mounted at same rearward angle as the engine?)
• Distance from bottom of frame rails to center of front drive pinion yoke on T-case.
Either truck would be fine with me for the pictures. I would also like to know the axle model if you can find it easily (eg. FSD12, SDA16…) I also would like to know the u-joint series on the front driveshaft.
I know that’s a bunch to ask for and I understand if you don’t have time but it would be very helpful. Thanks in advance!
Sent from my iPhone using Tapatalk
AdventureBus
Active member
I’ve been working on windows lately for the bus, trying to improve them as much as possible. It started out as an “11 window” bus, but after blanking 4 of them I ended up with 18 to disassemble, clean, modify, tint, seal, and re-install. It was amazing to see all of the dirt that came from between the glass and rubber seals. There was also a heavy amount of lime scale around the edges that I removed with distilled white vinegar and a razor blade.


I built a wooden crate to hold the freshly tinted glass for a couple weeks to get a good cure before handling them. All of the side and rear windows are getting 35% tint except the first ones behind the driver’s seat, which got 70%. This was so that each window could easily be see out of while still blocking 99% of UV rays and a good amount of heat from the sun’s rays.

There was a safety feature built into each sliding frame of the windows that keep kids from pinching their fingers while dropping the windows down. This resulted in windows that didn’t open evenly, causing them to lean and look pretty bad. I could barely stick my head out of the windows before modifying the stops. There was also a weird overlap when they were fully opened that made the top opening clear, a small sliver slightly tinted, and the bottom part darkly tinted. They now open over an inch wider and gone are all of the nuances that I disliked about them originally.
There were also these half-inch long screw’s holding the bottom rail of the sliding pane together that were backing out, causing the frame to sag and get hung up in the tracks, disallowing the frame to move up or down. I replaced them with 2” screws and eliminated the problem.
I replaced all of the rubber T-track bulb trim which was cut to 24” from the factory to fit a 24-1/2” wide opening . I’m assuming this was for easy math and tracking how much trim was used. It did however leave air gaps on each corner that you could see daylight through.
Almost all of the plastic thumb releases on the windows were cracked or broken, which meant many windows couldn’t be opened. They were so brittle, they could be easily snapped between three fingers. I replaced them all with new ones from Bus Parts Warehouse, and they should last the lifetime of this build.
Lastly, there was dust collected in every corner of every pane of glass where the rounded rubber trim was fit into a square corner. Daylight could be seen here too in each of these 136 corners (18 windows x 2 panes X 4 corners), so I used 100% silicone in the corners to seal them.
They aren’t perfect, and they are single pane, but after many improvements and future Reflectix curtains, they should satisfy my desires for functionality, inexpensiveness, and a way to feel connected to our surroundings while road tripping and wilderness camping.
Sent from my iPhone using Tapatalk


I built a wooden crate to hold the freshly tinted glass for a couple weeks to get a good cure before handling them. All of the side and rear windows are getting 35% tint except the first ones behind the driver’s seat, which got 70%. This was so that each window could easily be see out of while still blocking 99% of UV rays and a good amount of heat from the sun’s rays.

There was a safety feature built into each sliding frame of the windows that keep kids from pinching their fingers while dropping the windows down. This resulted in windows that didn’t open evenly, causing them to lean and look pretty bad. I could barely stick my head out of the windows before modifying the stops. There was also a weird overlap when they were fully opened that made the top opening clear, a small sliver slightly tinted, and the bottom part darkly tinted. They now open over an inch wider and gone are all of the nuances that I disliked about them originally.
There were also these half-inch long screw’s holding the bottom rail of the sliding pane together that were backing out, causing the frame to sag and get hung up in the tracks, disallowing the frame to move up or down. I replaced them with 2” screws and eliminated the problem.
I replaced all of the rubber T-track bulb trim which was cut to 24” from the factory to fit a 24-1/2” wide opening
 . I’m assuming this was for easy math and tracking how much trim was used. It did however leave air gaps on each corner that you could see daylight through.
 Almost all of the plastic thumb releases on the windows were cracked or broken, which meant many windows couldn’t be opened. They were so brittle, they could be easily snapped between three fingers. I replaced them all with new ones from Bus Parts Warehouse, and they should last the lifetime of this build.
Lastly, there was dust collected in every corner of every pane of glass where the rounded rubber trim was fit into a square corner. Daylight could be seen here too in each of these 136 corners (18 windows x 2 panes X 4 corners), so I used 100% silicone in the corners to seal them.
They aren’t perfect, and they are single pane, but after many improvements and future Reflectix curtains, they should satisfy my desires for functionality, inexpensiveness, and a way to feel connected to our surroundings while road tripping and wilderness camping.
Sent from my iPhone using Tapatalk
baipin
Active member
Just wondering, but have you considered skinning over the body now that the windows are out, and adding new RV windows instead of the old school bus ones?
I can say from plenty of experience with bus windows - both my own and helping friends with their bus builds, plus the skoolie community consensus - is that the original ones leak like crazy and can be fairly drafty, even from factory. Since these are out now, consider not putting them all back as you lose so much insulation from windows of any variety. To give some perspective; I was helping with a 35 ft. bus conversion, and we found that with all the windows we needed 2X 5kWh diesel heaters to keep warm in the winter. With 1/3rd of the windows remaining and the rest skinned over, a single 5kWh diesel heater made it comfortable in there.
If you do insist on keeping all the windows, consider making cut-to-fit panels of foam board insulation wrapped in fabric. It'll look good and outperform reflectix. If you wanted something flexible, consider buying 3M Thinsulate by the roll.
Similar threads
- Replies
- 3
- Views
- 339
- Replies
- 21
- Views
- 3K
- Replies
- 8
- Views
- 921
- Replies
- 0
- Views
- 275
- Replies
- 0
- Views
- 527

