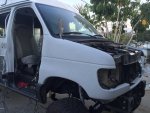
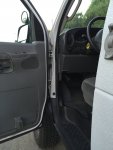
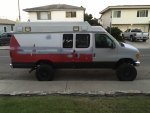
Introducing O'Billy - our new Type-II Ambulance

mike.marcacci

Adventurer
Those are *really* great tips - to be honest it's quite easy to forget about rust living in SoCal.

I guess doing this the right way probably means trimming them in place, pulling and painting them, and putting them back?

I imagine I could just take one out at a time without even using a jack? The remaining would keep the axel from moving at all, right?


Sent from my iPhone using Tapatalk
 

Corneilius

Adventurer
Correct, a U Bolt flip on a 99-04 axle is all but impossible so don't worry about that. Its up to you if they need to be trimmed further (mine have a 3/4" below the nut I believe). If you're in SoCal id probably just paint them in place. You run the risk of pressure from the trac bar/ lower u bolt plate/ shocks shifting your upper U bolt plates if you start removing them. If you start to see rust form its easy enough to pull it all apart.

Edit: I should clarify, U bolt flip is possible, but the juice isn't worth the squeeze. Just stay out of the rock garden and you'll be fine

Great looking van!
 
Last edited:

mike.marcacci

Adventurer
Correct, a U Bolt flip on a 99-04 axle is all but impossible so don't worry about that. Its up to you if they need to be trimmed further (mine have a 3/4" below the nut I believe). If you're in SoCal id probably just paint them in place. You run the risk of pressure from the trac bar/ lower u bolt plate/ shocks shifting your upper U bolt plates if you start removing them. If you start to see rust form its easy enough to pull it all apart.

Edit: I should clarify, U bolt flip is possible, but the juice isn't worth the squeeze. Just stay out of the rock garden and you'll be fine

Great looking van!

Thanks for the info – I think I'll just do them in place and be careful not to overspray all the pretty new pieces! What kind of paint is recommended here? Rust-Oleum undercoating, or real paint?

Also, I appreciate the note about the flip – I think I'm going to leave the bolts the way they are (other than painting them); we will be using the 4x4 a good amount to get places, but won't intentionally try to push its limits.
 

mike.marcacci

Adventurer
On another note, I had the "water in fuel" light go on when approaching the top of 2 quite large hills, but then turn off within a minute of leveling off; then after another few hours of driving it turned on and stayed on. I had the tank pretty low at that point (a tad less than 1/8 tank) so I filled it up just in case, but it didn't change anything.

Today I decided I'd just go ahead and drain it, which I understood was an easy task... not so. The handle and rod that the manual says to use are completely missing, and I spent well over an hour trying to figure out where the darn fuel bowl is! Eventually I found the little yellow lever by taking off the dog house and the heat shield, where I was just able to hook it with a bent coat hanger to get a good drain. I cycled the key once and collected a few cups of diesel out the bottom, put everything back together, let the fuel pump push out the air, and fired it up: fixed! ...until I drove it around the block. The "water in fuel" light is back on.

Out of general experience, should I be more suspicious of my sensor or my fuel? Is there an easy way to test some of my fuel to make sure the sensor is bad? Or perhaps the separator needs replacement (not sure if they ever go bad)? I'm going to call the guys at Diesel Tech to get their opinion tomorrow, but I'd be curious if anybody here has experienced this before.
 

Abitibi

Explorer
Usually water sinks at the bottom (heavier). Take some of the diesel you collected and add a little water to it. Look at it a couple hours later and use as a reference...

Sent from my SGP511 using Tapatalk
 

mike.marcacci

Adventurer
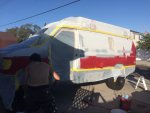
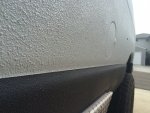
Ok, it's been a long time, but we've finally made some progress! Since none of us have any experience painting a vehicle, we decided to start with black raptor on the rocker panels, which we brought all the way into the doors. The rest of the exterior is going to be the light gray "steel" color, but at this point I don't think we'll bring it all the way into the doors, since the ambulance paint stops and we don't mind the ford white inside.

0316d4b8d7cace1c17e7f7bd1d4fc6eb.jpg


c4b125ae2cba1ab8b3503daa16518af7.jpg


05b598e6e0c4250b96390f16ee74f0e6.jpg


0f5594d5039530708db668a54c965782.jpg


7528b4d623b1b322d45ff2f5f82d7a8a.jpg


Sent from my iPhone using Tapatalk
 

rossvtaylor

Adventurer
That's a beautiful edge! Since we're going to be spraying Raptor or something similar, I need to know what worked for you on those edges? Regular tape and, if so, which one did you use? Or did you use the "fancy" wire edged tape? That's exactly the edge we'll want between our panels. Nicely done!
 

mike.marcacci

Adventurer
Thanks!

@rossvtaylor - we used the yellow "automotive" masking tape which (supposedly) stretches a little better than the tan/blue stuff. We got it here: https://www.amazon.com/dp/B000FP8HFK/ref=cm_sw_r_cp_api_Q0KWxbWBWQ9FB

I made the edges with that 18mm tape and then attached paper to it with thicker masking tape. Again, this was our first attempt at this, so there might be a better way, but it wasn't too hard and turned out exactly as we hoped it would!


Sent from my iPhone using Tapatalk
 

rossvtaylor

Adventurer
Okay, we'll order up some of that same tape. Glad to see you get such clean lines without the expensive (and hard to apply) wire edge stuff. One last question, then, please... how long after your last coat did you remove that tape? Was the Raptor spray still wet then?
 

Bikersmurf

Expedition Leader
my .02

don't try to edge tape and mask at the same time. Run your tape for the edge, and then apply the paper to mask with another width of tape. I've found this method is easier and faster. Which you do first isn't important... just don't bother trying to do both at the same time.
 

mike.marcacci

Adventurer
my .02

don't try to edge tape and mask at the same time. Run your tape for the edge, and then apply the paper to mask with another width of tape. I've found this method is easier and faster. Which you do first isn't important... just don't bother trying to do both at the same time.

I couldn't agree more; that's what we did here for the most part, setting up the edges first. The one time I tried to move back an already-masked line I ended up ripping the whole section off and redoing it from scratch because it was just too difficult to get straight.


Sent from my iPhone using Tapatalk
 

mike.marcacci

Adventurer
my .02

don't try to edge tape and mask at the same time. Run your tape for the edge, and then apply the paper to mask with another width of tape. I've found this method is easier and faster. Which you do first isn't important... just don't bother trying to do both at the same time.

That's a great question - we did 2 coats with a 1 hour flash time between, and pulled the tape about an hour and a half after the final coat. Raptor is EXTREMELY forgiving to work with, since it dries to the touch in about an hour but doesn't fully cure for many days. This gives you a pretty big window of time when it is soft but not messy.


Sent from my iPhone using Tapatalk
 

tgreening

Expedition Leader
Another opinion.

I mask first, close to where I want my edge to be, and apply the edge tape over top the edge of the mask. This way when you pull the edge tape, if it lifts an edge somewhere or something otherwise screws up, you dont have to reapply all that stinking mask you would have had to pull if you apply it second.

Especially important when spraying something that seems to splatter all over the place like Raptor liner.
 

mike.marcacci

Adventurer
Alright, 2 days of work and we're... half way finished. It turns out it takes a while for 2 people with zero experience to disassemble, spray, and reassemble the front half of a van. We made a few small mistakes, but overall it turned out great.

When buying the toner we opted to play it safe and err a bit on the lighter side, and when we first sprayed our test cardboard box, we had to ask ourselves, "is this too light?" We decided to just go with it, and I couldn't be happier.

Next Saturday we're going to finish the body and barn doors; and the following weekend we'll tackle the fiberglass. Then we'll finally get to start on the solar :)

IMG_3278 copy.jpg
IMG_3291.jpg
IMG_1818.jpg
IMG_1811.jpg
IMG_1821.jpg
IMG_1819.jpg
IMG_1822.jpg
 

Forum statistics

Threads
188,006
Messages
2,901,015
Members
229,320
Latest member
SMBRoamer

Members online

Top