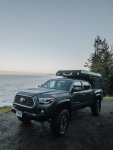
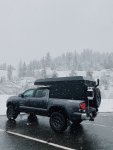
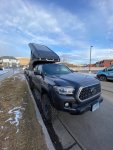
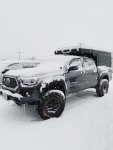
Introducing the “NEW” Alu-Cab Canopy Camper

dustfro

New member
I am going to assume what I am looking at here is pictures of a Tacoma, but obviously I could be wrong on that. If so, this is frankly a problem with all our trucks. The bed is actually three main pcs. A composite tub which mates to the bedsides. It is not one solid pc. Therefore, unless you seal up this area under the factory bed rail caps and along the inside edge of the bed (where the metal bedside mates to the composite tub) before having your CC installed, this can happen unfortunately. It's probably easier to look at the pictures (link ) below to see how I sealed mine up if that doesn't make sense. I would imagine this is a little disappointing to find out at this point, but that is most likely issue, and really the only way to attend to it is lifting the camper back off. You could try getting as much sikaflex or silicone along that crack where you see it coming in to help possibly.


Yeah, Tacoma 3rd gen. Really wish I would of sealed it before the installation.


Sent from my iPhone using Tapatalk
 

LionZoo

Observer
Has anyone had an issue with dirt and water coming in from underneath/between the bed liner and the plastic trim piece along the top of the bed sides? I had a tonneau cover on before the camper, and never noticed anything getting in. But now with the camper on, and especially in winter driving months, I have ALOT of water and mud coming in along the side of the bed, toward the tailgate area. When installing these campers, is anything done with the trim/bed liner before it goes on? Why is this happening. I have used sikaflex (thank you Tiny Rig Co.) along the outside of the camper where it meets the bed liner, so it can't be coming in from there. Any help is appreciated.

The bed below the bed caps has a bunch of cutouts that are open to the wheelwell. Therefore, just having Sikaflex on the outside of the camper will not seal up the interior of the bedcap. What you needed to do is remove the bedcaps and completely seal up the part of the bed that mates to the bedcaps, taking care to form a full seal around the bedcap itself. I silicone sealed the full area underneath the bed caps, but I still get some minor fine dust intrusion (likely because it's hard to 100% seal it all the time as there is flex in the region). I don't get any water intrusion, knock on wood.

Also, I think the screw holes that attach the rails to the bedsides are probably not fully dust sealed. I believe I still get some dust intrusion through the screw holes. However, trying to completely 100% seal the bed from all fine dust is a very difficult battle. The beds were not designed to be water tight and there are lots of parts forming the full assembly that can all move by themselves, so unless you take really good care and fully plan out your installation from the beginning to be fully sealed, you'll likely get some dust in the bed.
 

LionZoo

Observer
Is water intrusion an issue with most of these campers, or is it just installer error? Reading Wackyhacky's thread about snow blowing in on the drive home from the dealer is disconcerting. I was considering one of these for a multi-year trip and really don't want to deal with mold and troubleshooting leaks when out of the country.

As stated above, mine is pretty sealed, but it did take some effort. I've taken the truck through water crossings and have not had water intrusion.
 

wackyhacky76CO

Active member
Is water intrusion an issue with most of these campers, or is it just installer error? Reading Wackyhacky's thread about snow blowing in on the drive home from the dealer is disconcerting. I was considering one of these for a multi-year trip and really don't want to deal with mold and troubleshooting leaks when out of the country.

I have read quite a bit about them before & of course continue to do so, and no, I wouldn't say this is a common issue even with my experience that you read about. In my situation specifically, it was more on an installer hiccup than anything due to never having encountered an install without OEM bed rail caps. Most of the competing platforms (Vagabond Drifter, AT Summit, etc.) rely on weight resting on the bedsides of the truck, which the AC does not. This has many benefits when it comes to how that weight rides back there. I had prepped my truck (switching from the OEM plastic caps to flat metal) for one of these other campers that ended up not happening due to endless delays. The AC is designed with the height of the OEM plastic caps in mind when being fitted to the Tacoma, so my lower profile flat mating surface (along with the installer's attempt to seal to it) resulted in the leaks I have dealt with. That said, it is the ONLY area that ever leaked in my experience so far. While no topper style solution is going to be 100% impervious to leaks, the camper itself is actually pretty easy to seal up if you are planning from the start. Especially with the removing of the tailgate which is pain in the ass to seal around period. I feel confident, if I had the tools to install one myself, what I experienced could have been mitigated or eliminated.
 

abenteur_co

Member
Has anyone found a good quality marine, auto or audio box carpet that is approximately the same color as the Alucab carpet on the bed platform and that will work with velcro like that carpet does? I'm looking for some carpet to cover a bulkhead panel that I can velcro to but what I've been finding apparently has too tight of loops so velcro doesn't stick. Thanks!
 

blake92242

Member
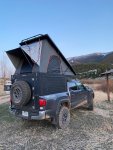
Selling to focus on buying a home. The truck is a dream and the camper weighs a little under 500 lbs so you cant even feel it when driving around. Please let me know if you have any questions. Below is everything that has been done to the truck. The price is $55k. Located in Montana. Reach out here or via email at blake92242@gmail.com.
IMG_5321.JPGIMG_7522.jpg


-2019 Toyota Tacoma OR (Manual Transmission)
-42k Miles
-Clazzio Black Leather Seat Covers
-TPAM with RAM Mount for Phone
-Rago Fabrication Center Console Molle Panels
-President Bill CB Radio
-S1 Amber Baja Designs Lights
-Rago Fabrication Ditch Light Brackets
-Yota mafia (4) Rock light kit
-SPC UCAs
-OME 2” Lift Heavy fronts and backs
-Grabber X3 285/70/17 Tires (Matching Spare)
-(5) AEV Crestone Dual Sport Wheels
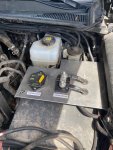
-Off Grid Engineering Red Arc BCDC1225d dual battery kit
-Alucab Canopy Camper (Installed by Mule Expedition Outfitters)
-180W Sunflare Solar panel
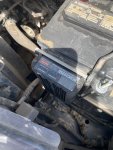
-Victron BMV 712 battery monitor with bluetooth
-Victron 75/15 Solar Controller with Bluetooth
-Custom goose gear electrical panel
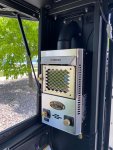
-Dickinson Marine P-9000 fireplace
-Expedition Essentials propane tank mount and 11 lb propane tank
 

Attachments

  • IMG_5081.jpg
    IMG_5081.jpg
    616 KB · Views: 86
  • IMG_5320.jpg
    IMG_5320.jpg
    228.2 KB · Views: 90
  • IMG_6595.jpg
    IMG_6595.jpg
    828.5 KB · Views: 98
  • IMG_7715.jpg
    IMG_7715.jpg
    628.6 KB · Views: 110
  • IMG_7729.jpg
    IMG_7729.jpg
    816.4 KB · Views: 107
  • IMG_7730.jpg
    IMG_7730.jpg
    641 KB · Views: 104
  • IMG_7731.jpg
    IMG_7731.jpg
    679.7 KB · Views: 98
  • IMG_7735.JPG
    IMG_7735.JPG
    237.9 KB · Views: 99

seekoutbeauty

Active member
Looking good. I bought a screen kit recently and fully anticipate the velcro to fail (as it has on my storage pouches on the inside rear door). I thought I saw someone on Instagram (maybe @tinyrigco) rivet the velcro strip into place, which I may try when I do the install. Have you noticed any water leaks inside?

Yes - You have two options on mounting the screens with Rivets.
Option 1) Rivet the velcro onto the camper.
Option 2) Don't use Velcro and mount the Screens directly to the camper with Rivets.

Additionally, the instructions for the screen kits recommend using 3M adhesive promoter. It works, and makes a night and day difference.
It is super important to properly prep the surface before installing the velcro. We have had a lot of success this way.

I honestly don't see myself removing the screen kits on my personal vehicle anymore, and will likely rivet the screens directly to the camper.
 

seekoutbeauty

Active member
Selling to focus on buying a home. The truck is a dream and the camper weighs a little under 500 lbs so you cant even feel it when driving around. Please let me know if you have any questions. Below is everything that has been done to the truck. The price is $55k. Located in Montana. Reach out here or via email at blake92242@gmail.com.
View attachment 663688View attachment 663689


-2019 Toyota Tacoma OR (Manual Transmission)
-42k Miles
-Clazzio Black Leather Seat Covers
-TPAM with RAM Mount for Phone
-Rago Fabrication Center Console Molle Panels
-President Bill CB Radio
-S1 Amber Baja Designs Lights
-Rago Fabrication Ditch Light Brackets
-Yota mafia (4) Rock light kit
-SPC UCAs
-OME 2” Lift Heavy fronts and backs
-Grabber X3 285/70/17 Tires (Matching Spare)
-(5) AEV Crestone Dual Sport Wheels
-Off Grid Engineering Red Arc BCDC1225d dual battery kit
-Alucab Canopy Camper (Installed by Mule Expedition Outfitters)
-180W Sunflare Solar panel
-Victron BMV 712 battery monitor with bluetooth
-Victron 75/15 Solar Controller with Bluetooth
-Custom goose gear electrical panel
-Dickinson Marine P-9000 fireplace
-Expedition Essentials propane tank mount and 11 lb propane tank

Quitter.
 

seekoutbeauty

Active member
Has anyone had an issue with dirt and water coming in from underneath/between the bed liner and the plastic trim piece along the top of the bed sides? I had a tonneau cover on before the camper, and never noticed anything getting in. But now with the camper on, and especially in winter driving months, I have ALOT of water and mud coming in along the side of the bed, toward the tailgate area. When installing these campers, is anything done with the trim/bed liner before it goes on? Why is this happening. I have used sikaflex (thank you Tiny Rig Co.) along the outside of the camper where it meets the bed liner, so it can't be coming in from there. Any help is appreciated.

My truck has this issue as well.
We are literally working on a solution today.

Post a photo of your rear wheel wells please, looking up towards the bed rail.
 

dustfro

New member
My truck has this issue as well.
We are literally working on a solution today.

Post a photo of your rear wheel wells please, looking up towards the bed rail.

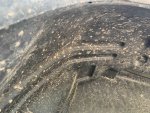
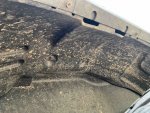
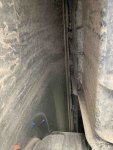
The third photo is looking up from underneath the truck, behind the quarter panel and above the wheel well. Saw your IG story today removing the camper. I think my best option is to take it off and seal up underneath the bed caps like wackyhacky76CO had done. How labor intensive is it to remove these campers? I have access to a shop with a hoist, hopefully making it relatively easy?
 

Attachments

  • IMG_0658.jpg
    IMG_0658.jpg
    693.1 KB · Views: 79
  • IMG_0659.jpg
    IMG_0659.jpg
    842.3 KB · Views: 85
  • IMG_0660.jpg
    IMG_0660.jpg
    497.4 KB · Views: 85

seekoutbeauty

Active member
The third photo is looking up from underneath the truck, behind the quarter panel and above the wheel well. Saw your IG story today removing the camper. I think my best option is to take it off and seal up underneath the bed caps like wackyhacky76CO had done. How labor intensive is it to remove these campers? I have access to a shop with a hoist, hopefully making it relatively easy?

It took about 2.5 hours to pull mine.... The install will take longer.
 

wackyhacky76CO

Active member
Does anyone have one of the Goose Gear Double Drawer cabinet modules in a short bed Taco or similar? I was curious how big the actual inside drawer space was if someone is willing to please take some measurements, inside length x width x depth of both drawers? Wondering if I can cram all of kitchen stuff into one of these or not.
 

wackyhacky76CO

Active member
Oh, another question before I forget. Does anyone know why there are velcro dots around the inside walls of the tent up near the roof? I just noticed them the other day for the first time. Is this for a possible future insulation kit? Anyone have a clue?
 

Forum statistics

Threads
188,283
Messages
2,904,831
Members
229,961
Latest member
bdpkauai
Top