Isuzu NPR HD Truck Camper Build

VicHanson

Adventurer
backup camera?

(also posted on power systems: 12v forum, ect.)

I was in an auto parts store tonight (didn't notice the name, sorry) and saw a backup camera on sale for $100, normally $130. It has a 3.5" screen and a wireless transmitter. The display model was sharp and clear with good color, but it was in the store which was well lit. Has anyone used one with a small screen like this and if so, is it big enough to be practical? I just glanced at it on the way out of the store so didn't notice the brand name or any details. Not sure if if could be plugged into a larger display, espec. a laptop, which I will be using with a Garmin GPS that plugs into the USB port.

Any advice or comments would be appreciated as I am almost done with my camper build and just realized that because I will be traveling alone I should probably have a backup camera.

Thanks,
Vic
 

VicHanson

Adventurer
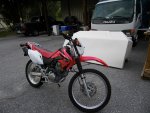
Honda CRF230L

I was looking at a 230L in Minnesota on Craigslist but the listing is gone now, must have sold. I just found another one today at Lakeland, about 100 miles from here. I'm trying to work out transportation to go look at it in the next day or two, looks like a nice bike at a fair price. It sure would look nice in my bike garage!

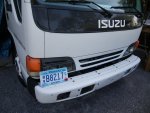
Oh, I got the licence plates for my RV today! Yeah!!
 
Last edited:

HINO SG

Adventurer
I got great news from my sister in Minnesota today, she was finally able to register my camper there as an RV. Yeah! I guess they liked all the pictures I sent them. I do have to take it in for a visual inspection when I get to Minnesota. Now as soon as I get the new title I can contact Progressive Insurance and try to get my insurance changed from a commerical vehicle to an RV as well.

congratulations. I paid for commercial registration and insurance for far too long on my rig, got pretty reasonable RV insurance through Progressive. RV reg. & insurance is less than 25% of what I'd been paying.
 

DontPanic42

Adventurer
(also posted on power systems: 12v forum, ect.)

I was in an auto parts store tonight (didn't notice the name, sorry) and saw a backup camera on sale for $100, normally $130. It has a 3.5" screen and a wireless transmitter. The display model was sharp and clear with good color, but it was in the store which was well lit. Has anyone used one with a small screen like this and if so, is it big enough to be practical? I just glanced at it on the way out of the store so didn't notice the brand name or any details. Not sure if if could be plugged into a larger display, espec. a laptop, which I will be using with a Garmin GPS that plugs into the USB port.

Any advice or comments would be appreciated as I am almost done with my camper build and just realized that because I will be traveling alone I should probably have a backup camera.

Thanks,


Vic

I have been using a backup camera on my FG for 5 years or so. Biggest problem is locating the monitor so that the picture isn't washed out from too much light. A little cardboard and tape can solve that problem. Handy gadget.
 

VicHanson

Adventurer
Thanks Bruce, that encouraged me to get one.

I just ordered a backup camera from Advance Auto Parts, they were $129.98, now on sale for 99.98. If you order on their website you get an additional discount of $20 for orders OVER $100, so I had to order a couple of bulbs that I need for the interior of my camper anyway. You can pick up in the store or orders over $75 get free shipping. I don't have a drivable vehicle now so took the free shipping. Here is the camera if anyone is interested.

http://shop.advanceautoparts.com/webapp/wcs/stores/servlet/product_3-5-Inch-Wireless-Backup-Camera-System-Peak_6050273-P_N3597A_A%7CGRP2021____

Brand is Peak, which I've never heard of, it got 4 out of 5 stars on 5 reviews.

Actually tomorrow I hope to have something to drive! Going to look at the motorcycle, a Honda CRF230L. It has 700 miles, if all looks OK will buy it and bring it home.

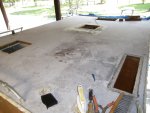
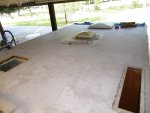
Today I got the rubber roof of the camper cleaned, what a job! My wrists are sore from scrubbing. I need to get a bunch of screws and then can put the vents back on the roof and put the rubber roof sealer on it. I've got the vents all cleaned up ready, had to put a new lid on the emergency vent, the old one was falling apart.
 

VicHanson

Adventurer
I got the bike! It's my first dual sport, and much smaller than my last bike, so I was a little concerned that it might feel a bit like a toy. But no problem, I love it! It has plenty of pep, although I haven't had it above 50 mph yet. It handles great on the pavement, will have to find some dirt to go play in soon. I just ordered an aluminum ramp, so as soon as that gets here, I can put it in the bike garage and see how it fits. I had wanted to build a fold down door/ramp for the garage, but following wise advice, decided to go with a regular door and a ramp, much easier. I didn't get a folding one as they only weigh 6 lb and I have plenty of room to store it unfolded (6 1/2 feet long), and folding ones are more expensive.

attachment.php

Previous bike - 6 cyl, Honda CBX, 1100cc

IMGP0540_resize.JPG IMGP0544_resize.JPG
New bike - Honda CRF230L, 1 cyl, 230cc

IMGP0530_resize.JPG IMGP0535_resize.JPG
Cleaning the roof - Done!

IMGP0527_resize.JPG
RV License plates!
 

VicHanson

Adventurer
A very unexpected report to post tonight. Yesterday, I think it was when I came outside after eating lunch, my cousin Jim asked me to move my motorcycle. I had it parked in one of the stalls of the carport, near his BBQ grill, so I thought maybe he wanted to use the grill. Then he told me to take it to the other side of the camper. There I saw that he had one of his ATV ramps up on the garage opening, and had cleared out some of the stuff in there. "Put it in the garage", he said. I had forgotten that he had that ramp!

I put a small step stool along side of it and tried to walk it up the ramp into the garage. I got the front wheel to the top and killed the engine, so had to roll it back down. Same thing on the second try. The third try worked OK! The bike fits in perfectly. I was a little worried that the foot peg would be too close to the water tank, even though I had measured it previously. You may remember that I built in a trough for the bike to set down in, to give more clearance, because I wasn't sure if I would get the Honda or a taller Yamaha. I began to regret that when it was time to take the bike out, now I have to lift it out of that 4" deep trough. We cut a chock for the front wheel to keep it from going too far forward, and made a little ramp to put behind the rear wheel. Because the garage is only 4' high, I can't stand straight up to make it easier to lift up the back of the bike to back it out of the garage. With the ramp, I was able to do it by putting one foot up on the battery box and push on that, but it is a little awkward. I may fill in some under the back tire so it doesn't drop in as far, but time to worry about that later.

Then in the late afternoon, Jim asked me to come in the camper, he wanted to talk to me. He said he and Adam (his stepson, who has helped with the plumbing and other things), were concerned about sealing the walls around the shower pan, and asked if it was OK for them to put something like shower stall material on all the bathroom walls, coming down to inside the lip on the shower pan. He said if it was OK with me, they would go get the material right then and do it while I was at church on Sunday morning! I couldn't say no, so they went off to get the material, and came back with FRP panels and all the trim. As it turned out, Adam couldn't help this morning, so they weren't able to start until this afternoon.
And then Jim decided to rebuild the vanity and medicine cabinet with a plastic 'lumber' material made of PVC, and that is taking longer than he expected, so it still isn't done.

I got the front escape hatch reinstalled, the hole filled in where the bathroom vent was, and a few other small details. I'm putting the former bath vent in the center of the camper where the old AC unit was because that is the only way I can put three 205 Watt solar panels on top, and at that it is a very tight squeeze! Jim had suggested going to Miami last week to get them, but we went to buy the bike instead, so maybe this week, not sure yet.

While starting to install the old gray water tank yesterday, we discovered a huge crack in it that hadn't been there before. It seems to be so brittle that it is worthless, so will have to replace it. Right now we are considering making one out of 4" PVC pipes and putting it the length of the camper, underneath between the frame rails of the truck, which otherwise would be wasted space. I did find one to buy that might work in the normal space (sideways under the back end of the camper. The price will be about the same either way, but the homemade one would have about twice the capacity. Decisions, decisions!

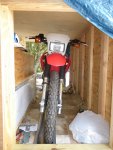
IMGP0545_resize.JPG IMGP0548_resize.JPG

Here is the bike in the garage, sure looks nice in there!
 

kerry

Expedition Leader
Don't know what kind of prices you are looking at for a new gray water tank, but using fiberglass cloth and epoxy on the outside of the tank would add tons of strength, and can be done pretty quickly.
 

VicHanson

Adventurer
Thanks for the ideas, Kerry and Peter. Rather than try to rebuild the old tank, which is quite small, I would rather make a new one if possible, however I have no experience with fiberglass. Please tell me if this would work - I was thinking about making a plywood box, like I did for the battery box, I can make it the right size and shape and it will hold about 40 gallons. If I fiberglass the inside will that work? How many layers? The lid would be separate, and clamp down on a rubber seal on the top of the box. If this can work, it would solve a number of concerns - ease of hookup to the gray water lines and the black water drain, large capacity without taking up needed space due to optimal size and shape, allowing room to easily install a trailer hitch later, and hopefully cheaper cost.

I can get help with the fiberglass work.

A new tank is about $150 to $200 and I haven't really found the right size and shape.

Thanks,
Vic
 
Last edited:

VicHanson

Adventurer
Thanks Peter. I need to get the camper drivable so I am thinking of holding off on the gray water tank for now. I might just put a valve on the pipe and use a bucket until I have time to do it right.
 
Last edited:

VicHanson

Adventurer
Thanks Kerry, I had looked at their site, didn't really see anything suitable there, but did find one at the boatdepot that might work, 25 gal for $105 and I think $25 shipping.

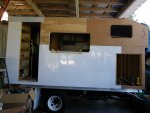
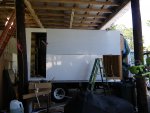
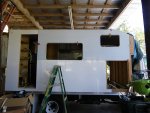
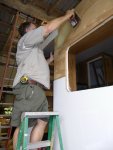
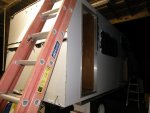
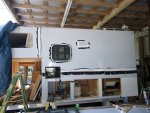
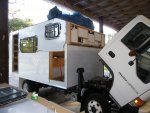
OK, the big news is that we finally got started putting the aluminum siding on! It's a big job. It really has started looking like a camper now. Lots of interruptions this weekend but got one side done yesterday and the back today. Also got the windows in and the door frame in on the same side.

Does anyone have experience using flat sheets of aluminum (4x8) for siding? I'm wondering if it needs to be screwed in the middle of the sheets or just on the edges and seams? I hate to put unnecessary screws in those big panels if not needed, more opportunity for leaks. The sheets are bonded on with Liquid Nails Professional, applied over the whole area with a serrated trowel. The metal is solid against the plywood under it now, but not sure if it will stay that way when it gets to bouncing on the roads (or off road).

We are using 10 x 3/4" aluminum pan head, square drive screws for the aluminum (couldn't find 1") and 10 x 1" stainless steel pan head, Philips head around the windows, door, vents, trim, etc. The aluminum screws have painted white heads. I like the square drive but couldn't find square drive in stainless. They are $17 per 100, the aluminum only about $7 per 100. I've pretty much thrown the budget out the window, just need to get this finished so not shopping for price anymore, it's only retirement money!

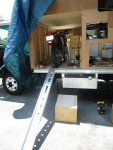
Also got my aluminum bike ramp and the backup camera a few days ago. The ramp works good, it is only 6' long instead of 8' like the other one I used but it doesn't seem to be a problem. The raised edges on the side of the ramp are nice. I did drill holes and screwed it to the truck so it didn't move around our slip off. There is one problem though, it is very shiny, I had to use sun glasses in the bright sunlight. I think I will paint it black. Can't install the backup camera until we finish with the siding, so haven't tried that yet.

IMGP0554_resize.JPG IMGP0557_resize.JPG IMGP0576_resize.JPG IMGP0577_resize.JPG
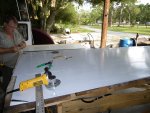
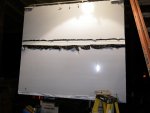
Getting ready to cut the aluminum. First pieces on! We had to clamp the piece in place, then mark the window cutouts.

IMGP0578_resize.JPG IMGP0581_resize.JPG IMGP0584_resize.JPG IMGP0588_resize.JPG
Checking the fit. Troweling on the adhesive. Have a window in! The back is finished (some pieces still have the protective plastic on them)

IMGP0589_resize.JPG IMGP0559_resize.JPG
Door frame installed. 6' aluminum bike ramp.
 
Last edited:

gait

Explorer
Just a thought. I'd suggest testing the glue, it may well be that the screws are unnecessary to hold the Al on. A large area of adhesive should be very strong in shear. If the adhesive lets go its probably not the right stuff.
 

VicHanson

Adventurer
The adhesive holds really well right now. I finally thought of calling the Liquid Nails company and asked them about it. Not good news. The adhesive is made for FRP, normally in a bathroom, which doesn't move or shake much! The woman I talked to said it is not recommended for aluminum and especially on a vehicle where it will be subjected to shaking and stress movement. It drys hard and she said it will probably crack with too much movement. She said they really don't make anything specifically for this purpose, but their Polyurethane Construction adhesive for marble and other hard surfaces would probably work, as is stays flexible. The problem is that it only comes in 10 oz tubes, rather than multi-gallon pails.

Well Jim came home from work while I was writing this and we decided to continue using the Liquid Nails for FRP, just using more screws. Lots of measuring and cutting small pieces this afternoon, for the pieces around the storage doors, LP tanks and water heater. We got those put on and cut the large piece that goes on top, even got the window opening and the stove vent opening in the right place! Will put it on tomorrow.
 

VicHanson

Adventurer
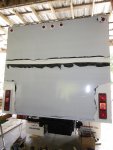
We got the last of the main pieces of aluminum on today! Still need to put the corner and trim pieces on, they should be ready to pick up tomorrow. Also need to skin and trim the doors for the garage and storage. Not sure exactly how that is all going to work, Dana had the corner and trim pieces bent but I haven't seen them yet. We are also using U-channel pieces to trim the edges of the doors, but it already fits tight without the aluminum on the front. The plan is to dado them around the edges on the back just enough so that the trim will fit over the wood and the aluminum.

Also got the taillights on, still need to mount a few clearance lights and put the fiberglass deflector cap on the front.

There is a little plumbing and wiring to do left to do, Jim is finishing up the bathroom sink and shelves, and I need to reseal the rubber roof. Then pack up everything and go to Miami to pick up the solar panels, hopefully in a week. I was going to install them while here in Florida but due to the time factor I think I will take them to Minnesota and (hopefully) do it there.

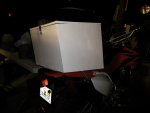
The shopping box for the bike is functionally finished, trying to figure out how to decorate it a little so I don't look so much like an ice cream salesman! The box worked great for shopping today. Stopped at the Honda dealer today to see if they had any Honda decals but nothing. I did get a nice helmet. It was priced at $80. There were some fancier ones on sale for $100 so I asked if they could give me a sale price on the one I wanted and she gave me a 10% discount, which was nice.


IMGP0603_resize.JPG IMGP0604_resize.JPG IMGP0605_resize.JPG IMGP0590_resize.JPG
 
Last edited:

Forum statistics

Threads
188,600
Messages
2,907,619
Members
230,759
Latest member
Tdavis8695
Top