You are using an out of date browser. It may not display this or other websites correctly.
You should upgrade or use an alternative browser.
You should upgrade or use an alternative browser.
"Jackur" 2003 Ford E350 Diesel 4X4 Build.
- Thread starter shachagra
- Start date
D
Deleted member 1276
Guest
Loving this build.
AeroNautiCal
Explorer
^ This!
Dinette Table
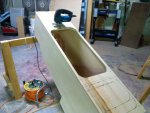
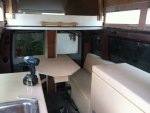
I have long put off building the dinette table because I just didn't have a design that motivated me to start building. My criterion is unusual. It has to be rock steady. People use the table to propel themselves into and out of the seat. It needs to be as sturdy as a grab bar. I don't like front posts, for two reasons. Your legs hit them coming in and out, and that real estate under the table makes a great extra bed without the hassle of reconfiguration- if you don't have a table leg in your chest. Jackur needs a place to crash while stealth camping with the top closed up.
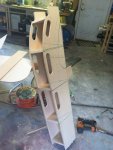
I was ordering a rear ladder online yesterday when an idea hit me. I need a ladder to climb up to open the top, but it would be cleaner if it was inside the van and I could make the ladder part of the table- plenty sturdy. I hit the shop to build a carcass and fit it, then I installed the rough table today. I love it. It will look really nice with some curves and a nice finish and it works well. I made the entire thing a box beam that bolts to the floor and ceiling so it is rock steady. I am considering making the table a drop leaf type with storage in the center box beam, but the table lifts out of the way so easily I may reconsider.


AeroNautiCal
Explorer
Absolutely Brilliant!
What I like best about your build is that you have the balls to think outside the box and the skills to make it happen in style!
Thanks.
Kind, encouraging posts help get me off my *** and back out to work.
Many pictures
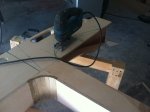
I have a hard time working with pictures in this format so bear with me. Today I worked on the ladder, cutting the final shape, and committing to the epoxy seams. Once epoxied there isn't much changing you can do. Added a few curves for no other reason than I thought it would look cool, structurally it is where it needs to be. I then sand as much as is possible and add epoxy fillets. I have posted pics of the manufacture of the curve. The angles are done by eye on my indispensable Delta stationary oscillating sander and took about 15 minutes to cut and fit.
Cutting Curves
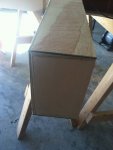
This form of building is very forgiving. My box beam wasn't square and the table needed to be adjusted and it left the end of the table support looking "askew" some belt sander magic and you'll never know the difference.
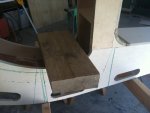
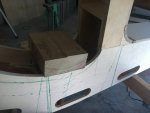
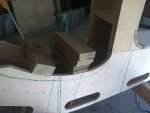
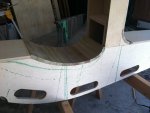
Making the curve. I have loads of beautiful poplar that I milled years ago in Maryland.
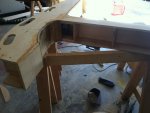
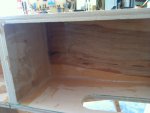
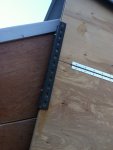
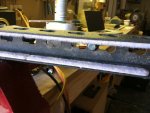
Last two pictures are of a safety devise. The main pop-top is held open by the open bed, but while the bed is being opened there is the danger that the main top will collapse- no damage but its a pain. These clips hold the top open until the bed is opened. Honestly the entire process takes less than 4 minutes.
Anyone interested in seeing the almost completed van can go to the Expo this year. Tom the owner will be taking her to Mexico for a shakedown and then bringing her to the expo. I will be on a panel discussing "to build or buy" I think you should built.
I have a hard time working with pictures in this format so bear with me. Today I worked on the ladder, cutting the final shape, and committing to the epoxy seams. Once epoxied there isn't much changing you can do. Added a few curves for no other reason than I thought it would look cool, structurally it is where it needs to be. I then sand as much as is possible and add epoxy fillets. I have posted pics of the manufacture of the curve. The angles are done by eye on my indispensable Delta stationary oscillating sander and took about 15 minutes to cut and fit.

Cutting Curves

This form of building is very forgiving. My box beam wasn't square and the table needed to be adjusted and it left the end of the table support looking "askew" some belt sander magic and you'll never know the difference.


Making the curve. I have loads of beautiful poplar that I milled years ago in Maryland.


Last two pictures are of a safety devise. The main pop-top is held open by the open bed, but while the bed is being opened there is the danger that the main top will collapse- no damage but its a pain. These clips hold the top open until the bed is opened. Honestly the entire process takes less than 4 minutes.
Anyone interested in seeing the almost completed van can go to the Expo this year. Tom the owner will be taking her to Mexico for a shakedown and then bringing her to the expo. I will be on a panel discussing "to build or buy" I think you should built.
Last edited:
Sanding Curves and making changes
Did some finish work and sanding today and I thought some might be interested to see how I sand curves I've built up. I use a sanding drum that i have mounted to a hefty Bosch drill. It makes short work of sanding curves
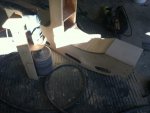
I really struggled with TV placement, I tried to mount it just behind the front seats but it would have taken up too much space and would have required it to drop down, which is complicated by the folding ceiling. I decide to make a storage space for it behind the drivers seat and just set it on top of the toilet when the ceiling. is raised. It fits well.

I changed my mind and decided to mount the electrical switches outside the closet, not behind a door. I can get to the back of the C/B units with a door just above the drivers seat. Those Blue Sea products are so nice it is a shame to hide them. I also find in Shachagra (our big RV) that having the switches available makes for easy securing of circuits I'm not using. So I cut up the cabinet, put in a new section and filled the gaps with my ultimate woodworking secret, Bondo. You'll never be able to tell I made a change.
The lower box is a DC voltmeter- it would have been really nice and clean if the DC panel had come with a voltmeter, and a remote switch for the inverter.
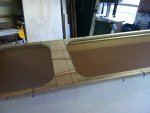
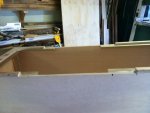
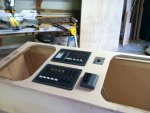
Did some finish work and sanding today and I thought some might be interested to see how I sand curves I've built up. I use a sanding drum that i have mounted to a hefty Bosch drill. It makes short work of sanding curves

I really struggled with TV placement, I tried to mount it just behind the front seats but it would have taken up too much space and would have required it to drop down, which is complicated by the folding ceiling. I decide to make a storage space for it behind the drivers seat and just set it on top of the toilet when the ceiling. is raised. It fits well.

I changed my mind and decided to mount the electrical switches outside the closet, not behind a door. I can get to the back of the C/B units with a door just above the drivers seat. Those Blue Sea products are so nice it is a shame to hide them. I also find in Shachagra (our big RV) that having the switches available makes for easy securing of circuits I'm not using. So I cut up the cabinet, put in a new section and filled the gaps with my ultimate woodworking secret, Bondo. You'll never be able to tell I made a change.
The lower box is a DC voltmeter- it would have been really nice and clean if the DC panel had come with a voltmeter, and a remote switch for the inverter.


Last edited:
Trim- what a hassle
I have been tackling the problem of how to trim out around the windows, this is so hard, it would be so much easier to have a van with no windows, but alas. I think I have it figured out but its time consuming. First I use sheet metal screws to attach pieces of 1/8" plywood to the lip above the window. I used multiple pieces to make the fitting easier, they will be joined together later. I then make a cut with the plywood held in place that lines up with the coaming above (the piece with the windows) I then have to temporarily attach plywood that fits tightly against the coaming, I don't worry if this is cut right, I'll trim it up later. To hold it I glue and nail angled pieces to hold plywood # 2 to the face. I use a nail gun to hold the shape temporarily. Then I take the assembly down carefully, add some gorilla tape and once happy with the shape I epoxy. Once the epoxy dries the trim is firm enough to route, sand and then I will prime and paint. This trim will make a great way to run wiring to LED lights in the cabin.
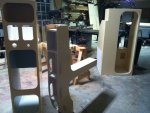
The last picture is of the painted cabinets ready to install once I get the window header described above finished.
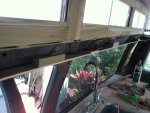
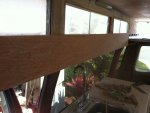
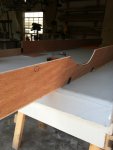


Last edited:
Update 12 Mar
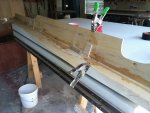
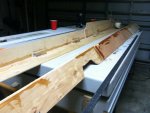
Took the topper off with my son so that I could make final size adjustments, glass the edges, paint add weatherstripping and reassemble. This is the second change in size for the main roof sides, the first change made them longer, now I just needed to trim 1/2 inch off the height of each so the mate with the bed roof perfectly. Now that the size is right I finish glassing them. In the picture you see the un-epoxied fiberglass on the ends where I extended the length.

I have the inside trim far enough along to fasten in the cabinets. They are attached to the coaming up top and attached to tye floor with sheet metal screws. I have wired the LED lights and will install tomorrow. I will do most of the electrical connections tomorrow, minus the solar panels. I need to finish the cabinet doors and do some more trim work.

Took the topper off with my son so that I could make final size adjustments, glass the edges, paint add weatherstripping and reassemble. This is the second change in size for the main roof sides, the first change made them longer, now I just needed to trim 1/2 inch off the height of each so the mate with the bed roof perfectly. Now that the size is right I finish glassing them. In the picture you see the un-epoxied fiberglass on the ends where I extended the length.

I have the inside trim far enough along to fasten in the cabinets. They are attached to the coaming up top and attached to tye floor with sheet metal screws. I have wired the LED lights and will install tomorrow. I will do most of the electrical connections tomorrow, minus the solar panels. I need to finish the cabinet doors and do some more trim work.

Similar threads
- Replies
- 3
- Views
- 2K
- Replies
- 16
- Views
- 3K
- Replies
- 3
- Views
- 301
- Replies
- 19
- Views
- 4K
- Replies
- 6
- Views
- 861

