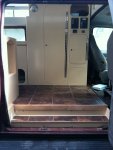
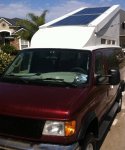
"Jackur" 2003 Ford E350 Diesel 4X4 Build.

shachagra

Adventurer
Step

Lots of odd jobs today, most not picture worthy. I fiberglassed the sides of the accordion top sides, worked on cabinet doors, installed the external 110V hook-up and did some trim work. I am using the old trim were I can, as you see in the pictures below.
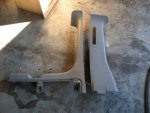
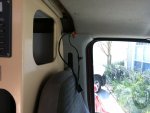
IMG_1800.jpgIMG_1802.jpg

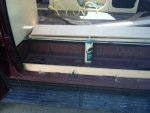
I also started boxing in the step into the van. This is a great illustration of how easy it is to work with wood and epoxy. I screwed in place the pieces that I felt needed to be snug with their attachment points. I then fit the other pieces as best I can, but with no need for a perfect fit. You can see the wedges I used to make a tight fit without regard to the seam between the pieces of wood, when I add a fillet of epoxy they will join fitting perfectly to the step. Once the epoxy hardens I will pull out the step, sand, finish and put back in place with nice trim and more Allure flooring.
IMG_1803.jpgIMG_1805.jpg

I also epoxied some brackets I will use to close off the back above the windows.

IMG_1806.jpg
 

shachagra

Adventurer
Family day

Had my son working today, those are the best days, I do fun creative stuff and he sands. He's a good body guy, works wonders with a bit of Bondo. It there is more filling to be done we use a micro-balloon slurry with epoxy, extremely light and strong, but takes a day to set up.

I did trim work (I'll return to that) while Charles concentrated on 3 jobs. First, getting the sides primed and painted, ready for final installation tomorrow, faired the topper and prepped the rusty trailer hitch for sand blasting. The topper was glassed and not faired, you could see the glass seams. I was going to leave, it makes no difference really, but it looks so much better finished.

In the morning we will add weatherstripping to the edges and install.
IMG_1808.jpg

Today was a hard day on tools. My trusty Bosch 6" Orbital sander finally died. Its been acting up so I ordered one just like it last week. Thought of going with a Fien sander, but at $500 its just too much. The Bosch has been great and it is used for hours everyday. Second was the belt on my Delta oscillation sander. 3HP, 220V with a 103"X6" belt. No problem, I went to replace it and found I had run out- what looked like a stored 103" belt was a bunch of 6" dis sanding belts. I come to a stop without my Delta sander.

I am convinced that if I were to do this again, and I might, I would scratch the entire back end and build from scratch. It is so much easier. A conversion van should be a van, identified as such inside and out, that is converted to a camper. I am way too much into detail work for a conversion van. I should just start with a custom build. You could disguise it in many ways so that it doesn't look like a camper until it is opened up.
 

shachagra

Adventurer
Not much accomplished the last two days- jacked up my leg. But some progress has been made. The final sides are up and the solar panels are on. My son is adding a lip for them to rest on while recessed in the roof, allowing air to circulate under them and cool as much as possible. The wiring is run. If anyone is interested I ran #10 from the panels to the controller, the panels produce 27V so #10 is more than enough. From the controller to the batteries I ran #6. That'll be less than a 1% drop in voltage.

I cleaned up the step into the van and hung the cabinet doors. It looks clean. I always use piano hinges now, I had bad luck with hidden hinges, and piano hinges have such an honest look about them and are as tough as anything.

IMG_1817.jpg
 

elmo_4_vt

Explorer
Nice! The doors came out sweet and I like the cabinet functionality. I hope my doors come out that nice on mine.

Don

-
 

shachagra

Adventurer
Solar panels

The first picture of the solar panels. 2 X 220W solar array. I was getting nearly 30A out of the array in March. The only problem as you can see is that you need park facing south to get the best output.
We started installing the grey water tank and propane tank storage which will reside just forward of the spare tire. I'll add pic when it is hooked up.
IMG_1826.jpg
 

Lost...Again

New member
Finally, beer and ice cream kept cold by the sun. I'm all about supporting the environment when it keeps the beer cold...

The cabinets look great and I agree the piano hinges, besides providing outstanding strength and durability, provide an honest and somewhat industrial/rugged look. Form following function at its' best!


shachagra

Adventurer
Gas Struts

Ordered the gas struts two days ago and the mounting hardware already showed up. The struts are about as long as you can get them, 44' extended, 25" compressed.

I thought I already discussed this but I must have not posted. Calculating the strut capacity was part testing, part math and most pure luck I hope. First we had to figure out where they would be positioned- this was done with a stick that marked extended and contracted lengths and we walked it along the open top until a point where it would work. Next we needed to weight te roof at that point. It is midway so the weight is high there, much more than when lifting from the end. Charles held a brace from the roof to a bathroom scale, 169 pounds. Then we needed to do a bit of math to calculate the pressure we want the struts to exert. It needs to be more than 169 pounds as the direction of the strut is 45 deg off the direction we need the roof to move.

The rest is PFM. I hope the roof gently rises on its own and needs to be pulled down. If it is still too heavy we'll add some shorter struts further down the top.

I hope you like the hinges, they cost you $30 a pop. The latches for the table hold down and the reefer were $50 a piece!
 

BajaSportsmobile

Baja Ironman
Get some Linear Actuators and flip a switch.

Ordered the gas struts two days ago and the mounting hardware already showed up. The struts are about as long as you can get them, 44' extended, 25" compressed.

I thought I already discussed this but I must have not posted. Calculating the strut capacity was part testing, part math and most pure luck I hope. First we had to figure out where they would be positioned- this was done with a stick that marked extended and contracted lengths and we walked it along the open top until a point where it would work. Next we needed to weight te roof at that point. It is midway so the weight is high there, much more than when lifting from the end. Charles held a brace from the roof to a bathroom scale, 169 pounds. Then we needed to do a bit of math to calculate the pressure we want the struts to exert. It needs to be more than 169 pounds as the direction of the strut is 45 deg off the direction we need the roof to move.

The rest is PFM. I hope the roof gently rises on its own and needs to be pulled down. If it is still too heavy we'll add some shorter struts further down the top.

I hope you like the hinges, they cost you $30 a pop. The latches for the table hold down and the reefer were $50 a piece!
 

shachagra

Adventurer
Actators

Just looked those up- they are great and will work much better than gas struts, may have to send them back!

Thanks
 

Lost...Again

New member
Doug, Actuators recommended by BajaSportsmobile look like they would nicely fit the purpose. And I suspect Baja knows a thing or two about what will survive use and abuse. He's got a just a "few" Baja runs under his belt.
 

shachagra

Adventurer
actuators

Here is what I plan to do. I am going to install the gas struts and see how they work. $52 a piece I am not gambling much. If they work as planned great, I go with a system that is not likely to fail. If not I add actuators that are assisted by the struts. Any ideas? Forums are a great place for ideas!
 

shachagra

Adventurer
advice on propane range

Any suggestions on a good propane range, built it? I'd love to go with a webasco diesel x100 like I have in my truck but the owner is too chinsey!
Single burner would be good.

I'm going to have to cut up and reconfigure the galley module to make it fit.
 

Lost...Again

New member
Chinsey?! Heck, I could have bought two Webasco's for the price of all the marine grade stainless hardware you decided to use!! In my experience, with the two previous RVs I've owned, I used the cooktops very little. Microwave for the quick meals and campfires for grilling.

Now, how about posting some more pics. I'm curious to see the sink/microwave side of the van and a close up of the table.

If the other forum members haven't noticed, Doug seems much more creative and motivated now that Jackur is getting a featured vehicle "parking spot" at the Overland Expo....
 

shachagra

Adventurer
Chinsey?! Heck, I could have bought two Webasco's for the price of all the marine grade stainless hardware you decided to use!! In my experience, with the two previous RVs I've owned, I used the cooktops very little. Microwave for the quick meals and campfires for grilling.

Now, how about posting some more pics. I'm curious to see the sink/microwave side of the van and a close up of the table.

If the other forum members haven't noticed, Doug seems much more creative and motivated now that Jackur is getting a featured vehicle "parking spot" at the Overland Expo....

I'll post pictures of the galley right before I cut it up to reconfigure it with a lame LP gas burner instead of an X100. I told you Tom, the expo participants who may wander through and look over my work mean nothing to me compared to the respect i get from someone I so greatly admire. And I'm sure someone like that may just wander through....!
 

Forum statistics

Threads
188,179
Messages
2,903,457
Members
229,665
Latest member
SANelson
Top