Jeepster Commando Build - A Different Sort of Jeep Thing - Stoffregen Motorsports

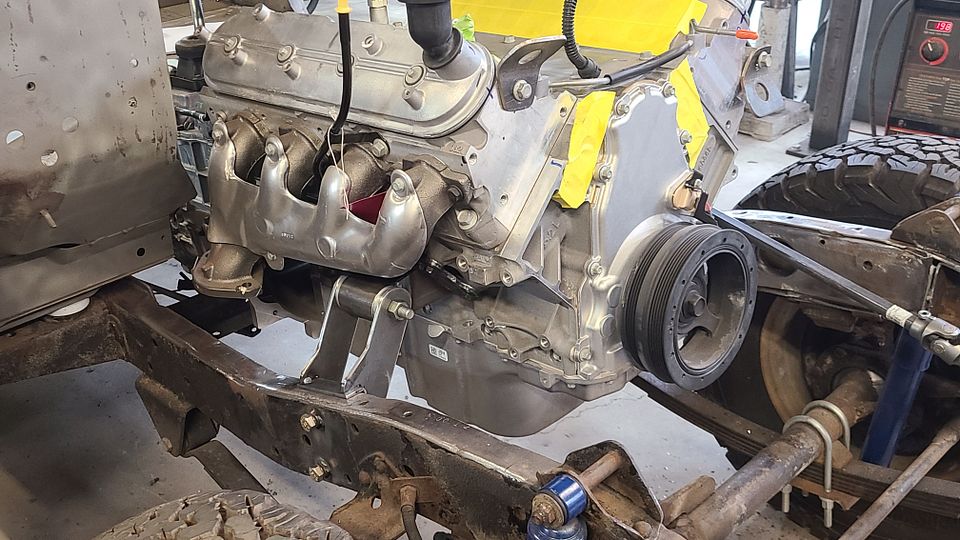
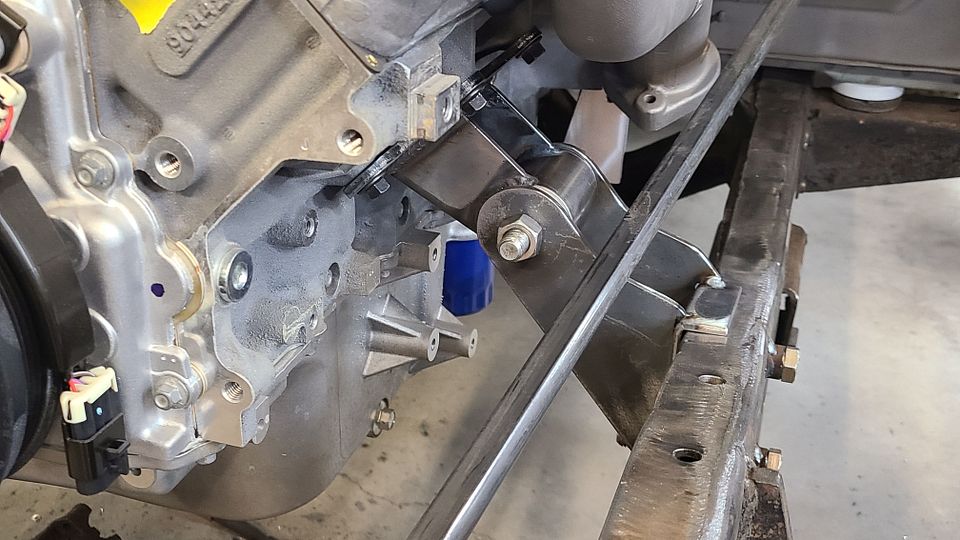
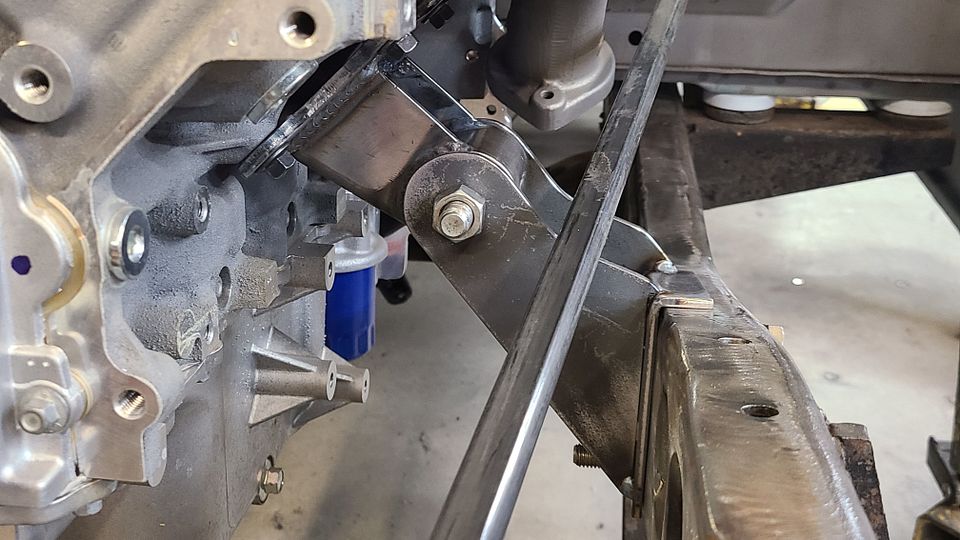
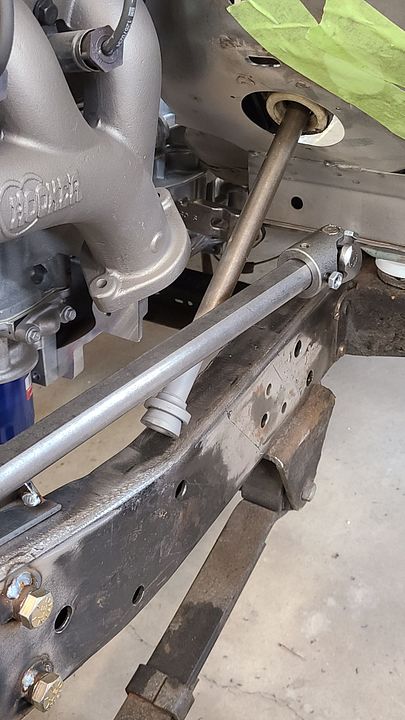
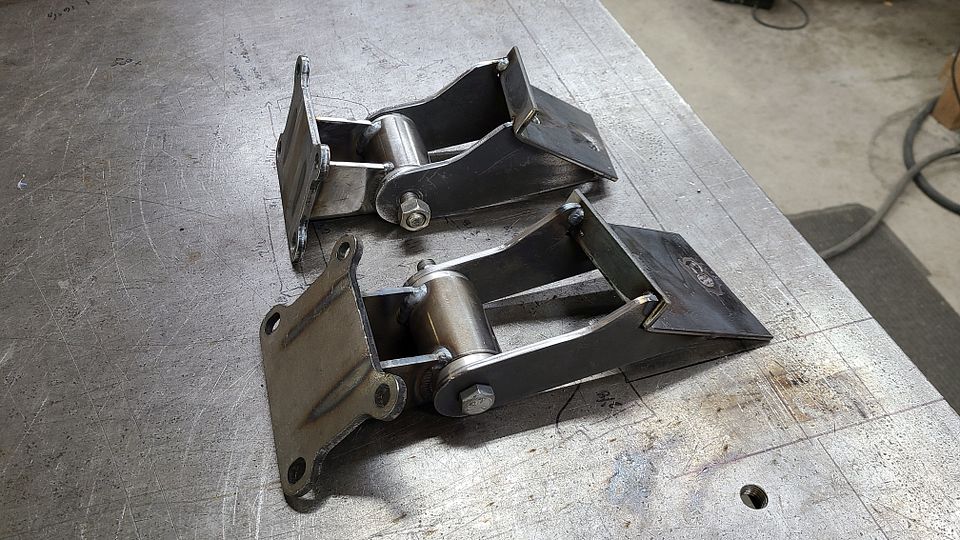
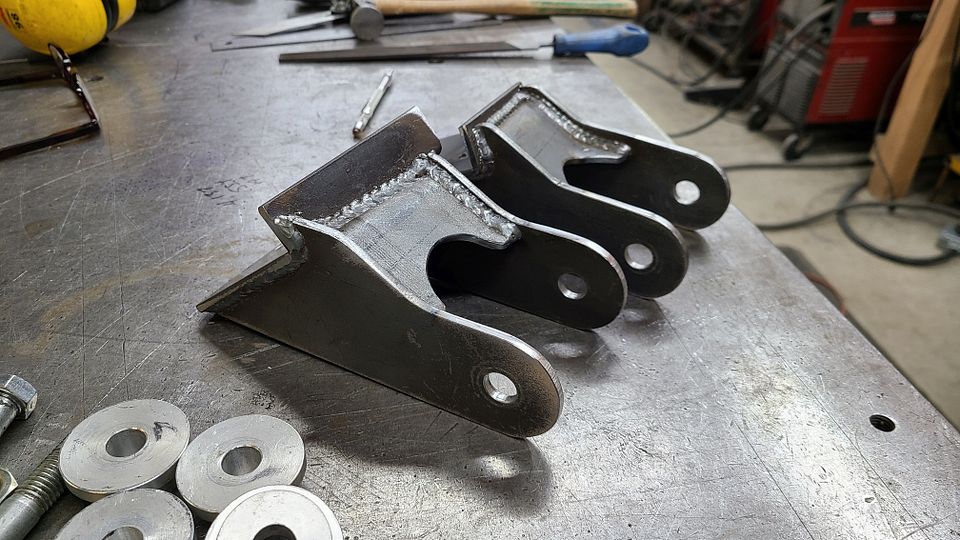
The motor mounts I started with were the basic Advance Adapters cushion style mounts, and would need to be modified to fit the steering shaft, so instead, I decided to build custom motor mounts to fit around the shaft. The new mounts look a lot better than the generic mounts and will also control the engine movement more, which is important since the engine bay is so tight. I used machined aluminum CJ5 leaf spring mock up bushings to make the motor mounts, which will be replaced with urethane during final assembly.
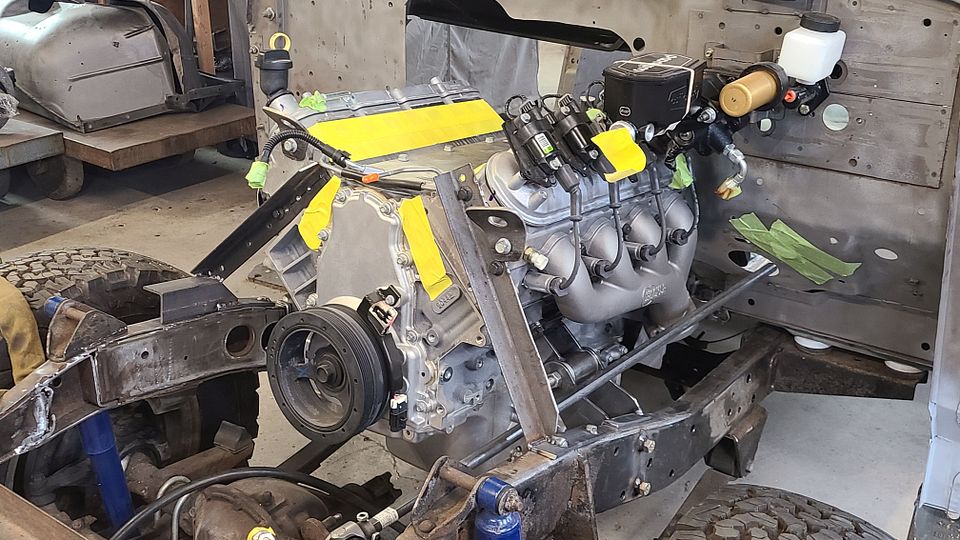
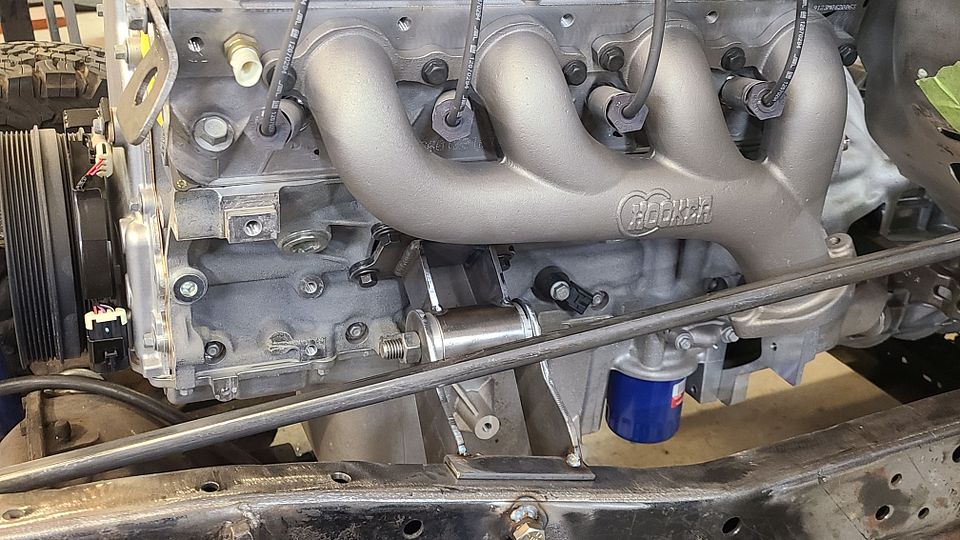
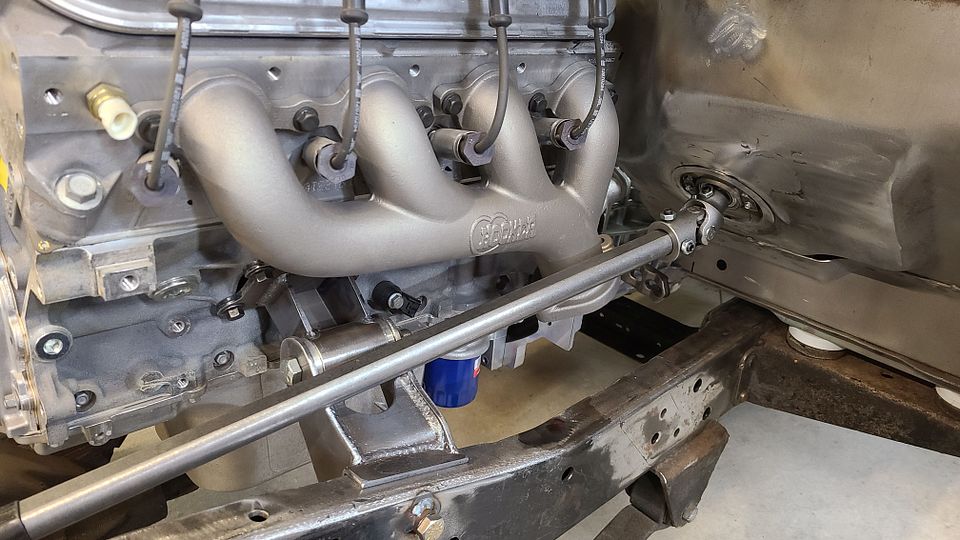
One more item got in the way of the steering shaft; the stock LS3 exhaust manifolds. The steering shaft was pointed directly at the wide outlet and instead of using a second u-joint and support bearing in the shaft assembly, a pair of Hooker exhaust manifolds were installed. These gave enough room to utilize a collapsible shaft in one shot from the box to the column. These manifolds also led to another problem, which I will discuss later.

The motor mounts I started with were the basic Advance Adapters cushion style mounts, and would need to be modified to fit the steering shaft, so instead, I decided to build custom motor mounts to fit around the shaft. The new mounts look a lot better than the generic mounts and will also control the engine movement more, which is important since the engine bay is so tight. I used machined aluminum CJ5 leaf spring mock up bushings to make the motor mounts, which will be replaced with urethane during final assembly.


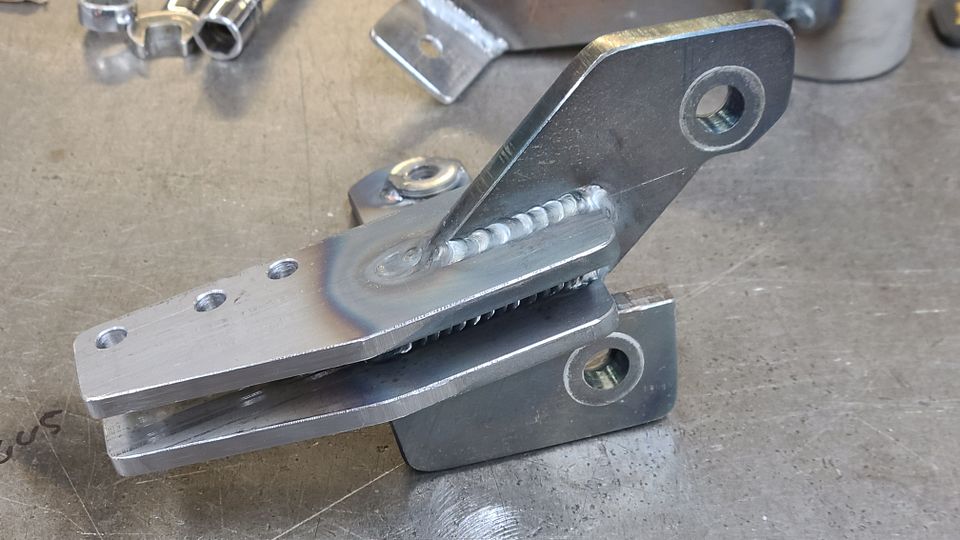
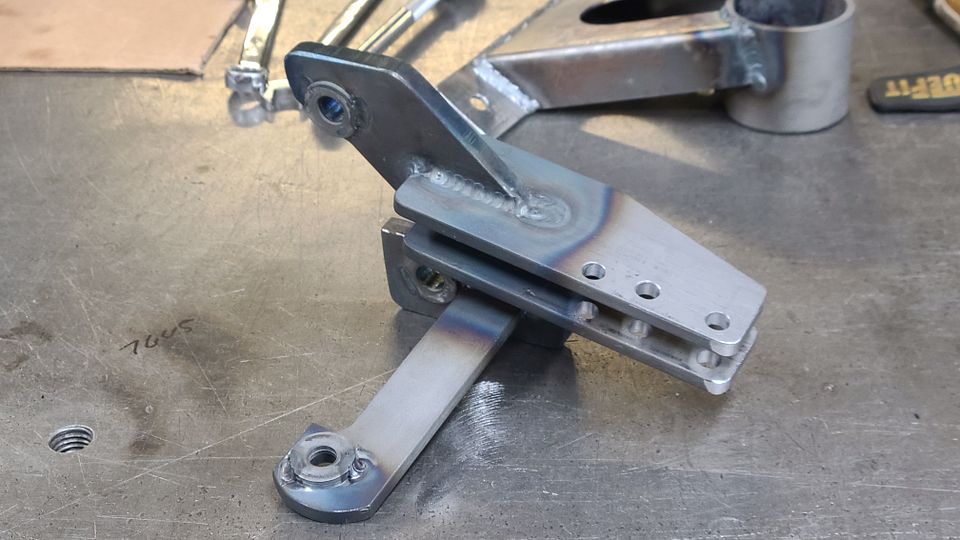
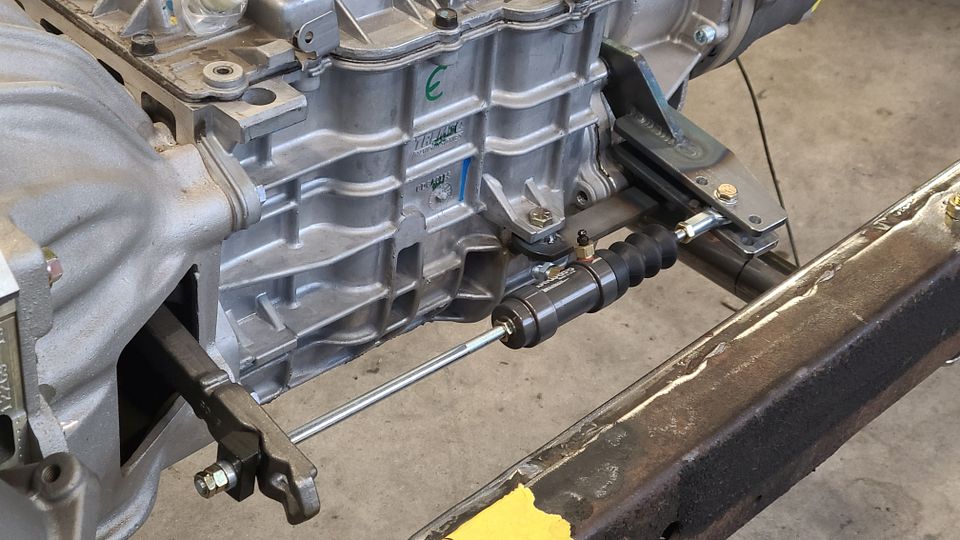
The aforementioned problem created by the installation of the Hooker manifolds was that now the outlet of the driver side manifold was in direct interference with the Advance Adapters supplied clutch slave. Not deterred, an elegant solution was found. Clutch slave cylinders are normally push style, but WIlwood also makes a pull style which mounts behind the clutch fork, so that's the direction I took. Not leaving anything to chance, a very stout bracket with adjustment holes was built to attach the clutch slave to the back of the trans, and a long connecting rod from McMaster Carr replaced the too-short unit supplied with the kit. The reason was that there was now interference with the floor of the body. But simply moving the cylinder back and angled slightly down, body clearance was no longer an issue.

Getting the volume of the two cylinders paired correctly took some math, and I was desperate to verify operation of the clutch system before I could sleep. So with all the parts in place, a temporary steel braided hose was installed and the system was filled with fluid and bled. Fingers crossed, foot on the pedal, can I turn the trans output shaft with the clutch depressed? Yes, success!!!


With three of the major mechanical sysems figured out and implemented, focus was turned to the HVAC.

Purchasing an aftermarket HVAC system is a daunting task. So many variables and options leave your head spinning. Armed with diagrams and a tape measure, I took a stab in the dark and ordered up a unit from Vintage Air. Obviously we wanted as large a unit as would fit under the dash, and also one with heater, A/C, defrost dash and floor vents. What we got was almost perfectly laid out for installation in a classic Jeepster. Keep in mind that a Jeepster has much more room under the cowl than a CJ does, so if you're reading this and wanting A/C for your CJ, this unit probably won't work for you.

With the unit temporarily suspended with bailing wire, I dropped the body onto the chassis to see how the firewall would clear the engine and then got to work building a patch for the massive hole in the firewall. There was one major pinch point in the system, and that was the original air intake in the cowl. A call to my buddy Jon Van Noord at Jet Air in Shingle Springs and the decision was made to delete the cowl vent altogether. This made much needed room for air ductings and even a nice place to mount the GM supplied ECM under the dash.

Some brackets were then made to support the HVAC unit and the firewall was tacked in place. But not before the GM fly-by-wire throttle was mounted up. The trans tunnel being removed made for very easy access to everything under the dash, I wanted to take advantage of its absence to tackle all of the under dash components. While I was in there, I bent up a bunch of small wire loom clip brackets and welded them in various spots under the dash. With all that fabricating done, the firewall patch was final welded and metal finished for a near perfect, no body filler required finish. A bracket was then welded to the inside of the patch for mounting the ECM.


For plumbing the HVAC unit, a four-way bulkhead fitting was fit to the area under the battery box and is perfectly placed so the hoses inside the cab will point up and get routed neatly to the HVAC unit. While I was in there, I cut a hole for the large ECM wiring. More holes will also need to be cut, for things like HVAC drain, HVAC electronic controls, etc.

It's odd to be doing wiring at this phase, but I wanted to verify that I had enough wire in the harness to attach the throttle pedal with the wires bundled up with the other ECM wires. This meant one less hole in the firewall. Unwrap the harness, make some quick adjustments, yep. It fits.


Am I mistaken, or did someone post last night with a frame question? I could have sworn I saw a notification and I'd love to answer that question. Where did you go?
 
Still making good progress on the Jeepster. A bunch of parts arrived the other day. I think you guys will love what we chose...

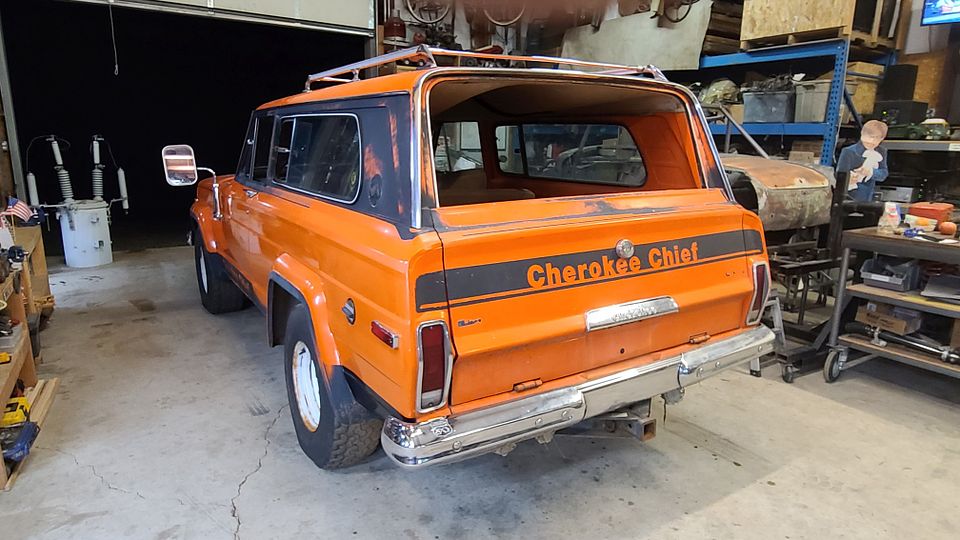
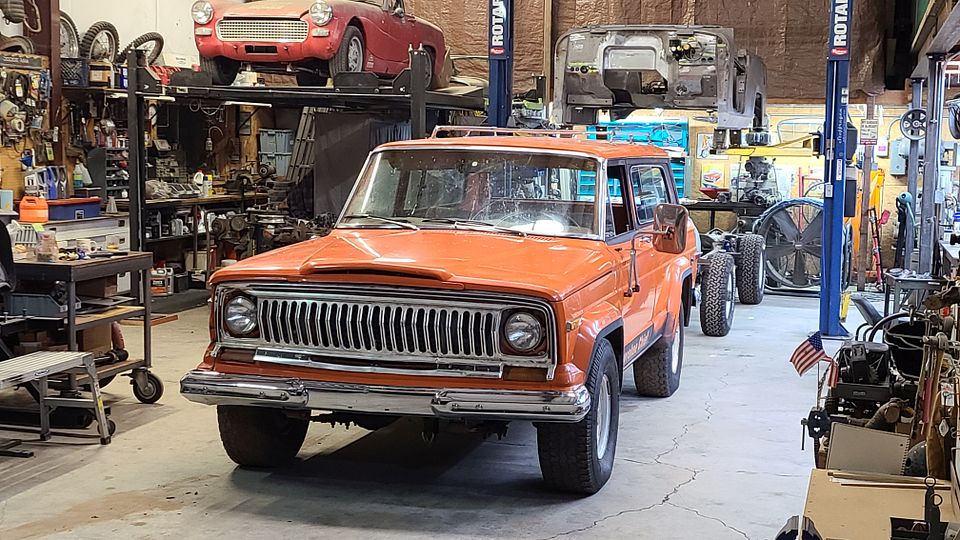
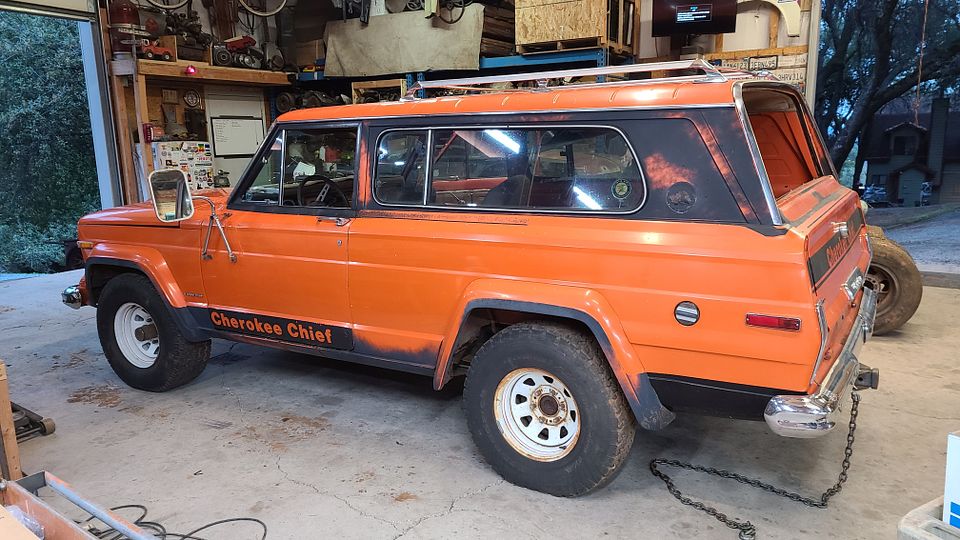
On a side note, I picked up a '77 Cherokee the other day. Long story short, a friend dragged me up to Grass Valley to check out a 240Z tucked away in a garage. The Cherokee was blocking the garage entrance. The bright orange color and very straight body immediately grabbed my attention. It begged for me to rescue it and bring it back to life. The price was low too, which made it a no brainer. I think I may start a thread for that one too.

Here are a couple pics.


Zeep

Adventurer
When I was fresh outta high school, my boss had the same Cherokee, except I believe it was a '79. (square headlights)
Awesome rig!
 

Antwon412

Well-known member
You must not be too far from me - I’m in Yuba City.

Let me know when you want to build anot Jeepster! ?
 

Antwon412

Well-known member
Love to build another Jeepster!

Hopefully I don’t come off stalker-ish here ?
I’d love to swing by and check this thing out sometime. Or if you’re ever doing some sort of local car show.

My father-in-law has a 69 Jeepster commando that is going to be my sons. I’m going to be bringing it down here to my place in the near future for some very basic work. Tires, fluid change, brakes, etc.

My kid would love to see yours as an inspiration.
Anytime. I'll pm you my contact info. This Jeepster should be off to the painter's soon, so maybe see if while it's in bare metal?
 
Very nice work. What's up with the A-H Sprite on the lift?
That red Sprite? It's a very long story, but the short version is that I bought the car when I was in my late teens, early twenties. Sold it after we bought our first house. Two years ago I had a dream that I was back building race cars again (not trucks) and it appeared in my dream. The next morning, I woke up and typed "Sprite" into the LA Craigslist search bar, because I heard it ended up down there somewhere. Lo and behold, the first search result was my actual car. 14 hours later it was back in my shop.

The seller did not believe my story about the dream, and it had already sold, but the buyer had not yet taken delivery. I offered the seller an additional $200 to tell the other guy to pound sand and that I was ready to hit the road and come get it post haste. When I arrived, it was in a garage with other cool classics, with Matt Dillon's Porsche 550 next to it. When I got it home, I took a day to get it running and realized the motor had to come out, It's a driver now, but needs paint and some mechanical stuff. It's got just over 25k on it and other than the paint, it's in beautiful shape. I just recently found the original plates (which I kept) and re-registered the car with its original black plates.

The plan was to turn it into a vintage racer, but then a '62 Sprite with log books going all the way back to the mid '60s fell into my lap, so I am building that one instead. Not really sure what to do with the red car yet.

Here's a pic of the two Sprites side by side.


The motor of the red Sprite, after I resealed it and rebuilt the trans. The motor is hot, with about 110hp.


And here's the race car. Massive amount of hours into it already and about 10k in parts sitting and ready to go. I just need to finish rebuilding the cage, get the skins back on it and then I can start fitting the mechanical pieces.


As you can see, I love bringing old cars and trucks back to life.
 

Jim K in PA

Adventurer
Fantastic. The car, the story on its reclamation, and the racer.

Is the red car a Mk IV? 1275 originally? 100hp from a 3 main A series is ambitious. ;)

We have a '67 Mk IV in the family for the last 35 years or so. My son is taking over stewardship of it soon.

I road raced from the early 80s through the early 2000s here in the east. I miss it a lot. I went to Daytona for the HSR races a couple weeks ago.

Apologies for the thread hijack.
 

Forum statistics

Threads
188,215
Messages
2,903,924
Members
229,665
Latest member
SANelson
Top