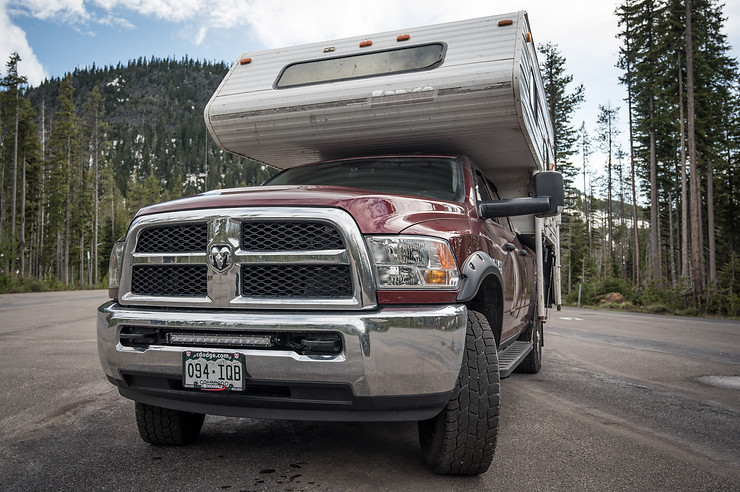
Lady Godiva: 2017 Ram 3500 CCLB Build

Bayou Boy

Adventurer
Booo on them, that’s lame. And here I was hoping they might be reasonable about it.

I’m throwing on a steering brace at the same time, so hopefully that plus the Synergy drag link will tighten things up and keep them that way.

WHich steering brace are you going with? It's time for all of this for my truck as well with 85k on the original parts.
 

Adventurous

Explorer
WHich steering brace are you going with? It's time for all of this for my truck as well with 85k on the original parts.

I went with the Synergy. They all pretty much look the same, but if anything I was hoping it would play nice with their drag link. Figured I might as well eliminate any potential issues.
 

Adventurous

Explorer
Been a long, long time since I updated this thread with any real content, so I believe it's time to do something about that. We've now been on the road since July of 2018 and have covered most of the US and Western Canada, so all of the mods on the truck have been tested on and off-road through all weather conditions. For things that have been on the truck for a while, I shall provide my thoughts on their performance and wear.
 

Adventurous

Explorer
I'll be honest, the headlights on the RAM aren't the best. As in, 2.5/10 kind of performance, most of that owing to the fact that they do indeed throw light. I'm not sure if the projector versions are any better, as they come from the factory, the headlights leave a lot to be desired.

During ordinary driving in developed areas with street lights, this isn't a huge factor. It is however, a huge safety liability on backroads and in remote areas with no ambient light to supplement the head lights. Honestly, I'm not sure I'd feel entirely comfortable heading out without knowing I had some additional light source in my pocket for those times when it's needed. I've used it countless times cruising back roads and fire roads and always marveled at how much I love having it.

On my Tacoma, I had a couple of cheap, LED light bars that I found to remedy this situation, and I can credit them with helping avoid several collisions with deer. I wanted to do the same on this truck, albeit in a less intrusive fashion.

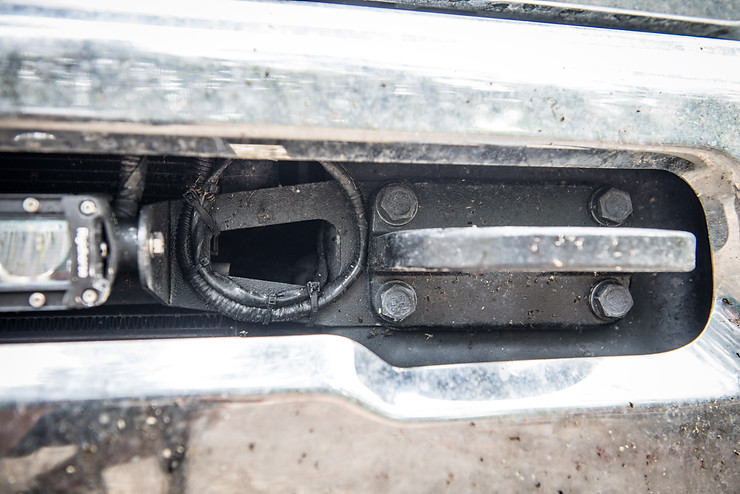
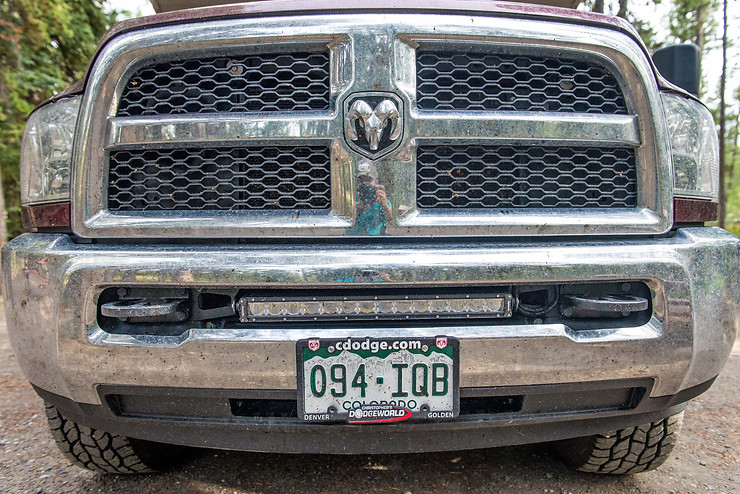
In steps the Rough Country LED light bar brackets. These mount behind the front tow hooks and offer the ability of mounting a 22” light bar with no fabrication necessary. Sounds good to me! I paired these with a Rigidhorse single-row LED light bar that I bought off of Amazon, and a light bar wiring harness kit and was off and running.

f2076f_be8931f30e18459f815a17c42329d1d7~mv2_d_5864_3915_s_4_2.jpg


At the forefront, I'll state that the Rough Country brackets are mediocre. They are one of those “kinda” pieces of hardware, the bolt holes kinda line up and the brackets are kinda bent to 90*. This is a shame as they need very little work to become an awesome solution, but I was able to make them work none the less.

The first step is to remove the tow hooks. I recommend an extra set of hands with this part of it as the bolts don't have captured nuts, so someone has to be on the back side with a wrench. With these out of the way, you can start mocking up the light bar and brackets to begin massaging everything into place. It took a few rounds with a crescent wrench and vise adjusting the brackets, and someone pushing on the bracket to get the bolt holes lined up, before it could all be installed. Tow hook bolts were re-installed to the “tight” spec.
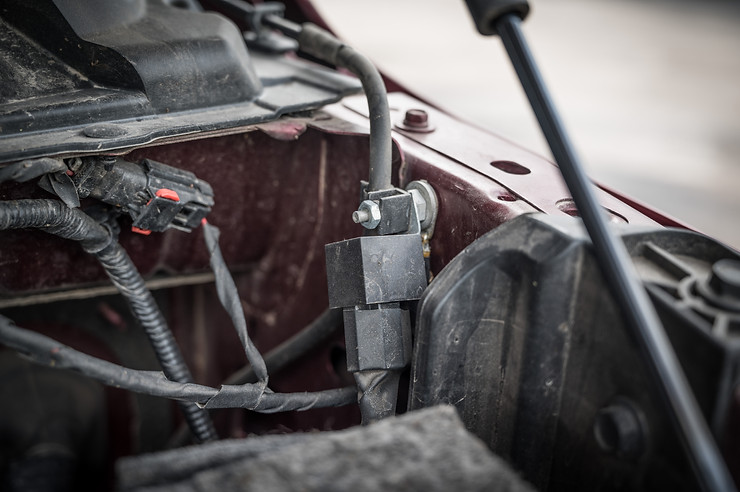
With the bar in place, you can begin running the wiring harness and switch. Space in the engine bay is at a premium, so it took a bit of playing before we finally found a location for the relay that was close enough to the battery and did not require drilling any holes.

f2076f_c00edbbc4f284b0ebf2c5774fedf2d54~mv2_d_6048_4024_s_4_2.jpg


Unfortunately, this location did require extending the power leads from the relay to the battery, but that was more to satisfy my own desire for neat wiring than anything. The positive lead does come with a fuse holder for safety.

f2076f_442d249870a04482a7630ed6ea1f941b~mv2_d_4016_6016_s_4_2.jpg


Running power to the light bar is a matter of personal preference, but I loomed the wire to provide protection against chaffing. All splices were soldered and covered with marine heat shrink for extra protection.

f2076f_c28952ee29794202be21c8bdfdb93f7f~mv2_d_6016_4016_s_4_2.jpg


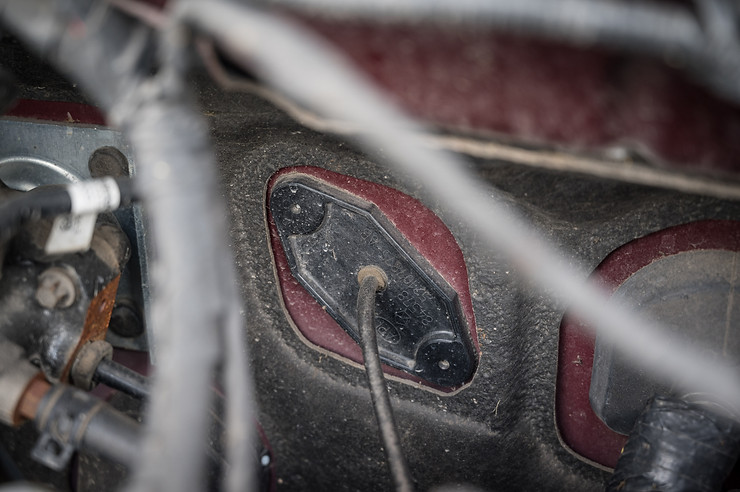
The next challenge was finding a good place to run the switch wires into the cabin. Previously, I've poked a hole in the main firewall grommet, but I never liked that method as it was never as neat or weatherproof as I hoped. Luckily my friend Dan, who I have to give copious kudos to for helping with damn near all of these mods, pointed out the blank cover plate that on a manual truck would be used to mount the clutch cylinder. It was easily accessible from both sides and provided a sturdy place to drill through and run the wires. At a later date, when I have an opportunity to run more accessories, I'll mount a bulkhead fitting on this plate to provide a plug so nothing has to be run through the firewall.

f2076f_2e63d017977a453d9444239bb04d61bd~mv2_d_6048_4024_s_4_2.jpg


I chose to go with a push button switch. While flipping a Carling rocker switch is satisfying, it also required either cutting a hole in the dash or purchasing a switch pod, neither of which I was interested in doing. The switch was located just under the steering wheel where it is convenient to turn on and off.

f2076f_582240e31c914ad9b06e12ebbca15d73~mv2_d_6016_4016_s_4_2.jpg


I did have to replace the double sided tape on the back of the button, it kept coming off in hot weather. I used a bit of 3M moulding tape which has so far provided a very solid attachment.

As with any light source, it needed a bit of aiming after the fact to be useful. Due to the bending and manipulating necessary to get the Smittybilt brackets to work, it's not perfect, but it's good enough as it. The bar throws a okay amount of light, certainly not what a higher quality LED would, but you get what you pay for. The spot lights in the middle extend the field of view significantly, and the flood lights on the sides help to illuminate the side of the road. Durability with the bar has proven to be an issue as there is already condensation behind the lens, but it still works going on 1 year later. It will eventually be replaced with a higher quality bar, more than likely something from Baja Designs.

Link to Products Discussed in this Post
Rigidhorse 22” LED light bar: https://www.amazon.com/gp/product/B074DQF27Y/ref=oh_aui_detailpage_o09_s00?ie=UTF8&psc=1

Rough Country light bar brackets:
https://www.amazon.com/gp/product/B015TKF0MS/ref=oh_aui_detailpage_o02_s00?ie=UTF8&psc=1

LED light bar wiring harness: https://www.amazon.com/gp/product/B01LWTRXW5/ref=oh_aui_detailpage_o08_s00?ie=UTF8&psc=1
 
Last edited:

Adventurous

Explorer
According to the RAM service manual, differential fluid should be changed every 15K miles for "severe" service. Given that I'm operating near payload, and use 4wd with some frequency, I figured I fall under that category.

There are two schools of thought on aftermarket diff covers, some think they are the bees knees, some think they are little more than a cosmetic bling accessory. Me, I'm rather enamored with the idea of being able to change the differential fluid without having to remove the cover. It is a bit annoying having to pull all of the bolts, loctite them, and torque to spec when I could say, get an aftermarket cover and do that a single time. For a mere $300 per axle that kind of convenience was a price I'm willing to pay.

From there my options boiled down to either finned aluminum covers that promise additional fluid and cooling capacity, or nodular iron covers from AEV. I didn't necessarily want extra fluid capacity as that meant physically larger covers, and given that I still have the spare tire mounted under the bed and a Thuren track bar which is sculpted for the front differential, the closer to the OEM profile the better. This left either the AEV covers or the low profile AFE, of which I went with AEV.

Both of these covers are pure beef. Like, a HUGE increase in both stoughtness and weight. Installation is straight forward and all required hardware, minus the loctite, is provided. My installation was made a little more challenging as I was doing it in my wife's friend's parent's driveway in California, thousands of miles away from any of my tools. Not being able to jack up and droop out the front axle meant it was a little trickier to torque the bolts to spec, especially the top ones, but I managed. I loved that the OEM gasket was re-usable as RTV can be a bit messy. 2K miles later and it hasn't leaked a drop.

f2076f_ad1b98df45d943418e8f29eb22eb90a2~mv2_d_6048_4024_s_4_2.jpg


Now, if you consult the Thuren website, they say that 99% of aftermarket front differential covers won't work with their trackbar and that is just the price you have to pay for superior steering performance. My setup must fall within the 1% exception however as I have bottomed the suspension out and have no witness marks to indicate contact. It's close, oh so close, but it doesn't contact, and that's what counts.

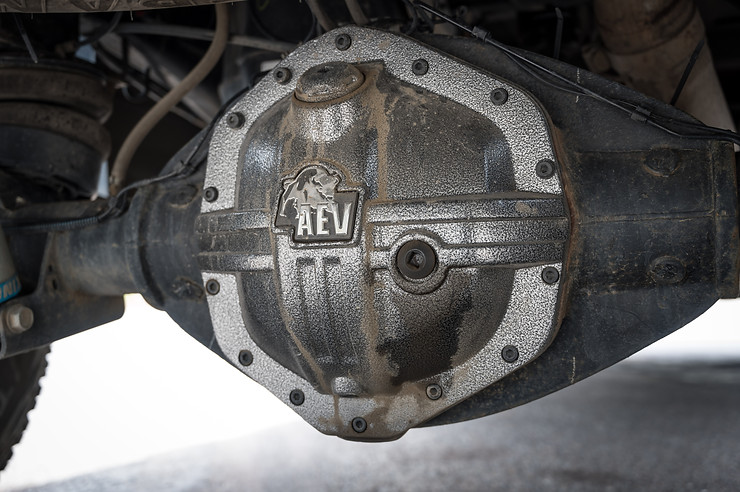
Installation on the rear axle is similar to the front with the exception of ensuring that the 3 long bolts go in the right spots. Other than that and the larger size, the installation went along quickly. 3.X qts of Valvoline full synthetic 75W-90 gear oil later things were wrapped up.

f2076f_a29496c6754c4fc5b45540f14a787748~mv2_d_6048_4024_s_4_2.jpg


(Oil residue is a remnant from fill, not from a leak.)

As I mentioned, I have 2K miles on the covers and I have zero complaints. They haven't leaked, they look pretty damn cool, and I'm looking forward to doing little more than pulling a few plugs when I have to change the oil in another 10K miles. While this isn't a must-have modification to the truck, they surely are a nice addition.

Links to Products discussed in this Post
AEV Front Differential Cover: https://www.dieselpowerproducts.com/p-14041-aev-front-differential-cover-14-18-ram-2500-3500.aspx

AEF Rear Differential Cover: https://www.dieselpowerproducts.com...r-differential-cover-14-18-ram-2500-3500.aspx

Valvoline Full Synthetic 75W-90 Gear Oil (8 qts.): https://www.autozone.com/greases-an...ynthetic-gear-oil-sae-75w-90-32-oz/977482_0_0
 

Adventurous

Explorer
There is no way around it, RAM blew it when designed the drag link for their HD trucks. Mine currently resides in a dumpster somewhere in CA, but basically it was two halves connected in the middle by a threaded collar and jam nuts. This allowed the length to be easily adjusted and the jam nuts would snug against the collar and lock it in. Simple right? Except those finicky jam nuts come loose, which, according to TSB V06/NHTSA 19V-021 can result in a separation of the drag link and loss of steering. Yikes! The proposed fix from RAM includes adjusting the drag link and tack welding the jam nuts to the collar to prevent them from loosening, which is a garbage fix in my opinion. While the drag link shouldn't require constant adjustment, some adjustment is necessary to achieve a centered steering wheel when lifting a vehicle. I'd prefer not to have to break out a grinder to do an alignment and elected to forego the RAM fix in favor of an aftermarket track bar.

There are two players in the RAM aftermarket steering game, Synergy Mfg. and Dodge Offroad. Both offer high quality offerings with the major difference being Synergy uses a beefier ball joint style tie rods whereas Dodge Offroad uses Heim joints. Now there is nothing wrong with Heim joints, but there are rumblings on the internet of failing vehicle inspections due to the presence of non-OEM style steering components. For this reason I went with the Synergy Mfg drag link.

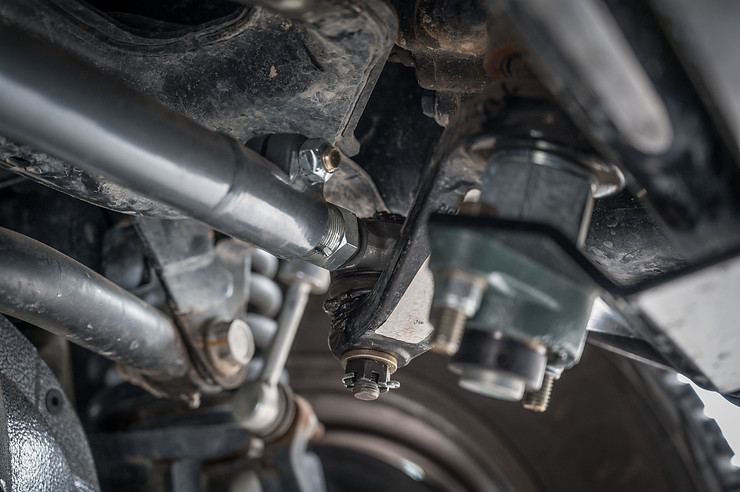
Holding it in your hand it's easy to tell that this is a quality piece of hardware. It is a 1.75" diameter DOM tube and sure weighs the part. It makes the OEM link look like a flimsy noodle. While I would have preferred black paint, the grey powder coat is high quality. Welds looked good, nothing was crooked, and kudos to Synergy for anti-seizing the threads from the factory.

Installation is fairly easy and can be done in a few hours with basic hand tools. I found a ball joint separator particularly handy to break the taper at the Pitman arm as it was a bit awkward smacking it with a hammer. The knuckle side got the hammer treatment and popped loose after a few good smacks. From there it's as simple as following the adjustment procedure in the installation instructions to adjust the bar to length, then bolting in place. I did anti-seize the threads of the tie rods at both ends where they thread into the bar to prevent corrosion. The pinch bolts at both ends received a dab of blue loctite to ensure they wouldn't loosen up, and the whole shebang was torque to spec. Easy peasy!
f2076f_913f7fd1981a44fe89fb3f72ebba2bd1~mv2_d_6048_4024_s_4_2.jpg


One thing to note, my Pitman arm did require the included washer in order to engage the castle nut grooves with the cotter pin holes. Also, I highly recommend filling the rod ends with grease before bolting on as clearances are tight and it's tough to get a grease gun onto the nipple once installed.

At the same time I was installing the track bar, I decided to install a Synergy Mfg steering box brace. Dodges are known for developing "loose" steering boxes, which can often be attributed to flex in the frame at the steering box. For years Dodge guys have been bolting on braces to support the box and tighten up the steering. Mine wasn't loose, but there's no sense in allowing it to become that way if I can help in.

Once again, the build quality on the brace is top notch. All welds are solid, all required hardware was included, and the directions are easy to understand and supplemented by pictures. There are a multitude of vendors offering steering box braces and while Synergy isn't the cheapest, I figured the less variables the better and maybe it would play nicer with the Synergy drag link.

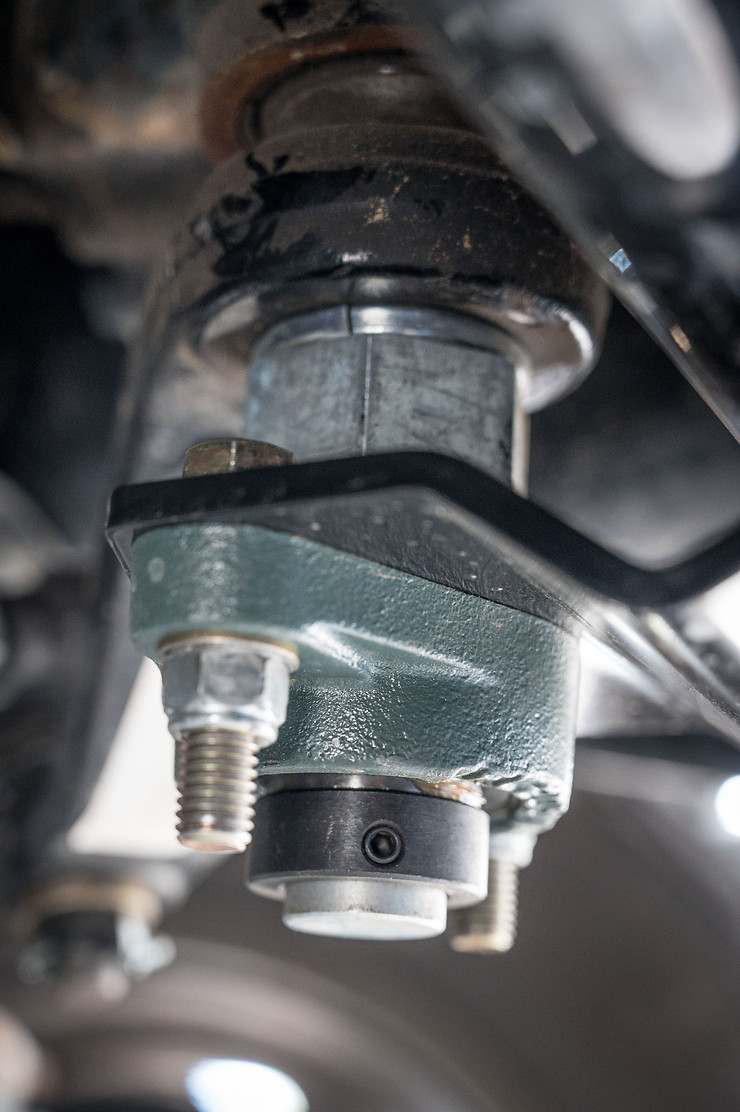
Removal of the massive pitman arm nut was easier than expected using a 24" breaker bar and 46mm crowfoot wrench. As in, it was alarmingly loose considering this is a massive nut on a critical component with no other safety feature. With this out of the way I could install the Synergy replacement nut/stud and lock washer, with some loctite and 175 ft*lbs worth of torque. Safe to say that nut is going nowhere now.
f2076f_85c81773c5a049afbfa1e534c6e91662~mv2_d_3449_5184_s_4_2.jpg


Installation of the brace is a bit of a bear, mostly trying to lift the sway bar/brace into place, line up the bolts, and get them started. It took a bit of wrestling and required the use of both hands and a foot, but nothing some wrangling couldn't solve. Sway bar bolts got a dab of anti-seize before they were threaded in, but I left them a bit loose until the pillow block bearing could be installed. Once again, everything lined up beautifully, and I bolted down the block after preloading the collar on the stud. The zerk fitting on the block can be oriented to the front or the back, oriented it towards the back provides an extra measure of protection and made it easier to grease while on the truck. With this in place I went around and torque all bolts to spec.

f2076f_f2d7a90e777c4ae298902fa71ee7c0a1~mv2_d_6048_4024_s_4_2.jpg


Since the steering was getting a makeover, I also added a King steering stabilizer courtesy of Thuren. It is plug and play with the stock mounting hardware, and it's every bit as quality as any King product. Which is to say that it's a thing of beauty.

Now, all parts were installed at the same time without any test drives in between, so I can only hazard a guess as to the impact of each individual component on the feel of steering. I can say however that after it was all done, the steering feels tighter and less prone to wander/road input than it did before. Whereas undulations in the road before would cause the truck to want to move around, there is significantly less of that sensation following the steering upgrades. It feels more solid while turning, especially over chatter bumps than it did before. That and I don't have to worry about the drag link separating sending us to a fiery death, so that counts for a lot too.

With 2K miles on the setup I haven't encountered any issues or problems. Big thumbs up to Synergy Mfg for providing the aftermarket with a much needed alternative to the crap RAM is trying to peddle on those affected. In the future I will most definitely add the Synergy tie rod to round out the package.

For those impacted by the recall, FCA may reimburse you for the cost of the drag link, installation, and other associated costs. Some have had their requests accepted, a few rejected, but either way, steering failure is not something to mess with, so pick your poison and address it now before something bad happens.

Links to Products discussed in this Post
Synergy Mfg drag link: https://www.dieselpowerproducts.com...heavy-duty-drag-link-13-18-ram-2500-3500.aspx

Synergy Mfg steering box brace: https://www.dieselpowerproducts.com...ring-box-brace-09-18-dodge-ram-2500-3500.aspx

Thuren Fab steering stabilizer: https://www.thurenfabrication.com/products/thuren-ram-king-steering-damper.html
 

Adventurous

Explorer
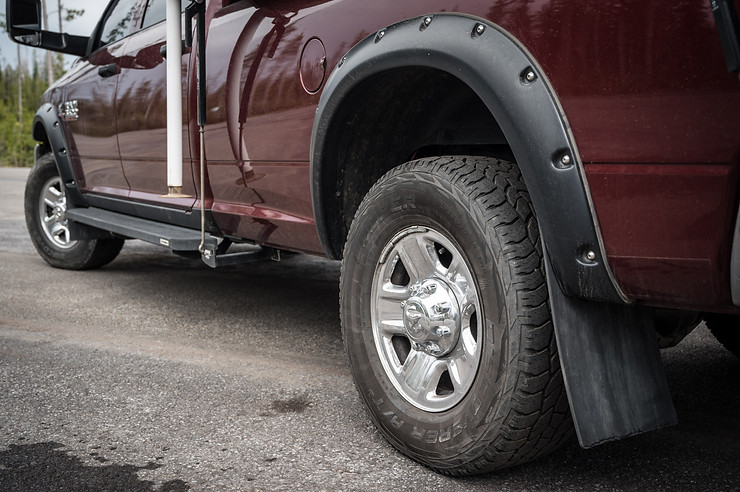
We all know them, Bushwacker pocket fender flares. They appear on everything from hardcore offroad rigs, to show queens, to absurd trucks with 48" of lift and low profile mud tires on high offset chrome rims. They are, in the RAM world, a cheaper and simpler option for those of us looking for additional crud catching capability without cost or cutting required for the AEV Highmarks. As I doubt I will ever run tires larger than 35", I didn't need the additional clearance of the Highmarks, but I do intend to add aftermarket rims at some point to push the tires out a bit and needed the additional coverage both to capture mud and to ensure I am road legal.

I was perusing the Amazon warehouse deals one day and caught a set of NIB pocket flares for 50% off the regular price. I snatched them up and a few days later laid the pieces out and begin installing them. After installing the billion bolts, washers, and nuts that come on them, I turned to the most daunting part of the process, installing the edge trim. This part sucks. Flat out sucks. The stuff doesn't want to go on, and it was by far the most difficult part of the installation. Two hours and two sore forearms later and I had it all attached and ready to install.

Installation requires little more than a ratchet and socket to remove the OEM fender liner bolts, place the flares on the truck, then re-install said bolts. Be sure to clean where the edge trim will hit the fender, and preferably apply some 3M clear tape to prevent scratches down the road. Things were a bit tricker in my situation as I have Duraflap mud flaps and there were some mismatches in the bolt patterns between the two, but nothing a drill and drill bit couldn't fix. After opening up a few holes in the Bushwackers, I wiggled everything in place and bolted them down. Tada!

f2076f_33526d54d15845b6add2f61435430a71~mv2_d_5699_3792_s_4_2.jpg


As expected, they have cut down on the amount of crap getting flung on/at the truck significantly. While the mud flaps did an admirable job by themselves, bigger tires and less offset rims require a bit more coverage. This will be a huge plus when we relocate to Massachusetts, which is notorious for failing vehicles for tire poke, following this trip. The only unfortunate thing I experienced was the flare contacting the Cummins badge on the fender. YMMV, but my badge will either need to be moved or removed entirely. I haven't addressed this yet, but will at some point.

f2076f_6c16747ba48249919350f0a68174a732~mv2_d_6048_4024_s_4_2.jpg


Another problem I had encountered but had yet to figure out a solution for was scratches in the paint on the sill from our dogs jumping in and out. They were quickly destroying that area and the thought of repainting it so soon wasn't exactly palatable, so once again I turned to Bushwacker and Amazon Warehouse deals to grab some NIB Bushwacker sill guards. These handy dandy plastic pieces wrap around the rocker panel on the truck and extend up onto the sill to provide protection both outside and inside. They attach using non-continuous moulding tape (moisture can escape!) and other than having to remove my running boards to install went on easily. I simply cleaned all areas the tape would touch with rubbing alcohol, peeled the backing strip part way back per the instructions, stuck them in place, then pulled the rest of the strips off and pressed them on all the way.

f2076f_c80d99d0f38340c0a2d3f8c9fca1c15d~mv2_d_6048_4024_s_4_2.jpg


f2076f_22382d6b99a7462085b50ee57357ad98~mv2_d_6048_4024_s_4_2.jpg


Fit, finish, and durability is excellent. It has held up very well to the puppets, which is more than I can say for the weather stripping in that area. RIP weatherstripping.

Links to Products discussed in this Post
Bushwacker pocket fender flares: https://www.amazon.com/gp/product/B003EOVDV4/ref=ppx_yo_dt_b_search_asin_title?ie=UTF8&psc=1

Bushwacker sill guards: https://www.amazon.com/gp/product/B01I4Y1L2E/ref=ppx_yo_dt_b_search_asin_title?ie=UTF8&psc=1
 

Yamadog77

Member
Very nice, I did the full synergy steering upgrade about 6 months ago as well. Loving the improved handling.

Have some Bushwacker fender flares waiting for me at home tomorrow when I get home from work.

Trucks looking great!
 

Adventurous

Explorer
One of the most important choices to make when outfitting the truck for our adventure was tires. Practically speaking, they are the only link between your vehicle and the pavement, so choosing an appropriate tire for the expected conditions is paramount to safety and reliability.

In our case, we needed a tire that would perform in all weather conditions, had adequate payload capacity for the truck + camper, had minimal road noise (after all, we are going to be pounding out a ton of highway miles), and was the biggest I could fit on the truck without clearancing.

After much research and debate, I narrowed it down to the following:

Cooper Discoverer AT/3
Nitto Ridge Grappler
Toyo Open Country AT2
Cooper ST Maxx

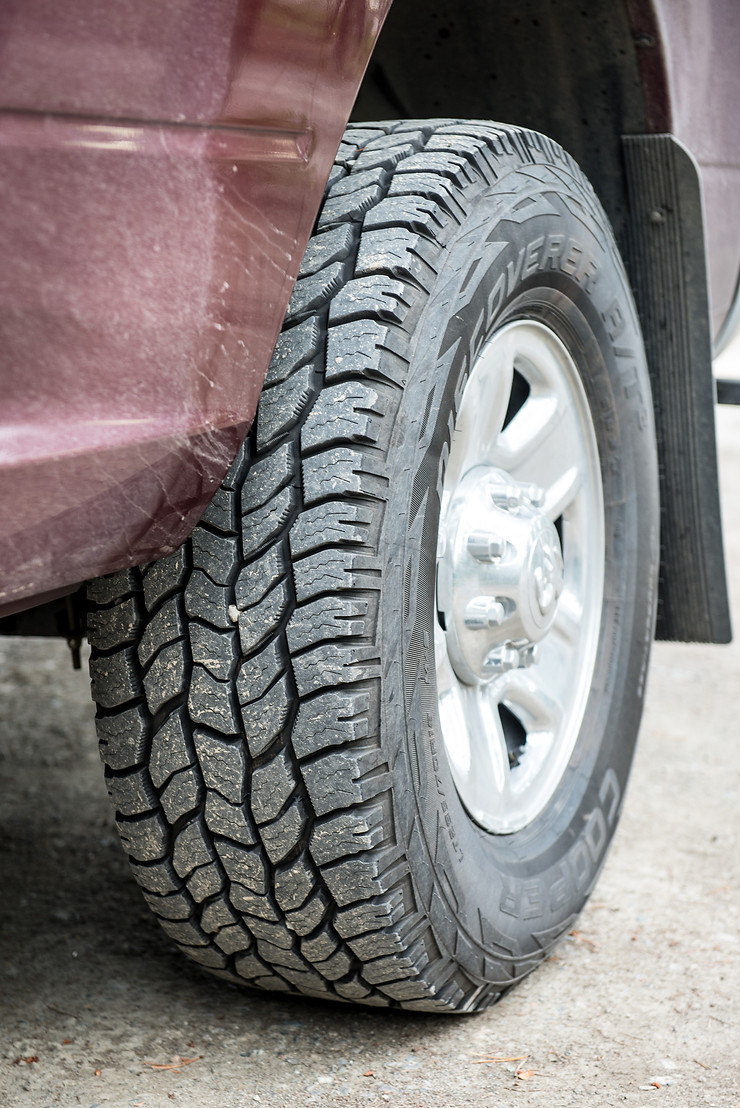
General consensus was this lineup represented the best performing all terrain tires for full-size pickup trucks. Of the four, I ended up choosing the Cooper Discoverer AT/3. While they are probably the least aggressive of the bunch, they are purported to provide more than adequate traction in inclement weather. Additionally, they are also supported by a 55K mile warranty and were sourced for the right price with replacement certificates through Discount Tire.

f2076f_819c87d8ed604ec19c977e227ead345d~mv2_d_6016_4016_s_4_2.jpg


The OEM size Firestones were 275/70R18, which works out to ~33.3 inches. My research indicated that a 34.5” tire was about the biggest that would fit without swapping to wheels with less backspacing or clearancing (http://www.thurenfabrication.com/tech/tire-and-wheel-fitment.html). The Cooper Discoverer AT/3 in 295/70R18 fit the bill, they are just shy of 34.5” and are E-rated with a single tire capacity of 4,080 lbs at 80 psi.

f2076f_21a2674321be4323a860f9b22105c765~mv2_d_3695_5535_s_4_2.jpg


After getting the tires mounted and balanced, I cycled the suspension (while installing the lift kit) to ensure that they would not rub anywhere throughout the travel. While they didn't rub during cycling, it turns out that they would kiss the radius arm and sway bar during full lock maneuvers. This may related to the track bar not being the correct length for the lift on the truck at the moment, but I would wager that they would contact even still when packed up with mud.

The tires now have about 27,000 miles on them, which includes a healthy mix of pavement and dirt. On pavement they are solid performers, the inconsistent tracking experienced with the Firestones was eliminated while road noise is barely if at all audible in the cabin. They are at 10/32" tread wear, which if I take them down to 4/32" would calculate out to about 55K miles as promised. Either way, they have delivered with no tread chunking or cuts, and only a single flat tire from a bolt I picked up in the road. That was patched 24K miles ago and has held ever since.

They did wear a little bit funky going into the first tire rotation, which I can attribute to the frost heaves and crosswinds of the Yukon territories and eastern Alaska. This resulted in accelerated wear on the outside edges of the tires despite the alignment and tire pressure being okay. It was by no means severe, but it was evident. They have worn fine following that first rotation, and have worn even better since being re-balanced at 20K miles. Their performance has been confidence inspiring and stellar, with only two instances of us requiring a little bit of extra maneuvering, once on a sheet of ice, and once in a wet, grassy ditch. Otherwise, across all of the highways, secondary, and tertiary roads, the fire roads, gravel, rocks, snow, rain, and mud, they have worked fabulously and have never left us stranded.

f2076f_252468d3b40a46eab346b0ce5b78a495~mv2_d_4032_3024_s_4_2.jpg


While they may not be the coolest looking tires out there, their superb all around performance has me resolving to get another set when these wear out. They are absolutely terrific and I can't sing their praises enough. For those in the market for something less aggressive than a mud terrain, but still need something that will hold up to the abuses of towing/hauling on an HD pickup, give these a gander.

Links to Products discussed in this Post
Cooper Discoverer A/T3 XLT 295/70R18: http://us.coopertire.com/tires/discoverer-at3-xlt.aspx
 

Adventurous

Explorer
And now we are, more or less, caught up to the present. There probably won't be any more mods done to the truck any time soon, unless some generous sponsor decides to parachute fun parts down to me ala Hunger games.

For those who would like to check the truck and camper out in person, my wife and I will be at the Northwest Overland Rally being held in Washington June 20th - 23rd. Swing by, chat about our travels, talk trucks, whatever. I'll be the guy wandering around with a dejected look on his face gazing longingly at all of the cool vehicles because my wife has declared our rig "isn't cool". ?
 

richxd87

Observer
Thanks for sharing your thoughts on the upgrades, some really great useful mods there!

Does anyone know if AEV has plans for pre-2014 diff covers for the Ram 2500?
 

JPR4LFE

Adventurer
Thanks for sharing your thoughts on the upgrades, some really great useful mods there!

Does anyone know if AEV has plans for pre-2014 diff covers for the Ram 2500?

I do not have any specific knowledge of this, but what I do know is that AEV historically tends to only move forward with model years, not backwards. Their parts usually complement their in house vehicle conversions to new vehicles, so as soon as a new model comes out they stop developing new parts for the previous models.
 

Adventurous

Explorer
Since you guys are my go to for such information, I'm hoping to poll the audience on the largest tire size I can stuff on this truck with no rubbing or trimming, using a 17" AEV wheels. I desire big meats, but I also have no desire to trim the pinch weld or cut any fender plastic. Was targeting a 315/70R17 as that is close to my current 295/70R18, but I don't know what impact the offset will have on fitment.

Discount Tire is having a killer sale for Memorial Day, and given that I will probably have burned through my current set before winter it would be prudent to have some freshies to put on before the snow flies.
 
Last edited:

Forum statistics

Threads
188,154
Messages
2,902,886
Members
229,582
Latest member
JSKepler
Top