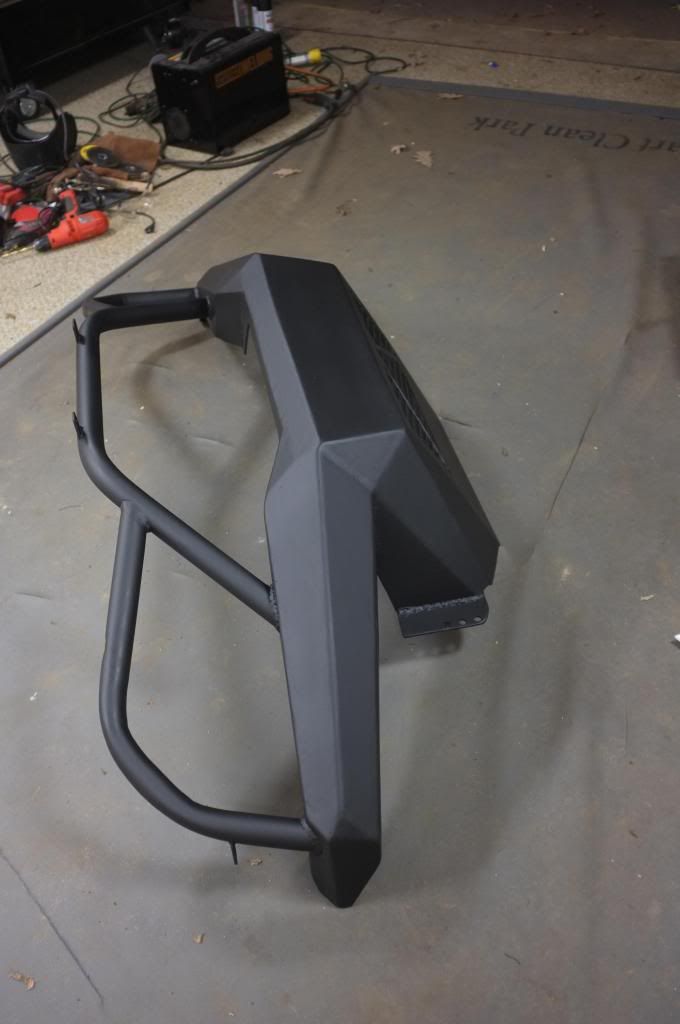
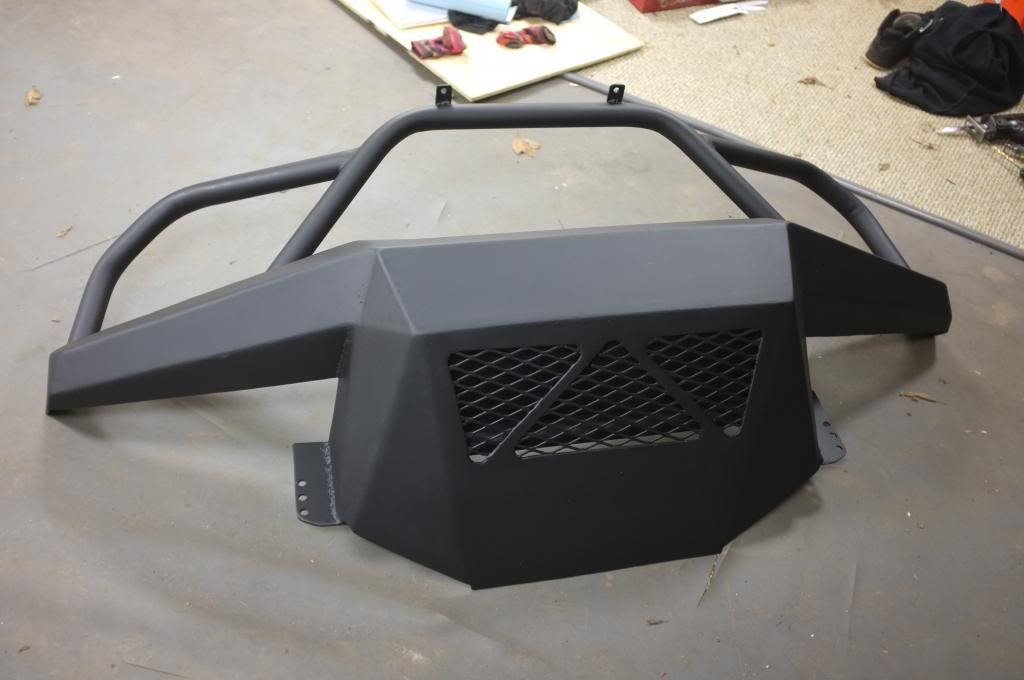
Lexus GX470 Expedition build

DanKunz

Adventurer
Love the bumper! One suggestion: go light bar. WAY lower profile so you get good airflow and WAY lower power consumption (with the same or more light output):

532186_10151164616348123_321965227_n.jpg

Got mine from http://shop.expeditionlighting.org/ which is done by a local wheeler here in GA. Really inexpensive and very high quality.
 

boo471

Adventurer
Love the bumper! One suggestion: go light bar. WAY lower profile so you get good airflow and WAY lower power consumption (with the same or more light output):

View attachment 193034

Got mine from http://shop.expeditionlighting.org/ which is done by a local wheeler here in GA. Really inexpensive and very high quality.

I already got a 42,5" light bar on the roof. But I don't think they have a good distance. They have a great flood fill but don't reach very far. My two HIDs will be used to give me some light further away.

If I overheat I have room on the undersides of the bumper to run hoses that will collect air and funnel them in to the cooler.
 

boo471

Adventurer
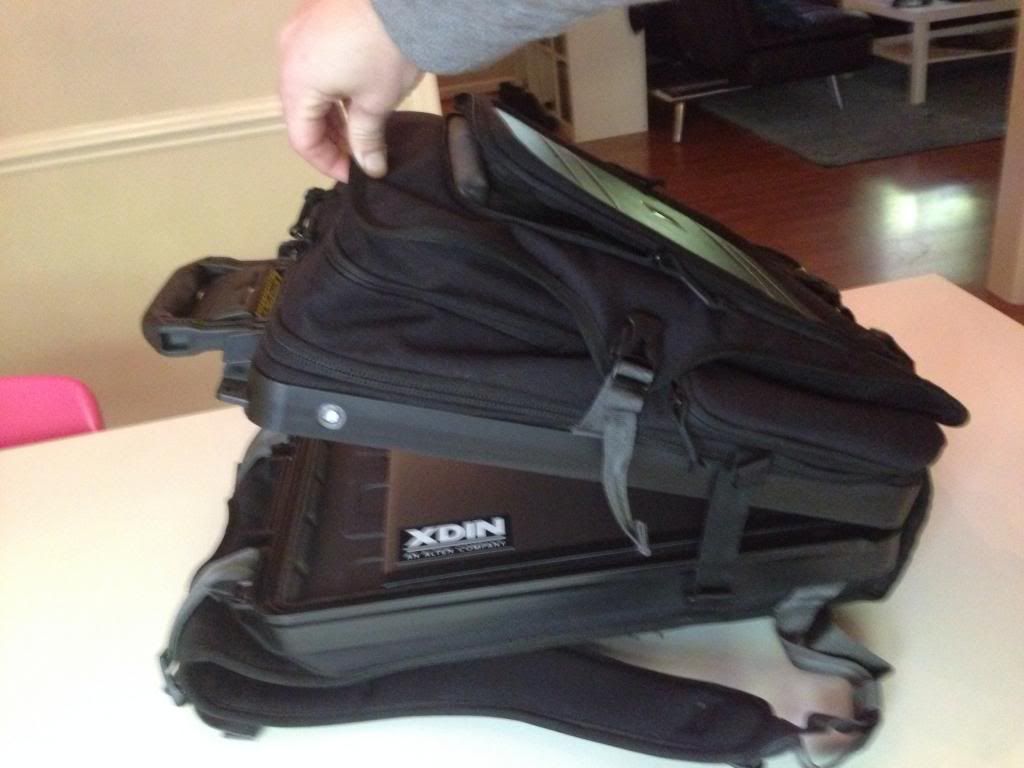
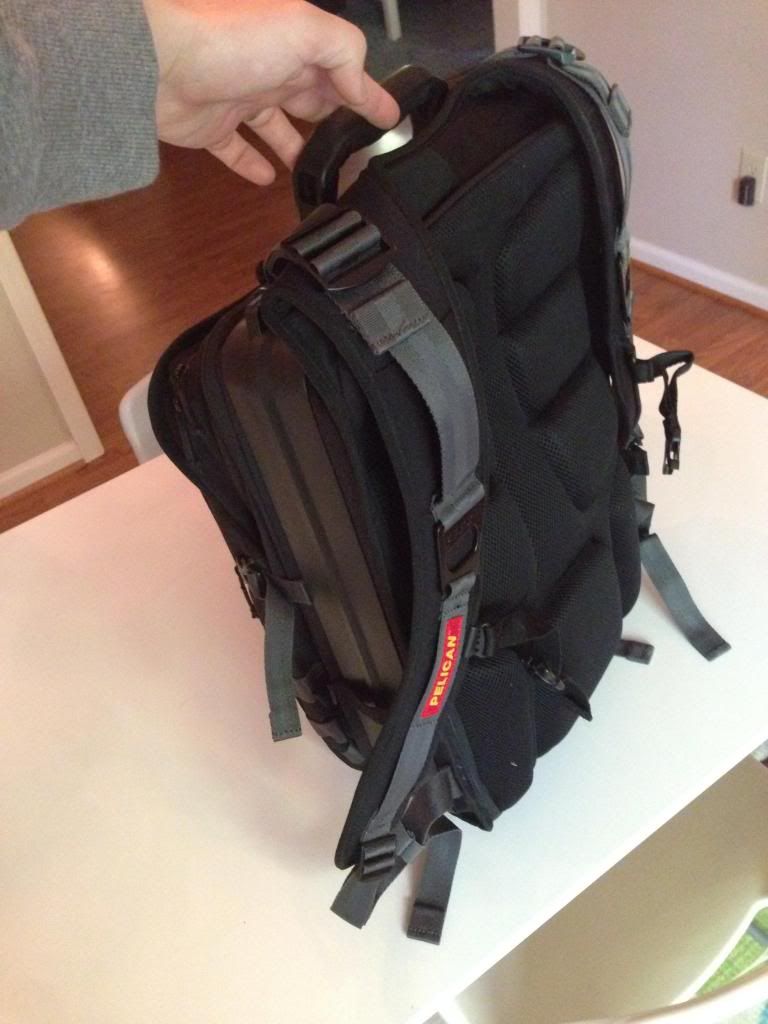
I liked the real estate, but I kept dropping the full size since I refused to have a man purse. The mini fits in my cargo pockets so it sealed the deal.

Dan, This is my "Man purse" that I use when I need to bring work with me on the trail. Its a Pelican U100 Elite laptop back pack. It has a built in Pelican case that holds my Laptop and its waterproof and shockproof. The back pack also holds my iPad, 4G mobile modem and some other stuff I need to work. And Camera, binoculars and gear that you want to bring with you on the trail. Its rugged as heck. Very good when you trow it around with tools and other stuff in the back of the truck.

image_zps0c86a991.jpg

image_zps96e8f413.jpg
 

marshal

Burrito Enthusiast
should check out VisionX's Optimus Prime series LED lights. they'll give HID's a run for their money on distance.
 

boo471

Adventurer
should check out VisionX's Optimus Prime series LED lights. they'll give HID's a run for their money on distance.

Nice, I haven't seen them before. Have you tried them? It seems you will need a few since they only produce about 900 lumens each. It might get a little costly to have them match the HIDs in lumens as well as distance but definitely interesting.


Sent from my iPhone using Tapatalk - now Free
 

boo471

Adventurer
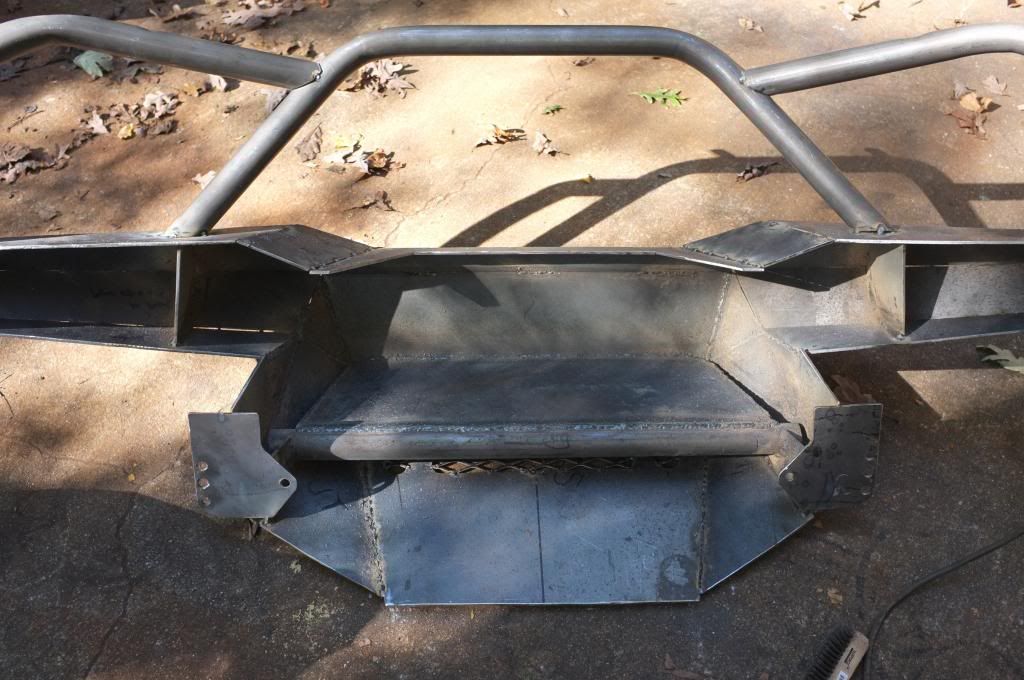
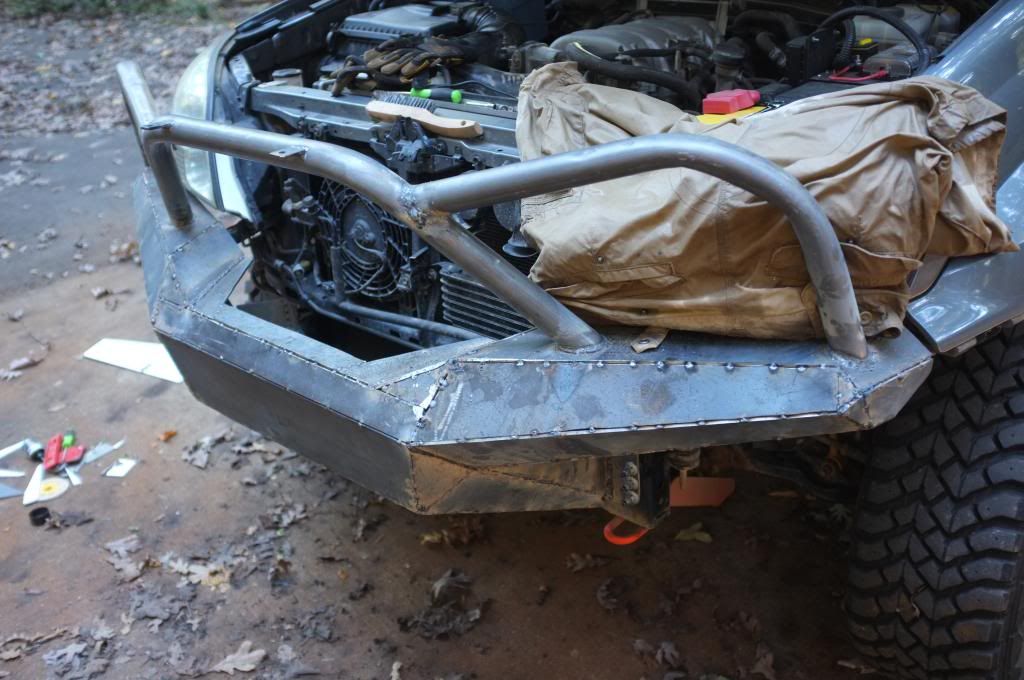
Front bumper build

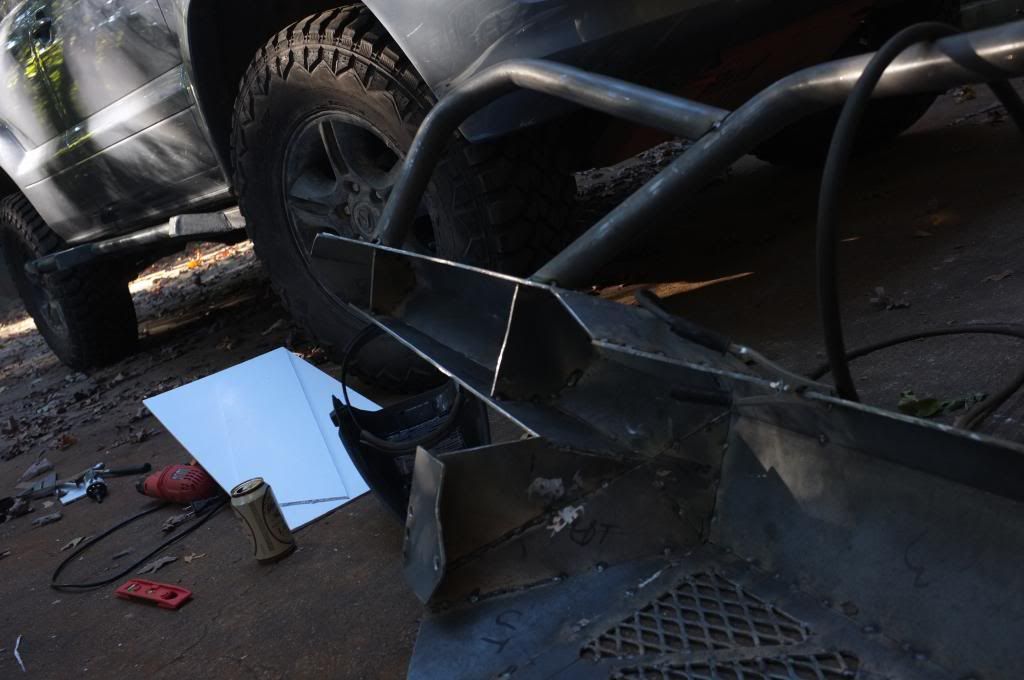
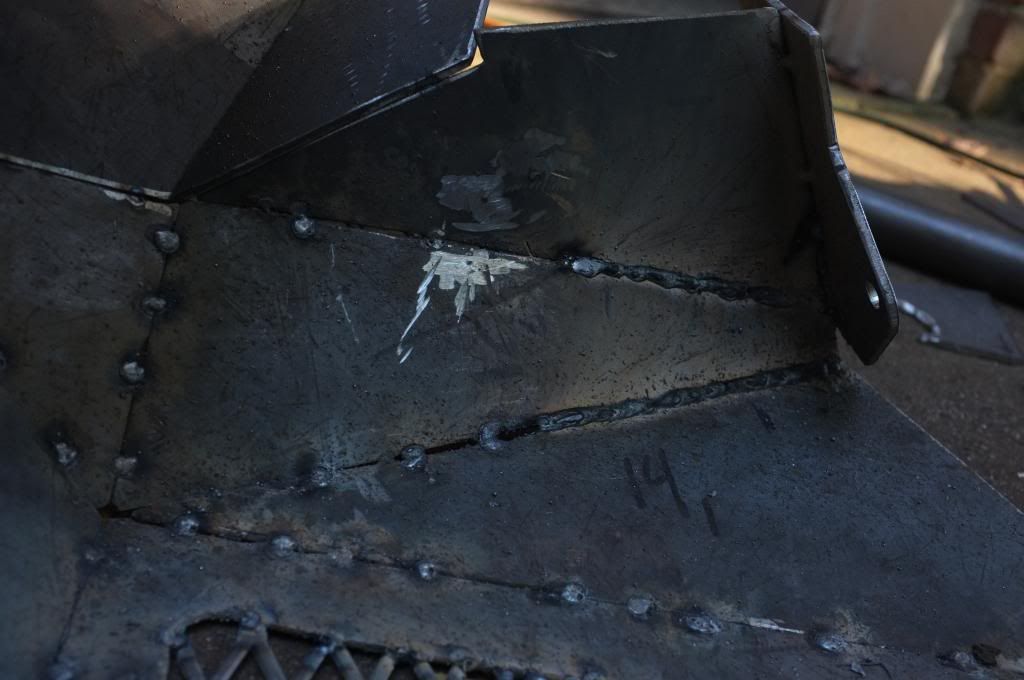
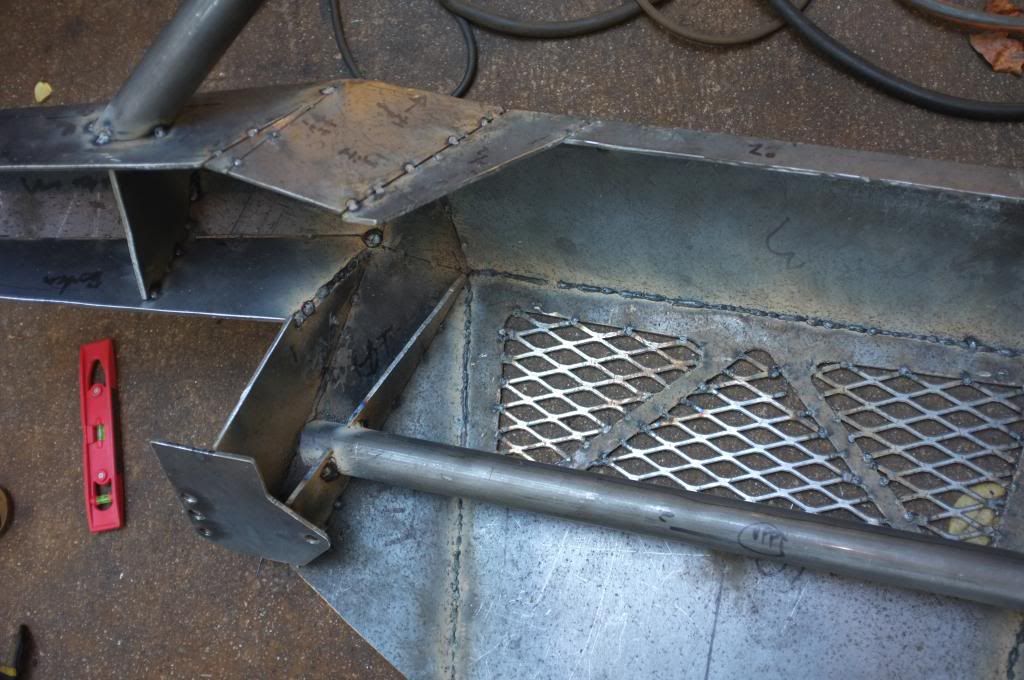
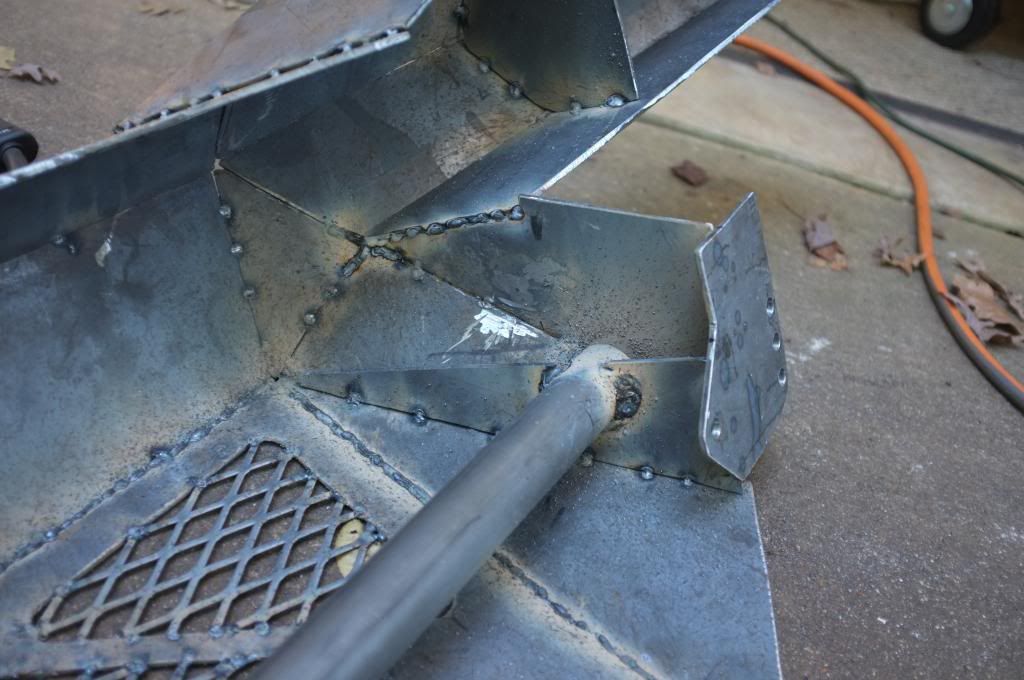
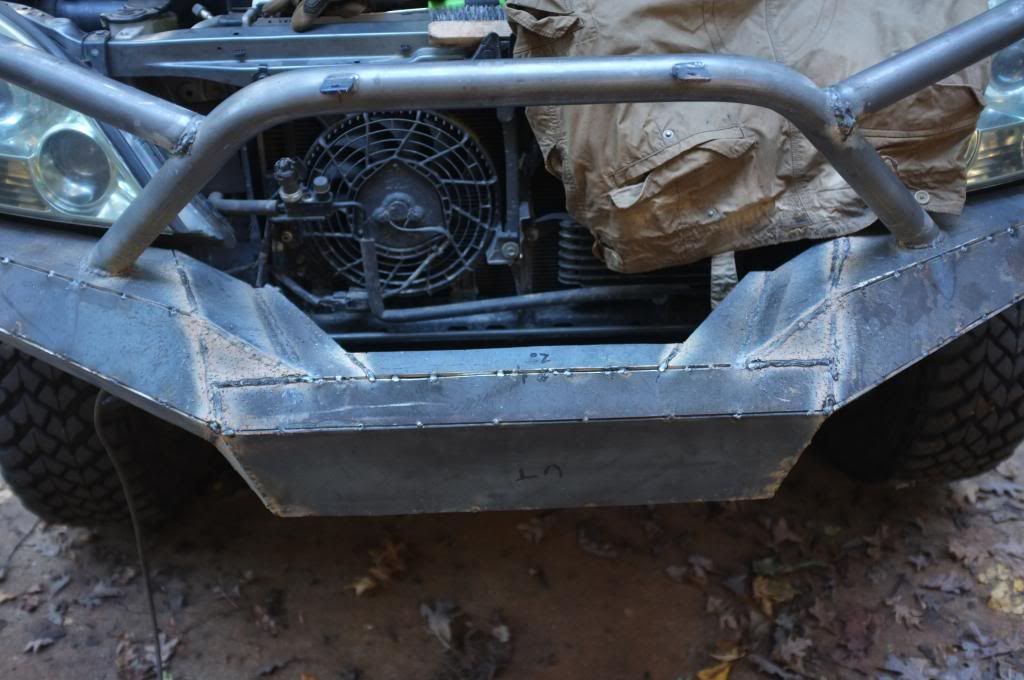
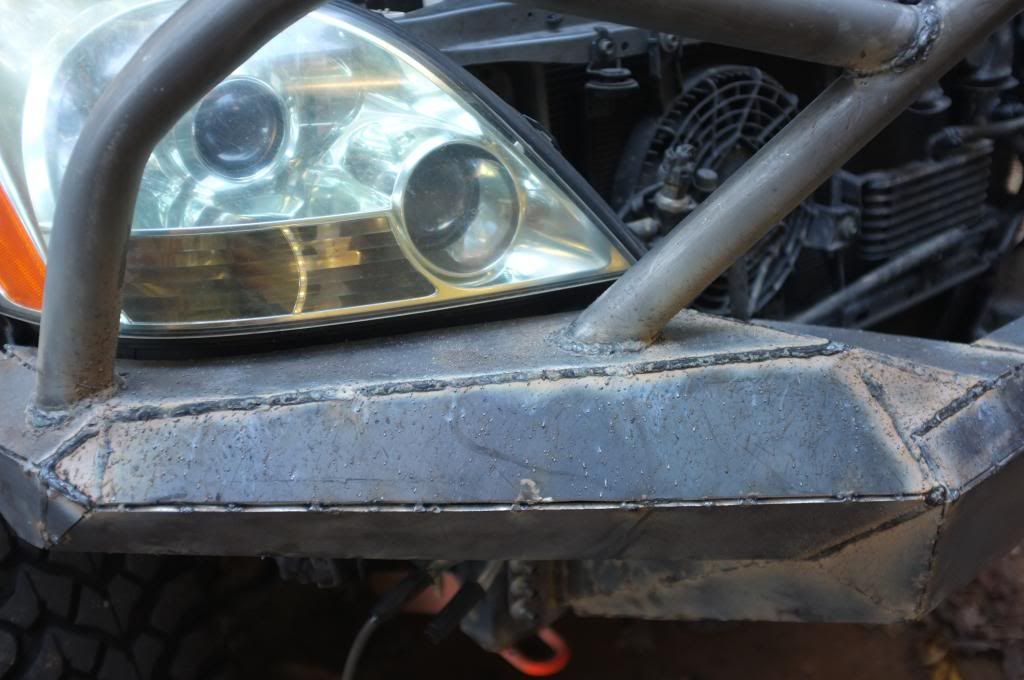
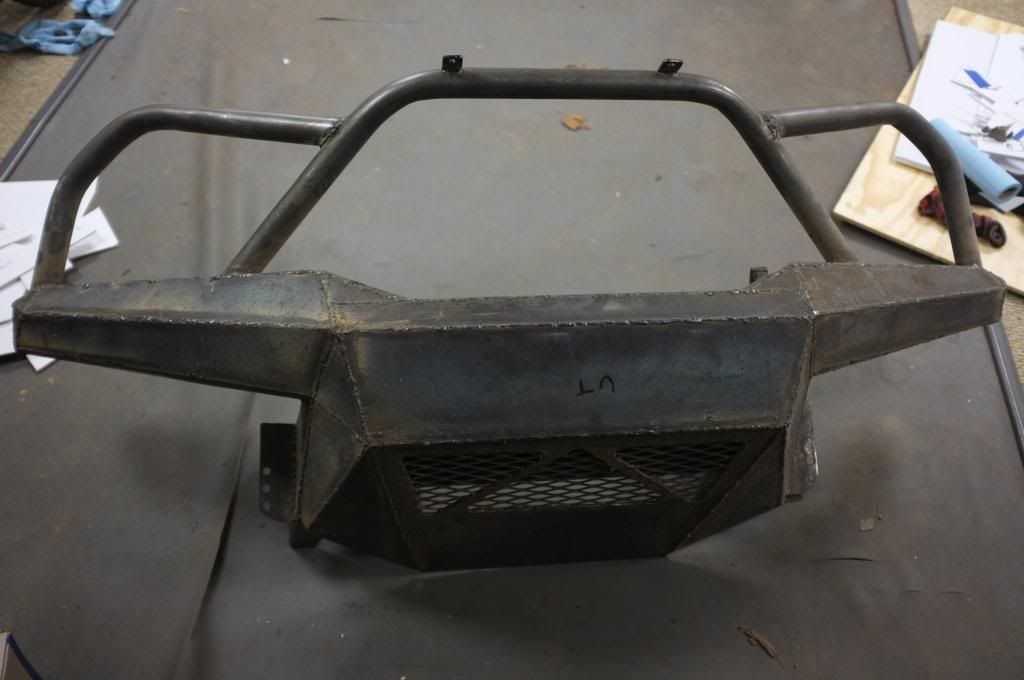
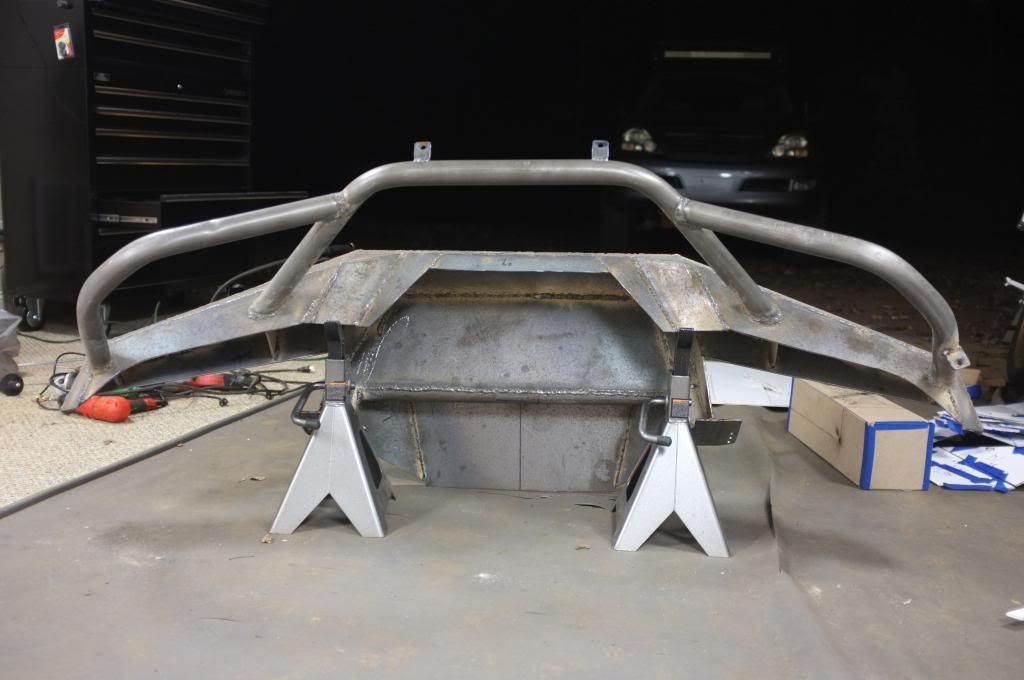
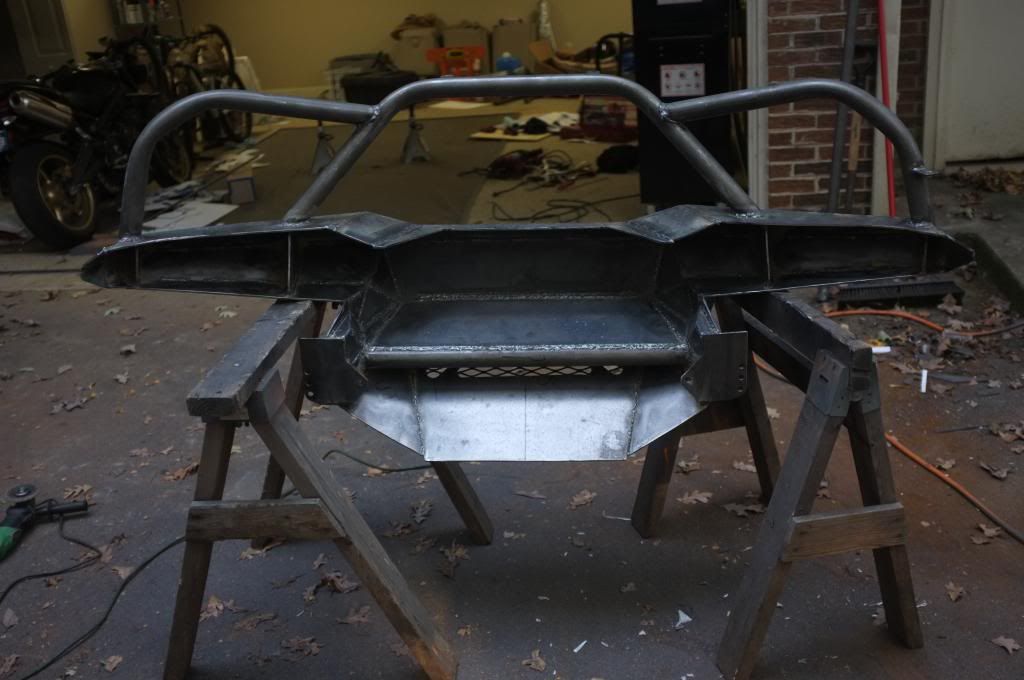
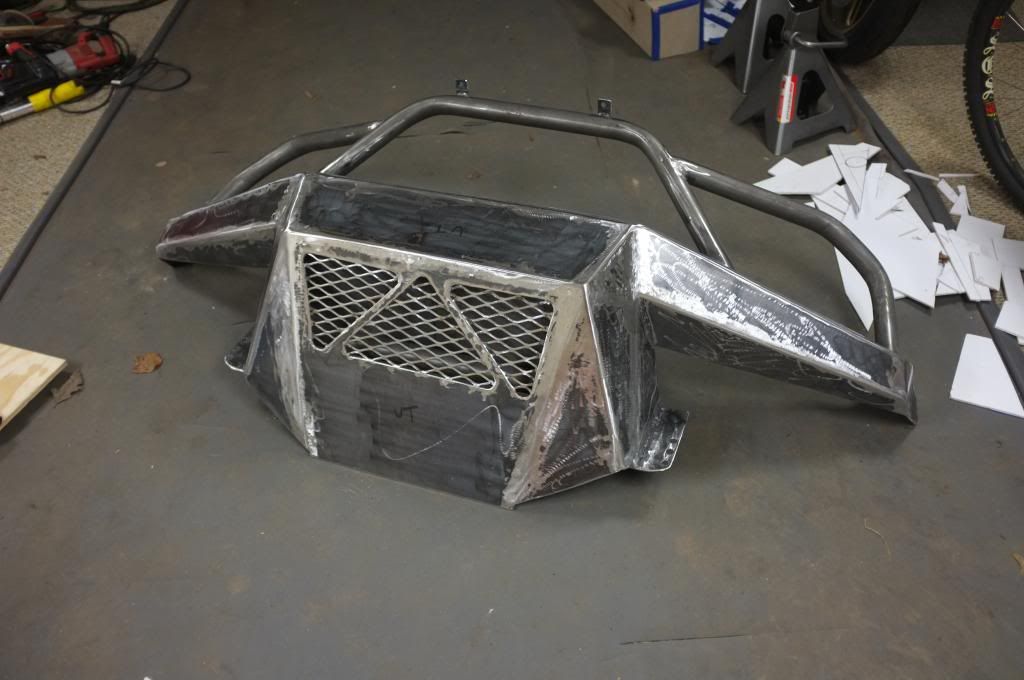
This weekend was spent working on the bumper. There was a lot of progress on it. I added the reinforcements needed. I also added a cross member, Winch plate and boxed in the area holding the winch plate and mounting plate.

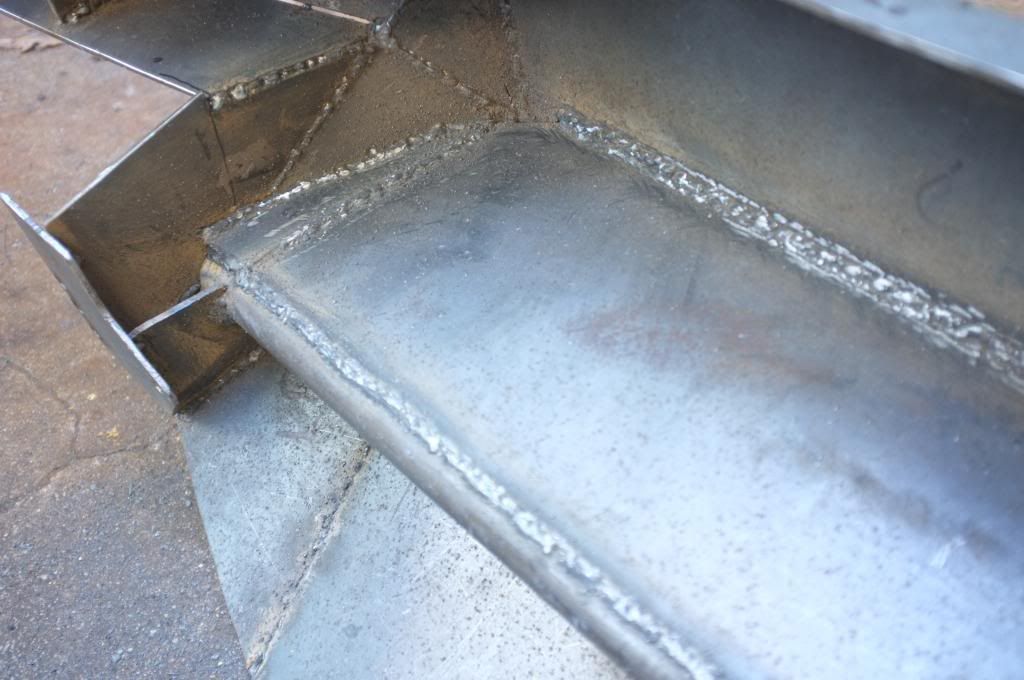
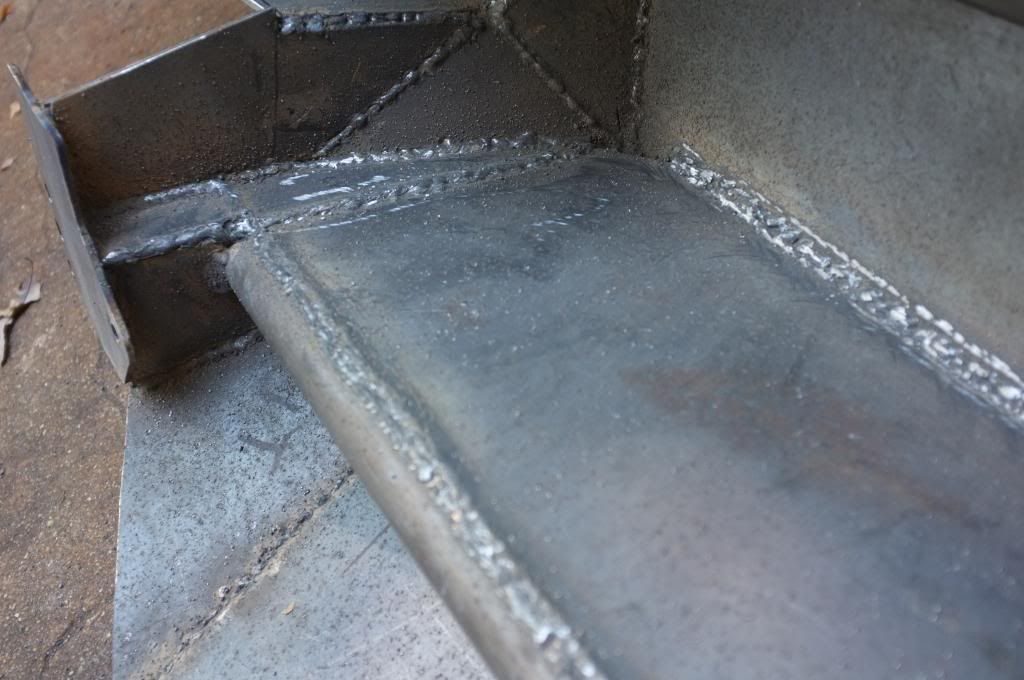
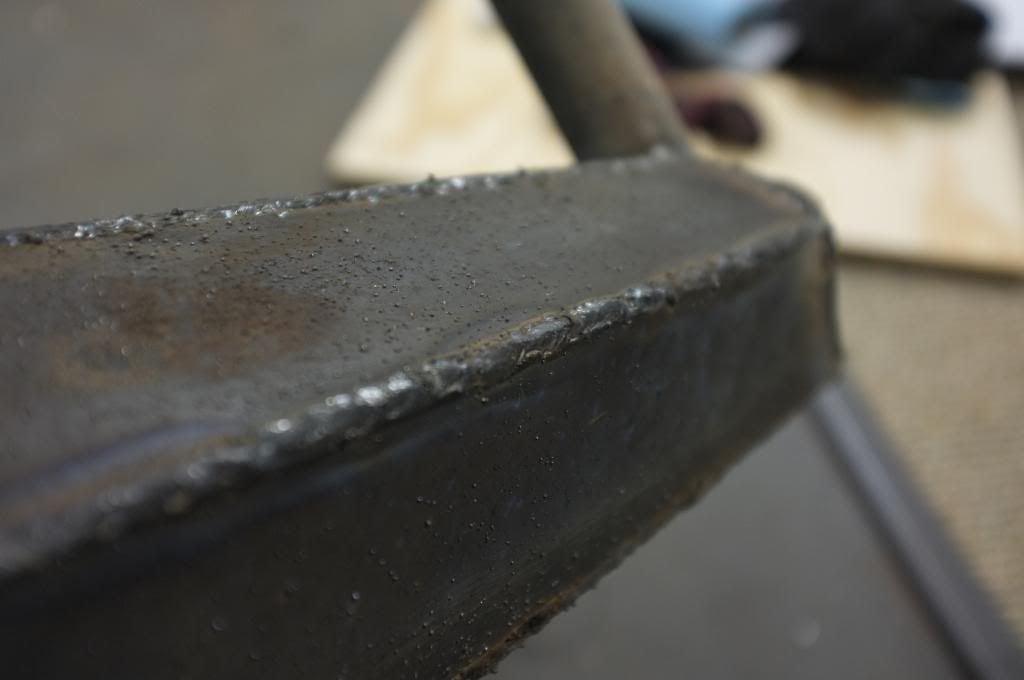
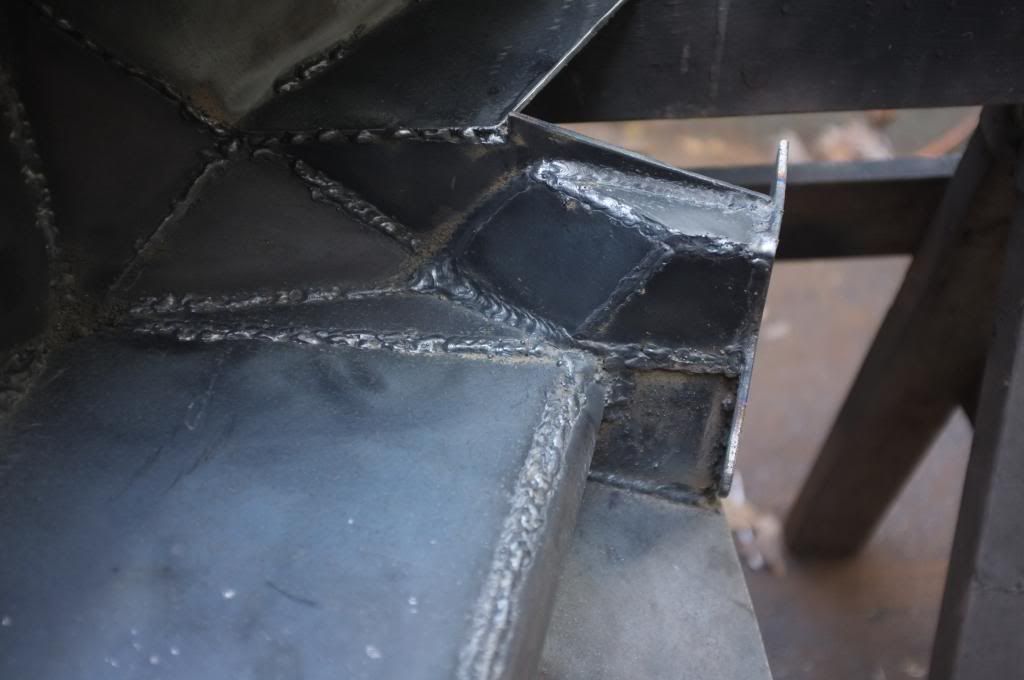
I also welded all the welds on the entire bumper. Full welds on the outside of the bumper and seems on the inside since I will smooth out the outside of the bumper and remove some material I wanted more welds on the inside as well.

Surprisingly there was very little warping. This is a benefit with using smaller pieces and lots of triangles in your design. It makes it VERY strong.

I started with adding reinforcement plates to the "wings"
DSCF2772_zpse109b7c0.jpg

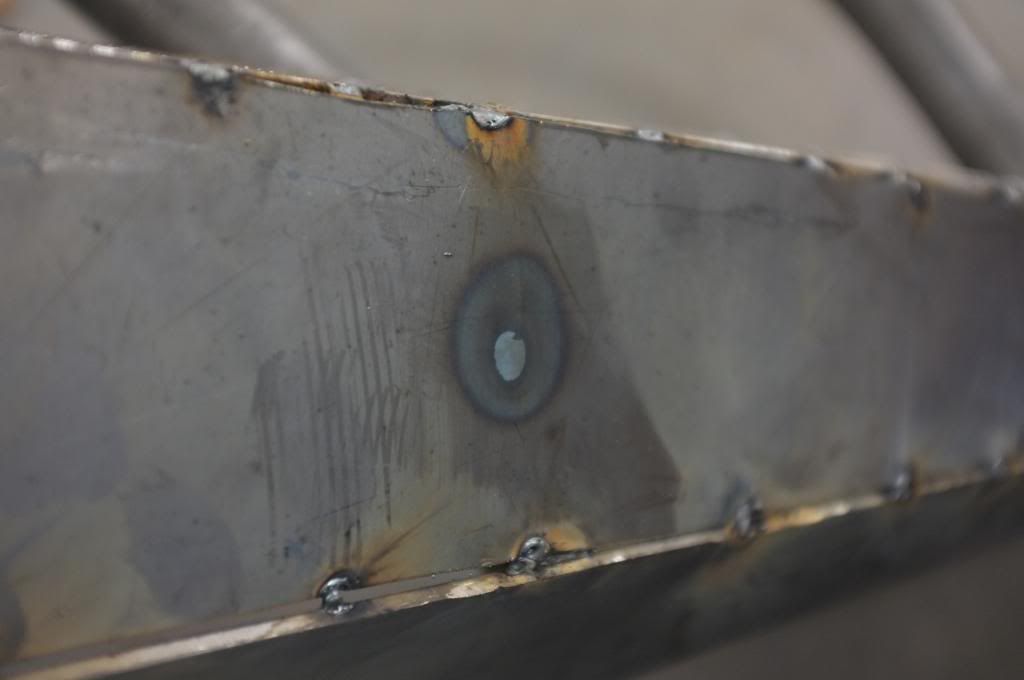
Good penetration for a cheap welder and using no gas.
DSCF2776_zps8c4dde26.jpg


Then I added the cross member and started working on the boxed in section which will strengthen up the entire area around the mounting plate and winch plate.

Prepped with welds before adding parts (I wont be able to weld here after adding the parts boxing in this area.
DSCF2773_zpsda296a6a.jpg


Started boxing in
DSCF2774_zpsb54a0613.jpg

DSCF2775_zps5dc37f43.jpg


Added the winch plate. In the end I did 3 runs on all welds holding the winch plate.
DSCF2778_zps84404045.jpg


Continued boxing in
DSCF2780_zps762bf777.jpg

DSCF2782_zpsa470502e.jpg


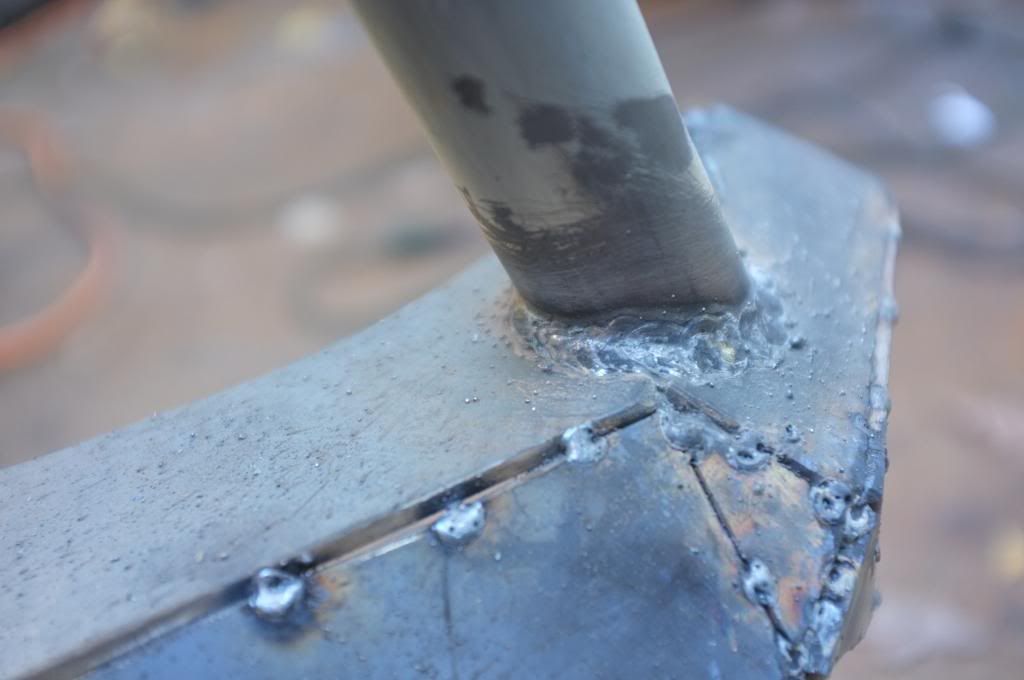
Then I started welding all the welds on the outside. Started with the tubes.
DSCF2781_zpsa4877fe9.jpg

DSCF2783_zps9215f0c0.jpg

and then just work my way from side to side to keep the warping in check. You have to be careful about where to weld here to not get a completely crooked bumper.
DSCF2784_zpsc9138e78.jpg

DSCF2785_zps49a3143c.jpg


At the end of the weekend it looked something like this. It took my about 5hrs to weld everything.
DSCF2786_zps160841a5.jpg

DSCF2788_zps4b2bd0f0.jpg

I added another tab as you can see on the passenger side tube. This will hold my CB antenna.
DSCF2787_zps38b60a4a.jpg


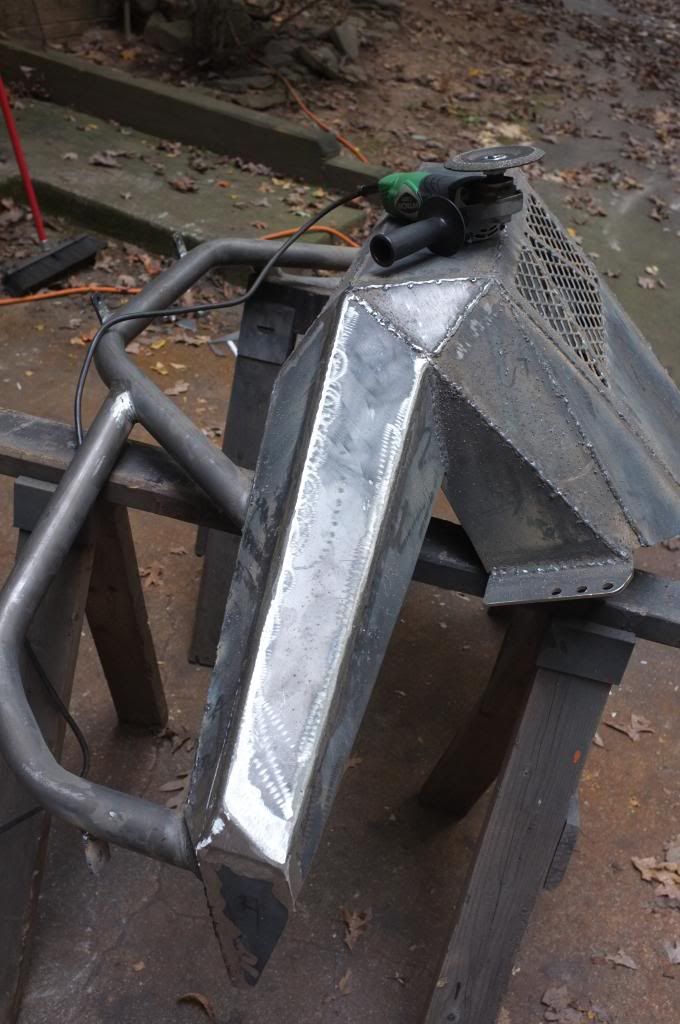
Now I have a a few fun hours of grinding to do to make the outside of the bumper smooth and seamless.

To be continued.

//Marten
 

boo471

Adventurer
Great looking design on that bumper...but do yourself a favor and buy a bottle of gas and ditch that flux core. :p

I know. I probably will soon. Only problem is that I need to be outdoors and weld. Not sure how well the gas will work when I can't be indoors with the wind and everything.

Any feedback on that. Have you done a lot of welding with gas outdoors?


Sent from my iPhone using Tapatalk - now Free
 

coastal616

Adventurer
I weld a fair bit outside too, if its windy.....kind of a pain, I usually end up shielding the weld with my glove. All you need is a small wind break, like a couple sheets of plywood leaned up. ;)
 

Kole

Adventurer
I was doing some work on a concrete pump a while back and need to weld a few parts back together. I just used one of those fold up gazibo tent things and made two walls out of tarp. They sell walls specifically for them but I was feeling cheap. Worked just fine for me tho.
 

boo471

Adventurer
Front bumper build progress

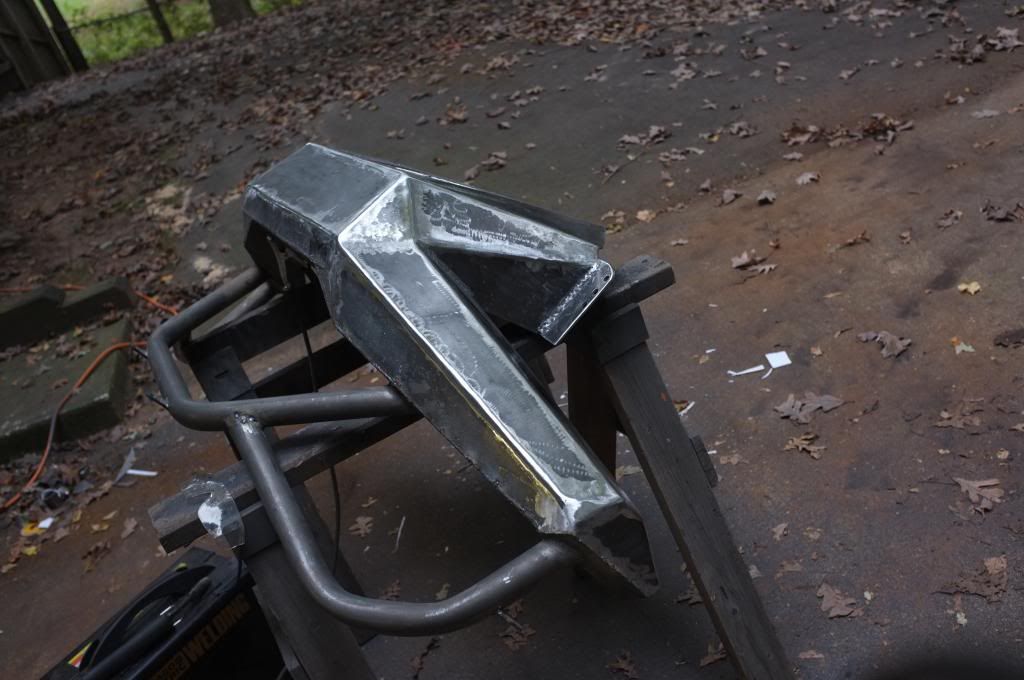
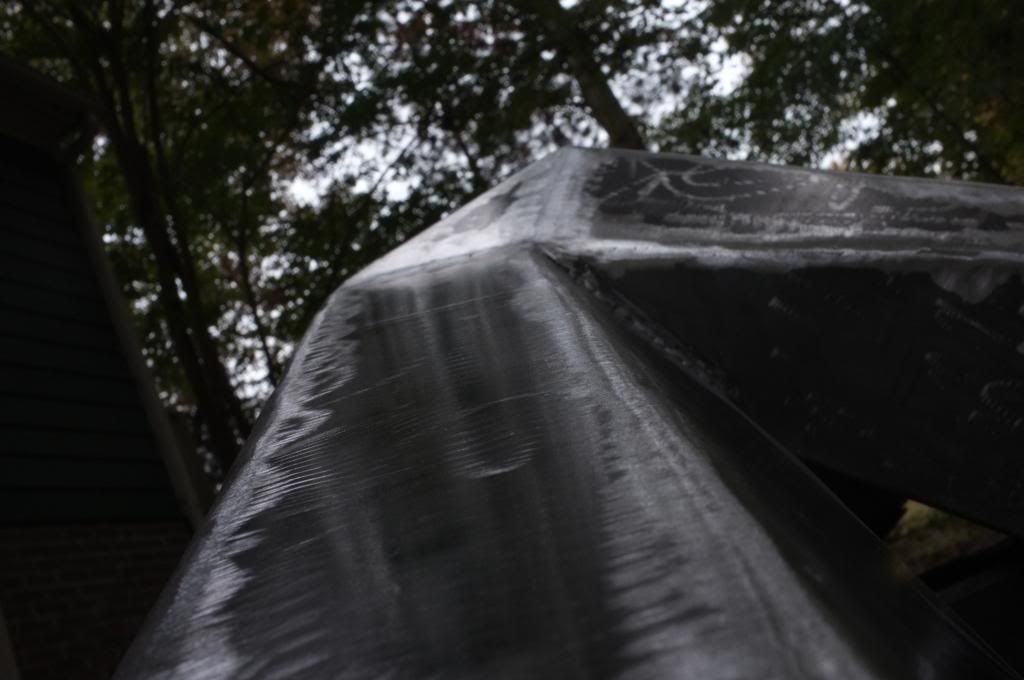
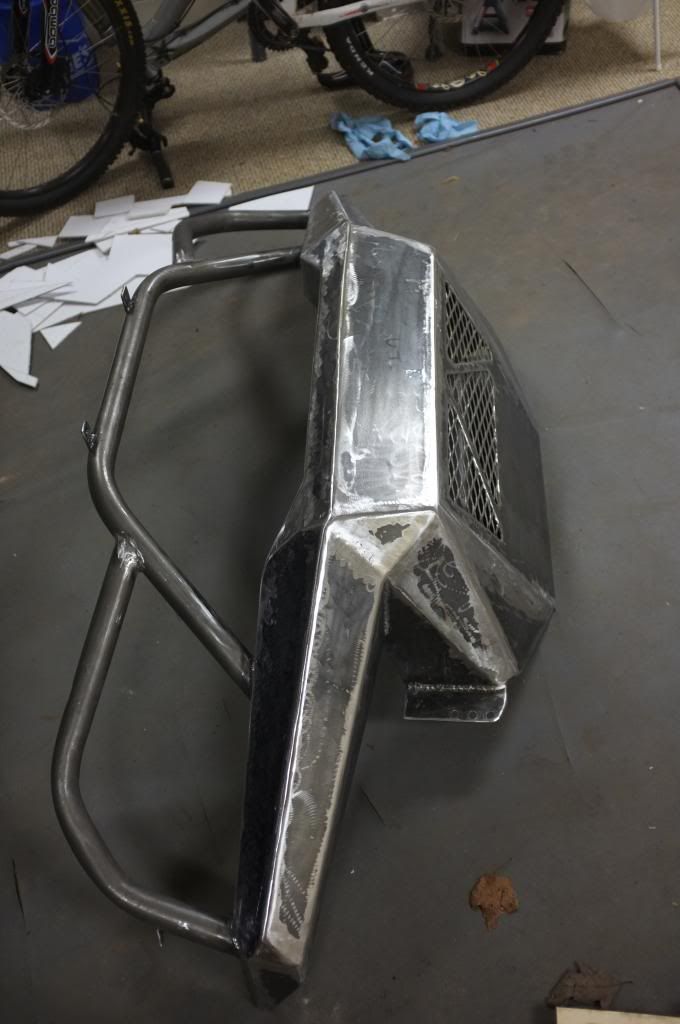
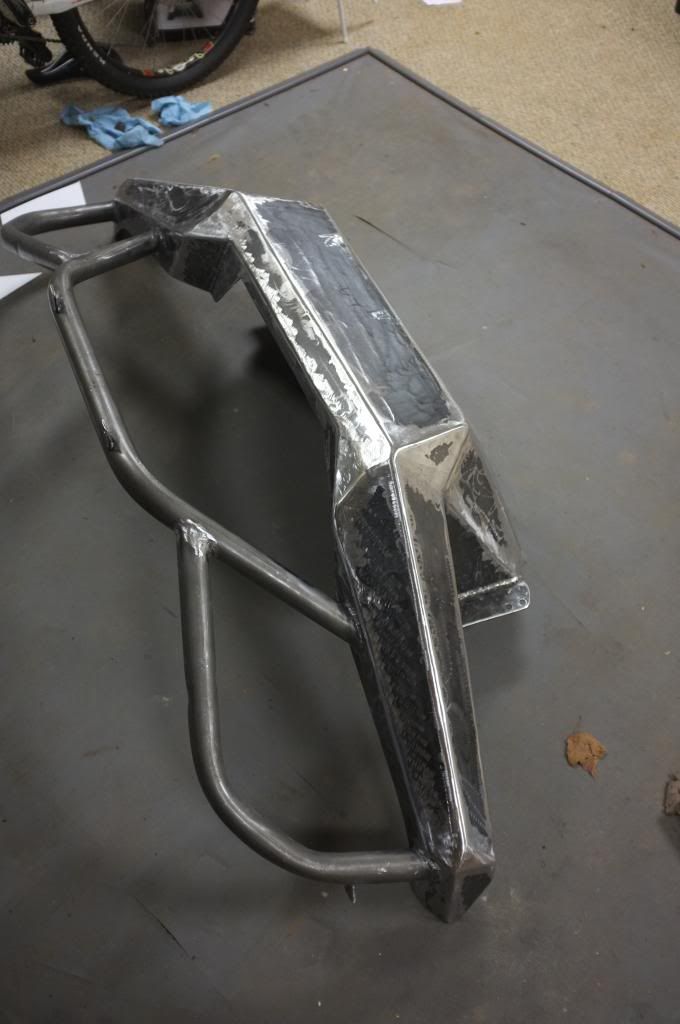
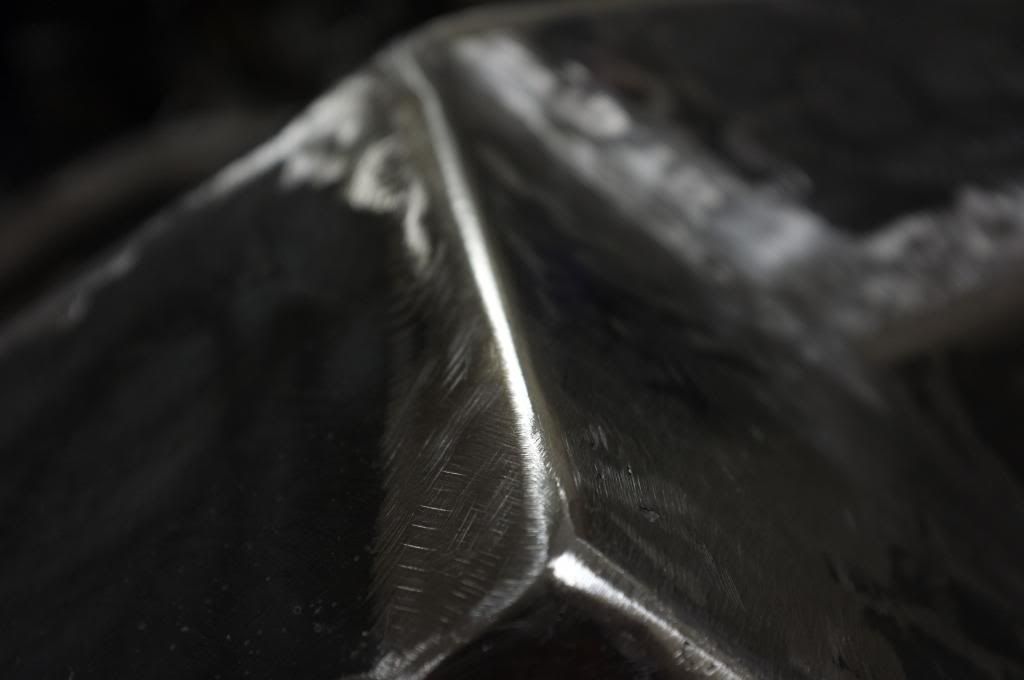
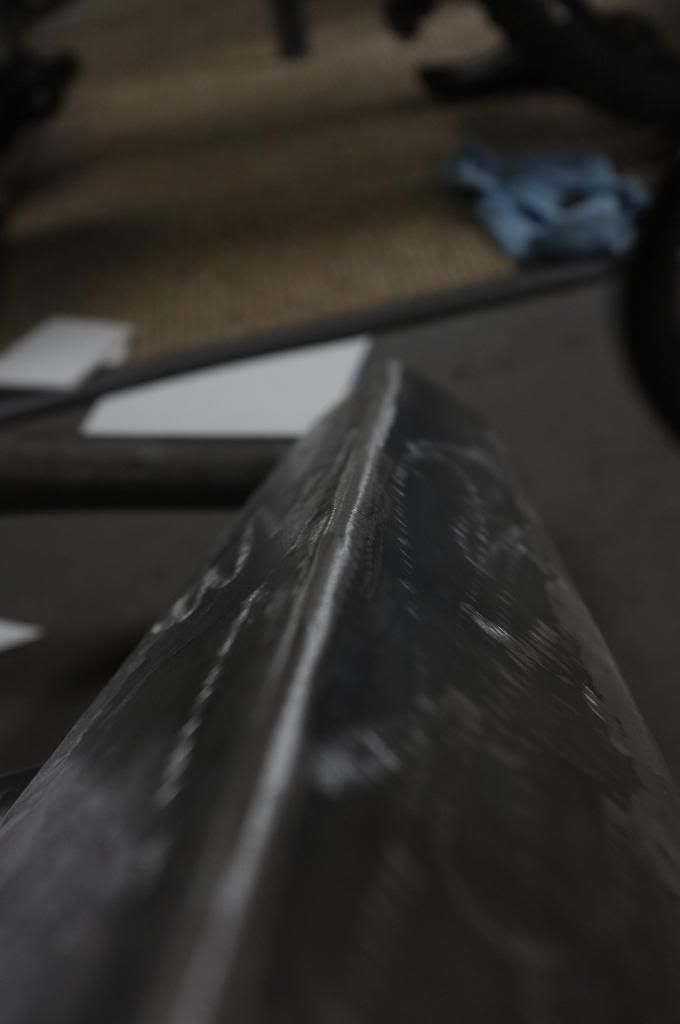
I worked some more on the bumper on Monday and yesterday evening. Quite a lot of progress on it these last days. I have gone over the entire bumper and grinded and sanded it several times to get it nice and smooth and get the right radius's on all the edges. Really not to complex to do but it takes time and its hard on your hands, joints from all the vibration.

I started with cleaning up the bumper with a steel brush. Then used a (several actually) grinding wheel to grind away the welds and start smoothing out the radius's and getting all the weld splatter away from the steel. After that I went over to a sand paper wheel for the grinder with a 30 grit and started shaping the radius's. Once I was happy with it I went over to 60 grit and did another run over the entire bumper.

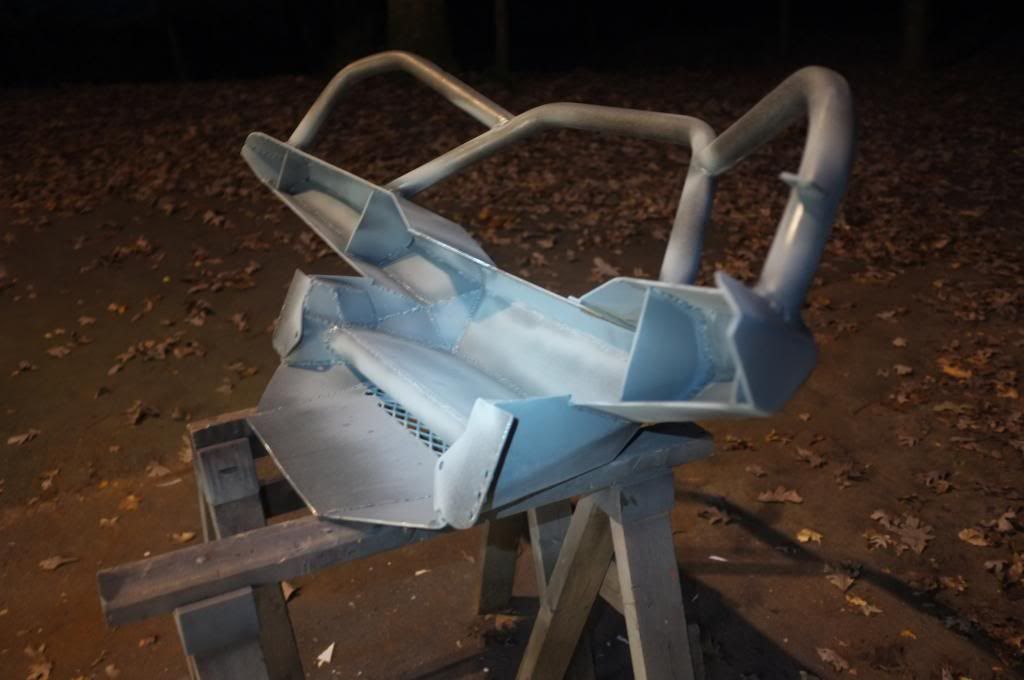
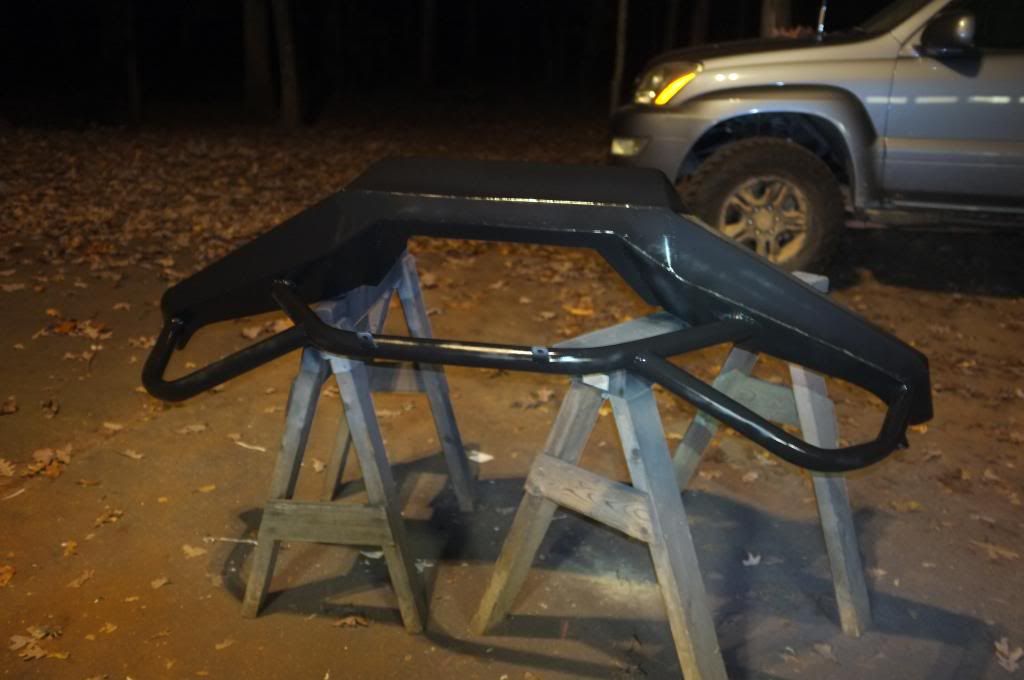
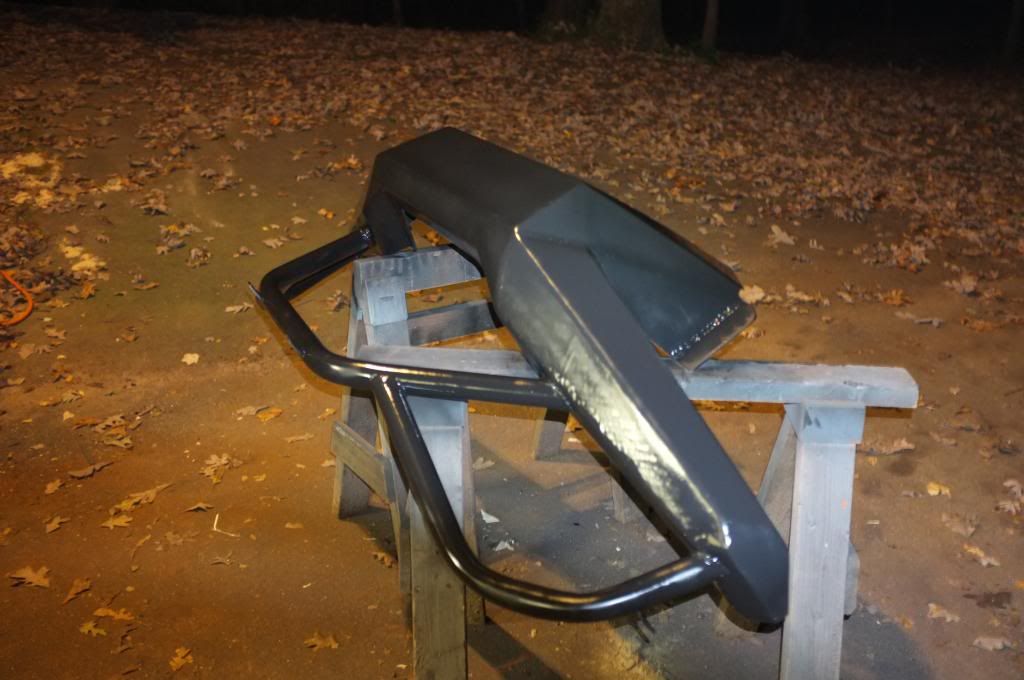
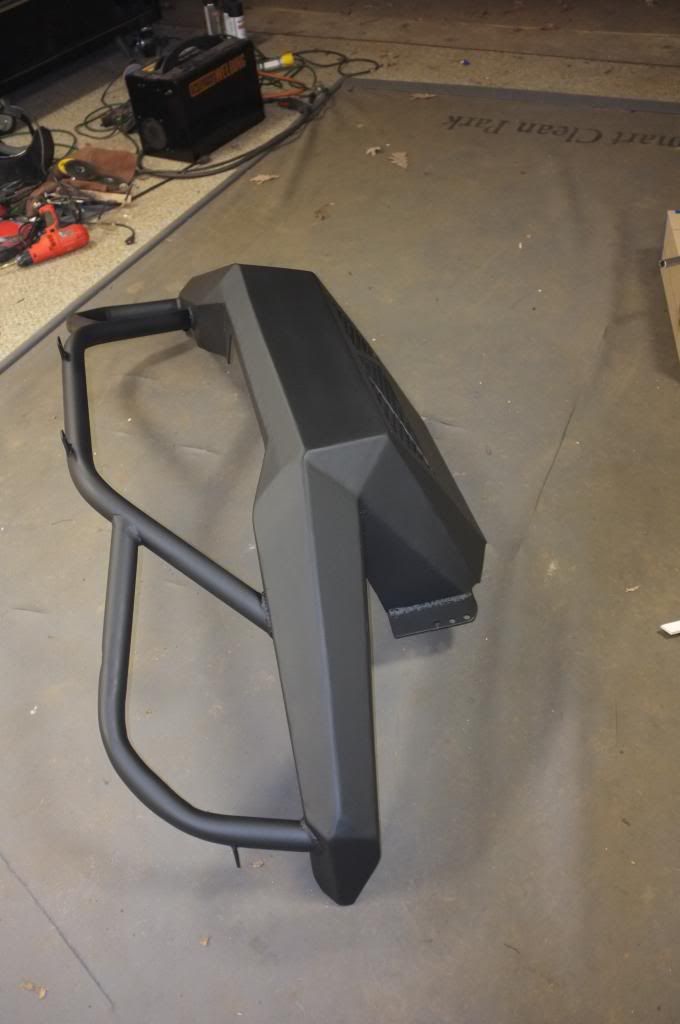
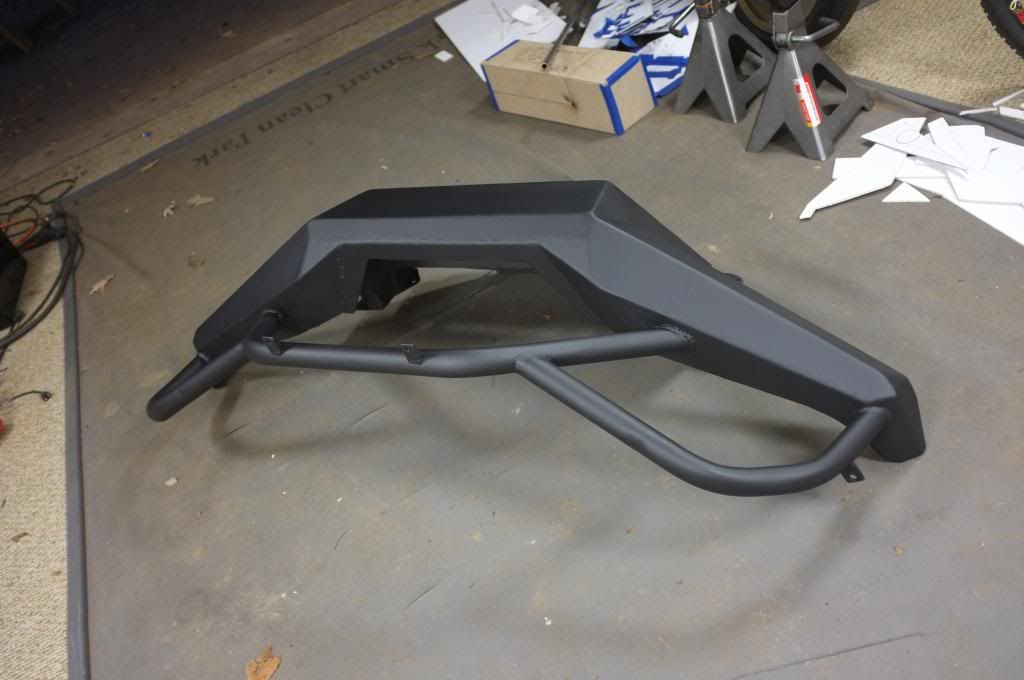
Once I was happy with the surface of the bumper I sprayed a thin coat of zinc based primer on areas that is more likely to have standing water. Then I did a full coat of a rust protective primer on the entire bumper. And after that have dried I did a satin black coat of the entire bumper.

I did forget to drill holes in some places to let water out and to have places to tie strap cables to. I might do that today or I'll do it once I have a winch because I will do some minor changes (Gussets for strength and add recovery points) to the bumper once I know which winch to use. If I decide to not drill today then I will do another coat of black today and after that the bumper should be ready (for now) to be mounted to the truck.

I started with adding some more reinforcements. Not that I needed it but I had room for it and though why not. After that I cleaned the inside of the bumper of splatter and flux.
DSCF2797_zpsa370099c.jpg

DSCF2796_zps7870ba16.jpg


I started grinding/sanding down the welds.
DSCF2789_zpsa9623b98.jpg

DSCF2795_zpsa4a50865.jpg


detail view after 30 grit paper sanding
DSCF2793_zps6c381b24.jpg


The entire bumper has been sanded down, cleaned up and ready for paint.
DSCF2798_zps0f1f0070.jpg

DSCF2799_zps22e632df.jpg

DSCF2801_zpsf39b1405.jpg

DSCF2802_zps917a80cc.jpg

DSCF2800_zps44d9d248.jpg


First coat of zinc based primer
DSCF2803_zpsc1d26251.jpg


First coat of rust proofing primer
DSCF2807_zps2ecf5475.jpg

DSCF2806_zpse8f1ccde.jpg


first coat of satin black paint
DSCF2810_zpsaf5dd5fe.jpg

DSCF2813_zps2d701751.jpg

DSCF2811_zpse36bea63.jpg

DSCF2812_zps399c9f47.jpg


It's starting to look good!

To be continued.
 
Last edited:

Forum statistics

Threads
188,061
Messages
2,901,738
Members
229,411
Latest member
IvaBru
Top