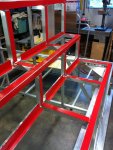
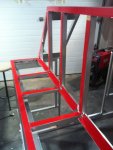
Lightweight Homebuilt Camper for my Tacoma

Thanks guys

just on lunch break..... I did manage to finally source some 1/2 inch EPS and will be installing a layer on the inside which will cover all structural members... as was my original plan

filling the roof members with foam..... hmmmm.... the whole frame would be a huge amount of work.... but just the roof.... hmmm

The roof is amazingly strong.... I can stand on one cross member alone and it will spring back to the curve I created... roof frame is 1 x 1.5 tubing in an .09 thickness.... put it on the bathroom scale this morning.... 55 lbs for the roof frame..... and almost finished

back to the shop

edit.....just finished the roof frame..... final weight 62 lbs (28 kg for most of the world) and with the one set of braces down the center it is even stronger now!
 
Last edited:

Billhilly

Adventurer
Thanks guys

just on lunch break..... I did manage to finally source some 1/2 inch EPS and will be installing a layer on the inside which will cover all structural members... as was my original plan
Couldn't remember who's idea it was!

filling the roof members with foam..... hmmmm.... the whole frame would be a huge amount of work.... but just the roof.... hmmm
Might stop the dripdrip

The roof is amazingly strong.... I can stand on one cross member alone and it will spring back to the curve I created... roof frame is 1 x 1.5 tubing in an .09 thickness.... put it on the bathroom scale this morning.... 55 lbs for the roof frame.
The strength in a simple frame made of 1" X 1" is incredible eh (I'm a welder).

back to the shop
.
 
question for you billhilly

why do you suggest holes in the top side for spray foaming the roof structure? I would have thought the bottom side would have been better.... any thoughts if it makes any difference?

back to the shop..... to design the lift
 
Last edited:

Billhilly

Adventurer
Just over thinking it!

Nah, just thinking in the case of the bowed roof that in an extreme load situation/metal fatigue deal (point of failure, never happen) that a hole drilled on the underside (all the load from the top) would result in the hole being the weak/tear point. Still would be the weak point on the top edge, just more of a collapse/crumple sort of a deal. My question is, how much would the (right) foam add to the rigidity of the whole thing? Any ideas? Pods8?
 

pods8

Explorer
Just over thinking it!

Nah, just thinking in the case of the bowed roof that in an extreme load situation/metal fatigue deal (point of failure, never happen) that a hole drilled on the underside (all the load from the top) would result in the hole being the weak/tear point. Still would be the weak point on the top edge, just more of a collapse/crumple sort of a deal. My question is, how much would the (right) foam add to the rigidity of the whole thing? Any ideas? Pods8?

Foam wouldn't particularly add much to a box tube which is already a strong structural shape. The sides of the tube do the same thing foam would do in a sandwich panel. Personally if I was going to inject foam I'd drill holes in the sides of the box tube around midline, lowest stresses there.
 
A flu bug slowed me down for a few days.... and family activities.... but back at it this week

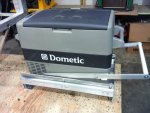
Was able to get the fridge slide mostly finished this morning..

IMG_1953.jpg

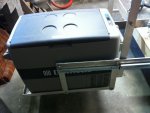
because the fridge will live under the counter inside the camper, but I want an indoor/outdoor kitchen I need the fridge to slide two directions......sideways into the camper space for indoor use .... and lengthways through the fridge door opening for outdoor use.

The fridge handles will have to come off as I have made the fit pretty tight.... don't want to waste any of that precious space

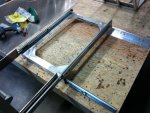
here it is screwed to the work table for construction
IMG_1957.jpg

as well.... it needs to drop down for access..... it should be the same height as sitting on a kitchen counter once it is dropped down.

luckily I found a fridge with a sideways opening lid that is easily reversible to open from either side..... perfect!
IMG_1956.jpg

here it is without the fridge.... waiting for some aluminum stock that I ordered before I can finish it up later this week
IMG_1957.jpg

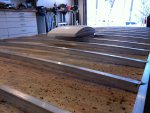
another photo.... from a couple weeks ago when I finished up the roof and tested the Maxx fan fit
IMG_1950.jpg

spent the rest of my time working on the outdoor fold down counter.

The skin material will arrive this week then I get to start installing.
 
Last edited:
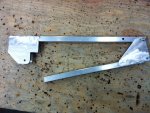
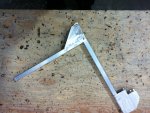
put together the frame and fold down arms for the quick access outside kitchen!... I pondered the design for a long time.... tried many complex lift mechanisms but could not get the drop I needed.... finally settled on this very simple design.

This is one arm of the fold out counter... folded up
IMG_1969.jpg

Same arm opened out
IMG_1970.jpg

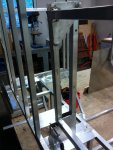
The whole thing with the counter frame welded on closed
IMG_1972.jpg

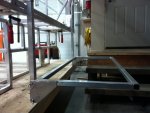
a look at the fold out and down counter open.... it needed to fold down about 12 inches (30 cm) to be the same height as a kitchen counter. I will need to put one quick pin in each side to hold the counter in the horizontal position.
IMG_1973.jpg

IMG_1980.jpg

Now working on the roof lift thingies..... away this weekend for the last ski race of the season for my boys... so back at it next week.
 
Last edited:
Work seems to progress in bursts.... a week of good progress then a week of busy life.... just finished the ski race season for the kids .... now find myself coaching baseball for my 10 yr old..... but squeezing in some work on the project

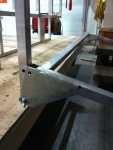
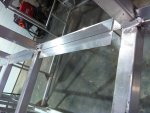
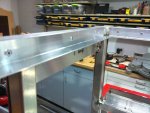
installing all the backing bits on the inside corners.... 1x1 .06 angle ... to hold the skin and inner panel edges.

The camper is upside down right now
IMG_1994.jpg

backing angle that will hold floor edges or seat edges is attached with VHB tape and rivets... pieces that will simply hold edges of inner vertical panels will be fine I think with just the tape.... this stuff has amazing stick power!
IMG_2002.jpg
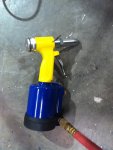
This little air tool is great! bought it for pop rivet installation on the camper build.... works super slick!

IMG_2001.jpg

getting ready for skinning the camper.... needed to find a quiet job as the kids bedroom is right beside the attached garage... so no cutting and grinding early mornings or late evenings
IMG_1998.jpg

Probably not going to have enough tape as I didn't account for all the backing angle... I had thought to rivet it all on.... but the tape is easier and more solid.
IMG_1997.jpg
 
Last edited:

roninjiro

Explorer
Wow this camper is coming along. So the VHB tape is really all what it is said to be? I haven't even touched mine yet. You also have a lot going on on your camper, but loving the concept!
 

Forum statistics

Threads
188,499
Messages
2,905,834
Members
230,501
Latest member
Sophia Lopez
Top