You are using an out of date browser. It may not display this or other websites correctly.
You should upgrade or use an alternative browser.
You should upgrade or use an alternative browser.
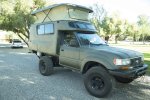
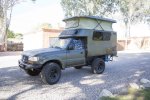
LX450 + CHINOOK CONVERSION
- Thread starter swcruiser
- Start date
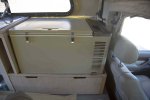
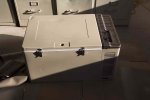
I started working on the wiring, lights and outlets. First i pulled the freezer and seeing that it didn't match the color scheme of the interior I sanded it down and gave it a new color. The color "Fossil satin" looks almost perfect with the oak color of lx450.
Attachments
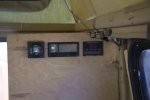

The original metal frame has a channel all the way around the circumference of the popup so i used this to run all the wiring for lights, outlets and gauges. I used 12 gauge/14 gauge for most everything. There are 12v single outlets in each rear corner and a triple 12v outlet in the front cab over portion. I figured they needed to be out of the way and adjacent to a horizontal space. The gauge panel is a sea quest II which has battery meter, propane gauge, water level, grey water and switches for the pump and heater.. pretty cool little gizmo. The thermostat is a digital dometic gauge- looks perfect next to the lights which are 90's era VW. All the wiring is zip tied and also in a loom. The cable keepers are fixed to the channel but I think they are going to need epoxy to keep from falling.
d
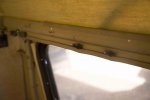
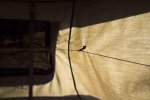
Im always trying to think about how to make the space functional and efficient so I welded small metal rod to the frame just above sink area. I can hang cups and plates to dry. I am also going to make some magnetic ones so I can easily hang whatever needed. The cable cord going along the circumference of the pop top is used to more easily close the top. The cord draws the top in as it lowers. This is common in other builds. I like having it on the interior so I can use it to hang items if needed. Always looking for storage. As you can see the top lets in a nice glow of light. Some people might not like this but i think it looks great and keeps everything well lit. The last pic is for lifting the storage covers under the cushions.

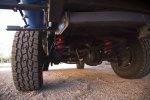


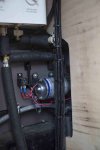
I decided I wanted a 12V puma compressor after all the great reviews. The compressor head fits nicely into the area next to the heater and I decided to retain the tank. After running the copper lines through the floor it was fairly easy to refit the connections. The compressor is supplied with power via 8 gauge wiring from within the cab.
You can also see in the pic the water tank sensor. There is a also a propane sensor which connects to meter panel.
To the left of the filler are the valves for the air bags. I originally thought i would need the airbags for the weight of the truck but considering how light it is I may not need them. I guess I can always keep them for towing. Some people have said the handling is improved.
mhiscox
Exp. Leader Emeritus
I'm glad you feel that way. One of the best builds here on ExPo, and it really ended up looking the business. Sincere congratulations.Thanks guys! Its been a long project but a rewarding one.
Thanks for the kind words Mike! I'll feel most rewarded when I'm out in the middle of nowhere relaxing and i can pull some cold ones from the freezer!!!!
This project is a culmination of years of learning, tweaking, and trying new skills.. After its complete Im taking a little break to enjoy!
This project is a culmination of years of learning, tweaking, and trying new skills.. After its complete Im taking a little break to enjoy!
Overland Hadley
on a journey
What kind of different settings are you looking for?
I would look at marine units. That is where I started, and then rebuilt to fit my wishes.
I would look at marine units. That is where I started, and then rebuilt to fit my wishes.
I am trying to find units that have different light output settings. I think in most cases i won't need the high setting so would just be waisting energy. Ideally it would be great to having dimmable LEDs. George Scolaro has made some of these using bike housings and this seems to be ideal but not exactly a one step process. I like to buy somewhat off the shelf... as you can see i have enough to work on already.
Similar threads
- Replies
- 12
- Views
- 4K
- Replies
- 0
- Views
- 1K
- Replies
- 6
- Views
- 2K
- Replies
- 7
- Views
- 1K
Forum statistics
Members online
- mark5280
- topofpalomar
- crystalclear
- Sotomojo
- SVTRIT
- WanderingBison
- mk216v
- benSan
- roaming.nomads
- toddz69
- Joe917
- Woodcrow
- crolison
- Oteitscheid
- DickM
- DillHoll
- driveby
- premiumople
- stinkpanther
- McCarthy
- Titan_Bow
- MSGGrunt
- Bigly
- Crooked Beat
- valcon1
- HayStax
- Spencer for Hire
- Bluedog1
- albrow100
- kaceman
- fadagnes
- HNWforum
- Oyster9
- luthj
- Voayageue
- Delsh
- Elkfitness
- Fergie
- Hothonda
Total: 5,431 (members: 45, guests: 5,386)

