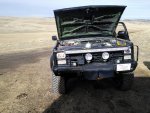
M1010 expo build. The Mountain Turtle

E.Roy

Aspiring Explorer
Despite what I said in post #61 about the stock Cummins VE pumped engine (see quote), I wouldn't trade that engine for any other engine available today. Part of that is the reliability, but also the simplicity and fact it can run with no electronic gadgets. I agree about the weight, but mine proved not to be much of a hindrance in offroad conditions (currently open diffs)

I'm enjoying this build! Thanks for mentioning your plan on using the little generator in the winter to run the block heater, great method.

So have you considered mounting the spare on the rear doors? The hinges look beefy, but not sure how strong the door is. You could also make a bracket that gives extra support to that door by running over to the hinges. You could add an adjustable damper to slow the tire swingout say if you had the nose up hill and needed to open the door.


Lastly, I like that your making due with the 6.2. The 89-93 Cummins 12 valves are great but are 160hp so need a few mods to have a nice power band, they start defueling at 2300 rpm, so you'd want to swap the gov spring, and get a smaller turbine housing, for immediate torque. Their stock setup like my truck is aggravating with the poor combo of the turbine housing, gov, and high stall converter, it's hard to keep the truck in the narrow power band.

Regards, Eric
 
Last edited:

stevo-mt

Member
Cummins are great. I'm always super jealous I don't have one. It's crazy what people have done with them. I realize that last post probably comes off a bit like a turkey! I think most of my frustration comes from the thought of working on and off on this truck for so long and the thought of doing anything that major would put the truck out of commission for a while! I'm just at the point where it goes good enough and I'll drive it! I'm always wishing I had done something with more power when I'm going up a hill though. 12v is probably the best diesel out there without a doubt. The old 80's and early nineties trucks are working so well that a used dodge with a cummins has held their value to the point where you can't find one with low miles for a decent price! It's like having gold!

I've never done anything with the H4's. I put some fancy PIAA bulbs in my friends 4runner and it did make quite a bit of difference. I'm guessing anything will be better than the old square halogens. Less than $100 for the kit, plus it will take some new wiring for the harness. From what i've researched the stock chevy headlight wiring isn't heavy enough to handle the current from brighter bulbs. Not sure on the later 80's, but I think the 85 is marginal. I'll have to double check, but it will probably require two relays wired in there for the headlights.
 

E.Roy

Aspiring Explorer
I have tried Phillips Extreme power bulbs and can recommend them as these have been quality and actually throw more light, and last for a good amount of time. Not the same for Sylvania Silverstars
 

mp_tx

Observer
I really like your aluminum rack from the MRAP. Got a source or NSN number so I can start the hunt? Thanks.
 

Kmehr

Adventurer
I totally respect that. My dodge has been off the road since July and is nowhere near ready to drive. Simple always is good, and it's great you can be content with the 6.2, hard to yank a motor with that low of miles! Sometimes I just wish I didn't have my dodge and I'd just spent about a third of the money I've spent on it making my chevy nicer and the rest on trips!

I'll be watching to see how you like the lights. I ordered a cheap 12in LED bar to run with my high beams, but it'd be nice to have something brighter for the lows.
 

Bojak

Adventurer
I would recommend the lmc headlight relay kit for your truck if applicable to your system if you haven't already done one. Best mod for dollar you can do for a square body, except pex on the door strikers.
 

stevo-mt

Member
http://www.amazon.com/gp/product/B001FVFVW0/ref=oh_aui_detailpage_o01_s00?ie=UTF8&psc=1

Here is where I bought those headlights. I'll just wire in my relays. That way they will be the good German made Bosch. It seems like all these kits and everything just use the generic ones. Plus I kind of enjoy wiring all that stuff. Lights should show up here in a few days so when they do I'll get some pics.

Pex on the door strikers, I'll have to look into that. Thanks Bojak. It looks like you just take some 1/2" pex and put it on the door striker. I happen to have some and I'll have to try it.
 

chilliwak

Expedition Leader
Thanks for posting that up Stevo. I will probably get some round ones for my old 79 this summer. Cheers, Chilli...:)
 

stevo-mt

Member
I'm going to do an experiment. I purchased a humvee 4 groove water pump pulley to replace the 3 groove CUCV water pump pulley. Originally the truck had two 100 amp leece nevil alternators. One upper and lower on the passenger side of the engine bay. One alternator when straight from the crank while the other wrapped around the water pump. I am currently using one of those. When I built my spare alternator one belt was not enough to transfer the power of the 140 amp alt. So I will be doing a little machining and making it fit. This will allow me to install a double pulleyed alternator. I am currently using the top engine alt. position. The bottom alt position is spaced out a little further and wouldn't work for a dual belt pulley.
water pump pulley.JPG
I can install the 100 amp alternator in the bottom bracket and keep it there as a spare. If the two pulley fails I can put a belt on the bottom and everything will work after swapping the leads.
A bit heavy of a part to pack, but I figure an alternator and starter are two parts that would leave me out in the woods. Well a starter is probably a better spare to keep. I sheared a starter bolt earlier this winter and had to jam a block of wood to keep it engaged just so I could get the truck started and limp home!


Of course this Toyota project has been consuming most of my time. I'm planning on pulling that out of the shop tomorrow and pulling in my truck to work on it. The Toyota needs some further testing to make sure it's ready to drive up to Alaska.
http://www.expeditionportal.com/forum/threads/139088-Project-4FunR
 

stevo-mt

Member
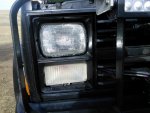
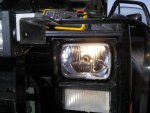
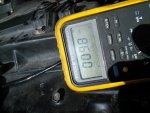
H4 bulbed headlights are in. What a dramatic improvement! I don't know how I missed these for so long. I measured the current of the original sealed beams. It was showing about 9 amps for both headlights on both the high and the low circuits. To make sure that I wouldn't burn anything up I measured the current with the new headlights in. The new headlights were drawing ~10 amps. So roughly 1 amp more. The wire looks like its at least 16 awg, which has the ampacity rating of 10 amps. I know they sell aftermarket kits and a lot of people rewire in some relays. But I don't know how necessary that is. The current is pretty much the same and if the truck can handle it for 30 years the way it is I don't think that it will fail now. At least for a while. Pretty straight forward mod on an 85. The headlights metal holder needed a little bit more room to fit the halogen rubber moisture barriers. I used a 3" hole saw and removed some of the material. Basically just the two tabs that were sticking up. Bolted the lights back in and called it a day.
IMG_20150224_140652.jpg
IMG_20150224_141534.jpg
Before
IMG_20150224_143231.jpg
After
IMG_20150224_143224.jpg
IMG_20150224_143239.jpg

I also got the AM/FM radio antenna installed. I ended up just getting one that clamps onto the mirror. I had to put the clamp in the vice and bend a 90 degree bend into it to clamp on the base of the post. Forgot to snag a picture though...
 

Wilbah

Adventurer
This has been a great read! Thanks for posting all your experiences and work. Truly inspiring.

When I was reading about the "death wobble" you were experiencing on the H1 wheels I thought of papawheely's Centramatic dynamic wheel balancers.

http://www.expeditionportal.com/forum/threads/128106-Project-quot-Autonomous-quot-F-350

I realize you have changed the wheels but still might be a good idea?

Good luck and look forward to seeing your continued progress! And best of all- you are getting out there USING it.
 

stevo-mt

Member
DSCN6415.jpg
DSCN6417.jpg
DSCN6418.jpg
DSCN6420.jpg
DSCN6425.jpg
DSCN6426.jpg

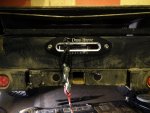
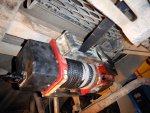
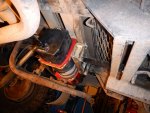
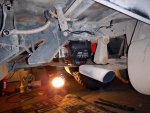
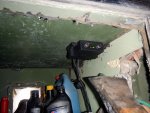
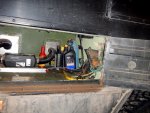
I installed the Husky 10 winch in the back. I cut a hole into the bumper and bolted the fair lead it in. The bracket that holds the winch was built last year and was already in place. I wired the switch for the wireless control in the box on the side near the Espar heater. A sealed planetary winch would be a better setup than this for tucking up under the bumper.but I had the pair of them. The benefit of the Husky is it's a worm gear style. So it has full 10K lb braking capability.
 

Forum statistics

Threads
188,178
Messages
2,903,430
Members
229,665
Latest member
SANelson
Top