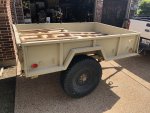
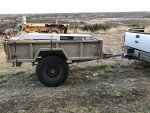
M101A2 Adventure Rack

Buffalobwana

Observer
I’d say I got lucky in that there was no discernible deflection. Like you, I actually expected more. But, if you are in town, I’ll buy you a donut and a coffee too.

Polished all the welds and removed all the rust that accumulated in the 2 months since I started this, and then primed the bare metal.

The rack itself is basically done now. It’s time to start the fun part.

Accessorizing.
 

Buffalobwana

Observer
What size is the lug size? Looks like the wheel uses standard tapered seat nut. Is the angle different?
Probably standard taper. Best I can tell. I don’t know the stud sizes, but I believe they are the same as what you would find on the HMMWV (H1)

The lug nut size itself could vary, as I bought a few different sizes from Oreily that fit that stud. I have 7/8 on there now. I had three of these trailers with no wheels or lug nuts and needed 48 immediately and Oriely didn’t have 48 of the same size, so I took what I could get.

The inside width, between the wheelwells on a 101A2 is less than 48” (45” I think) which is inconvenient when hauling plywood, Sheetrock or anything that is 48”.

I had to lay down pallets to raise the floor to the top of the wheelwell to haul plywood.
91D2CB77-0719-4F5A-804E-40BAF33B167F.jpeg

3092DA3C-08B4-405A-A738-AA88197C82FD.jpeg
This has been inconvenient enough for me to consider cutting the wheel wells out, and moving them to at least 49.5”. I would have to chop the axle and extend it. I’m sure I would be better off just buying a new axle after everything that goes with trying to extend one.

This isn’t at the top of the list right now.
 

Buffalobwana

Observer
Which JD2 die set did you use with the 1 inch sch40?
I used the 3” Center line radius 180* die. (Tightest radius they offered) Since the pipe had been powder coated, it didn’t fit perfectly.

I noticed the discrepancy before I ordered it ... Oh well, it was .010 larger which doesn’t sound like much, but it’s enough to stick in the die after a bend.

There is a guy on YouTube who does some great instructional videos on bending. It was a huge leap forward in the learning curve for me. I’ll find his channel and post a video.

The biggest time and material saver for me was making a good cheater and taking good notes and learning how to make a bend and hit it right on the money.
31B47CC6-A192-4B1E-81BC-A74F9DB4FD5C.jpeg
I bought a few other dies, a 1” sq tube, 1/2” sch 40 as well. I bought 180* dies instead of 90* dies, and bought the tightest radius offered on each.

I can see now that I need a brake, and a press, CNC plasma table ... all able to handle 8’ sheets of course.

My wife says she wants her garage back. I’m trying. If I had these tools, maybe I could finish these projects and give her a tiny spot.

Maybe.
 
Last edited:
More Tools! Can never have enough. Love the take up cheat sheet you made. Having bent my fair share of conduit, these can be valuable plus knowing the spring back of the material. I am no pro but have made plenty of junk lawn furniture from my mistakes.

Best thing a person can do is bend a measured test piece first. Manufacturer data might be wrong or like your situation the material is slightly different.

I am going to invest in bending software when I buy my JD2 bender. It will save many headaches and mistakes. Going to make my own roll cage and roof rack for my Bronco. Wife doesn't feel secure riding topless.
 

Buffalobwana

Observer
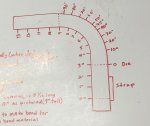
I have a test piece for each die/material. Each one has inch marks scratched in the metal and I traced each one on poster board, then wrote all the notes to the side.

Huge time saver. For example, I know (on the 1”) that the distance from the strap to the outside of a 90* bend is 8 1/16” ... every time.

Since I no longer trust my memory, I have started a binder of notes. If I have to reproduce a piece or go back and make something similar, I can reference my notes. This guys video above is long and a bit geared toward the beginner, but it’s full of info. When you are done, you should be able to bend a complex piece.
 

Buffalobwana

Observer
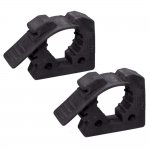
What is everyone’s opinion of the quick fists?
1A618AFF-5209-4B57-986F-504D77FABEF3.jpeg
Good reviews, but I’m concerned that the rubber won’t last a year in the sun.

Anyone concur with experience? I guess they are cheap enough to just replace every season. Sure seem handy.

Anyway I bought some. Don’t let that change your review of them. $21 for 8 of them 2 small 4 that are useful size and 2 fire extinguisher size.
 

ToRo13

Active member
What is everyone’s opinion of the quick fists?
View attachment 459502
Good reviews, but I’m concerned that the rubber won’t last a year in the sun.

Anyone concur with experience? I guess they are cheap enough to just replace every season. Sure seem handy.

Anyway I bought some. Don’t let that change your review of them. $21 for 8 of them 2 small 4 that are useful size and 2 fire extinguisher size.
I had them on the roof of my FJ for 8 years in the hot Colorado Sun –– They never failed
 

Buffalobwana

Observer
Thanks. I just looked at the box and it says “UV resistant” so, I’ll give it a go. I see some guys use metal brackets that wrap around the sides of the fists. Looks strong, but not sure it’s worth the coin. Obviously, as “fabricators” the first thought is “how much time and money am I willing to spend to make a pair of $20 brackets”

Probably 10 hours and $50.
 

Buffalobwana

Observer
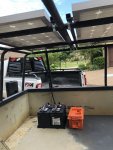
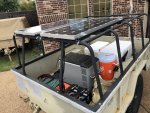
I bolted some 1” square tubing to some conduit hangers, which were mounted to the top bars, to give me a flat bar to mount the solar panels to. These panels put out 100 watts each at 19 volts (they are 12v panels, but the panels do say output is in the 19v range) I tested them, and they were true to their specs.
63D99199-E68F-4E75-9909-D88AC2514183.jpeg
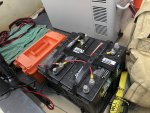
I installed two, in line, to two batteries, in line, with a charging regulator between the panels and the battery.

This was a rush job job since I was pressed for time. I was leaving for an Antelope Hunt in a couple days. Needed a way to mount all this to the trailer. I remembered that a piece of plywood fit snug with the tailgate closed, so I took a few cans of spray paint after notching out for the wheel wells, I painted the plywood and screwed everything to the plywood.
5AE35F39-DBBA-4BD7-9311-34FB58BFD187.jpeg

I used an Engel MT-45 fridge/freezer. It froze all the meat by the time I got home, which wasn’t exactly my plan, but it worked. It ran 24/7. I would throw a case of water in it to freeze and use the frozen bottles of water to keep food in the cooler cold. It was the perfect setup.
F8B8C10D-EBE9-4413-831C-7F8BF63AE747.jpeg

I dont know if i could have gotten by with one battery. Maybe, but I had two, so I took two.
 

Buffalobwana

Observer
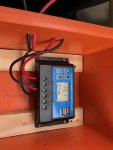
I installed a cig lighter port in the side of the orange ammo can to plug the fridge into.
FF996625-A536-4EFD-A5D8-891849C39B76.jpeg
Here is the wiring and the charging regulator. It has USB ports for cell phone charging. (This pic was taken before I installed the cig lighter). You can see the orange ammo can is secured to the plywood with screws through the 1x2 at the corners. I mounted the regulator off the floor in case moisture got in the box, but it turned out to be water tight.
8B7ED10D-7848-41D4-A2DE-786F133F077A.jpeg
 
Last edited:

Forum statistics

Threads
188,314
Messages
2,905,320
Members
229,959
Latest member
bdpkauai
Top