Making a ifting roof on a 110

wuntenn

Adventurer
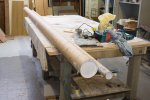
Alloy arrived today. BIG packages!
sides-1.jpg

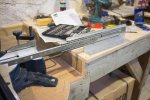
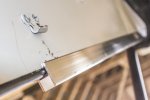
So here's the intended design for the clip-in sides. This H profile is riveted to the top of the panels.
sides-5.jpg

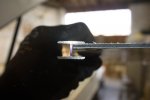
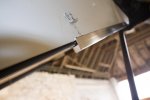
The back of the rivet will be concealed in the lower channel of the H and the upper channel fits the edge of the lifting roof with the rubber seal on it perfectly, when clipped up it should be fairly waterproof - see two pics below.
sides-3.jpg

sides-4.jpg

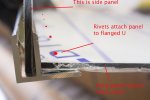
Then at the sides the flanged U channel will be riveted on to the back panel (which will be hinged across its width to make it smaller for storage) and when it is offered up it's U channel will sit over the sides.
sides-7.jpg

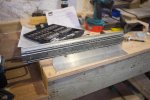
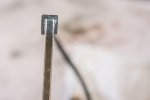
Rubber U edging fitted on the alloy panel will make the joint waterproof when inserted into the slot. This is it fitted onto a sample of the alloy panels.
sides-2.jpg

This might seem a fiddle - having to store and install the panels, but it's a good way to have a versatile setup where the fabric sides are used when the weather is good and lots of air and light inside is desirable, but if it gets windy and cold, wet or snowy they can be easily clipped in to make the whole vehicle substantially more weather-resistant and warm. It does not matter if the panels get wet or dirty either as they are installed outside the fabric sides and with a 25mm gap between them and the inner fabric. There are several storage options for them - on the roof in the area above the cab forward of the roof hatch or on cargo rails running along the side (or a combination of both). Anyway I've bought the stuff for them so I'm committed now!
 

Attachments

  • sides-6.jpg
    sides-6.jpg
    88.5 KB · Views: 60

krl81

Adventurer
Great idea! I think this will work really well. :) It will be interesting to see how the sides/panels end up.
 

wuntenn

Adventurer
Phew - glad someone else does! :)

I've got to build the roofrack first before I can collect the sheet material for the sides, so it will be a wee while before I get to fitting them.
 

wuntenn

Adventurer
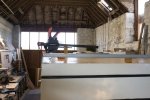
Just so you can see it 'operate' here's a short video clip of the roof lifting with me giving it the first push and then the gas struts taking the strain.


Current doings are fabbing up the roof rack, but currently waiting for the nice stainless fastenings for it (rather unorthodox construction*) and fitting out the inside - small sink installation, HD runners for the fridge and various other things. This is a rather convoluted part as I'm fitting cargo tracking on the outside so need to strip out some previously installed ply paneling to get access to the back of the bolts for fitting nuts and bracing, and this means that currently my sink unit build is only temporary as it'll have to come out when I fit the cargo track.

*Roof rack. Because I've got rivet heads protruding above the roof surface, along the edge of the alloy sheet I decided to try to fab the roof bars so they would not just provide roof bar support and modest load carrying capacity, but also cover the rivets and edge of the roof sheet thus making it neater and more waterproof by sealing the long line of edge/rivets with Sikaflex Marine grade PU sealant/glue under the L profile. See pic below:

pckr-1.jpg

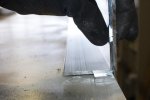
This is the side view, packer visible, angle not cut yet, and without the 100mm flat bar on the outside which will cover the packer and come down the side of the roof about 25mm.

pckr-2.jpg

So as the rivet head plus 1.2mm alloy sheet is 3.2mm in total I got a 3.2mm flat bar as a packer - this raises the roof edge up to the top of the rivet. On top of that is an L profile 75mm x 50mm x 3mm thick with the 75mm side upwards and 50mm side horizontal and neatly covering the rivets. On the outside of the L is a 100mm x 3mm flat bar which is flush at top but covers the lower edge of the roof by 25mm. Now, I considered a seam weld along the whole top edge but I'm afraid it will warp it so instead I'm bolting the L and flat bar together with neat low-profile stainless fastenings at close intervals, with the whole thing smeared in the mating faces with Sikaflex. Once its all glued and bolted together it will be sealed/glued and stainless bolted through the roof to firmly fasten it. I've done a trial bolt-up and its plenty strong and fits neatly. I stuck a section of alloy tube in below so I could see what it looked like.

pckr-3.jpg

pckr-4.jpg

I'm contemplating through-drilling the rack for the alloy pipes that run across, and leaving the pipes 'loose' but drilling a small hole through them to accept a stainless steel split pin, so I can take the cross pipes off when I don't need them thus making it less heavy and reducing wind resistance. I'll see when I get to that stage. Otherwise they're going to be held in place by a small blob of weld on each one.
 
Last edited:

wuntenn

Adventurer
Some progress.

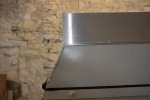
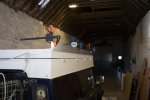
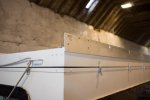
Roof rack/running bars are coming on. I was unsure whether to try welding the long top seam joining the two pieces of alloy that make up each side, but after considering the (high) chances of it warping, waiting for the welder to have time to do it (he's very busy just now) I decided just to bolt it together with a line of stainless button head bolts and flange nuts behind, and be done with it. So I did. Now, although the side looks 'slabby' and quite large it is actually only 8 inches higher than the original roof, and thats to the top of the roof rack side, so in reality it's less high than many proper roofracks (to which a roof tent would be added making it even higher).

rof-5.jpg

It has a funky sort-of shipbuildy-rivet vibe going on which is not perhaps 'pretty' in the slick aesthetic way that a Toyota/Nissan/Datsun is, but after all is said and done it's a basic shed-on-wheel 110 that's 25 years old and with the best will in the world and all the TLC one can throw at it it, it's still going to be a large boxy riveted, lump. So, in that sense the roofrack probably 'fits'! It'll do me, and I doubt I'll see another the same. The plan is to have the crossbars loose, held with a couple of beta-pins so they can be pulled out when not needed, or put on in various sequences depending on my needs - I often use one of two roofboxes and they are different lengths so I can choose where on the roof I need to fit them and how far apart the bars need to be and insert as appropriate. And yes I've designed it so the roof bars clear the roof hatch by 1" so I can use them anywhere on the roof, even over the hatch.

rof-6.jpg

rof-7.jpg

The left side is complete (but not fully bolted down) but as you can see the right side is still not fully bolted as I ran out of stainless bolts (more arriving tomorrow).

So I started fitting the fridge runners. Some of the alloy offcuts from the roofrack are just perfect. The fridge is going on the rhs (hinge side) of the back door.

rof-1.jpg

rof-2.jpg

A bit of bodging and bashing and this is what it looks like, open and closed.

rof-3.jpg

rof-4.jpg

They open to 100% plus 1" so will fully clear the cupboard structure above (which will hold the gas cooker) to allow the fridge top loading door to lift unhindered. Weight carrying capacity is 68kg and even at full extension so able to carry the fridge (24kg empty) plus a full load of food/drink. They have a lock-out function so will stay out safely, and a lock-in latch so should stay closed too. There's a lift and remove function too so I should be able to easily detach the hinges and remove the fridge. The fridge has rubber feet/buffers that protrude around each corner with a 6mm bolthole in them into the carcase of the unit so I can bolt through directly and utilize the rubber feet as shock absorbers.

This is all very slow and laborious work, but it's the two critical parts - one the roof bars that (hopefully!) provide an additional waterproof seal for the roof edge and line of rivets that hold it down (under the L section will be filled with marine grade adhesive sealant) AND the other the fridge fitting which will determine where everything else will fit around it on that side - which will be mostly storage. I have some plastic stacking boxes that I'm going to use, inserted on runners, the idea being that I can remove the weight of 'stuff' easily by hoofing the boxes out if I'm doing daily driving and want to lighten the load, and if going away I can just check the boxes to see if I have all I need then slide them in, and pull a tambour/roller door down in front to retain them and off we go.
 
Last edited:

Arjan

Fossil Overlander
Interesting !

But please make a locking pin - those "dead point stoppers" don' t work well when you bump into them and the last thing you want is to see that slide in while the fire is on and something hot and liquid get thrown off...

Let' s see if I can put up a picture here from a kitchen we used in the Land Rovers. 3 Burners + sink, running water and a drawer for all the kitchen stuff.

Alpen Trip 2013 # 21 = Pannenkoeken op 2100 meter.jpg

It is, like yours, on sliders and works very, very well. But we learned the hard wat that you need a locking mechanism on them.

In the HardTop that we' re having in the Workshop right now we will fit a Webasto Diesel cooker.
 
Last edited:

wuntenn

Adventurer
The cooker wont be movable!

Well it will be in the sense that it can be lifted out and used outside, but the basic two burner unit I have and I think will keep is going to be fixed to its work surface with a few wingnuts, and the gas supply connected with quick release connectors (gas bottle outside on rear quarter in a box) so I can use the cooker inside, with it firmly fixed to the unit, or it can be quickly unscrewed and placed on the flip down tray I've built on the back door and be connected to the gas there.

Basically I'm fitting the fridge on rails so it will slide in and out across the width of the vehicle, and in a permanently fixed unit above it will sit the cooker assembly. The fridge can slide, the cooker cannot.
 

wuntenn

Adventurer
I've just got some cargo track today and will fit that on the outside rear sides to be able to carry various things on, but will attach it with long bolts through some wooden battens on the inside so that the internal fitments are all firmly bolted to something substantial. The cargo track will basically act as a large load spreader for anything fastened to the inside (and of course it works 'the other way' too).
 

krl81

Adventurer
Great progress!!
I have been away on a motor event and after that I've been knocked out with a flu. So I got online today to see what I've missed on the subbed threads on ExPo these last ten days and I see even though close to nothing has happend to my Jimny you have been working and done a good job as well. :)
 
Last edited:

wuntenn

Adventurer
Thanks krl81 - trying to get some major bits done so I can get it out of the shed and have the fabric sides made up.

Arjan - those Webasto cookers are (supposedly) brilliant - I'd have one, but only if they were 1/10th of the price! They make a lot of sense though - only one fuel to have to carry, and by all accounts a very efficient device. Lucky you!
 

Forum statistics

Threads
186,712
Messages
2,889,219
Members
226,872
Latest member
Supreet.dhaliwal
Top