Well I managed to get into the welders today at 7.30 am but only for a couple of hours as Stevie the welder was going to a child's 1st birthday party, but we got back in later in the afternoon for an hour.
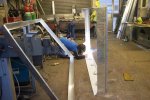
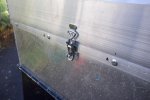
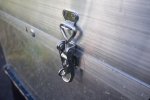
Got the brackets tacked on that fix the lower section of the new roof to the existing roof. Bit concerned about the heat warping the alloy but although the weld locations are slightly visible from the outside they're not unduly noticeable and I may fix a pair of long swing-out brackets to support an awning on there anyway, at least on one side, which will conceal any slight imperfections. I could have bolted on the brackets through the face but I'm trying to make the least number of holes in the new roof as possible to minimize water ingress. It is a Land Rover after all.............
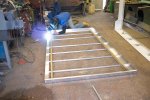
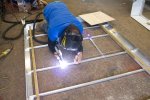
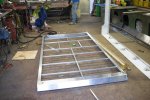
Then the box section bracing for the lifting portion of the roof was laid out. This is where the pair of wooden 'rods' I'd prepared previously (with the spacing for the box section marked out and slots for box pieces cut out) proved their worth. It was quick and easy to align and tack the individual cross-pieces, as they were held rigid and in precisely in the correct location by the wooden rods, which also helped to prevent any (rotational) twisting out of alignment. It made the welders job a lot easier, so whilst Stevie was tacking on I was able to get final and accurate sizes for the shorter box section pieces running long ways, and quickly cut them on the chopsaw. With everything fitting well, I brought in the roof hatch and we used that to align the final two short sections to ensure the fit was perfect - the hatch has very tight tolerances for fit because of the quite tight corner curves, only a couple of mm or so, so working to the dead size of the hatch was ideal.
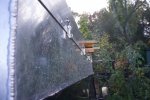
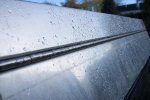
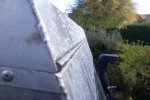
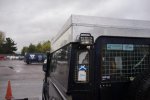
Then off to the party! And later on finally we got it all done and lifted it back onto the Land Rover roof, where the lower section (which had looked a mile off on the workshop floor) was forced back into shape. Whilst it was on the floor it looked terrible, the upper section's fit seemed really bad, but this improved when it was put back onto the vehicle. It was obvious that there has been a slight bit of warping (outwards) in the centre of the upper section - you can see it in the photo taken outside (yes its still raining, well almost snowing in fact). I reckon I'll need to get a couple of blocks of wood and stilson wrench onto it and 'tweak' it a bit to straighten it out. Have a few options to remedy this, just have to see which is best.
Next job is to 'tweak' the lifting section with the hinge attached properly, to get it as 'square' with the lower section as possible, and then drill and loosely fasten the alloy sheet for the roof. By doing that I'll have holes pre-drilled for fitting the pop-rivets when I glue the sheet down and the panel will take the 'proper' alignment (all things going to plan!) when I'm working with it off the van and on the ground.


Got the brackets tacked on that fix the lower section of the new roof to the existing roof. Bit concerned about the heat warping the alloy but although the weld locations are slightly visible from the outside they're not unduly noticeable and I may fix a pair of long swing-out brackets to support an awning on there anyway, at least on one side, which will conceal any slight imperfections. I could have bolted on the brackets through the face but I'm trying to make the least number of holes in the new roof as possible to minimize water ingress. It is a Land Rover after all.............

Then the box section bracing for the lifting portion of the roof was laid out. This is where the pair of wooden 'rods' I'd prepared previously (with the spacing for the box section marked out and slots for box pieces cut out) proved their worth. It was quick and easy to align and tack the individual cross-pieces, as they were held rigid and in precisely in the correct location by the wooden rods, which also helped to prevent any (rotational) twisting out of alignment. It made the welders job a lot easier, so whilst Stevie was tacking on I was able to get final and accurate sizes for the shorter box section pieces running long ways, and quickly cut them on the chopsaw. With everything fitting well, I brought in the roof hatch and we used that to align the final two short sections to ensure the fit was perfect - the hatch has very tight tolerances for fit because of the quite tight corner curves, only a couple of mm or so, so working to the dead size of the hatch was ideal.


Then off to the party! And later on finally we got it all done and lifted it back onto the Land Rover roof, where the lower section (which had looked a mile off on the workshop floor) was forced back into shape. Whilst it was on the floor it looked terrible, the upper section's fit seemed really bad, but this improved when it was put back onto the vehicle. It was obvious that there has been a slight bit of warping (outwards) in the centre of the upper section - you can see it in the photo taken outside (yes its still raining, well almost snowing in fact). I reckon I'll need to get a couple of blocks of wood and stilson wrench onto it and 'tweak' it a bit to straighten it out. Have a few options to remedy this, just have to see which is best.

Next job is to 'tweak' the lifting section with the hinge attached properly, to get it as 'square' with the lower section as possible, and then drill and loosely fasten the alloy sheet for the roof. By doing that I'll have holes pre-drilled for fitting the pop-rivets when I glue the sheet down and the panel will take the 'proper' alignment (all things going to plan!) when I'm working with it off the van and on the ground.

Last edited:

