Making a ifting roof on a 110

wuntenn

Adventurer
Bit of a hiatus recently, sorry folks.

When you start doing something like this you accept that there will be interruptions. All sorts of stuff will intrude and keep the balloon on the ground. I accepted that reality, happy to work around those little problems. However did not expect what happened this week. It's a long story, but it has resulted in my partner ending up on a ventilator in the Intensive Care Unit of our local hospital with a degree of brain damage. To save me load of writing you can read some of whats gone on here. And here, and also here. (I'm finding that writing about this is useful for me.)

But I need to keep my head in the real world, think ahead and plan for the time that all will be well and we can go off and use the new lifting roof.........so the work continues, and I arranged to go to the welders on Saturday for an hour to get the re-aligned roof section rewelded where I'd cut the joints. It worked just fine. Bit of a bow in the alloy (upwards at each end) where the heat has slightly dipped it but nothing that wont pull out when clipped down. And I still have an inverted L section to bolt longitudinally on each side to act as the support for the roof bars. This will be substantial alloy section and should help to 'flatten' the roof and also provide considerable rigidity. The lifting roof section is so light I can lift it on and off on my own, move it about and generally manipulate it with ease (despite a bad back!).

lid1.jpg
Cut joint ready for reweld. This is the front end of the lifting portion.
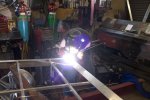
lid2.jpg
Stevie the welder does the job on Saturday.
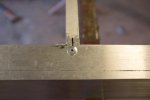
lid3.jpg
Realigned box bracing attached with pop rivet so the roof stays correctly aligned until welded. Drilled them out later. You can see where the old weld was and get an idea of how far out of alignment I managed to get it. Lesson learned! What I should have done was to pop rivet the box sections at each end in the first instance and add the bracing bars across each corner so that it was exactly the shape of the lower section, then when lifted off for welding it would not have 'shifted'.
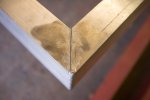
lid4.jpg
Cut joint ready for reweld on the rear section of the lifting bit.

Today I got the grinder out and smoothed off all the top welds ready to put the alloy roof skin on, before going back to the hospital - where there is some real progress, my partner has emerged from induced coma and after they switched off the sedative delivery and raised the temp on the 'chiller' (they dramatically lower body temperature to counteract brain swelling) and she is giving big smiles, eyes working, limb movement, comprehension and attempts at speech (but because of the tracheostomy for the ventilator she cant talk). But it is all happening in slow motion for her. But we did not expect this a few days ago. We have been told by doctors to expect ups and downs, they are concerned about fits. But at the moment although starting to 'emerge' she is very very tired - experiencing lots of sadness and elation and confusion as she struggles to understand what happened. One moment she was walking along, and she woke up in ICU three days later connected to a vast array of machinery. Strange days.

When you've parked up your adventure wagon tonight, here's what I suggest. Hug your partner, and tell them you love them. Then go out and plan your next excursion together. And do it. Just go and do it.
 
Last edited:

paulnb57

Observer
Best wishes to you both, hopefully you will both come out of this OK. We are just dealing with my partners Breast Cancer aftermath, an out of the blue diagnosis, following a scheduled scan, that changes your life in an instant.
I feel your pain and anxiety, been there.......

Keep busy and focussed!

Paul
 

ersatzknarf

lost, but making time
Hello John,
Very sorry to hear about what happened, but glad to know that there were people to help right then and there.
Prayers and good thoughts for you both.
 

AndrewClarke

Adventurer
Hi. I'm one of those strangers you wrote about, but I'm hoping and praying that things work out well and quickly for Melanie. It sounds like we're about the same age, with kids the same age, so it hit home for me how quickly things can change from what's expected.
 

wuntenn

Adventurer
Thanks lads, appreciate your thoughts. She's awake and smiling, trying to speak, moving all the bits that need to move. Slow though. Last night forecast was snow. I've got a potential swimming pool sitting on the 110 roof - the whole lower frame, plus the lifting lid on top, BUT....no top alloy sheet to seal it. Aargh!

SO last night between hospital visits as the first snow shower came over the mountains I made a mad dash outside and wheeched the sheet onto the roof, stuck a few battens across and a set of tiedowns. Just in case.

Its white this morning! I had visions of it filling with snow and freezing inside and getting heavier and heavier so I'd be lurching about like some road-going Titanic but carrying my own iceberg.

But, crisis averted for the time being! Phew.
 

wuntenn

Adventurer
Thank Arjan. Things are improving slowly, still no idea what caused it but she makes good progress daily. Going to be a long road to recovery.

But I decided to press on and today was able to get the top roof sheet fixed on. I had been offered a neighbour's garage but the weather was fair so I decided to go for it on the drive again, which saved me a load of hassle shifting it all across the road, and carting all the tools over too.

Started by drying it all off - lots of condensation everywhere, but a good soft towel and blast from the mapp gas soon had it dry.

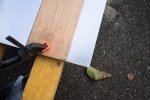
stick1.jpg

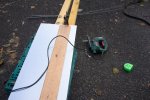
stick2.jpg

I then started to cut some packing pieces to fill the difference between the top of the box sections alloy and the outer rim, 3mm caused by running the box under the rim alloy. I then decided this was a waste of time and would add a considerable hassle factor I could not be bothered with so instead decided to just glue and rivet all around the edge.

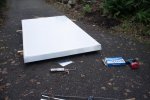
stick3.jpg

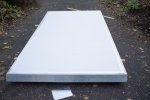
stick4.jpg

So I laid the sheet onto the frame, got it as a accurately aligned as a I could and drilled a couple of holes in two corners and stuck a rivet in to hold it secure and then marked it up and worked out distances between rivets to keep it neat. Then drilled all the holes. The top sheet has a plastic protective sheet on it so I cut a narrow piece of the edge of the sheet only, to retain the covering over the majority of it so when I get round to etch-priming it I can pull it off and have minimal cleaning to do.

stick5.jpg


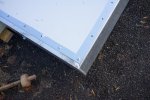
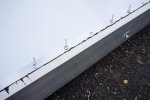
Once the holes were all drilled I brushed off all the loose shavings and put masking tape all along the edge of the top sheet, stuck to the perimeter frame. The tape will give me an accurate line within which to stick the sealant, and when the sheet goes down on the sticky stuff any residue pressed out will be caught on the tape and then easily removed so I don't mess up the alloy and have to spend ages cleaning it.

Drilled all the holes and then pulled the sheet off to clean all the burrs off the back and give both it and the frame it one final clean, dry and heat with the mapp gas torch.

Then it was on with the sealant (a PU flexy adhesive sealant) and a final blow with the mapp before the top sheet was lifted into place and dropped down using the masking tape as a guide, then pulling it into position with a rivet in a hole in one corner and then getting one in the other three. I had a neighbour help with this bit as I didn't want to make a pigs ear of it and have mastic all over the place, or drop it and bash the corner.


stick6.jpg


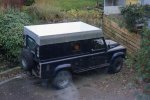
My neighbour shoved rivets in all the holes and I went round behind him with the riveter and whacked them in. Three hours and it was done and lifted back onto the roof. I'm not entirely sure if I need to put 3mm packing pieces between the box sections and the underside of the sheet as I can stick the rigid structural insulation to the back of the sheet and that will keep it from lifting and rattling and will save me putting more rivets across the width. I may even just glue a 3mm packer in from below if I need it. I dont want to have a 'dish' on the roof that will gather water and be all slimy and horrible.

stick7.jpg

stick8.jpg

stick9.jpg

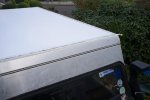
Tomorrow when the sealant has cured I'll pull the masking tape off and will hopefully be left with a clean edge.
 
Last edited:

buff

Observer
Sorry to read about your partner, wishing them a speedy recovery. Roof is looking great !!!
 

UK4X4

Expedition Leader
Sorry to hear about your wife, but glad to hear she's showing signs of recovery !

The roofs cool too If your worried about pooling of water if you can get some UPVC window wedge's you should be able to tap them into place

Where are you in the frozen North - we just got transfered to Aberdeen !
 

wuntenn

Adventurer
UK4x4 - Just a few miles east of Inverness on the A96 (towards Aberdeeen)!

And thanks for the good wishes (& Buff too).

I figured if I was going to throw in the towel whilst my partner was in a coma, and she came to, she'd be well hacked off that she'd created a problem! And if she did come to she'd be delighted to see the progress!

She has some brain damage (hypoxic) and rehab will be a long process On the positive side there is no sign of a heart attack nor any aneurysm or clot so no massive localized brain injury, so doctors are baffled. Had the people who found her not acted so quickly - and we're talking seconds, and taken the action they did, the doctors have been blunt with us that she'd either be dead or massively brain damaged. Two people's actions saved her life. Sobering.
 

94Discovery

Adventurer
I have a small concern about the rivets i hope you chose the closed ends because they will leak water inside i had this problem this sumer whilst tring to put a sheet metal to cover my sunroof hole .
Thank Arjan. Things are improving slowly, still no idea what caused it but she makes good progress daily. Going to be a long road to recovery.

But I decided to press on and today was able to get the top roof sheet fixed on. I had been offered a neighbour's garage but the weather was fair so I decided to go for it on the drive again, which saved me a load of hassle shifting it all across the road, and carting all the tools over too.

Started by drying it all off - lots of condensation everywhere, but a good soft towel and blast from the mapp gas soon had it dry.

View attachment 197823

View attachment 197824

I then started to cut some packing pieces to fill the difference between the top of the box sections alloy and the outer rim, 3mm caused by running the box under the rim alloy. I then decided this was a waste of time and would add a considerable hassle factor I could not be bothered with so instead decided to just glue and rivet all around the edge.

View attachment 197825

View attachment 197826

So I laid the sheet onto the frame, got it as a accurately aligned as a I could and drilled a couple of holes in two corners and stuck a rivet in to hold it secure and then marked it up and worked out distances between rivets to keep it neat. Then drilled all the holes. The top sheet has a plastic protective sheet on it so I cut a narrow piece of the edge of the sheet only, to retain the covering over the majority of it so when I get round to etch-priming it I can pull it off and have minimal cleaning to do.

View attachment 197827


Once the holes were all drilled I brushed off all the loose shavings and put masking tape all along the edge of the top sheet, stuck to the perimeter frame. The tape will give me an accurate line within which to stick the sealant, and when the sheet goes down on the sticky stuff any residue pressed out will be caught on the tape and then easily removed so I don't mess up the alloy and have to spend ages cleaning it.

Drilled all the holes and then pulled the sheet off to clean all the burrs off the back and give both it and the frame it one final clean, dry and heat with the mapp gas torch.

Then it was on with the sealant (a PU flexy adhesive sealant) and a final blow with the mapp before the top sheet was lifted into place and dropped down using the masking tape as a guide, then pulling it into position with a rivet in a hole in one corner and then getting one in the other three. I had a neighbour help with this bit as I didn't want to make a pigs ear of it and have mastic all over the place, or drop it and bash the corner.


View attachment 197828


My neighbour shoved rivets in all the holes and I went round behind him with the riveter and whacked them in. Three hours and it was done and lifted back onto the roof. I'm not entirely sure if I need to put 3mm packing pieces between the box sections and the underside of the sheet as I can stick the rigid structural insulation to the back of the sheet and that will keep it from lifting and rattling and will save me putting more rivets across the width. I may even just glue a 3mm packer in from below if I need it. I dont want to have a 'dish' on the roof that will gather water and be all slimy and horrible.

View attachment 197831

View attachment 197832

View attachment 197833

Tomorrow when the sealant has cured I'll pull the masking tape off and will hopefully be left with a clean edge.
 

wuntenn

Adventurer
Thanks 94Disco - you know to be honest I have no idea. I'll have a look and see, but I've done what I always do with pop rivets which is push overpaintable mastic down each hole with my finger and then a rub with a file when dry before priming.
 

wuntenn

Adventurer
Thanks for that. Never seen them before - I live and learn! It does make sense. Hmm. May change them. Last thing I want is damp! Wont be a huge job as the backs of them are all accessible at the moment so can be whacked off with the grinder and leave no marks on the top.
 

Forum statistics

Threads
188,388
Messages
2,904,041
Members
230,274
Latest member
mbauerus1
Top
­