You are using an out of date browser. It may not display this or other websites correctly.
You should upgrade or use an alternative browser.
You should upgrade or use an alternative browser.
Making a ifting roof on a 110
- Thread starter wuntenn
- Start date
Hi Red - I got some like that from the company who supplied my bulk order of foam (the actual 'converters' who make the stuff) and their spray glue lasted all of one summer before it failed with the heat inside a dark blue (Oslo Blue) Defender. Several people have advised there are sprays that work but I've tried two or three and not been successful despite following the instructions. What brand do you suggest?
I've got a new spray to try so I'll test that anyway and see what happens, but am always interested to hear others suggestions.
I've got a new spray to try so I'll test that anyway and see what happens, but am always interested to hear others suggestions.
buff
Observer
http://www.westcountrycampervans.co.uk/online-store/ I used these guy's, just because they were local to me and not to bad on prices. The glue they supplied has so far held up on the roof insulation. But i did do it in warm weather which help's i think.
Been a bit mild so a good chance to get some more stuff done. I put sealant all around the joint of the roof sheet, inside and out, and the rivets top and bottom too. This is the PU overpaintable sealant which should not toss the paint off like silicone does.

So today I cut the insulation to fit the roof sections. The idea is to fit them and number each one, then take them out, put a 3mm packer of foam in behind each of the 19mm box section subframe 'ribs' that supports the roof sheet, and then plaster all around the box/roof sheet joints with adhesive sealant. This should stop the roof sheet from popping up (I'm trying to avoid putting more rivets in anywhere other than the edges).
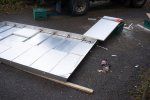
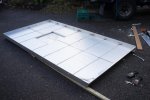
Once the adhesive is set I'll put an X of adhesive on each insulation panel and gently push it into place so it 'grabs' the roof sheet. Then shove more adhesive around the edges of the insulation panel to bond them to the 19mm box. Once the ply goes on over the top it should be pretty rigid.
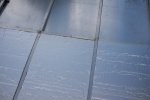
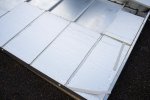
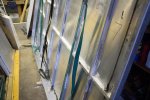
In order to hold the roof sheet against the 19mm box underneath I wrapped several ratchet straps around the roof and on the 'outside' which you cant see in the picture below I shoved a couple of pieces of insulation under the straps to 'push' the roof sheet tight against the subframe to hold it until the glue sets.
Hopefully tomorrow the glue will have set and I can take off the straps, and stick the insulation in.

So today I cut the insulation to fit the roof sections. The idea is to fit them and number each one, then take them out, put a 3mm packer of foam in behind each of the 19mm box section subframe 'ribs' that supports the roof sheet, and then plaster all around the box/roof sheet joints with adhesive sealant. This should stop the roof sheet from popping up (I'm trying to avoid putting more rivets in anywhere other than the edges).


Once the adhesive is set I'll put an X of adhesive on each insulation panel and gently push it into place so it 'grabs' the roof sheet. Then shove more adhesive around the edges of the insulation panel to bond them to the 19mm box. Once the ply goes on over the top it should be pretty rigid.


In order to hold the roof sheet against the 19mm box underneath I wrapped several ratchet straps around the roof and on the 'outside' which you cant see in the picture below I shoved a couple of pieces of insulation under the straps to 'push' the roof sheet tight against the subframe to hold it until the glue sets.

Hopefully tomorrow the glue will have set and I can take off the straps, and stick the insulation in.
ersatzknarf
lost, but making time
Neat stuff ! Good progress 
Cheers lads. Glacial progress when you've no proper workshop. Our garage is stuffed full, plus my motorbike, so the roof can only fit vertically!
Aye hoping to do the lifting bit white, and the lower fixed section Oslo Blue like the rest of the van. I've got some Upol Acid 8 Etch Primer to fire onto it, which I am not looking forward to using. Seems there are two likely outcomes to such DIY forays - death from noxious fumes OR a mess. I'm hoping for some middle ground!
As for shows - no idea! Getting it finished seems a long way off......... the list of other jobs is a long one:
Remove lower section of new roof and clean gutters, heat and apply mastic and sit lower section back in, use lifting top as template and bolt lower section through existing roof. Chuck in a load of builders foam to insulate, seal, and hold rigid.
Estimate weight of roof and order and fit gas struts.
Get fabric sides measured and made up.
Cut roof and fit roof hatch.
Fit wiring for ceiling lights.
Make bed platform - one part fixed and structural, other removable (stacking), from 2 sheets of 1/4 ply with 19mm softwood 'ribs' in between and builders foam as a glue/insulator/structural member.
Fit plastic water tanks on either side and small grey water tank.
Build seating combined with bed for small boy, aged 5 (he'll sleep across the width of the van) and this *may* be built so that it nudges into the front cab area (with seats flipped forward) and a curtain across so he can go to bed and we can still have the rear area to flop about in.
Build units to hold sink and cooker.
Fit sink & plumbing
Fit cooker & piping.
Weld up gas bottle holder for outside back door.
Make swing out awning supports from 19mm box.
Make roof rack - 3" x 2" x 1/4 alloy angle bolted through roof with alloy bars across. This will be designed so that the 2" side is slightly rebated so that it covers the rivet heads all along each side.
Trim out finished roof area with some sort of thin fabric.
New timer to fit to Eberspacher heater - to give more flexibility and ability to interrogate for error codes. Need to track down the wiring loom that vanishes into the bulkhead from the small simple timer I have on the Eber at present.
And a shedload more!
The hassle bit is the having to do certain jobs according to the weather. It was frosty/snowing recently and well below the temp that the sealants will comfortably work, and the low temp causes massive condensation anyway so stuff wont stick, so I'd not much opportunity to do a great deal. This week it is 12-15 deg so much easier hence the mad dash to stick on the insulation because that will prevent any condensation when it gets colder and it means I can get some other stuff done.
Last edited:
Still mild so work continues. Yesterday I stuck the insulation into place on the lifting roof section. Put adhesive all over the back of the insulation so it stuck to the roof alloy, and then silicone mastic into the edges where it abuts the 19mm box section that forms the roof subframe so it binds the lot together.

However today was 'messy'. The roof overall is 8 inches wider than an 8 foot x 4 foot sheet of ply, so to save me trying to joint some pieces together I'm fitting a length of red wood, 4 inches wide by 3/4 inch thick on either side, and across the rear. This not only allows the 8x4 ply to fit nicely across the width, it also gives a solid fixing point for the top of the fabric sides which can be screwed tightly onto it, and as it's pretty robust it will give a solid fixing point for the top of the gas strut so that when the roof is being pushed up by the struts the weight of the whole roof is not all on that one fixing point (and the box section underneath) but spread evenly along the whole length of the roof side with the red wood. I'm going to rebate the red wood 6mm to allow the ply joint to be supported by the red wood.
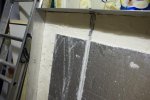
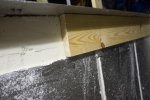
The messy bit is cutting the insulation so that 3/4 inch red wood sits down flush against the box section. The box section is 19mm and the insulation is 25mm so theres a 6mm difference. I did think about cutting the 6mm out of the insulation before I stuck it in but I figured it would weaken it and it might snap when I pushed it in. So this is where the oscillating tool comes into its own because you can easily slice through the foam with it.
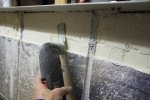
Before I started I used a Stanley knife with the blade stuck out 6mm and cross-hatched cut the insulation so that when I pushed the oscillating tool through it the pieces just fell out. Still, its very very messy and tiny foam particles go everywhere - I used a face mask, and a big tip - don't wear a fleece as it attracts the particles like a magnet.

However today was 'messy'. The roof overall is 8 inches wider than an 8 foot x 4 foot sheet of ply, so to save me trying to joint some pieces together I'm fitting a length of red wood, 4 inches wide by 3/4 inch thick on either side, and across the rear. This not only allows the 8x4 ply to fit nicely across the width, it also gives a solid fixing point for the top of the fabric sides which can be screwed tightly onto it, and as it's pretty robust it will give a solid fixing point for the top of the gas strut so that when the roof is being pushed up by the struts the weight of the whole roof is not all on that one fixing point (and the box section underneath) but spread evenly along the whole length of the roof side with the red wood. I'm going to rebate the red wood 6mm to allow the ply joint to be supported by the red wood.


The messy bit is cutting the insulation so that 3/4 inch red wood sits down flush against the box section. The box section is 19mm and the insulation is 25mm so theres a 6mm difference. I did think about cutting the 6mm out of the insulation before I stuck it in but I figured it would weaken it and it might snap when I pushed it in. So this is where the oscillating tool comes into its own because you can easily slice through the foam with it.

Before I started I used a Stanley knife with the blade stuck out 6mm and cross-hatched cut the insulation so that when I pushed the oscillating tool through it the pieces just fell out. Still, its very very messy and tiny foam particles go everywhere - I used a face mask, and a big tip - don't wear a fleece as it attracts the particles like a magnet.
Last edited:
piratexpress1369a
Explorer
you need a vacuum hose taped up to the cutter as you go lol
Another dry morning (sleet and hailstones forecast for the pm though) so I thought I'd rebate the pine that runs along the side with a groove to accept the ply.
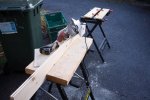
Doing the short (end) piece first.

Worked ok so onto the longer pieces for the sides.
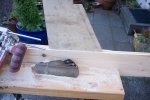
Ply fits perfectly in the groove.
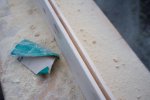
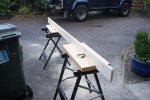
Plunging router is the thing for this. A couple of workmates to hold the wood solid and a quick rattle through each piece and job done. Fitted beautifully.
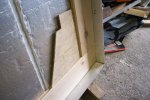
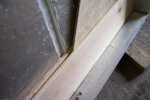
A quick slit in the insulation and the wires for the roof lights were in and taped over too. Tomorrow I may get the pine screwed on and ply sandwiched in between.
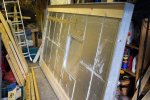
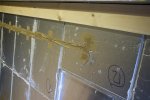
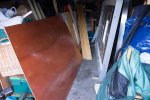
Last thing was to paint the whole lot with varnish to seal it all.

Doing the short (end) piece first.

Worked ok so onto the longer pieces for the sides.

Ply fits perfectly in the groove.


Plunging router is the thing for this. A couple of workmates to hold the wood solid and a quick rattle through each piece and job done. Fitted beautifully.


A quick slit in the insulation and the wires for the roof lights were in and taped over too. Tomorrow I may get the pine screwed on and ply sandwiched in between.


Last thing was to paint the whole lot with varnish to seal it all.
Scrapdaddy
Adventurer
Very nice work. I'd like to make something like yours for my FJ55.
Good Job!
Good Job!
Similar threads
- Replies
- 0
- Views
- 422
- Replies
- 1
- Views
- 360
- Replies
- 2
- Views
- 590
