Wee tip - watch out for katabatic winds round Inchkenneth - it can batter down off the Gribun cliffs and slam into the sea around there really viciously. I had a narrow escape there on my own in my kayak doing some work, and had a rude awakening as the sea erupted, water spouts flying about and the wind screaming. I've seen it do it a few times, scary!
You are using an out of date browser. It may not display this or other websites correctly.
You should upgrade or use an alternative browser.
You should upgrade or use an alternative browser.
Making a ifting roof on a 110
- Thread starter wuntenn
- Start date
For various reasons the lifting roof has not seen much use since last autumn - I was wrestling with time to get more fitments and mechanical things done that badly needed doing.
My fuel pump was leaking so I bought a s/h one and had it fully overhauled by the local Bosch agent before christmas, not cheap as it needed a new hydraulic head. It should have been straightforward swap for my old leaking one but it is proving to be a pain in the butt. I got the local 4x4 garage to do the swap and change the timing belt as well as it was mid-winter and having it all apart and off the road whilst I played with it on the drive was not an option. It wasn't running right after the overhaul and the garage & Bosch agent were perplexed. I got the Bosch guys to look at it again and they decided to tweak the fuel screw (bearing in mind this is all under warranty work now) which improved it but still not great.
Long story short I realized there was no apparent fuel increase under boost so pulled the pump top off myself and found that the boost pin (which moves up and down in response to the turbo pressure) was jammed solid! Pump guys had a devil of a job getting it out as the fuel pin (which comes across to butt against the boost pin) was jammed in the bore and needed a rod welded onto it to get it out. They got it back on the road with bits from another pump and then I noticed it had a leak, so took it back to Bosch and they fixed the leak but again performance has taken a hit, this time too much smoke and an initial odd surge in rpm a few days after I collected it from them, which meant I had to wind back the idle speed. It might be going back in to Bosch once again although it is usable and pulls nicely, running very very sweetly, but the smoke under heavy load is excessive.
At the same time as all of this I had a head gasket fail so replaced the head myself with a Turner Engineering one, adding various new gauges for turbo boost, exhaust gas temp etc at the same time. All this messing about with the engine and pulling off the manifold and downpipe has revealed a more badly corroded exhaust than I thought which I had to replace, and the air intake & intercooler piping has had a good inspection too when they were off and they all looked pretty tired as they've had 15+ years of use so I've ordered new silicone ones and will replace them next week or so.
Inside I've finally got the inverter wired in and working, also all the wiring for a 240V mains hook-up and RCD protected outlets for both of these - the wiring was incredibly time-consuming to do ensuring its all properly routed and fully sheathed and protected from vibration.
My back door was failing, the skin crumbling although the steel subframe was not too bad, but I decided a whole new door was easier than replacing the skin, and not much dearer, so a few weeks ago I painted up a new one and replaced that too.
And to add to the fun there's been a bad adhesion problem with the Sikaflex and the cellulose paint and etch primer I'd used on the new roof. Basically the Sikaflex has eaten through the paint and primer right down to the alloy! So I've had to scrape that off the various joints and reseal.
Anyway it's now usable so my wee lad and I went off for a week for a boys own adventure to the north coast. Weather has been a bit iffy - we've had snow right into June (on the hills), and its been distinctly cool. Anyway we'd a great time, and the trip revealed a few weaknesses to my design and many many strengths so I thought I'd give you an overview.
Negatives first:
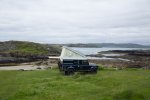
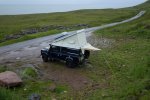
1) The rear awning I designed and built has had as much of a slope on it as is possible within the small space between the back door top and the lifting roof joint - basically the more of a 'drop' you put on the swing-out awning arms, the more space you need to store it when its folded back and not deployed (think of the triangle shape needed and you'll understand). One solution was to make slots in the brackets that hold it to the van so that the bolts holding the awning 'triangles' could be slid to and fro to alter the angle when its deployed, but I decided against that (I may change my mind on this). Anyway it really rained when we were away, a lot of water, and with the two arms out and the fabric taut, it filled with rain. The slope is definitely not steep enough. There was an easy solution - I had an adjustable awning pole which I used on one side. Simply folding one of the awning support arms back in out of the way and using the awning pole and a few guy lines to give a good water-shedding slope. It worked perfectly. So basically I have the two arms out for sun shade and light showers, but for heavy showers I can pull back an arm and drop a side on the adjustable pole and shed water away from the door. (see pictures below).
Arms out and level, good for light rain and sun.
One side dropped on a pole for heavy rain and wind.
2) The interior loops used to pull the fabric inside when lowering the roof. These are stitched through the fabric sides and onto them I attach thin elastic cord with hooks on the end when I drop the roof, then remove them. The loops were always going to be a potential leak point however I had seam-sealed them and made sure they were watertight. However the continual use, and temporary tension applied by the elastic cords inside when I drop the roof, has revealed that the seam-sealer is not flexible. We'd a few really wet nights and the first one had the interior fabric loops getting pretty damp as the water was wicking through on the stitching. I solved it temporarily during the night with a strip of j-cloth on the cord loop inside acting as a 'wick' into a cup, which in the event wasn't really needed as it didn't get to the dripping stage. But next morning the sun came out and it was very windy so it dried quickly and I was able to slather some clear silicone on the stitching all round. Just as well I did as it got even wetter the next day and we'd a very rough night but this time it stayed absolutely dry. I'll put some waterproof fabric patches over the outside exposed stitching to properly seal them. In retrospect I should perhaps have simply stuck some loops on the inside and not stitched through at all.

Stitch-through sewing (and a dragonfly we picked up)
Now the positives:
Happy to say - many!
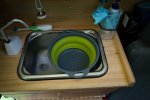
1) The interior layout work REALLY well. The sink at rear, with cooker opposite is a great combination for food prep and cooking. The lid of the slide-out fridge gives an additional work surface too. The really useful things are the ply 'lids' I've added to strengthen the tops of the plastic food and plate storage boxes (which makes them usable as seats outside the van or inside) but which fit the top of the sink and can be used as additional work surface.
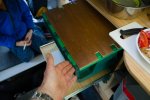
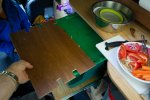

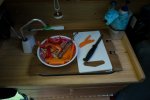
Things like a folding colander that sits across the sink is a huge boon for easily draining rice and pasta, minimizing spill and scald risks. And the small slide-out table with extra, larger, top which can be added if needed (which is normally the detachable front of a cupboard) is a great asset, making a quick and easy work, eat, read, laptop surface.
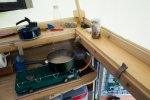
But the real winner is the shelf around the roof. When I built it I retained part of the original roof, and used the old 'curve' coming up out of the gutter to fasten the new roof to. This left a 'lip' inside all round which I put 6 inch wide pine on, thus making a wide shelf down both sides and across the back. This has turned out to be even more useful than I imagined. It can have cups and bottles put on it, small items like cameras and binoculars, bottles and tins and stuff thats required when cooking such as bits of veg or spice and sauce bottles. It really has made the rear area incredibly versatile and usable, and keeps spillable things well out of the way of main work areas and elbows, and really reduces the risks of spillage as well as making life easier.
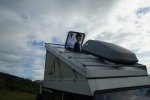
Roof hatch: brilliant investment (yacht deck hatch) - enables huge ventilation which helps prevent condensation from the fully waterproof fabric sides, keeps upstairs part cool and allows great sky views in bed or sitting up looking with binoculars at the view. Wee lad loves standing up on the bed platform and looking out!
Continued below in another post - kind of a small trip review:
My fuel pump was leaking so I bought a s/h one and had it fully overhauled by the local Bosch agent before christmas, not cheap as it needed a new hydraulic head. It should have been straightforward swap for my old leaking one but it is proving to be a pain in the butt. I got the local 4x4 garage to do the swap and change the timing belt as well as it was mid-winter and having it all apart and off the road whilst I played with it on the drive was not an option. It wasn't running right after the overhaul and the garage & Bosch agent were perplexed. I got the Bosch guys to look at it again and they decided to tweak the fuel screw (bearing in mind this is all under warranty work now) which improved it but still not great.
Long story short I realized there was no apparent fuel increase under boost so pulled the pump top off myself and found that the boost pin (which moves up and down in response to the turbo pressure) was jammed solid! Pump guys had a devil of a job getting it out as the fuel pin (which comes across to butt against the boost pin) was jammed in the bore and needed a rod welded onto it to get it out. They got it back on the road with bits from another pump and then I noticed it had a leak, so took it back to Bosch and they fixed the leak but again performance has taken a hit, this time too much smoke and an initial odd surge in rpm a few days after I collected it from them, which meant I had to wind back the idle speed. It might be going back in to Bosch once again although it is usable and pulls nicely, running very very sweetly, but the smoke under heavy load is excessive.
At the same time as all of this I had a head gasket fail so replaced the head myself with a Turner Engineering one, adding various new gauges for turbo boost, exhaust gas temp etc at the same time. All this messing about with the engine and pulling off the manifold and downpipe has revealed a more badly corroded exhaust than I thought which I had to replace, and the air intake & intercooler piping has had a good inspection too when they were off and they all looked pretty tired as they've had 15+ years of use so I've ordered new silicone ones and will replace them next week or so.
Inside I've finally got the inverter wired in and working, also all the wiring for a 240V mains hook-up and RCD protected outlets for both of these - the wiring was incredibly time-consuming to do ensuring its all properly routed and fully sheathed and protected from vibration.
My back door was failing, the skin crumbling although the steel subframe was not too bad, but I decided a whole new door was easier than replacing the skin, and not much dearer, so a few weeks ago I painted up a new one and replaced that too.
And to add to the fun there's been a bad adhesion problem with the Sikaflex and the cellulose paint and etch primer I'd used on the new roof. Basically the Sikaflex has eaten through the paint and primer right down to the alloy! So I've had to scrape that off the various joints and reseal.
Anyway it's now usable so my wee lad and I went off for a week for a boys own adventure to the north coast. Weather has been a bit iffy - we've had snow right into June (on the hills), and its been distinctly cool. Anyway we'd a great time, and the trip revealed a few weaknesses to my design and many many strengths so I thought I'd give you an overview.
Negatives first:
1) The rear awning I designed and built has had as much of a slope on it as is possible within the small space between the back door top and the lifting roof joint - basically the more of a 'drop' you put on the swing-out awning arms, the more space you need to store it when its folded back and not deployed (think of the triangle shape needed and you'll understand). One solution was to make slots in the brackets that hold it to the van so that the bolts holding the awning 'triangles' could be slid to and fro to alter the angle when its deployed, but I decided against that (I may change my mind on this). Anyway it really rained when we were away, a lot of water, and with the two arms out and the fabric taut, it filled with rain. The slope is definitely not steep enough. There was an easy solution - I had an adjustable awning pole which I used on one side. Simply folding one of the awning support arms back in out of the way and using the awning pole and a few guy lines to give a good water-shedding slope. It worked perfectly. So basically I have the two arms out for sun shade and light showers, but for heavy showers I can pull back an arm and drop a side on the adjustable pole and shed water away from the door. (see pictures below).
Arms out and level, good for light rain and sun.

One side dropped on a pole for heavy rain and wind.

2) The interior loops used to pull the fabric inside when lowering the roof. These are stitched through the fabric sides and onto them I attach thin elastic cord with hooks on the end when I drop the roof, then remove them. The loops were always going to be a potential leak point however I had seam-sealed them and made sure they were watertight. However the continual use, and temporary tension applied by the elastic cords inside when I drop the roof, has revealed that the seam-sealer is not flexible. We'd a few really wet nights and the first one had the interior fabric loops getting pretty damp as the water was wicking through on the stitching. I solved it temporarily during the night with a strip of j-cloth on the cord loop inside acting as a 'wick' into a cup, which in the event wasn't really needed as it didn't get to the dripping stage. But next morning the sun came out and it was very windy so it dried quickly and I was able to slather some clear silicone on the stitching all round. Just as well I did as it got even wetter the next day and we'd a very rough night but this time it stayed absolutely dry. I'll put some waterproof fabric patches over the outside exposed stitching to properly seal them. In retrospect I should perhaps have simply stuck some loops on the inside and not stitched through at all.

Stitch-through sewing (and a dragonfly we picked up)
Now the positives:
Happy to say - many!
1) The interior layout work REALLY well. The sink at rear, with cooker opposite is a great combination for food prep and cooking. The lid of the slide-out fridge gives an additional work surface too. The really useful things are the ply 'lids' I've added to strengthen the tops of the plastic food and plate storage boxes (which makes them usable as seats outside the van or inside) but which fit the top of the sink and can be used as additional work surface.


Things like a folding colander that sits across the sink is a huge boon for easily draining rice and pasta, minimizing spill and scald risks. And the small slide-out table with extra, larger, top which can be added if needed (which is normally the detachable front of a cupboard) is a great asset, making a quick and easy work, eat, read, laptop surface.


But the real winner is the shelf around the roof. When I built it I retained part of the original roof, and used the old 'curve' coming up out of the gutter to fasten the new roof to. This left a 'lip' inside all round which I put 6 inch wide pine on, thus making a wide shelf down both sides and across the back. This has turned out to be even more useful than I imagined. It can have cups and bottles put on it, small items like cameras and binoculars, bottles and tins and stuff thats required when cooking such as bits of veg or spice and sauce bottles. It really has made the rear area incredibly versatile and usable, and keeps spillable things well out of the way of main work areas and elbows, and really reduces the risks of spillage as well as making life easier.

Roof hatch: brilliant investment (yacht deck hatch) - enables huge ventilation which helps prevent condensation from the fully waterproof fabric sides, keeps upstairs part cool and allows great sky views in bed or sitting up looking with binoculars at the view. Wee lad loves standing up on the bed platform and looking out!
Continued below in another post - kind of a small trip review:
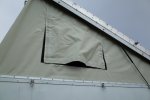
Big side windows with bug nets - indispensable. Bugs were awful in places and being inside, ventilated but safe from them was a godsend. One advantage to the 2 inch wide velcro is that it allows a 'bunch-up' of fabric to create a small vent that's protected from weather, although if VERY windy it can allow little spits of water to blow in and up through the bug net - but nothing serious.
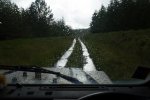
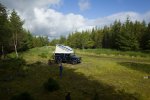
We'd a great week, several days of horrible weather, several more of sunshine, but mostly cold. First couple of nights we'd some shelter on a windy hilltop in a very remote forest with a great drive in:
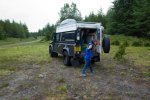
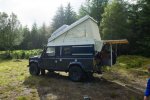
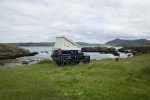
Then several days in a secluded coastal spot with no-one else around and practiced our cairn-building skills:


We'd a great week, several days of horrible weather, several more of sunshine, but mostly cold. First couple of nights we'd some shelter on a windy hilltop in a very remote forest with a great drive in:


Then several days in a secluded coastal spot with no-one else around and practiced our cairn-building skills:


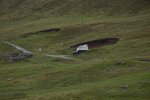
Then out to a gale-lashed point to a high spot where I've often slept with hard-sided vehicles but thought too risky with the more flimsy fabric sides given the weather forecast so came down off the top and stopped in a small roadside quarry that gave some shelter and parked wedge-forwards to the west - which is where the worst weather comes from, and it did that night, but we were warm dry and comfortable.
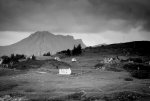
And some odd pictures of things we saw:
Near Tongue on the north coast:



And then down the west coast Durness to Lochinver and on to Gairloch.



So a really good used-in-earnest trip. My guess on the suspension setup with the airlift bags on normal LR springs & shocks (no fancy expensive stuff) and superpro bushes all round, proved ideal, not too hard, good damping off road and only a small amount of roll on corners - which was good considering we'd a full 9 gallons (40ltr) of water, and an extra 9 gallons of diesel in a rear wing tank in addition to the normal 17gallons main tank. Plus enough food for us and the dog, the 45 litre fridge filled to the neck, a load of tools, a serious pile of cameras and other stuff and clothes for winter weather, and an additional awning tent (shop bought thing with heavy steel poles which isn't going to fit without some 'tweaking' (more on that another time when I figure out the plan for it!). Saw two huge MAN and Unimog 4x4 trucks with swiss and german plates both of which were too big for some of the places we could get to. Always a compromise I guess.
One thing to finish - please don't ask me for exact locations - some of the places will be obvious from the photos and near the road, a couple of others are up tracks that may not be obvious - the north-west and north coast is chock full of little corners that one can easily get well away from the main road. Some are spectacular and used occasionally by the more capable off-road camperwagons, but others are certainly less spectacular but still pretty remote and quiet. Looking around as you go will reveal little tracks that you can discretely go up, (or down) onto hilltops or into forests and woodlands well away from the road.
Just dont do any deliberate trashing/winching and ground-wrecking things. I've never been reprimanded for quietly stopping in places, simply doing the sensible stuff - cleaning up and maintaining a tidy camp, packing out trash and following healthy latrine practices - many remote settlements have hill-fed water systems so dont pollute them, and on the coast keeping your ablutions below the tideline ensures its all washed out (bogroll removed first and burned though.) And keeping firepits on the rocky shore rather than on the grass. There are plenty of good spots if you look.
A few sites I've visited and been in all on my own have had their details put online by the careless and over a few years have been trashed and there's ended up with large boulders blocking routes off, fences and padlocked gates going up, or even in some cases a digger brought in to cut the tracks off completely. Although the landscape may look remote it's all owned Estates and managed, with varying degrees of care and vigour. Often asking a crofter or keeper for a spot to pitch up will get you a little tip on a place to go. If you are lucky enough to get such a 'gift' keep it to yourself as it WILL get trashed if made public, and then we all lose out.

And some odd pictures of things we saw:
Near Tongue on the north coast:


And then down the west coast Durness to Lochinver and on to Gairloch.


So a really good used-in-earnest trip. My guess on the suspension setup with the airlift bags on normal LR springs & shocks (no fancy expensive stuff) and superpro bushes all round, proved ideal, not too hard, good damping off road and only a small amount of roll on corners - which was good considering we'd a full 9 gallons (40ltr) of water, and an extra 9 gallons of diesel in a rear wing tank in addition to the normal 17gallons main tank. Plus enough food for us and the dog, the 45 litre fridge filled to the neck, a load of tools, a serious pile of cameras and other stuff and clothes for winter weather, and an additional awning tent (shop bought thing with heavy steel poles which isn't going to fit without some 'tweaking' (more on that another time when I figure out the plan for it!). Saw two huge MAN and Unimog 4x4 trucks with swiss and german plates both of which were too big for some of the places we could get to. Always a compromise I guess.
One thing to finish - please don't ask me for exact locations - some of the places will be obvious from the photos and near the road, a couple of others are up tracks that may not be obvious - the north-west and north coast is chock full of little corners that one can easily get well away from the main road. Some are spectacular and used occasionally by the more capable off-road camperwagons, but others are certainly less spectacular but still pretty remote and quiet. Looking around as you go will reveal little tracks that you can discretely go up, (or down) onto hilltops or into forests and woodlands well away from the road.
Just dont do any deliberate trashing/winching and ground-wrecking things. I've never been reprimanded for quietly stopping in places, simply doing the sensible stuff - cleaning up and maintaining a tidy camp, packing out trash and following healthy latrine practices - many remote settlements have hill-fed water systems so dont pollute them, and on the coast keeping your ablutions below the tideline ensures its all washed out (bogroll removed first and burned though.) And keeping firepits on the rocky shore rather than on the grass. There are plenty of good spots if you look.
A few sites I've visited and been in all on my own have had their details put online by the careless and over a few years have been trashed and there's ended up with large boulders blocking routes off, fences and padlocked gates going up, or even in some cases a digger brought in to cut the tracks off completely. Although the landscape may look remote it's all owned Estates and managed, with varying degrees of care and vigour. Often asking a crofter or keeper for a spot to pitch up will get you a little tip on a place to go. If you are lucky enough to get such a 'gift' keep it to yourself as it WILL get trashed if made public, and then we all lose out.
Attachments
And some interior shots showing the layout being used:
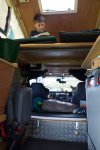
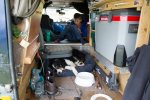
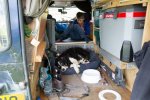
Huge advantage to building the fridge and storage units above the wheel arches is that the pull-outs will go over the dog's head, and also clear the storage boxes, boots and other junk that gathers, so I don't have a pull-out nightmare clearing stuff out of the way to get at things.
Pull-out table that fits between the storage boxes is great too - the boxes can still be pulled out above and below it, and it makes a great work surface for many things.

And finally home-made fold down shelf on back door - great for making sandwiches on, cutting up veg, cooking outside etc. Cant do without it.
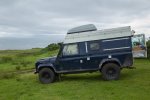
And this last spot from just out of Gairloch where we stopped for lunch the wee lad sheltered from the icy wind whilst I watched what I think was a killer whale breaching waaay waaay off in the distance towards the Isle of Skye. Brief but fleeting, and we were home in under two hours from here.


Huge advantage to building the fridge and storage units above the wheel arches is that the pull-outs will go over the dog's head, and also clear the storage boxes, boots and other junk that gathers, so I don't have a pull-out nightmare clearing stuff out of the way to get at things.
Pull-out table that fits between the storage boxes is great too - the boxes can still be pulled out above and below it, and it makes a great work surface for many things.

And finally home-made fold down shelf on back door - great for making sandwiches on, cutting up veg, cooking outside etc. Cant do without it.

And this last spot from just out of Gairloch where we stopped for lunch the wee lad sheltered from the icy wind whilst I watched what I think was a killer whale breaching waaay waaay off in the distance towards the Isle of Skye. Brief but fleeting, and we were home in under two hours from here.
piratexpress1369a
Explorer
Those are some awesome pictures. .glad you both had a great time
very nice and great scenery. Is the "hole" you are set up in a camping spot?
Are you referring to the 'hole' by the roadside? That's a small muddy cut-out made by the road builders. Not very nice underfoot, but it was sheltered from the wind and the view was stunning.
This was a one-night stop, as we'd arrived late in the evening and the weather was deteriorating quickly, so it was a case of find somewhere sheltered and feed small tired boy and dog!
Fantastic stuff! Glad to see you are putting all that hard work to use.
I understand your point about posting location details. It's a terrible shame for what inconsiderate slobs we humans can be.
Cheers! I'm still working on it, have been over the winter, but we'll get good use out of it this summer.
A cautionary tale!
I did have a little 'episode' when I was away recently. A cautionary tale for anyone replicating my roof.
The roof is reasonably heavy - not ridiculously so, but the rear end of it is well away from the hinge so there's a lot of leverage being exerted, but thanks to the 4 gas struts it's pretty well balanced and manageable. However the gas struts, because of the acute angle they have to operate at in their initial phase (when the roof is in the down position), don't actually exert any 'push' until the roof is about 18 inches up, then they kick in and it rises nicely. And of course it does the same coming down - nice and controlled until that last foot and a bit.
So to open it I stand inside and push upwards with my shoulder against a timber strengthening plate that runs across the rear of the roof, designed for that purpose, and it rises. To close it I stand outside on the back steps and pull down on an internal cord fastened to that same wooden plate and then use the external heavy duty handles, one either side on the back, and lower it gently down. When lowering I've perfected the knack of letting the roof balance just at the point where the gas struts action ceases, and holding it there with one hand, then leaning left and right and checking both sides to make sure that the fabric is pulled well inside and all the clips are well out of the way before I lower it completely. You can see the pine plate in the pic below - it's also the join between the end of an 8' ply sheet and the small piece extra needed to fully line the roof. And the substantial handles internal and external are visible, with a cord to pull down to close it - that's a tatty old bit of climbing rope as a temporary fix - I've got a nice neat strap there now that rolls up and ties out of the way when not needed.
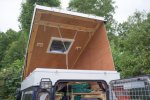
Anyway this time it went wrong.
I'd put a small roof box on with some light but bulky stuff in it, bolted on well forwards on the roof, but it was enough of an upset to the normal balance point for a little gust of wind to cause the roof to come down, and it did. On my left arm. Trapping me rather painfully just above the elbow. I was unable to lift the roof with my other arm because of its weight, and it was excruciatingly painful. However my 7 year old responded to my yelping and leaped into action, following my instructions impeccably and standing in the back and pushing the roof upwards just a little. That wee bit of extra assistance to my own pushing was I all I needed to get the roof up far enough to get my arm out. Had I been alone I might have been in trouble! Lesson learned. I was cut and severely bruised but no lasting damage.
So to remedy this and avoid having the roofbox on, and utilize the big empty space in the driver's side wing which I've always intended using, I fitted a big metal storage box this week.

Pretty simple - whack a great hole out of the side, stick in the metal support arm which bolts to existing holes in the chassis.

Then shove the box in and pop-rivet on.
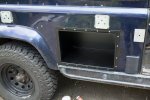
Offer up door and pop-rivet that on too.
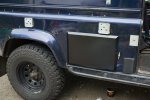
It's a nice neat fit. The box is really well made, all steel, well constructed and neatly welded, and powder coated to finish. (Got from FCX here)
I was going to weld up my own, but I figured that by the time I bought the steel, figured out a gasket solution, and got it rust-proofed, then messed about trying to figure out the shape, I'd still be at it by the autumn! I've saved enough by doing lots myself so its good to spend a wee bit extra on good functional things.
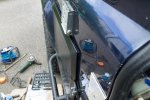
And the good bit is that the alloy that came out of the hole in the van side is the perfect shape and size to bend into a stone-deflector/box guard that will go round the wheel arch end of the box and protect it from the junk tossed at it by the rear wheel.
This is looking at the end of the storage box with the camera resting on top of the rear wheel, with the alloy wrapped around the box and self-tapped on. Should give it a wee bit of protection from small stones and grit that will otherwise over time degrade the powder coating.
I did have a little 'episode' when I was away recently. A cautionary tale for anyone replicating my roof.
The roof is reasonably heavy - not ridiculously so, but the rear end of it is well away from the hinge so there's a lot of leverage being exerted, but thanks to the 4 gas struts it's pretty well balanced and manageable. However the gas struts, because of the acute angle they have to operate at in their initial phase (when the roof is in the down position), don't actually exert any 'push' until the roof is about 18 inches up, then they kick in and it rises nicely. And of course it does the same coming down - nice and controlled until that last foot and a bit.
So to open it I stand inside and push upwards with my shoulder against a timber strengthening plate that runs across the rear of the roof, designed for that purpose, and it rises. To close it I stand outside on the back steps and pull down on an internal cord fastened to that same wooden plate and then use the external heavy duty handles, one either side on the back, and lower it gently down. When lowering I've perfected the knack of letting the roof balance just at the point where the gas struts action ceases, and holding it there with one hand, then leaning left and right and checking both sides to make sure that the fabric is pulled well inside and all the clips are well out of the way before I lower it completely. You can see the pine plate in the pic below - it's also the join between the end of an 8' ply sheet and the small piece extra needed to fully line the roof. And the substantial handles internal and external are visible, with a cord to pull down to close it - that's a tatty old bit of climbing rope as a temporary fix - I've got a nice neat strap there now that rolls up and ties out of the way when not needed.

Anyway this time it went wrong.
I'd put a small roof box on with some light but bulky stuff in it, bolted on well forwards on the roof, but it was enough of an upset to the normal balance point for a little gust of wind to cause the roof to come down, and it did. On my left arm. Trapping me rather painfully just above the elbow. I was unable to lift the roof with my other arm because of its weight, and it was excruciatingly painful. However my 7 year old responded to my yelping and leaped into action, following my instructions impeccably and standing in the back and pushing the roof upwards just a little. That wee bit of extra assistance to my own pushing was I all I needed to get the roof up far enough to get my arm out. Had I been alone I might have been in trouble! Lesson learned. I was cut and severely bruised but no lasting damage.
So to remedy this and avoid having the roofbox on, and utilize the big empty space in the driver's side wing which I've always intended using, I fitted a big metal storage box this week.

Pretty simple - whack a great hole out of the side, stick in the metal support arm which bolts to existing holes in the chassis.

Then shove the box in and pop-rivet on.

Offer up door and pop-rivet that on too.

It's a nice neat fit. The box is really well made, all steel, well constructed and neatly welded, and powder coated to finish. (Got from FCX here)
I was going to weld up my own, but I figured that by the time I bought the steel, figured out a gasket solution, and got it rust-proofed, then messed about trying to figure out the shape, I'd still be at it by the autumn! I've saved enough by doing lots myself so its good to spend a wee bit extra on good functional things.

And the good bit is that the alloy that came out of the hole in the van side is the perfect shape and size to bend into a stone-deflector/box guard that will go round the wheel arch end of the box and protect it from the junk tossed at it by the rear wheel.

This is looking at the end of the storage box with the camera resting on top of the rear wheel, with the alloy wrapped around the box and self-tapped on. Should give it a wee bit of protection from small stones and grit that will otherwise over time degrade the powder coating.
Fantastic stuff! Glad to see you are putting all that hard work to use.
I understand your point about posting location details. It's a terrible shame for what inconsiderate slobs we humans can be.
Most folks I've met are fine but there's a cabal of 'party-campers' who fetch up, boogie and leave piles of trash behind them and spoil it for everyone, so I try to avoid making the decent spots that are left too public.
mervo
Observer
Wuntenn,
I just stumbled across this thread when searching for 'how to build a pop-top camper.' I began reading and 2 hours later my brain is mush!
To say that I'm impressed would be putting it mildly. You are an absolute genius when it comes to fabrication!!! I really hope you sell your design to someone to make some $$ back for all of your hard work.
Thank you for all of the time and energy you've put into this build, it's certainly been incredibly informative to me.
Similar threads
- Replies
- 0
- Views
- 422
- Replies
- 1
- Views
- 360
- Replies
- 2
- Views
- 590

