You are using an out of date browser. It may not display this or other websites correctly.
You should upgrade or use an alternative browser.
You should upgrade or use an alternative browser.
Mercedes 1222A.. The beginning!
- Thread starter Sitec
- Start date
Sitec
Adventurer
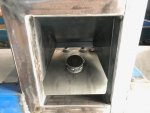
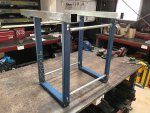
Next was to fill the only remaining space on the RHS between the axles. This is filled with the AC base unit. It was originally going to be chassis mounted, but as there will be a reasonable amount of body/chassis movement at this point, I have decided to hang it off the body so there is no movement with the copper pipes between the base unit and head unit. Here's the fabricated carrier. I know it's not an ideal location, as the noise will carry through the body, but I think on the rare occasion we are wanting AC when parked, we will be so glad of the cold air we won't be phased by the noise! I got used to the hum of these things when sleeping in Mine Donga's in the Pilbara, and it's not too bad... White noise I think they call it! 

Iain_U1250
Explorer
That's a great idea. I kept my tanks lower to be able to get the nozzles into the filler.
Hi Neil. After extending our Iceland trip in 2010? to the last vehicle ferry of the year we found the tarmac road up, over and down to Seydisfjörður harbour covered in sheet ice, road with no barriers etc. not a good place to have put our 9500kgs in with the clock ticking. I'm told bus drivers in the Alps put a pair of chains on the driven axle and one on one front wheel only, so we will have just three to save weight. Still heavy though.
One day we'll be off I hope!
One day we'll be off I hope!
Last edited:
Neil
Observer
Jason.its a Dilemma.
I was offered a set of 4 made by MAN, that were made for my tyre size, just before we left. They had never been used and were being given to me. The must have cost a fortune.
The weight and storage size made it impossible to take them.
Luckily, despite being at 5000m , minus 30 in the snow we have got away with it.
We are unlikely to see deep snow now until the top of north America which will be a good few years away
Neil
Sitec
Adventurer
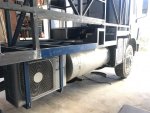
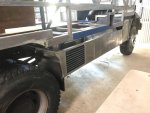
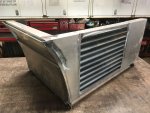
Slow but worthwhile progress here. I wanted to get the RHS side skirts completed before looking at the left side and battery tray shifting. The RH skirt covers the AC unit and also form the splash guards. It has to have provision for the rubber interlink covers that join the body to the skirt. There will be around 100mm of movement at the rear of the truck between the skirts, rear lockers and body, so there was a lot of head scratching! Here's the AC unit cover fabricated and awaiting fitment.

Sitec
Adventurer
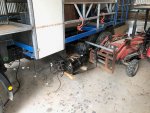
Side swap time, and onto a job I've been putting off! Relocating the battery box and air tanks! Once I had all the hoses labelled and disconnected, it was time to deploy the trusty helper and lift the tanks out. Once out, I had a half day repairing one of the tank straps (that has been caught on a tree by the PO) and I've shifted the larger side mounted tank into the battery tray and added a smaller side mounted tank off the spare truck. The extra air tank is for the Train Horns! I've also modified both brackets that support air valves etc and managed to get them all closer to the tray. With these mods and the smaller tank added to the end the tray and tank setup is nearly 200mm shorter.

Sitec
Adventurer
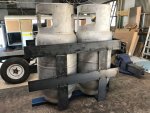
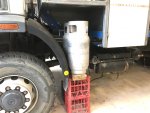
Once the mods and alterations were done, it was time to refit the tray into its original factory supplied location (before the crane was fitted) and start reconnecting the hoses. Some are too long and some are too short! Happy days!! With the battery box in place, I could start to get my head around the gas cylinder locker/storage. Both cylinders fit... just!  Now to make the cylinder carrier.

shade
Well-known member
Very efficient packaging of the air & propane. I'm guessing you can still access valves and change out tanks without too much trouble.
Watching your progress, it's clear that anyone attempting something similar better have a wide array of skills & equipment. It also shows how much of a budget would go to labour if paying a pro to get it done.
Watching your progress, it's clear that anyone attempting something similar better have a wide array of skills & equipment. It also shows how much of a budget would go to labour if paying a pro to get it done.
Sitec
Adventurer
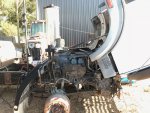
Once all the side skirts etc are done, I have another decision to make... I have my spare donor Mercedes 1734 prime mover... This has the same V6 engine but is a (knackered... thrown a leg) 340hp version of my current 220hp non turbo unit. The cab has very good wheel arches, but they are slightly different as the cab sits approx 60mm higher. I'm thinking of swapping the cab mounts lifting my cab slightly allowing me to use the later arches. This also gives me the clearance under the cab to fit the turbo, high pressure fuel injection pump, injectors, turbo..? and associated intercooler hoses of the 1734. Is it ever worth it!?

Sitec
Adventurer
Very efficient packaging of the air & propane. I'm guessing you can still access valves and change out tanks without too much trouble.
Watching your progress, it's clear that anyone attempting something similar better have a wide array of skills & equipment. It also shows how much of a budget would go to labour if paying a pro to get it done.
Hi Shade. It's all fairly close but should work well. I have around 300mm free space above the cylinders to undo the valves. I also plan to make the flex hoses long enough so they can be fitted prior to putting the cylinders into the lockers. Watch this space! As for costs, yeah, time soon spirals with 'one off' builds! It'll be interested to see what value the truck is when finished, and what it cost me!
shade
Well-known member
No matter the cost, you'll have the truck you want, and that's difficult to appraise. If Wifetec has any complaints about the time or total price, find out what a similar vehicle would cost off the lot, and she'll probably be happier. Yours will also be customized beyond whatever you'd buy would be, so there's that, too.Hi Shade. It's all fairly close but should work well. I have around 300mm free space above the cylinders to undo the valves. I also plan to make the flex hoses long enough so they can be fitted prior to putting the cylinders into the lockers. Watch this space! As for costs, yeah, time soon spirals with 'one off' builds! It'll be interested to see what value the truck is when finished, and what it cost me!
Similar threads
- Replies
- 0
- Views
- 218
- Replies
- 0
- Views
- 1K
- Replies
- 2
- Views
- 1K
- Replies
- 26
- Views
- 4K

